
|
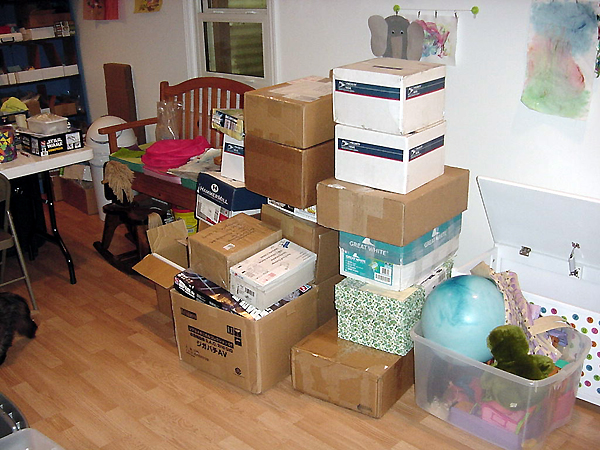
Editor's Note: What could you build given 3 pounds of parts and a deadline? In 2007, the second challenge was issued on the Starship Modeler Discussion Forums to answer just that question. Participants scoured their strategic styrene reserves for likely parts, then sent them in to SSM, where they were randomly boxed up and sent back out again. None of the participants knew what they would get. The results .... well, see for yourself. The full record of events is still online on the Discussion Forums (though some of the individual links have undoubtedly decayed since then). By Bill Human - images & text © 2008 Well, BOS II started off much like BOS I; me, looking through a box of random parts going, "Hmmmm. Crap." Not that I wanted full sprues loaded with a complete FM Y-wing (would it have been too much to ask?), or a load of resin miscasts, but it was just what was advertised. A random assortment of completely dissimilar ping-pong balls, half completed models, toys, cootie bits and debris. This time, however, we received sheet stock, some plastic and aluminum rod and lighting kits. |
![[Please click to enlarge]](2007_challenge/bh_2007_box_001.jpg) |
|
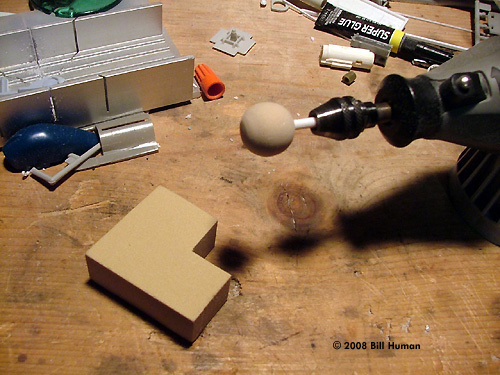
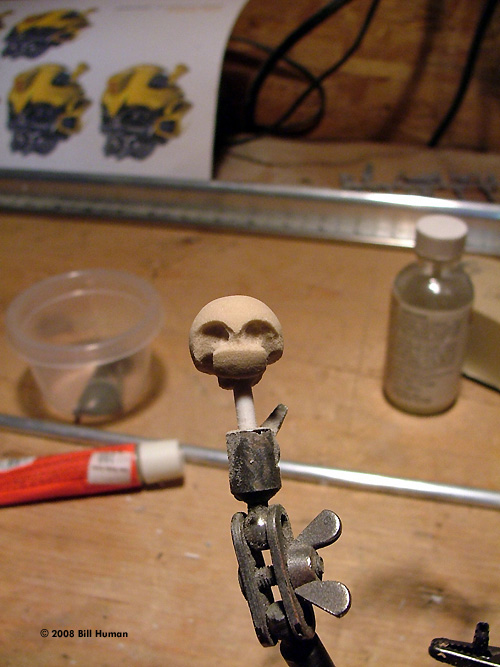
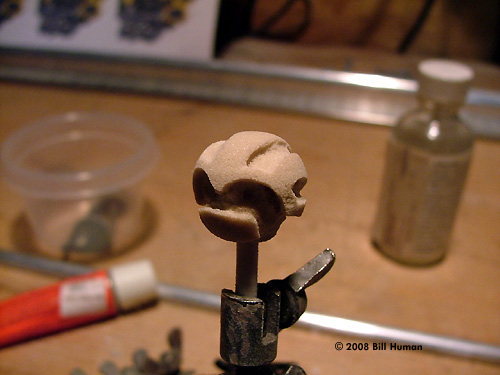
Image: Poor man's lathe Image: Roughing out the shape of the head Image: Head, complete Image: Primed Image: Looking up Image: Base Image: Do you feel lucky? |
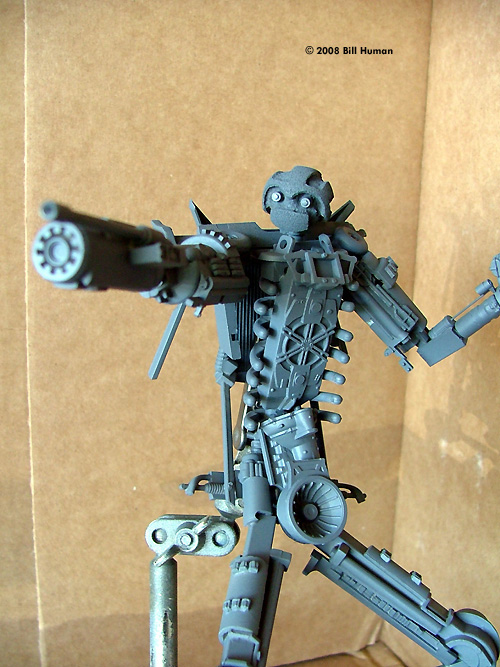
Nothing obvious jumped out at me. There wasn't anything that screamed, “Spaceship”, “Fighter”, or (God forbid) “Hover-tank!” So, I sat and stared, and drank, and randomly fit different parts together. Still nothing. I did receive a, mostly complete Ford GT-40. I said, “mostly” for a reason; no wheels. Tires, yes. No wheels. Could still have done a MadMax version of a GT, but it just didn't 'sing'. I was, and am still, enamored of the Ohio class sub I found in the box, but my mind kept coming back to that GT shell. Back during the Legs Contest, I had an idea for a bi-pedal 'junkyard-monster', standing astride a pile of scrap. Well, the incomplete GT kept bugging me, and two and two just came together one night. Getting Started I started by just seeing if the GT parts alone could provide all the pieces I needed; the idea being that a Transformer was composed of only the bits and bobbles inside the vehicle. To this end, I downloaded a bunch of pictures of “Bumblebee”, and took a good hard look. Whaddya know? It's not so important that a “Transformer” be plausible, so much as that it look like it could be plausible. So, I scrounged long pieces of sprue out of the box to assemble into a skeleton. From an old toy box, I found an old GI Joe and positioned him into a 'fighting' stance that I wanted for my 'bot. Then, with a candle, I softened the sprue, in spots, to resemble the pose of my GI Joe, and glued it onto a slightly curved sprue-spine. With skeleton assembled, I just started gluing stuff on. This was actually the hard part. I went through bunches of parts, placing them here and there, upside down, on top and then bottom. There was no real plan, just what felt 'right'. Case in point, the ribs. I know, I know, real Transformers don't have ribs, but again, it felt right. In my box I had received six or eight small, u-shaped dental flossing bits that were arranged in a small blister pack in a rib formation. I glued them all, following the 'curve', en masse, to the spine. And they just looked like they belonged there. Hands and Feet What with filling out the bones well under way, I started thinking about the hands and feet. I thought about some complex, articulated-looking foot assembly but after more parts hunting and tinkering, the GT's bucket seats got the nod. Flip'em upside down and there you go! The hands however, did not happen in one night. I didn't have any suitable, pre-made bits, so I started looking for things that looked 'intricate'. About all I had were 1/35 German army bits: canteens, ammo pouches, e-tools, gas-mask containers, and grenades. By carefully cutting these apart and super gluing them together to form 'joints', I wound up with a nice, three digited, left hand with a nice 'robotic' feel. For the right, I wanted something resembling Bumblebee's hand-cannon. For this I used an MPC X-wing laser cannon pod, cut down, with a 1/72nd scale Chieftain tank barrel and numerous greeblies added. |
|
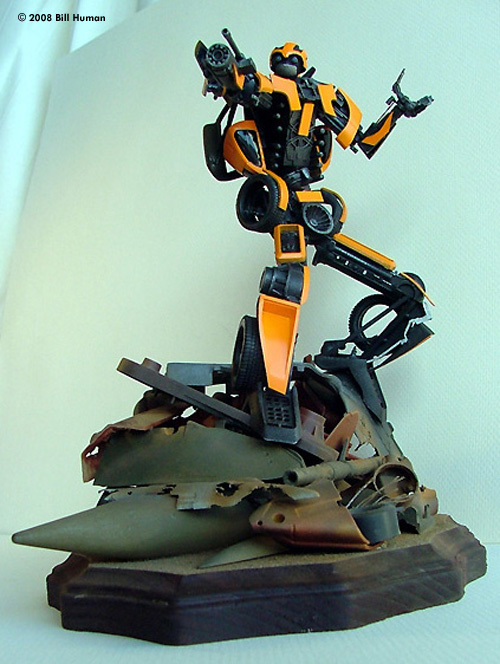
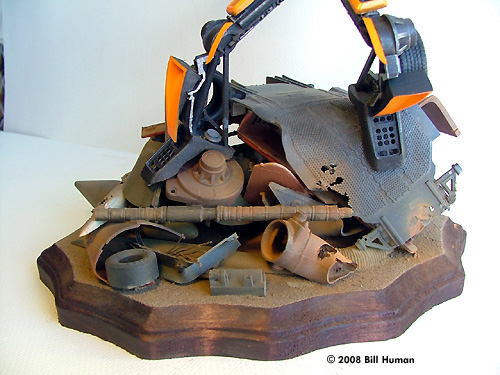
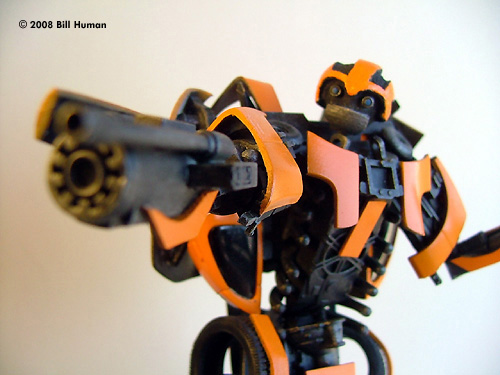
Head and Shoulders One part that I kept putting off was the head. I just didn't have a part, or even several parts, that I thought acceptable. One thing I had donated but received back, was a small 1”x2”x2” scrap of urethane sign foam. Easily cuttable, sandable, glueable, etc, it was going to have to do. I cut a small, 5/8”x5/8” cube, cut the edges off with a hobby knife, drilled a small hole, and glued it upon a bit of sprue. Then I chucked it into my Dremel and began sanding it down with an emery board. When complete, I had a sphere on a stick that I then mounted into a postionable vise, and began, very carefully, dremeling out parts of it to look vaguely like Bumblebee's head. I wasn't going for an exact match, just similar. With the addition of two small detail bits for the eyes, from a 1/35 Tamiya German anti-tank gun found in the box, I was quite happy with it. In retrospect, I should have taken the time to putty and sand the 'helmet' areas of the head. Urethane has a texture that primer and two coats of paint don't quite cover. I consider this lapse to be the biggest single flaw on the build. Once the head was complete, I then gave the whole 'bot a coat of primer, and then a layer of Gray/Black. On this I did a heavy drybrush of steel, with some Aluminum highlights, here and there. At this point, I considered the body finished. Next were the body panels. I started by assembling as much as I could of the GT-40. Not the undercarriage or the interior, but just the shell. Then, again using my trusty Dremel, I carved the body up into various pieces! Observing the photos that I had, Autobot body panels aren't wholly recognizable bits of car body that they were back in the eighties. So instead of trying to find a place to fit a whole quarter panel, I cut smaller pieces with more complex shapes (or tried to; some are just small rectangles!) After these had been primered and coated with several coats of Floquil Orange, I began supergluing them to the body, again using 'just feels right' as my guide. Also knowing that using 100% of the body was not needed, I just used enough to look plausible. The Base Next, after consulting the Board on rules for the base, I bought a wooden plaque form Michaels, and started collecting bits from the box that looked like 'junkyard' scrap. There is a 1/35 tank turret, numerous drop tanks, the chassis to the GT-40, part of a Valkrye cockpit, a 1/35 Chieftain tank barrel, a vertical stabilizer, some Lost in Space robot parts, a name plaque to that Ohio class sub, half of a Kazon ship nose, and also some tires, car engine parts and a braided steel cable lock that was in the box. These I first piled on the base to make sure I had enough scrap. Some parts I bent over a candle flame, some I Dremeled to simulate rust, and some I 'dented'. Then I painted all the parts, some in Flat Black, some with Olive Drab, and the remainder in Red Oxide primer. Then I just started super gluing stuff! After it was set, weathering was applied using Bragdon Enterprises Weather System pastels, then Blaze was mounted atop it all, using styrene pins and more superglue. Afterword Well, that's it. In a fury of activity brought on by the impending arrival of my baby girl, I finished this thing in three weeks! I had fun, I don't know if there's a project two in that box or not, but I did have fun trying to make something I hadn't made before. |
![]()
This page copyright © 2009 Starship Modeler™. First posted on 29 February 2008.
![[Please click to enlarge]](2007_challenge/bh_2007_box_007.jpg)
![[Please click to enlarge]](2007_challenge/bh_2007_box_003.jpg)
![[Please click to enlarge]](2007_challenge/bh_2007_box_004.jpg)