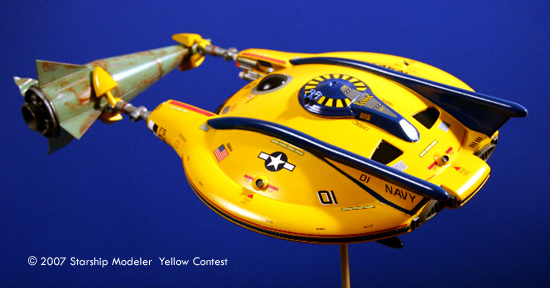
Taking a page from Syd Mead's design for the "Spinner" in Blade Runner, the decision was made to make the Flying Sub an aerodyne - a vehicle which directs air downward to create lift. Air comes in through lift intake grids located around the sides of the craft, while the primary ducted exhaust for flight is located on the bottom of the craft. (Under water, the lift engines are covered by special louvers- like they are in this model.) Since the Flying Sub is steered by varying the direction of thrust from these ducts, the vertical tail surfaces are primarily for stabilization purposes, and have no active flight controls. (The saucer shape also provides some lift in forward flight.)
Propulsion in water is accomplished through two ducted exhausts in the back of the sub. Directional control is achieved through the use of six rotating "jets", shooting high-velocity water to control the movements of the sub. The decision to use the rotating jets for control was necessitated by the need to keep the design as clean and streamlined as possible. The standard, prop-driven control motors for a standard submarine would have created too much drag in flight mode to be practical. (These powerful "jets" also could be used underwater and on the surface as an offensive weapon, at close range.)
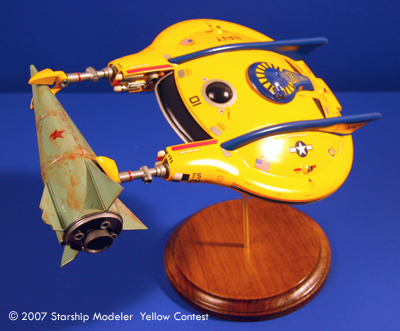
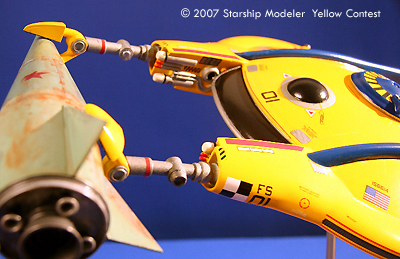
Another major design change made for VTTBOTS:TNV involved equipping the Flying Sub with manipulator arms. (This was actually done, to a lesser degree, in the original series) Two heavy-lift manipulator arms are housed in the twin booms at the front of the craft. The manipulators themselves are made up of the tips of the booms; the arms extend from and retract into the booms themselves. Smaller manipulators, extensible lighting units, and small-scale probes are located on the interior surfaces of the booms- the "equipment bays". (These pieces of exploratory equipment can be- and were, at many points in the series- replaced with defensive and offensive ordinance of many different types.) When the heavy-lift manipulator arms are not in use, they retract into the sub, giving it a streamlined profile. (The twin booms also have the added effect of minimizing canopy stress during one of the Flying Sub's classic "splash" landings.)
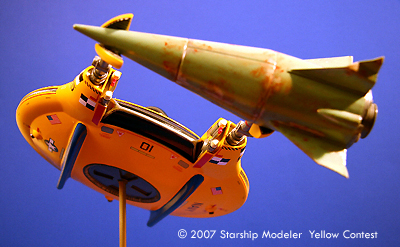
Primary access to the Flying Sub is through the oversized two-person hatch on top of the vehicle. Both the navigator's bubble and the front canopy also open, although these access points are seldom seen in the series.
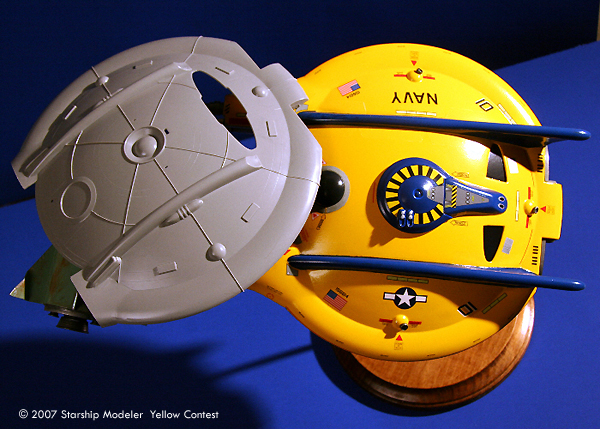
The markings on the Flying Sub include the distinctive "checkerboards" on the boom tips, used as guides by the Automated Docking Mechanism onboard Seaview II to bring the Flying Sub into her "Moon Pool". Because of the improved resolution of "modern" TVs, and the heightened expectations of modern TV viewers, official-looking U.S. Navy markings were also added.
This model is built around the Revell Germany "Space Jet Glador" kit, based on a ship from the Perry Rhodan book series. I was looking for inspiration based on the theme for this contest. Since I am a big fan of the "original" Flying Sub, I thought that I would just try to buy one of the Monogram repops of the original Flying Sub on eBay. It turns out that even the relatively recent repops are still fetching exorbitant prices. Consequently, I went to check my unbuilt model collection, to look for a kit that could be kitbashed into a sort-of "Next Generation" Flying Sub.
The Space Jet Glador is a relatively good kit; however, it has HUGE obnoxious raised panel lines, and other extra raised pieces that I felt might detract from the streamlined performance of a true "Flying Sub". I spent a week cutting off unwanted details, sanding and grinding down raised panel lines, and building up new vertical stabilizer fins from laminated styrene sheet and tubing. The landing skids were entirely scratchbuilt.
I was constantly trying to decide what to keep on the original model, and what to remove, Early on I decided to keep the six hemispheric bulges located at the sides and back of the craft. I decided to make these spheres part of the control system of the craft, This extended to other areas, as well. For instance, the small plastic saucer that rides on top of the Glador became the access hatch.
Then it was a solid week of putty, sand, prime, repeat. I used both Aves white and Bondo on different areas of the model, and Rust-Oleum White sandable primer (which hid a multitude of sins.). I also made the front cockpit canopy, the dorsal "hump", and the end caps on the vertical stabilizers out of Aves. This turned out to be surprisingly easy.
The toughest part to make, and the one I'd had the most trepidation about doing, was the cockpit bubble. What I wanted was a complex curve, following the flat-plate surface of the doors of the Glador (at least, I'm guessing they're doors) and turning that shape into a more aerodynamic set of curves. I took a big chunk of Aves, a small putty spatula, my profile tool, and some rubbing alcohol, and in about a half-hour I was able to rough out a consistent form that followed the curves of the original model well. I then spent most of a day filing and sanding it to a smooth, precise final contour. (A tip- cut a styrene contour pattern, so you won't have to clean Aves out of your contour tool). I had Dremeled off the details on the upper ribs and puttied them smooth, but ended up with some leftover putty. Not wanting it to go to waste, I just shaped a dorsal design around the existing top hatch with this putty, let it dry, and filed it to shape afterward.
I cut the front off the two booms, turning the top and bottom halves into the top and bottom manipulator claws. (I don't know where this idea came from- I just pictured the need for some sort of heavy manipulator on this sub.) The ribbing on the pads is actually tub anti-skid material. (I used small pieces of the same ribbed material to make the ribbed lip of the aerodyne exhaust.) The manipulator arms are made from tube styrene, with some resin bits I got from Erin Lantz at the WF '05 pool party. I put a back mount plate behind the holes in the two booms, then mounted the arms in a bed of Aves putty (so I could control their level as they set.) I also ran some epoxy down the tube of the arm supports. The manipulator claws are pinned to the warhead assembly. Originally, I had intended to make the claws retractable, or at least make up a pair of fake tips for the pods in "flying" mode, but this will have to wait for the next version of this model.
The Soviet warhead is actually an Estes "Lucky Seven" X-Prize kit, pretty much OOTB. I did trim the fins, and added a big resin engine bell (again from Erin.) Damage to the fins was accomplished with a pair of needle-nosed pliers and a #1 human manipulator assembly (i.e., my right hand.) I would have liked to have done more damage to the warhead, but I just ran out of time.
After assembling and painting the main body, I gloss-coated the model and began the process of decaling the kit. There are over a hundred decals used on this model, from many varied sources. (It helps to be a pack rat.) I then glued on the final detail pieces (more resin bits, exhausts, and aerodyne "intakes" made from cut-down zip ties, all painted with Testor's Titanium Metallizer), and gave her a couple of heavy gloss coats (for that "underwater" look.) The base is a standard brass rod and pine assembly.
All in all, I'm happy with the way she turned out. I may do some upgrades before she "goes public" at WF '07, though.
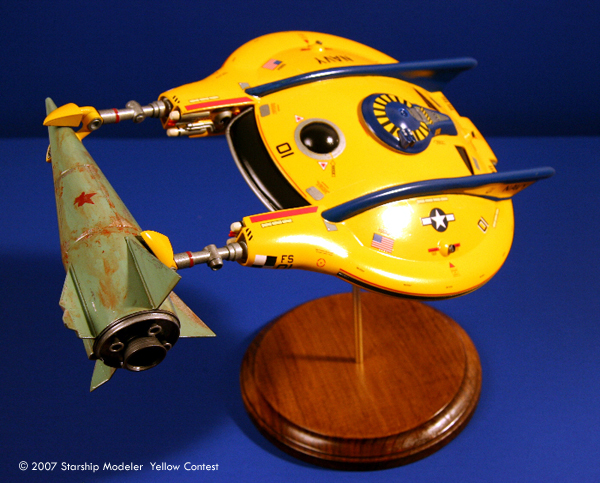
Image: Above/left view
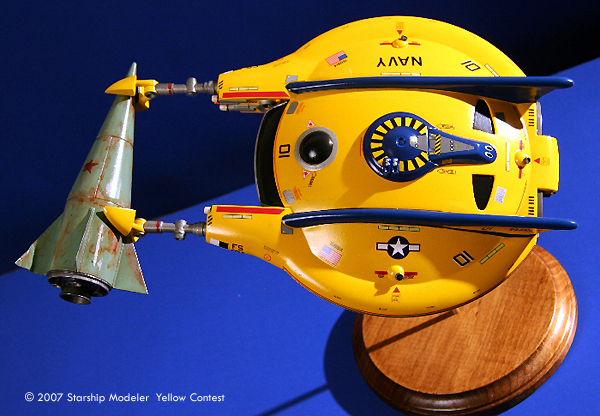
Image: Overall
Image: Overhead
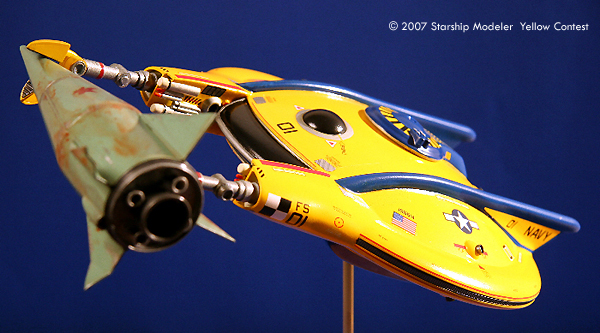
Image: Right side
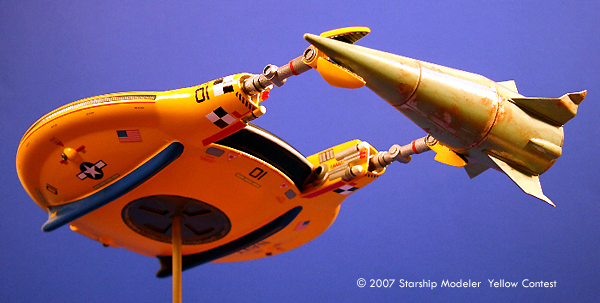
Image: Left/front
Image: Underneath
Image: Comparison with stock kit
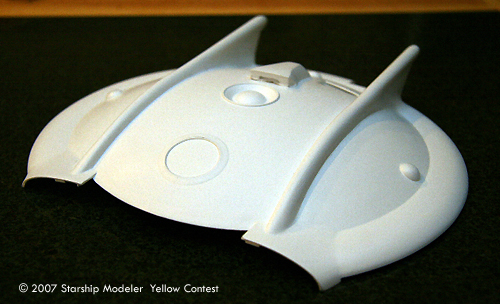
Image: Basic shape, primed
![[Yellow]](Yellow-banner-6fs.gif)
![[Scale Solutions]](SSOL_banner.jpg)