
|
By Jeff Cooper - images & text © 2003
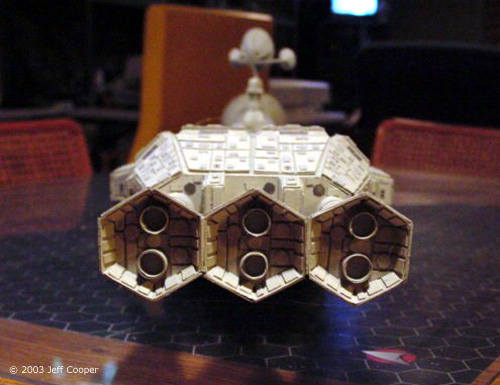
Image: Rear view, showing thrust cones
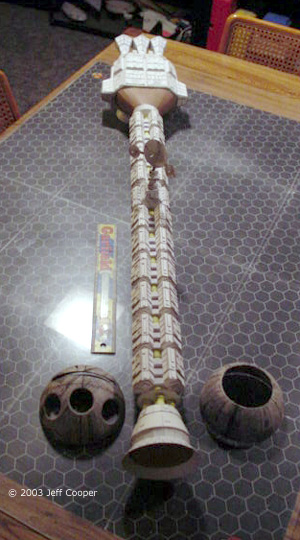
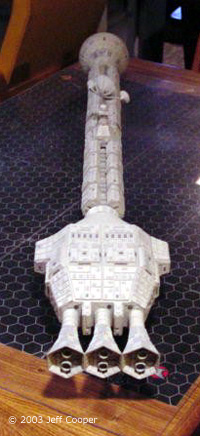
Image: Top view, forward half of completed model. Image: Same view, under construction. Image: Top/rear view, completed model. |
I've seen a lot of 2001 Discovery models on this site and thought I might as well add my about five dollars worth. (Not including labor!) I've always wanted a model of the Discovery ever since I was a 15 year old boy when the movie first came out. However, I absolutely could not afford the Atomic City 11 foot long version and felt the resin cast Planet X version was a bit pricey for an 18" model. So what does an avid sci-fi modeler do in this situation? If he's a bit crazy, he decides to build one out of paper. The centerpiece of my project, literally, was a 36 inch long ¾" diameter wooden dowel. This dowel formed the backbone of my scratch-built Discovery model. I designed and built 30 brackets, made out of card stock paper, that slipped over the wooden dowel. These brackets were the supports for 60 trapezoidal shaped boxes that made up the cargo modules mounted on the central boom. The cargo modules were made out of cardstock glued into box shapes with Elmer's Glue. Thick layers of paper were glued onto these boxes using a glue stick to increase the surface detail. A single cargo module assembly consisted of large and small trapezoidal boxes mounted in three pairs 120 degrees apart on three of the paper brackets glued onto the wooden dowel. I needed ten of these assemblies for the model. The central communications antenna array was made out of the same large and small trapezoidal boxes as the cargo modules. However, these boxes were mounted in pairs 90 degrees apart so I needed four sets of large and small boxes. Additional odd-shaped boxes, cylinders and conic sections were used to make the antenna mount. The antenna dishes were simple shrouds scored and shaped to form parabolic dishes. The structural support for the central antenna spines are just thin strips of paper. The antenna support bracket is thin laminated cardboard cut to fit the antenna layout. As in all other model assemblies, layered paper was used to increase surface detail. The command module adapter or neck was made from a series of shroud shapes formed from cardstock. In some cases these shrouds were scored with a razor blade and bent to give a paneled affect. Portions were built up with layers of thick card stock to add surface detail. A flat paper disk and four paper cyclinders were mounted on the aft portion of the neck to match the reference drawings that I had and connect the neck to the cargo module boom. |
||||||||||||||||||
|
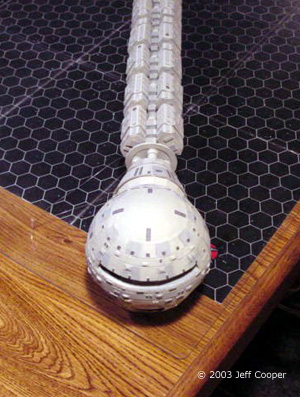
The engine assembly was just one big odd-shaped paper box. Several other boxes were added for major surface details. I added three cylinders at the back of the engine assembly for the ion engines. I then attached the thrust cones to the cylinders. The thrust cones are hard to describe. They were six-sided truncated pyramid shapes that had to fit together with fairly close tolerances. As with all the other major modules, I added layered paper to increase surface detail. I used several layers of thick cardboard covered with a heavy paper shroud to make the connection between the central boom and the engine assembly. This assembly had to be very rigid so the engine would not droop below the central boom. A couple of small circular shrouds were added at the fore end of this connector to match the detail in the reference drawings. The command module was the most problematic portion of the model. I made a papier maché ball by layering strips of newspaper soaked in a dilute solution of Elmer's Glue over a 5 inch styrofoam ball. After the papier maché dried, I cut the paper free of the styrofoam ball in two hemispheres. I then made the needed cut-throughs for the main window, pod bay doors, and airlock door. After that, I built an interior cockpit, airlock, and pod bay, before sealing the two halves back together. (Yes I was that nuts). Finally, I added surface detail by layering paper over the papier maché ball. (Note: It was at this point that my wife made a brilliant suggestion. I needed something to smooth the surface of the papier maché ball. Layered paper worked OK but I wasn't completely happy. At this point she suggested vinyl spackling paste, the kind you buy at a Wal-Mart for next to nothing to cover seams between sheet rock or other carpentry projects. I was already too far along to use it extensively (darn it), but the stuff was great! Very light, durable, and sandable. I now use it for seam filler and contour putty on almost all my models!) When the project was complete, I was slightly disappointed to see that the cargo modules were actually a bit larger than they should have been. At that point, I decided I'd rationalize the size difference by naming this model the Discovery II that was mentioned in the movie 2010, The Year We Make Contact. That gave me a bit of poetic license with the project. I used my HP Deskjet printer to produce a lot of decals on typing paper for heat radiators, vernier rockets, panel accesses, and other greeblies and then began to carefully glue them onto the model with a glue stick. I also added a few more greeblies and decals to the command module to simulate additional sensing equipment mounted on my Discovery II. I know my little four-foot paper model can't compete with the beauty of the 11 foot model made by the Atomic City team or the surface detail of the resin cast Planet X model but it cost me less than five bucks and made me very happy. (Besides, there's always room for improvement in the next build!) |
![]()
This page copyright © 2003 Starship Modeler™. Last updated on 5 March 2003.
![[Click to enlarge]](jc_dsc_frontoblique.jpg)
![[Click to enlarge]](jc_dsc_commodoblique.jpg)
![[Click to enlarge]](jc_dsc_commodfront.jpg)
![[Click to enlarge]](jc_dsc_commmast.jpg)
![[Click to enlarge]](jc_dsc_engine.jpg)
![[Click to enlarge]](jc_dsc_enginerear.jpg)
![[Click to enlarge]](jc_dsc_engtop.jpg)
![[Click to enlarge]](jc_dsc_rearoblique.jpg)
![[Click to enlarge]](jc_dsc_constcommmast.jpg)
![[Click to enlarge]](jc_dsc_constengine.jpg)
![[Click to enlarge]](jc_dsc_constneck.jpg)
![[Click to enlarge]](jc_dsc_constspar.jpg)
![[Click to enlarge]](jc_dsc_constcommod.jpg)
![[Click to enlarge]](jc_dsc_constside.jpg)