
By Jim James - images & text © 2008
|
![[Please click to enlarge]](jj_drwho_box_0379.jpg) OK, this is really an in-box preview but since I'm over half way through the build, you'll have to tolerate photos of a half built kit. Emphasis on half built - I ain't done yet. |
|
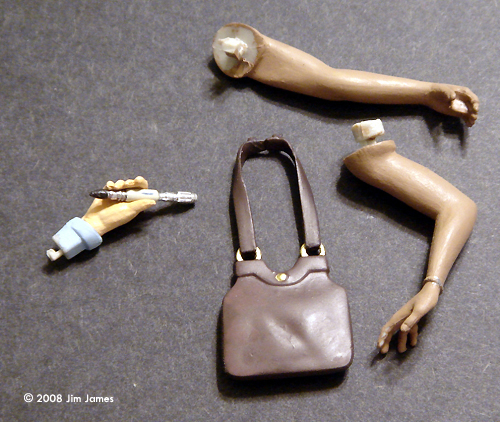
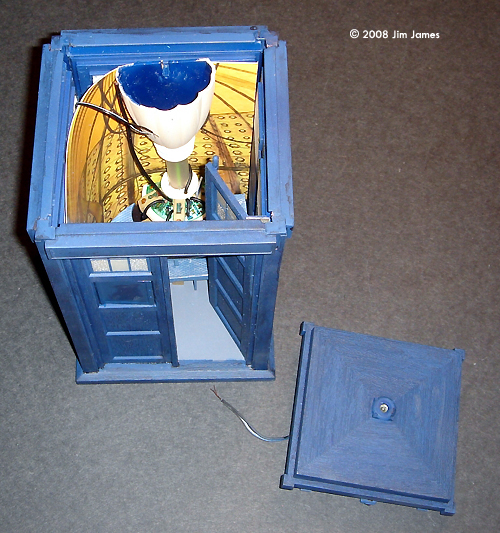
Image: The Doctor's body, painted Image: Shoew with added Converse logo Image: Fit is really pretty good Image: Martha Image: Arms and purse Image: TARDIS, assembled |
What You Get This is a diorama of a scene at the end of the Dr. Who episode, “Smith and Jones,” where Martha makes the decision to join the Doctor. The door to the Tardis can be opened and is connected to circuitry that makes the blue beacon on top flash and Tardis sounds to play (for about 5 seconds). The interior of the Tardis is represented by forced perspective that includes a small Tardis console and a cardboard wrap-around of the walls. The molding is really nice. The Tardis walls have wood grain overall. Windows are clear but will be painted on the back. The telephone box in the door opens to reveal a telephone (wow). The kit comes with 12 pots of Humbrol acrylics, 3 brushes and a tube of glue. Almost all the colors you needs are here (no flesh color) but there's not enough blue to paint the Tardis. I recommend you match the colors with paints available at your model shop (Blue Angel Blue works well for the Tardis, BTW). However, you have to use acrylics on the vinyl parts. Perhaps the most amazing thing about the molding is the two figures. The breakdown of parts allows the modeler to create very realistic looking figures. The stances are very natural and the parts - especially the heads - are molded to fit very well. If you want to see the instruction booklet, Airfix has posted it online.The Tardis There are really two assemblies here - the box and the console. The box assembles easily. Airfix tells you to leave the roof loose to allow you to change batteries (the sound and light parts are all preassembled in the roof part). Iain from SFM:UK suggests extending the battery wire through the Tardis base and gluing the roof in place. This is a good idea since the roof is not a tight fit. The console begs to be lighted but it would be a challenge. Most of the console is molded in clear and a lot would need to be blacked out to trap the light. When you get your kit, look for a small square of fluorescent green paper. It goes inside the central column and is easily overlooked (mine was in the instruction book). |
|
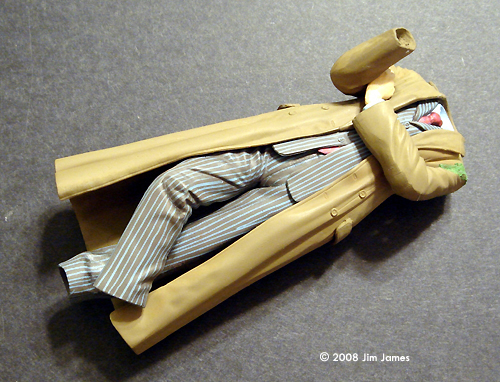
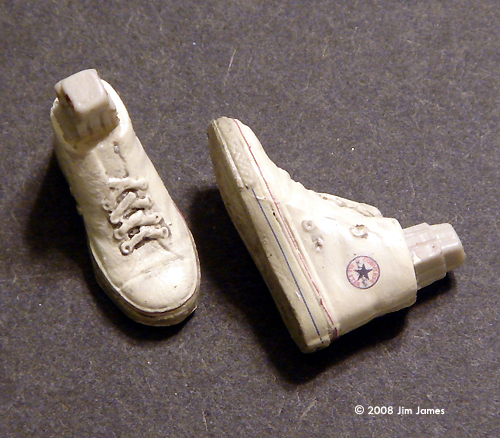
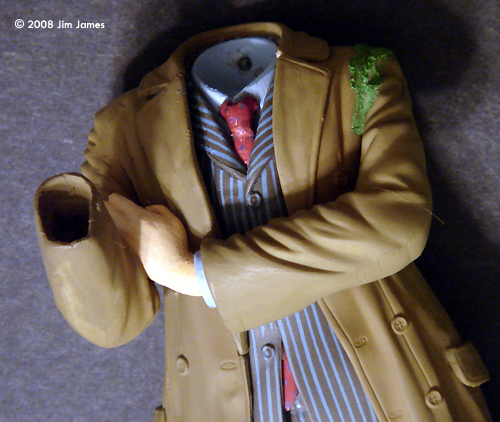
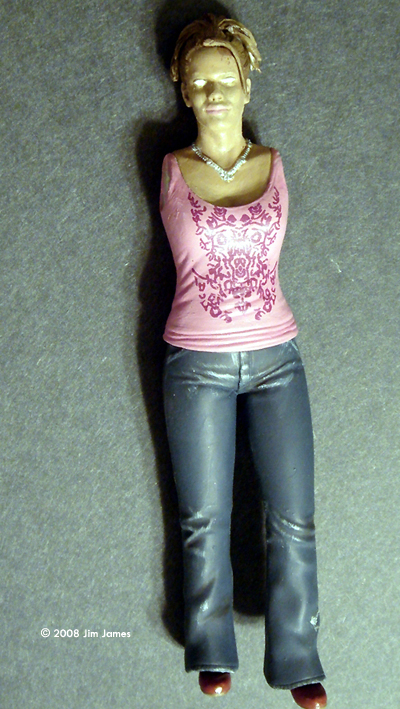
The Doctor My goodness, it really looks like David Tennant! Lots of opportunity for detailing here - pin striping the suit, pattern on the tie, logos on the shoes (Converse). The pose is very nice and the parts go together really well considering that pose. BTW, the hair on both figures seems to have been molded separately and just plugged in. The joints are almost invisible and this method allows for a lot of dimension and detail. Martha Again, great pose, nice detail, great likeness and great hair. The opportunities for detail here are the design on the shirt (why didn't Airfix give us a decal?), the earrings (replace them with wire) and the jeans. The Base There isn't one. Airfix advises that you “glue' the figures to the Tardis. My advice - make a base. Overall I said it in the threads on Hobbytalk and on SSM, this is the most fun I've had building a model kit. You can build this kit straight out of the box and get a great model. But if you want to go that little bit extra, you can do a lot more. I pinstriped the suit. I decaled the Doctor's tie and Martha's shirt. I added a few pipes to the Tardis console. This is a cool model. |
![]()
This page copyright © 2008 Starship Modeler™. First posted on 19 February 2008.
![[Please click to enlarge]](jj_drwho_WelcomeAboardkit.jpg)
![{It really looks like David Tennant!]](jj_drwho_Doctor-head.jpg)