
By Larry Strickland - images & text © 2001
|
![[What you get - click to enlarge]](ls_laser1.jpg) My first task when building a model is to get any references that are available. The photos I found on the internet did not really give me any help as far as detail. Therefore I basically used the color photo (2"x3") provided with the kit as my main reference. |
|
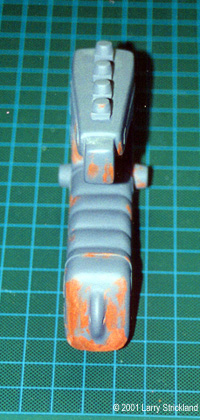
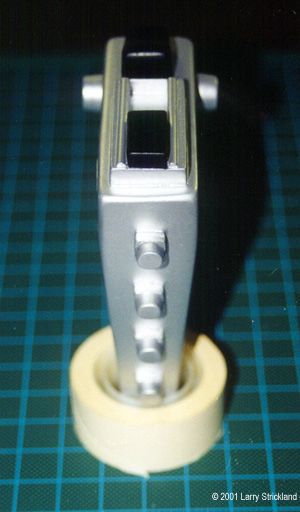
Image: Most of the pitting was concentrated on the bottom of the grip. Image: I painted the emitters the colors called for in the instructions, but I wasn't satisfied, so I stripped the paint to do it again. |
THE KIT
This kit only comes with two parts- main body and stun/kill selector switch. Along with these parts you get a one page instruction sheet. I thought the instructions were very good and included several helpful hints on: appropriate putty choices (Bondo Spot and Glazing Putty), and suggestions for color choices. As far as the parts themselves were concerned, the casting was very well done. The molding on my sample was sharp with very good detail. The only areas of concern were: the seam line which covered about the bottom 1/3 of the model, with a fairly large number of pin holes from air bubbles in the resin concentrated on the bottom of the weapon. This was not a major problem since 80% of these pin holes were located in one spot at the bottom of the handle. The next stage was cleanup. I trimmed off excess resin and sanded the mold lines smooth. I used 320, 400, and 600 grit sandpaper for this task. Tip: I always get my sandpaper in the automotive department at Wal-mart or Kmart. They are great quality and more economical than the small packages you get at hobby stores. I then washed the model with a mild degreaser (Simple Green) to remove any remaining mold release agent. Tip: I use "Simple Green"; it costs about $7/gallon, works great, and is environmentally friendly. ASSEMBLYThis took all of about five minutes, since there are only two pieces in this kit (main body and stun/kill selector switch). The fit was fairly good. I used 320 grit sandpaper and the top of my workbench to improve the fit of these two pieces (making them both very flat and easy to join together). Then I used regular crazy glue and two clamps to hold parts together. (Thank God for crazy glue). After the glue had dried overnight, I began the process of filling in the pinholes and seamlines. The instruction sheet suggested "Bondo Spot & Glazing Putty". In the past I had always used "Squadron Green/White Putty" with mixed results, so I thought- what the heck I'll give it a try. Trust me, if you are working on a resin project like this one- "Bondo" is just great - I will never use Squadron Putty again on a resin project. This may sound like a plug for the Bondo company, but seriously it was excellent. Tip: Bondo Spot & Glazing Putty - about $3 a tube at any auto parts store or Kmart. It dries in about 30 minute, very little shrinkage if any, and sands very easily. |
|
PAINTING
I started with 2 light coats of Krylon Sandable Primer. After I let this dry for one to two days, I wet sanded the project with 600 grit sandpaper until I had a nice smooth surface for my primary color. The directions called for Testors Model Master German Silver. Instead of this, I used a Krylon Metallic Enamel Bright Silver which I had from a previous project, and it gave it a nice metallic look. I like to use Krylon paint, it is very easy to use and dries fairly quickly. After the basecoat of silver had dried, I followed the suggestions in the instructions. The instructions were general, listing the following detail colors: flat black, red, yellow, green, and blue. Normally a list like this would drive me crazy: "What shade of blue?" But what the heck, I just used the color photo on the box as a guide. Besides, it's Sci-Fi anyway, so relax and have fun. Even though I used Krylon for the primer and basecoat, all the detail colors were done with my trusty Badger 150 airbrush. I used a variety of waterbased acrylic paints, mainly Createx brand paints, which I purchased at Michaels- $2.70 for 2 oz bottle. I have been using this brand for the last 2 years; it flows very well in my airbrush, and is very high quality, Best of all since these are acrylic water based paints, I can use Windex to clean my airbrush. Tip: I use a solution of ľ water to Ľ Windex with ammonia D to clean my airbrush. It's cheap and a lot easier on my lungs. After my model was finished, I used Future floor polish to seal the paint. Two lightly misted coats seem to work well for me. FINAL THOUGHTSFor the money, this is a great kit. Most of the time I'm just not willing to shell out $40- $60 for a comparable resin model. This kit is almost entirely a painting subject and was completed in approximately 12-15 hours, primarily due to the sanding, putty work, and detail painting required. I would recommend this kit to anyone who is comfortable with working with resin models, or someone who would like to add to their Sci-Fi weapons collection. |
|
![]()
This page copyright © 2001 Starship Modeler™. Last updated on 11 May 2001.
![[Click to enlarge]](ls_laser2.jpg)
![[Click to enlarge]](ls_laser8.jpg)
![[Click to enlarge]](ls_laser10.jpg)