
|
By Steven "Ignatz" Lee - images & text © 2008
|
![[Please click to enlarge]](sl_seaview_0001.jpg) Who can forget the first time they saw the Seaview ? It was that dramatic emergency blow where the Seaview slices out of the arctic waters in Irwin Allen's 1961 feature film, Voyage to the Bottom of the Sea. |
|
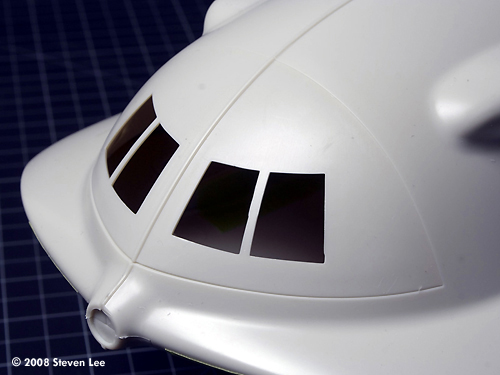
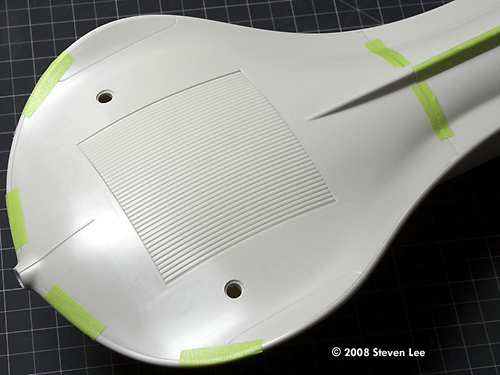
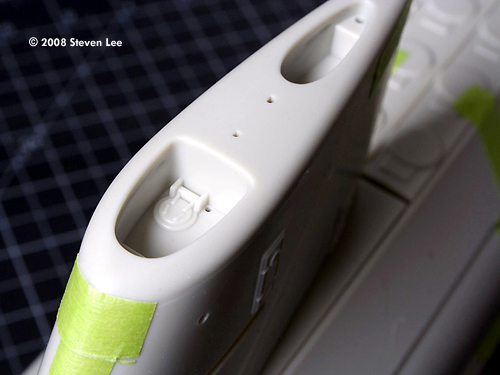
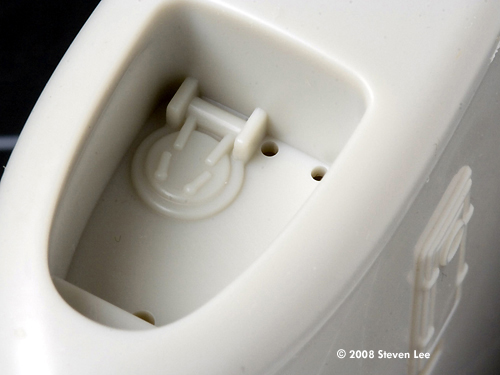
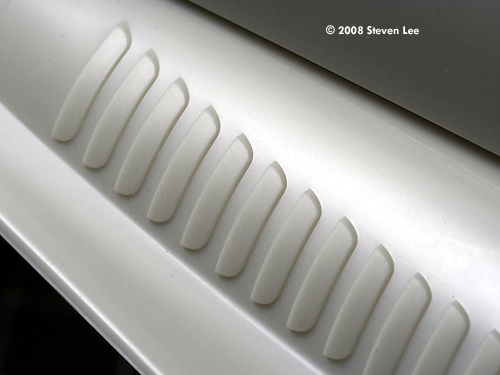
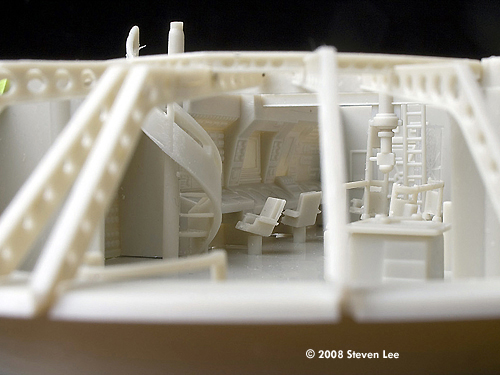
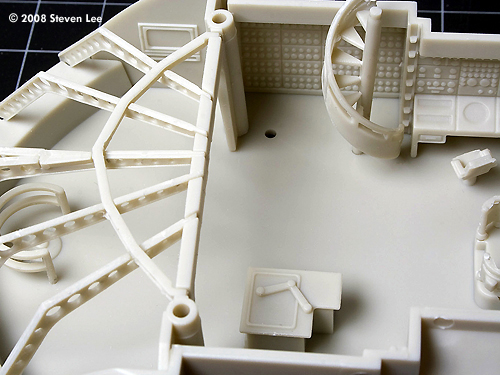
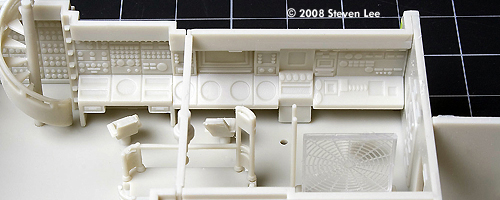
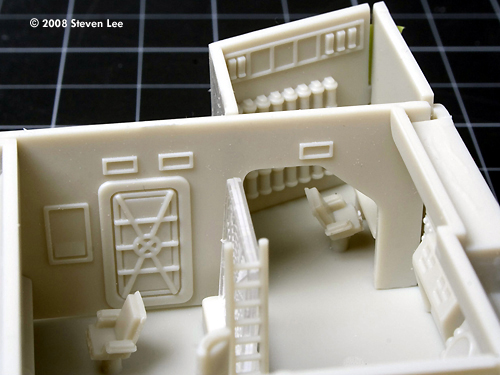
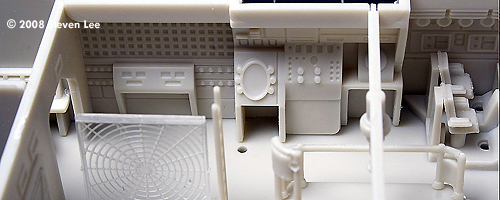
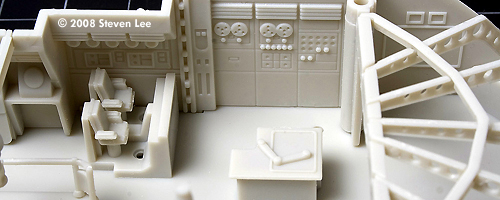
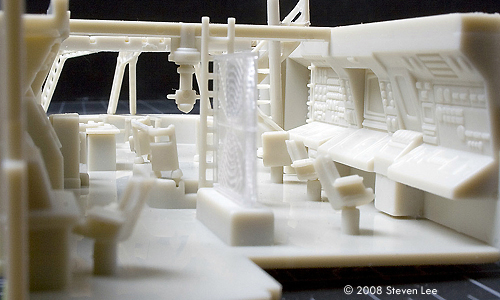
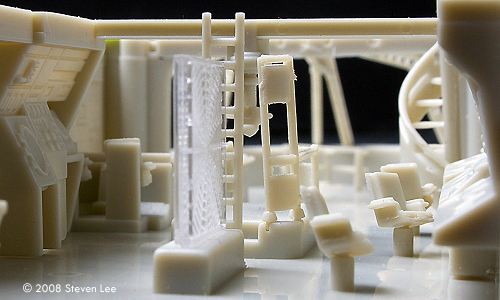
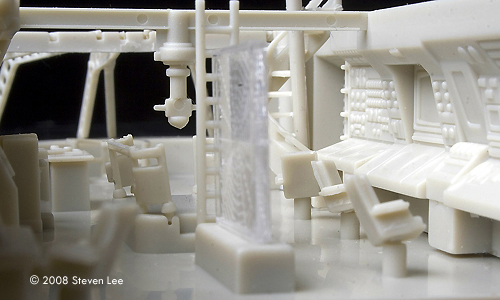
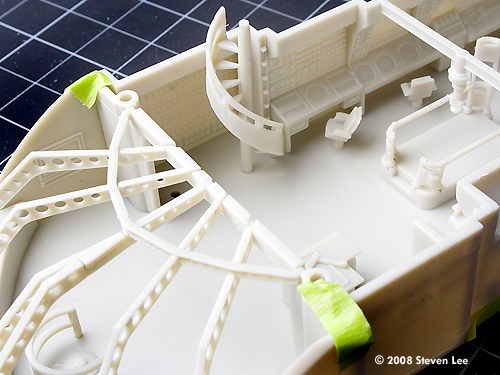
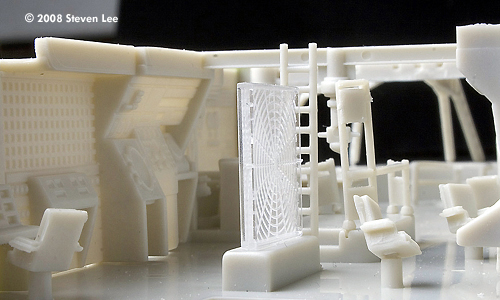
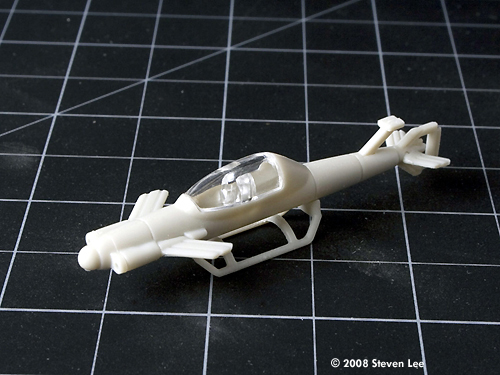
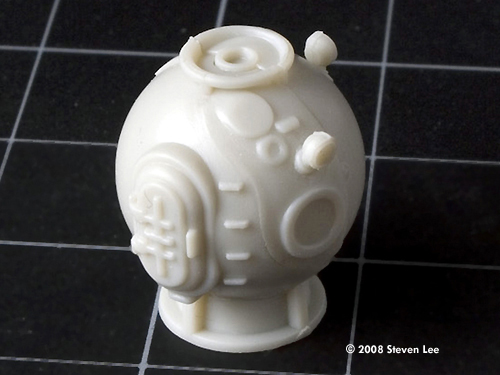
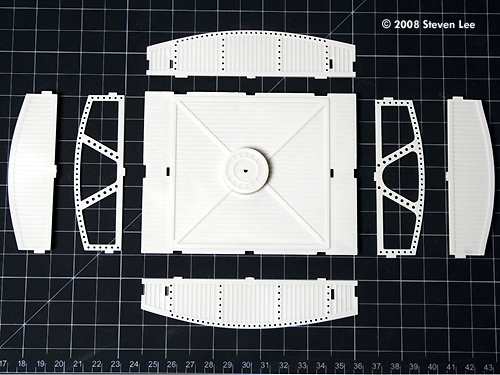
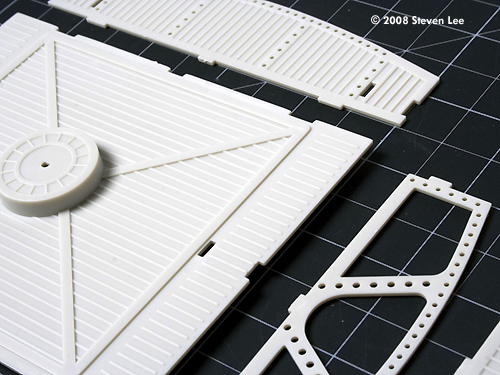
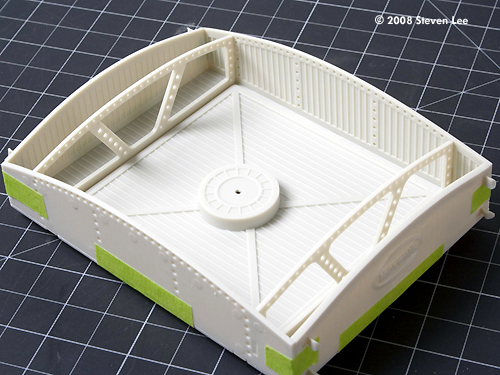
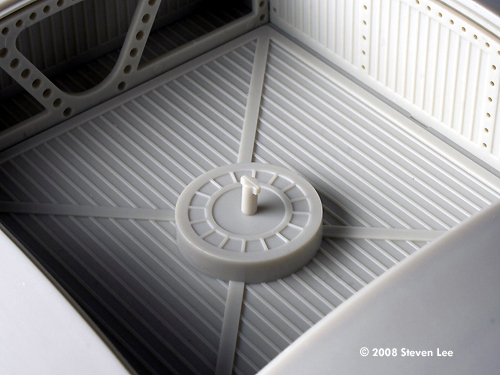
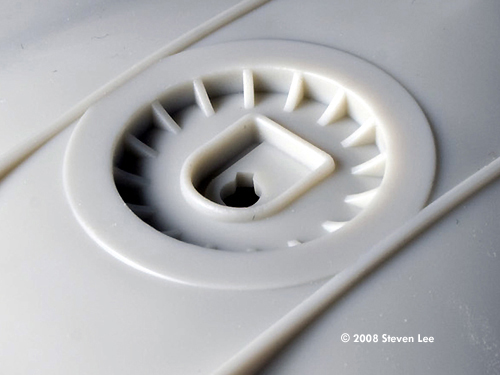
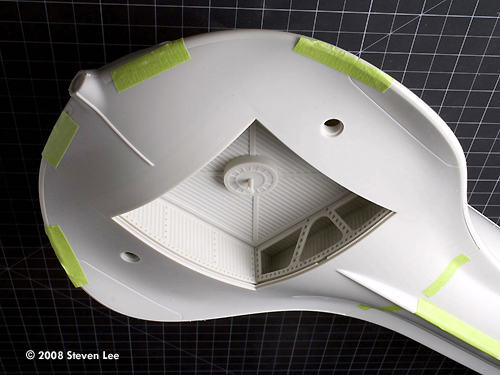
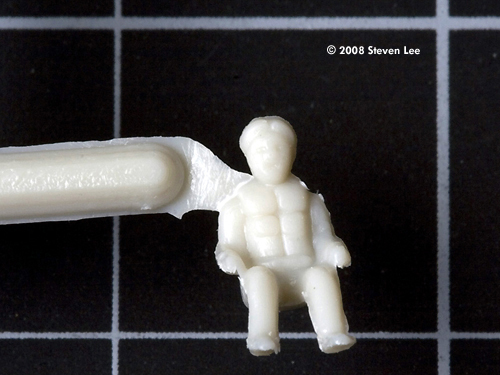
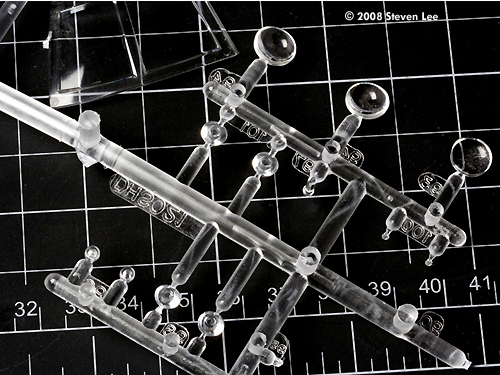
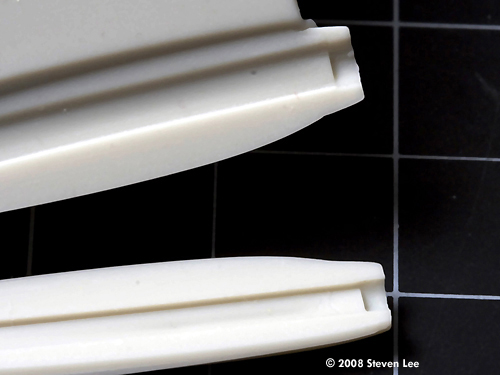
Image: The frameless observation window option representing the 17 foot miniature. The hull parts fit together very well. Image: The girder parts that will be the most visible feature seen through the observation windows. The parts are well made but assembly is a bit fiddly as there's some play to them when assembled and the slightest amount out-of-true will be obvious. The observation Deck archway, (#41) had a significant bend in it, but the soft plastic make it easy to bend into place. Image: Fish-eye view of the interior. Image: View inside from the port side. Image: View of the Observation Deck, and front of the Control Room including the Plotting table and circular stairway. Image: Back half of the Control Room showing the periscope island and control panels. Image: A view of the radio shack and door leading aft. Image: Port-side control panels. Image: Port-side showing pilot's station, and computer tape decks. Image: View into the Control Room from the Radio Shack. Image: View into Control Room from door to the rest of the Seaview. Image: Another view of the Control Room. Image: Front of Control Room and the Observation Deck. Image: Another view into Control Room from door to the rest of the Seaview. Image: Back-end of Flying Sub. Image: Mini Sub Image: Diving Bell Image: The Flying Sub Bay parts. Image: The Flying Sub Bay parts close-up. Image: The Flying Sub Bay assembled. Image: The keyed mounting post that will hold the Flying Sub in the bay. Image: The slotted hole can be seen once the Flying Subs top hatch is removed. Image: The Flying Sub Bay installed with mounting post in position. Image: One of two standing figures. Image: One of six seated figures. Image: The clear parts sprue. Image: Tail fin running light illuminated by .060-inch fiber optic. Not the glow of the F.O. can be seen through the tail fin along the top edge in the right side of the photo. Image: Tail fin detail. Image: Close-up of tail fin running light housing. |
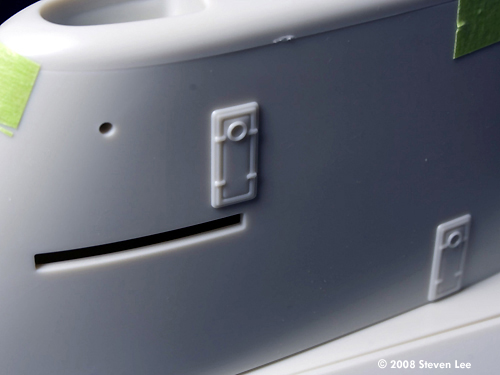
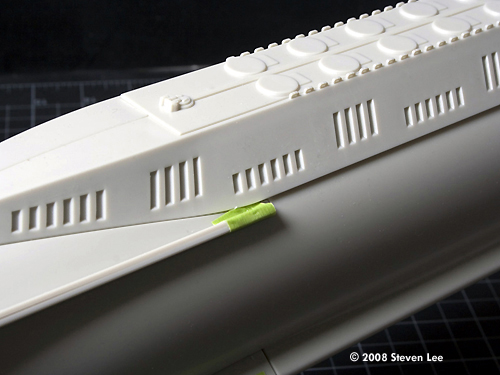
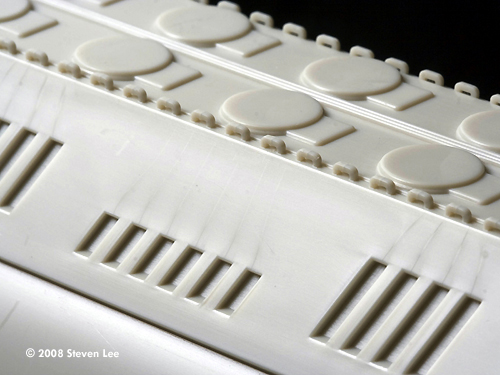
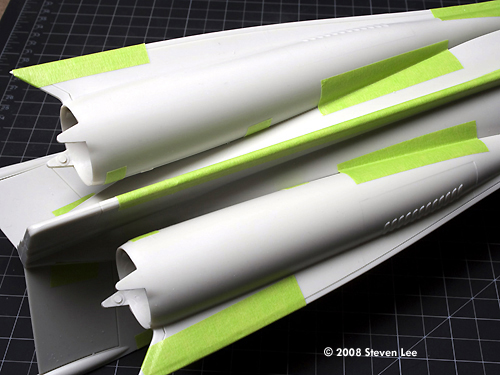
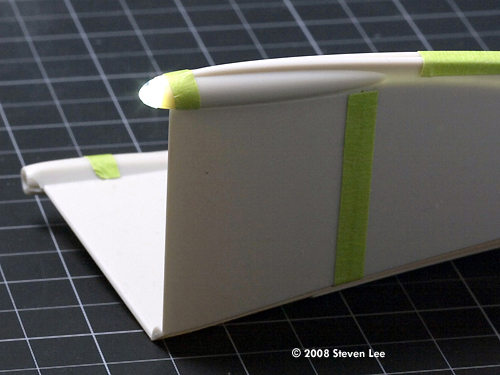
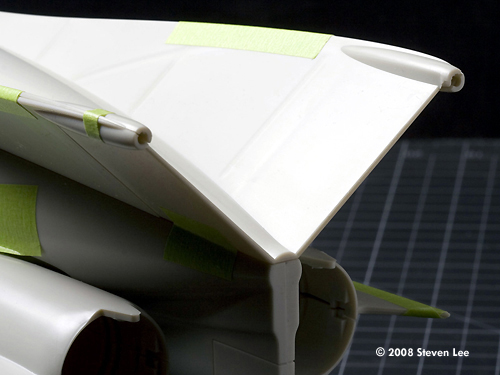
20th Century Fox Art Director Herman Blumenthal was primarily responsible for the design of the Seaview . With its distinctive glass nose, manta-like front end and rakish tailfins, the Seaview was the centerpiece of one feature film and four seasons of the TV series. Several models were built for the movie: a 4-foot model, an 8 1/2-foot model, and the largest one, measuring 17 feet 2 inches in length. Several less-refined 2-foot models were built for the series. These models varied in features and characteristics so it was always interesting watching the show to pick out which model was used in each shot. The largest Seaview was primarily used for surface shots and the 8 1/2-footer was used for underwater shots. The overall intended length of the Seaview has always been in question. Lengths ranging as short as 300 feet to as long as 650 feet have been quoted. With a total assembled length of 39 inches, this model, at 1/128 scale, would represent a vessel that's 416 feet in length. Previously, the only styrene model of the Seaview available was Aurora's static model kit. It was small at only 13 inches long, with an unstated scale, representative of styrene model kits of the time - it was sized to fit the box. The proportions were off. Overall, the hull looked slightly too chunky, and the distinctive manta fins looked somewhat truncated. The model also represented the movie version and so lacked the dual, side sonar domes and Flying Sub bay. Polar Lights reissued the Aurora Seaview for a short time and had intentions to produce a larger, more accurate styrene kit, but its plans were shelved (along with the dreams of many Seaview fans) indefinitely when Playing Mantis (parent company of Polar Lights) was purchased by toymaker RC2. Thereafter, a large-scale, affordable model kit of the Seaview seemed destined to be unrealized - until now. Enter: Moebius Models, the venture of Frank Winspur, owner/operator of the Doll & Hobby Shoppe in Florida. Moebius made its debut in 2007 with its inaugural release, a reissue of Aurora's Dr. Jekyll as Mr. Hyde. Its sophomore effort, the Voyager submarine/aircraft from the Saturday morning cartoon Fantastic Voyage, fulfilled the wish lists of many Aurora collectors as this rare and expensive kit was suddenly available and affordable. In 2008, Moebius produced its third model kit, the limited-edition Captain Action figure. With the introduction of the Seaview , Moebius has taken an audacious step in producing a large-scale model kit of one of cinema's most iconic fantasy vehicles. What You Get The large box features a painting of the Seaview by Polar Lights box art alum Chris White. Photographs of the assembled and painted model grace the side panels. All the parts are well-packaged. Included along with the instruction sheet are a separate Painting Color Chart to guide the builder in painting the model, a color flyer for Amazing Figure Modeler, a small booklet describing the design and use of the miniatures in the series, and a visual diary of Dave Merriman's restoration of the largest miniature - a very nice extra! The Model The model is comprised of 129 styrene pieces: 110 in light grey styrene, 19 in clear styrene. A four-piece stand is also included. Moebius' Seaview represents the TV show miniature from the second season. This is the version with four large observation windows and the Flying Sub bay. Moebius has thoughtfully provided two options for the builder's consideration: a set of observation windows with frames to represent the smaller 8 1/2-foot model (part 22), and a set without frames to portray the large 17-foot model (part 23). The different number of missile silo doors between the two models, 20 for the 17-footer and 16 for the 8 1/2-footer, are also provided for in extra optional deck parts. A model of the Flying Sub, the Mini Sub (introduced in the 1961 movie), and Diving Bell are also included. They are full models in their own right; in fact, the Flying Sub even comes with a miniature version of the classic Aurora aircraft stand so that it can be displayed on its own! Detailed interiors for the Observation Deck, adjoining Control Room, and 8 crewmen figures are also provided. The fit of the hull is excellent. Initially, I was concerned about tolerances between the very large pieces that comprised the hull, but my taped-up dry-fit shows each part mating together with great precision. The forward hull tube and aft portion fit together with a substantial inner sleeve molded into the forward section. The rather complicated geometry of the aft section, with the tapering tail cone, the twin-engine tubes, and the fins, is well-executed; there should be minimal seam lines to address in its assembly. This aft portion is a complicated collection of intersecting shapes, angles, and curves. From what I can see, Moebius has done a terrific job accurately replicating most of it. The tail cone still looks a bit bloated and the vents on the engine tubes fail to capture the craftsmanship that is evident in the movie miniature, but few models of the Seaview manage to come as close as Moebius does - from the gentle S curve of the large fins to the way the engine tubes tuck neatly into the tail cone. The Flying Sub bay is comprised of eight parts, making up the walls, ceiling, framework, and Flying Sub mounting post. Although the wall and frame parts appear similar, they all have a specific orientation, and the alignment tabs are sized to prevent the parts from being assembled out-of-place. If you have trouble assembling a part, it may be reversed or positioned on the wrong side. Carefully check the parts and their orientation against the instruction sheet before gluing. The assembled observation deck/control room fits above the Flying Sub bay; then that assembly is fitted to the lower bow piece (#3). This entire assembly is then mated to the hull. If you intend to light the interior, you'll have to work out the assembly steps to include the installation of the lighting components. Overall, the interior details are very good and well-molded, if maybe a bit heavy. But once closed up not much of it will be visible through the observation windows. One thing to note: From watching the episodes, I noticed the spiral staircase near the front of the control room does not appear to have hand rails. The kit part (#66) has hand rails, but because of the production characteristics of injection-molding, the rails are more like a wide, sloping spiral. It's probably best to remove the rail altogether. But so many things can be changed, replaced, and upgraded, one has to balance the investiture of one's energies and resources in pursuit of scale accuracy with the practical consideration of how much one can really see from the observation windows. Lighting The level of detail and overall size of the kit beg for interior lighting. In fact, Moebius has already accounted for this in having channels molded into the fin parts to accommodate wiring, and providing clear lenses where appropriate so the modeler can place illumination inside the model (two styles of lenses are included for the tail lights, the more accurate hemispherical lenses and a set of sportier teardrop lenses). I didn't have any small diameter LEDs on hand to try out, so I inserted a .060-inch diameter fiber optic into the channel. With just a bit of persuasion, the fiber optic can be tightly squeezed into the backside of the tail lens. Although it was a bit thick for the channel, once the fin was closed up and the lens installed, the lighting through the fiber optic was very realistic. Auxiliary Vessels The Flying Sub is comprised of seven grey parts, and one clear plastic part that represents the entire front face of the Flying Sub. Assembly is easy. There is a rudimentary interior, with two seats and two figures. The relatively thick windshield will prevent a clear view in, but the intrepid builder can even super-detail the interior and add lighting. The Flying Sub docks into its bay via a small keyed post. Removing the top hatch on the Flying Sub reveals the slotted mounting hole. It's a nice way to have the sub secured in the bay and yet still have it removable, but the mounting post seems like a fragile solution. Maybe a better solution would be to exchange the plastic post for a metal one, or perhaps epoxy a magnet into the sub just under the top hatch and then attaching another magnet or a piece of steel sheet above the bay floor. The Mini Sub is comprised of seven grey parts and three clear parts. There is no interior, but the clear canopy and headlights add a greater dimension to this tiny model. The Diving Bell is a bit disappointing; comprised of six grey parts, the observation windows and lights would have to be painted in. Not a deal breaker by any stretch, but it would've been preferable to have the lights and windows as clear parts. Everything Else The accompanying black and white, 8-page booklet describes the history of the Seaview and its use in the movie and TV series productions. There's also a concurrent photo diary of David Merriman's restoration of the 17-foot 2-inch miniature. It is wonderful to have available the back story to this singular submersible, as it lends a richness, even a bit of scholarship, to the subject. The instruction sheet is the only component of this model kit that falls short. Although the text directions are more than adequate, the Step 2 diagram describing the assembly of the interior is inexplicably small, rendering the parts drawings nearly unrecognizable. I have a passing familiarity with the control room, and with a quick viewing of a few episodes on DVD, I was able to place all the relevant parts into position in only a few minutes. Still, I think a set of larger, more detailed exploded-view diagrams would be the best solution to aid in assembly and painting. Painting Guide The Painting Color Chart is a separate sheet with a coded list of paint colors and their equivalent in three varieties of Testor's brand paints; the final column lists the kit parts to which a specific color is to be applied. Although the color callouts look extensive, they often indicate only the general color of a part, like the Back Wall of Radio Shack, Assorted clock and instrument faces, and Plotting table. It is up to the builder to fill in the various details that are there. The chart also describes painting the Flying Sub trim a bright blue (Testor's Acryl 4659). It would behoove the builder to do a bit of research to to find out where exactly this hue occurs on the Flying Sub, as there are no indications in the kit-supplied materials. One more item of note: the Painting Color Chart states that the upper hull exterior is Light Ghost Grey (Testor's Acryl 4762) and the bottom hull is to be painted Camouflage Grey (Testor's Acryl 4766); however, Merriman's text states that the upper hull is DuPont's Lucite 131S Fill-N-Sand automotive acrylic lacquer primer, and below the bilge keels is colored white. The discrepancy between the bottom hull paint specification may be to account for scale effect or to compensate for optical perception of pure white on a scale model looking unrealistically bright. As to the upper hull color, I don't have a color sample of the primer, so I can't judge, but I will assume the Light Ghost Grey to be an equivalent to DuPont 131S - possibly taking into account either scale effect or optical adjustment. |
|
In Conclusion... On the plus side, Moebius' Seaview will build up beautifully with little trouble. Tight tolerances make assembling the hull trouble-free, with only minor seam-filling to be done. The great features - detailed interior, included figures, complement of auxiliary craft, crystal clear parts, thoughtful engineering, and the sheer size - make this an absolutely fantastic kit even if you simply follow the directions and use the kit parts as supplied. But that's just the ground-floor possibility. This model kit can serve as a wonderful starting point for the model builders' loftiest ambitions. Superdetailing, lighting, parts articulation, and radio-control solutions can all be implemented in a model of this size. On the down side, I found the diagram for Step 2 inexplicably labyrinthine and the painting chart occasionally nebulous. Also the color cross-referencing exclusively to Testor's paints is not very helpful when there are many other popular lines of paints available to the hobbyist. In spite of these shortcomings, there's a lot to love about this model kit. The word monumental comes to mind, and I'm not talking just about the size of the model. For the fans of the show, and particularly of the Seaview , it's taken nearly half a century for a hobby kit to be realized that properly represents this fantastic, fictional vessel. Sure, there are other worthy ships for which the wait continues: the Icarus from Planet of the Apes, the Discovery from 2001: A Space Odyssey, the Nautilus from Disney's version of 20,000 Leagues Under the Sea, and many more. But none have had the screen time of the Seaview . As it glided past the fuzzy cool-grey glow of my parents' Zenith console every week for four seasons, we sat rapt at the high adventure and suspended our disbelief at the improbable stories of Admiral Nelson and the crew of the Seaview . That beautiful submarine burnt into our minds as indelibly as the Indian-Head TV test pattern into that very same Zenith console. Only 47 years later, we finally get a model kit that properly reflects this iconic submarine! Nelson's Folly! has finally put into port. Many thanks to Steven's wallet for providing the review sample. You can see more of Steven's work at his Forbidden Plastic website. Manufacturers and retailers, interested in getting your wares reviewed and publicized on a site averaging 3500+ readers a day? Contact us! |
![]()
This page copyright © 2008 Starship Modeler™. First posted on 8 May 2008.
![[Please click to enlarge]](sl_seaview_0002.jpg)
![[Please click to enlarge]](sl_seaview_0012.jpg)
![[Please click to enlarge]](sl_seaview_0013.jpg)
![[Please click to enlarge]](sl_seaview_0021.jpg)
![[Please click to enlarge]](sl_seaview_0025.jpg)
![[Please click to enlarge]](sl_seaview_0028.jpg)
![[Please click to enlarge]](sl_seaview_0035.jpg)
![[Please click to enlarge]](sl_seaview_0039.jpg)
![[Please click to enlarge]](sl_seaview_0048.jpg)