
|
By Tony Agustin - images & text © 2003
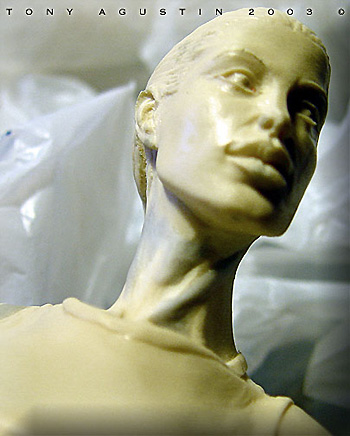
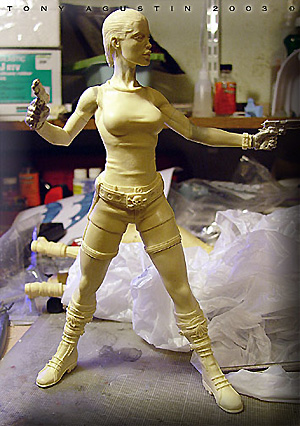
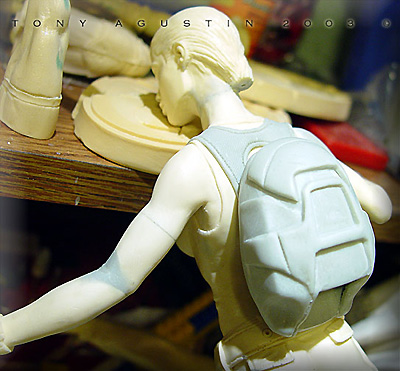
A couple of years ago I found this figure kit of Angelina Jolie at a local Chicago Model Convention. It is a Jimmy Flintstone figure called 'Raider Girl'. I thought it was a remarkable sculpt and the likeness was very good. One problem I had with the figure was the pose was too stiff and unnatural. This figure was going to be my first venture into the world of re-posing. I would also get introduced to a material called BalsaFoam. This won Best Female Figure at Kitbuilders 2003 and also won Silver at Wonderfest 2003. |
![[Click to enlarge]](ta_lara_AJa.jpg) |
|
|
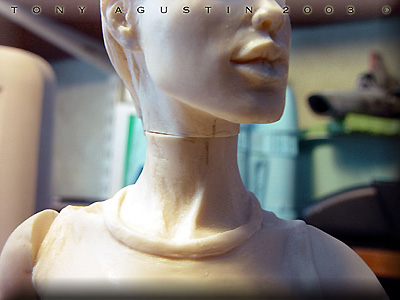
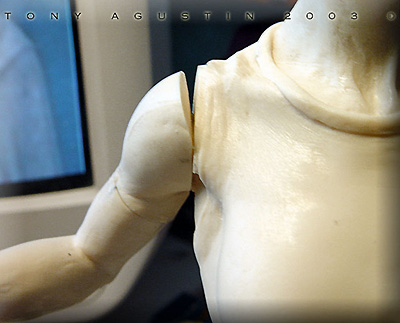
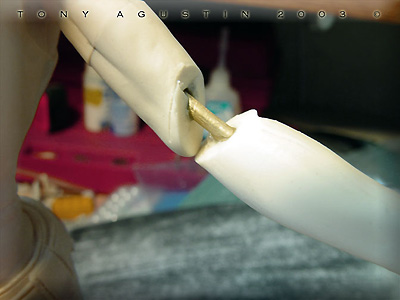
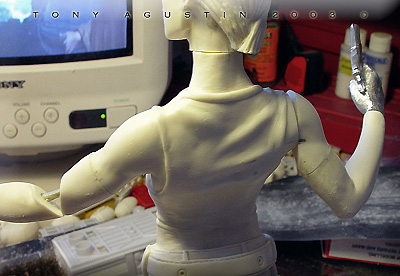
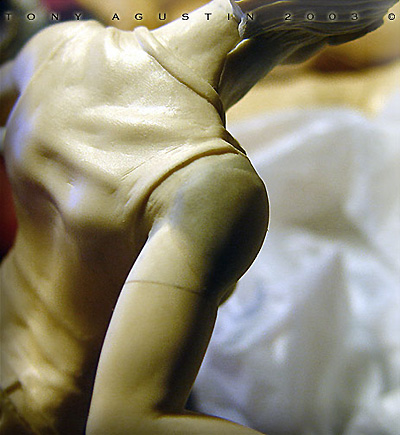
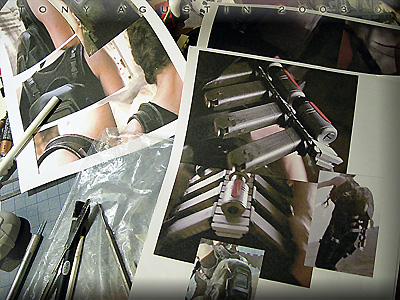
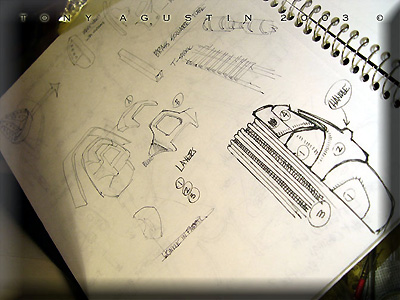
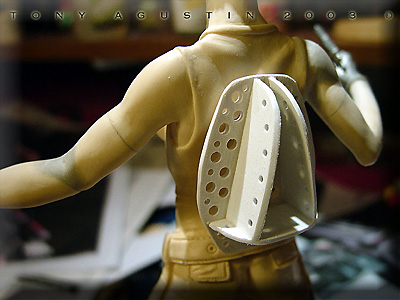
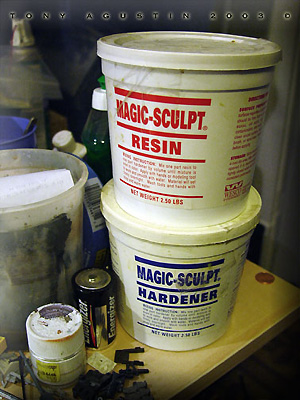
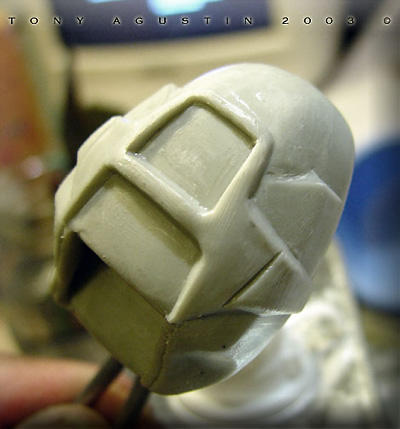
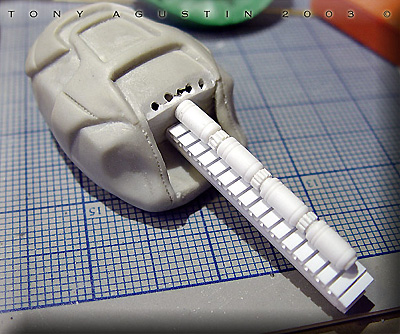
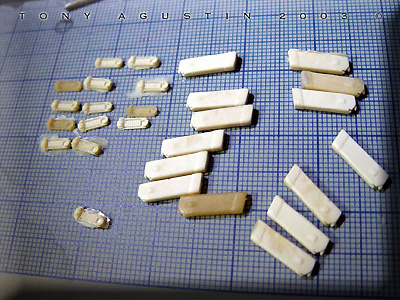
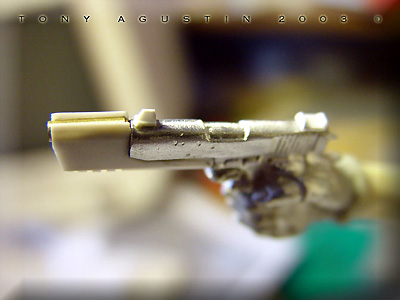
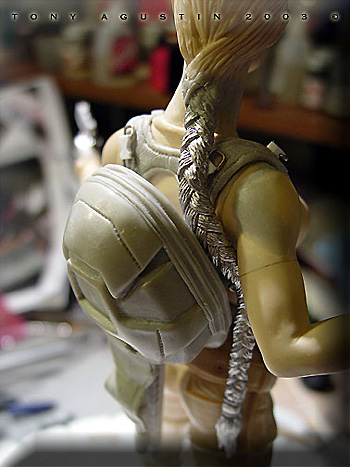
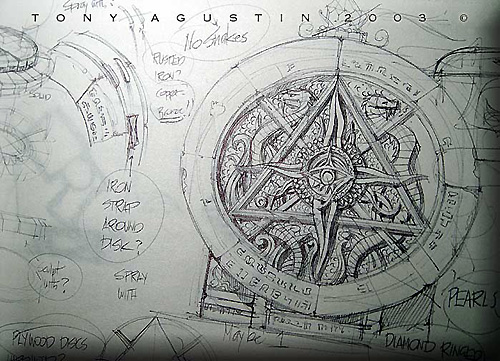
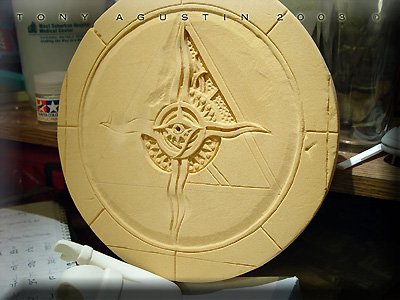
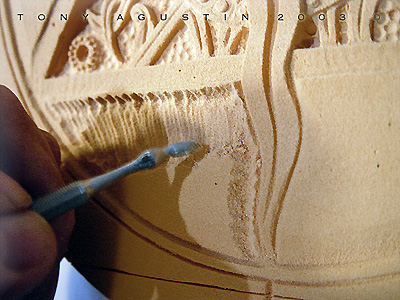
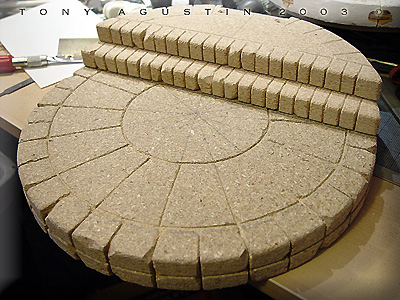
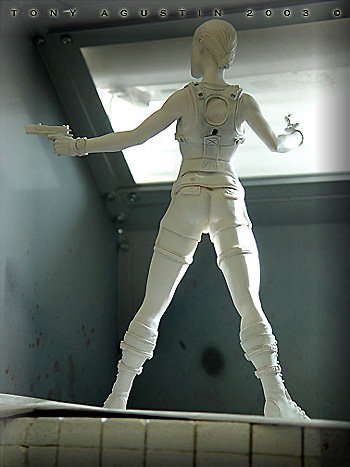
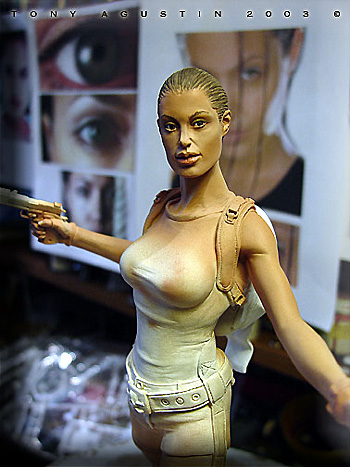
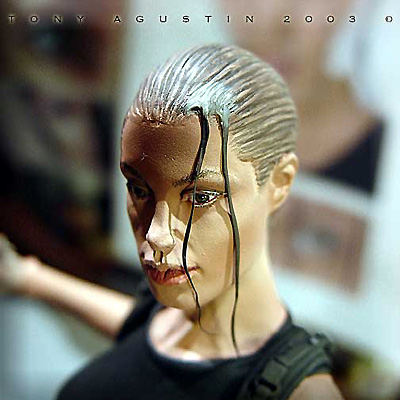
Image: The first thing was to decide on a more naturalistic stance. Once that was decided I beheaded the figure with a razor saw and reattached it with brass rod. Image: The same thing went for the right shoulder... Image: ....and the left elbow. Image: Only three major cuts needed to be made. Image: I used epoxy putty to re-sculpt neck details... Image: ...and the arm details. Image: This re-posed figure looks much better now. Image: The one thing the figure didn't have was the ammo backpack. I had to make it from scratch so I took some screen grabs off the DVD of the movie for reference. Image: I sketched out the parts I thought needed to be made. Image: The inner frame of the pack was made of thick styrene. Holes were drilled into it so the epoxy putty could have something to grab onto. Image: I used Magic-Sculpt to fill out the pack. I love this stuff. Image: The putty was laid down in layers until the form took shape. Image: A harness needed to be sculpted as well. Image: Styrene structural shapes were cut and assembled to make this whats-a-ma-widget. Image: Ammo clips and clip mounts for the pack needed to be cast up into many many pieces. Image: The original guns weren't too good so I modified them with extra styrene bits to make them look like the movie guns. Image: The pack and harness was sculpted. Little buckles were made with styrene and paper clips. The kit supplied pony tail was made of white metal and had to be carefully bent to conform around the pack and behind her arm. Image: This figure needed a cool base so I sketched out my own version of this circular carving but with a huge gem in the middle. Image: I found this material called Balsa Foam and with little dental and sculpting tools.... Image: ....proceeded to slowly carve out the details. Image: Here the main disk is finished and being protected with primer. If I had to do this part over again I would have brushed on clear resin instead for strength if I had known. Image: The Base was made of 4 layers of particle board. Individual stones were carved in. Image: The center of the base where the figure would stand looked too plain, so I took a thin slice of Balsa Foam and carved in new details for interest. Image: The figure was sprayed with white primer direct from the can. I prefer to prime figures with a white primer. Image: The first colors are airbrushed on. Other details were done with a paint brush and colored pencils. Image: Loose strands of hair were cut from scrap vinyl lettering sheets. Epoxy putty was used to blend the strands to the hair line. |
![]()
This page copyright © 2003 Starship Modeler™. First posted on 27 October 2003.
![[Click to enlarge]](ta_lara_AJb.jpg)
![[Click to enlarge]](ta_lara_AJg.jpg)
![[Click to enlarge]](ta_lara_AJf.jpg)
![[Click to enlarge]](ta_lara_AJe.jpg)
![[Click to enlarge]](ta_lara_AJd.jpg)
![[Click to enlarge]](ta_lara_AJc.jpg)