
By Vince Hoffmann - images & text © 2005
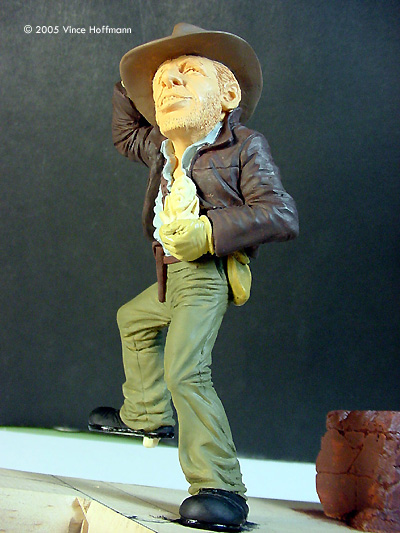
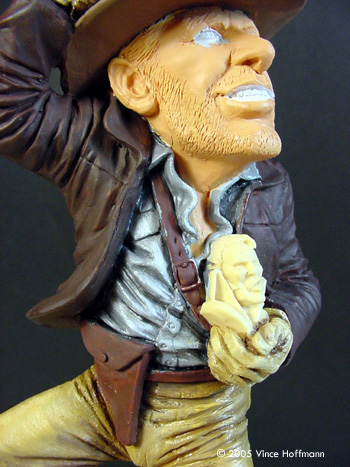
I spotted this little figure kit at a convention last year hidden away in a forest of other figures all set out on a display table. Not being someone who typically gravitates toward figure kits, my untrained eyes usually glaze over with so much to see - that is, until I spotted Indy. |
![[Please click to enlarge]](vh_indy_done_1.jpg) |
|
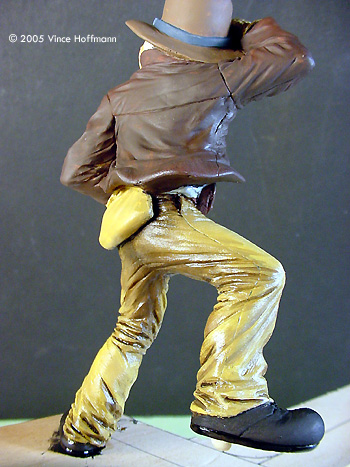
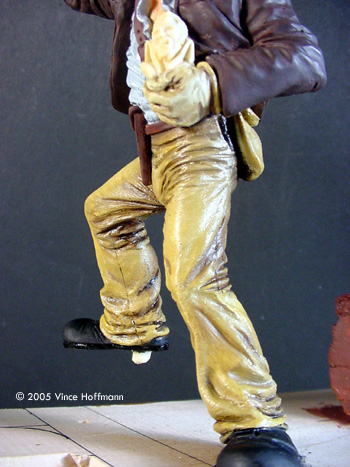
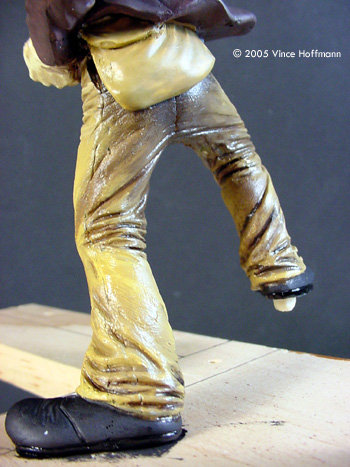
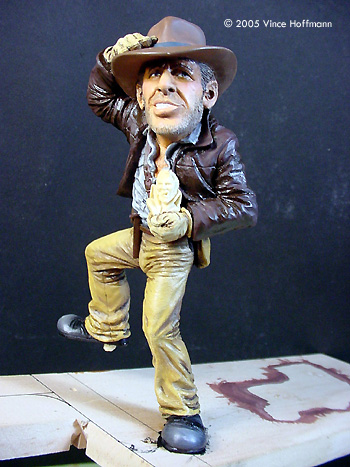
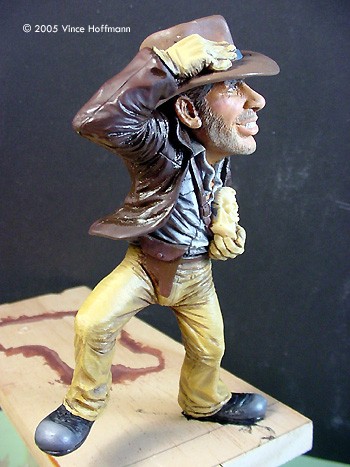
Image: First step in painting: acrylic bases coat Image: Step 2: Adding details Image: Step 3 Image: Step 4 Image: Step 5 Image: Step 6 Image: Closer look at the pants, front ... Image: ... and bhind Image: Step 7: working on the jacket Image: Step 8: Done with the clothes Image: Step 9: Teeth and eyes Image: Palette for face painting Image: Painting the face Image: Painting the base - first steps Image: Finishing the base Image: Completed figure, right side Image: Behind |
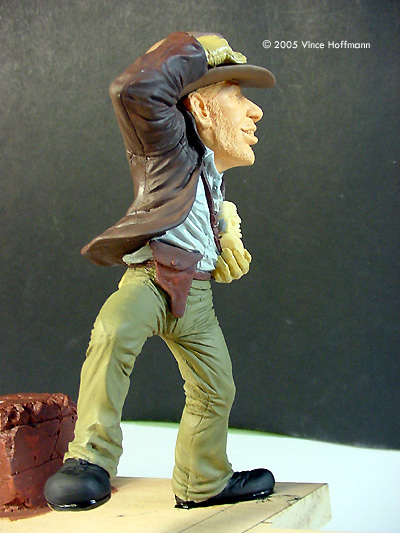
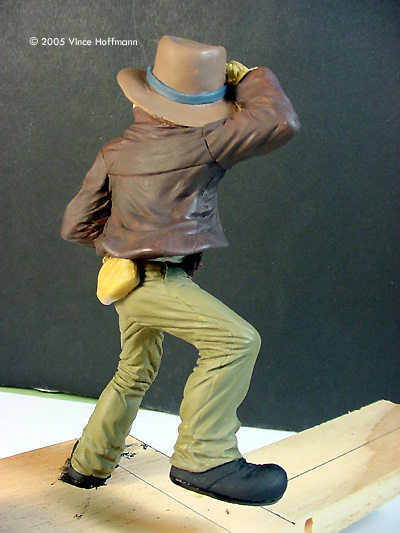
I picked up the display model, examined it closely and saw that the level of detail sculpted into this little figure was quite impressive! I had seen caricature sculpts before and the attention to detail would generally lack because of the subject matter, but not here. $15.00 later Indy found a new home. Overview As a nicely sculpted 120mm figure, this kit is an excellent opportunity to practice your painting skills. There is no need for instructions and painting is left to your imagination. Casting quality is good with minor seam lines visible down the arms and legs, and other seam lines cleverly hidden along natural breaks and texture changes. The detail is quite deep in some areas and small bubbles had to be popped out of many of these recesses. Cleanup and Assembly After the visible seam lines were cleaned up with a file and sandpaper, all of the parts were washed using Formula 409 and water. This very effectively removes all casting residue and finger oils. For ease in painting and to reduce handling, the figure and base were mounted on a 4"x8"x1/2" wood block with a short brass pin. The parts were then primed with lacquer based primer and set aside to dry. Base Colors The first paint to go on was acrylic, mixed to closely match the final color. No shadowing was done at this point; the objective here is to provide a flat layer of color to act as both an adherent for the oil paint to come, and a neutral color to which the shadows and highlights would be applied. After the facial flesh color dried, a very light grey base color was painted over the eyes and teeth. Painting From the Bottom Up I chose a heavy-handed approach to painting this figure; I wanted every shadow to be darker than normal, and every highlight to be lighter. It is a caricature after all! Windsor and Newton oil paints were used for the final colors, shadows and highlights. For Indy's pants, yellow ochre, white, raw umber and a touch of blue were blended to make a nice medium khaki color. For the shirt, white, black and a tiny touch of blue made a nice grey color. For the jacket, a leather tone was created by blending a small amount of raw umber with brown made from red, blue and yellow. Indy's hat is the same brown blend, with white added instead of raw umber to give it a bleached appearance. The glove colors are a lighter variation of the khaki used for the pants. From each of these colors, separate blends for the shades and highlights were created. Working from dark to light, the medium shadows were applied to the folds; highlights were applied to the high spots, and blended in the middle. Dark shadows and light highlights were added afterward to create more depth. Additionally, the undersides of the legs, arms, hat and jacket were given a forced perspective shadow treatment by making these areas typically darker than the surroundings. The intent here is to create a 60 degree sun direction (from the front) therefore, everything below and behind will be generally darker. Because paint was used to create the shadows and highlights, neither a wash nor a dry brush treatment was necessary to bring out the detail. |
|
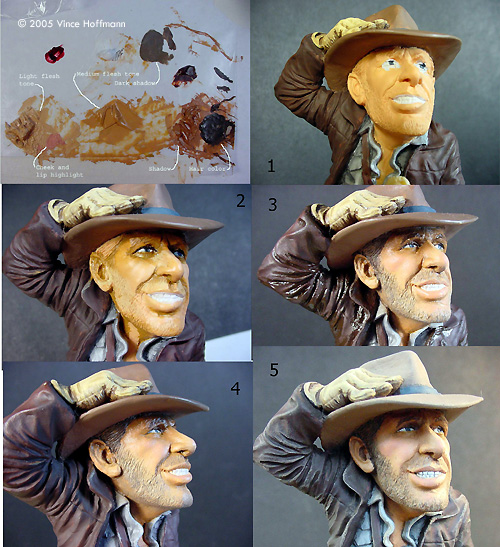
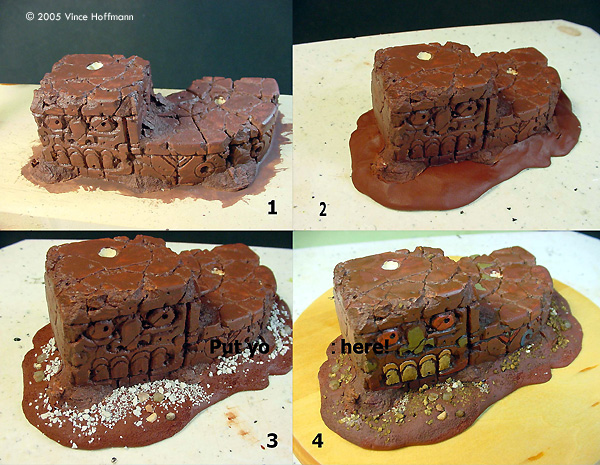
Face Painting After sitting for a two week drying time, the clothing was done and face painting began. First, the eyes were painted. A broad stripe of light blue was painted vertically onto each eye, followed by a tiny black stripe for the iris. Three basic colors were used to make the various flesh tones: white, yellow ochre and burnt sienna. Burnt umber was used for very dark shadows and crimson was used to slightly tint the flesh tones for a more pink appearance around the cheeks and lips. The three base colors were blended until a satisfactory flesh tone was achieved, then white and burnt sienna were added for light highlight and shadow colors. Starting with the eyes, upper and lower eyelids were outlined with the dark flesh color. This color was continued down around and under the nose. The same shadow was painted under the chin and cheeks and continued back to the ears and neck. Using the light flesh color, the eyebrows and forehead were painted. The top of the nose was painted as well as the cheeks up to the shadow line previously used to outline the lower eyelid. The chin and lips also get this light flesh color. All of the edges were blended and light highlights and dark shadows were accented with very small applications of white and burnt umber. A very small dab of crimson on the cheeks and lips gave the face some color, while a dark brown swatch for eyebrows and a thin black wash to bring out his teeth finished up the face. After the face had time to dry, hair was painted dark brown with black wash, and Indy's 5 o'clock shadow was dry brushed with grays and brown. The flesh tone was allowed to show through for a stubbly appearance. Painting and Finishing the Base I thought the base needed to be a bit larger Using Sculpy modeling clay; I extended the edges of the base and added miscellaneous rocks and gravel for texture. After about 1/2 hour in the oven, the base was ready for paint. Using the same type of oil paint that was used for the figure, extra thinner was added to raw sienna make a fluid mixture, and this was applied very liberally to the base. I allowed the wash to pool in all of the recesses and added a second application of Burnt Umber to make the shadows extra dark. After the initial wash dried, the stone face was painted and the whole thing lightly dry brushed with light brown. A viscous mixture of acrylic matte medium and water was then applied liberally to the base and grass flocking is sprinkled on, along with a sparing amount of dirt (sifted to remove bugs and twigs). Dried, crushed broccoli flower was used to make leafier ground cover. |
|
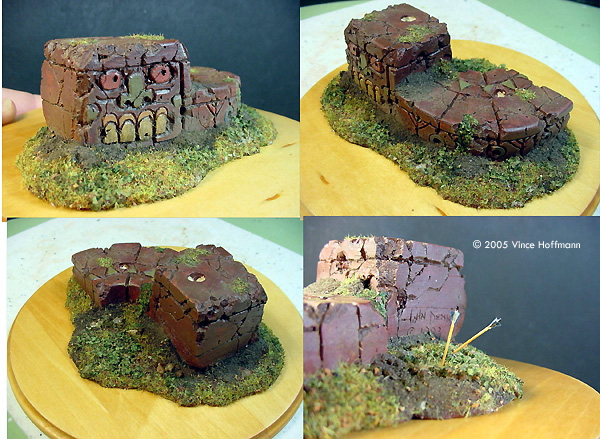
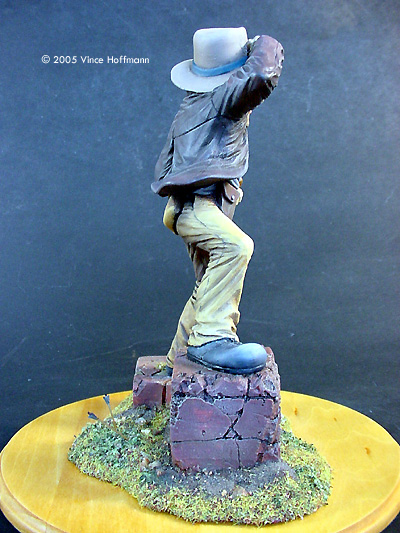
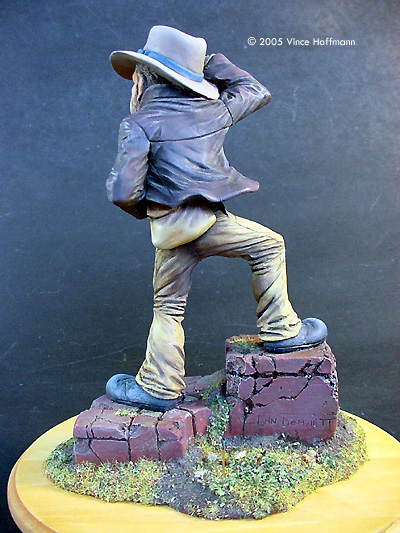
The excess was shaken off and left to dry. When the glue holding the dirt and grass was dry, the finished base was sealed with a flat acrylic spray and attached to the finished wood base with 5 minute epoxy. Little arrows were made from plastic rod, painted and attached to the back of the base. Finishing Up The figure was sealed with a light spray of flat acrylic, removed from the temporary wood base and epoxy secured it to the new base. After the flat acrylic, the very last item to receive paint was the idol, which was given a slightly red-tinted gold color. Conclusion This kit is suitable for any level of model builder and the extent of detailing and finishing is completely left up to the modeler. A total of 15 hours (not including paint drying time) was spent building and painting this figure model. |
For the figure:
For the base:
|
![]()
This page copyright © 2005 Starship Modeler™. First posted on 27 July 2005.
![[Please click to enlarge]](vh_indy_done_20.jpg)
![[Please click to enlarge]](vh_indy_done_5.jpg)