![[Starship Modeler - The complete information source for modelers who build sci-fi, fantasy and real space subjects]](../mb_mast.jpg)
|
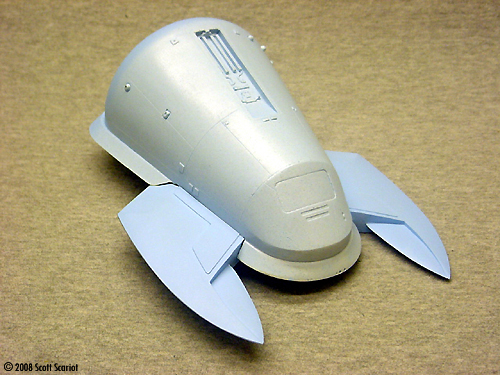
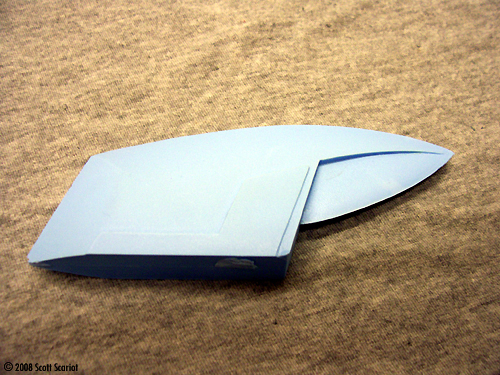
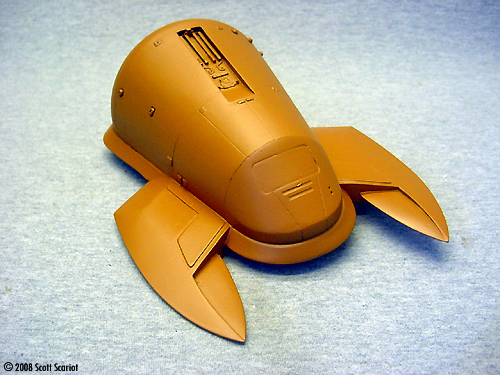
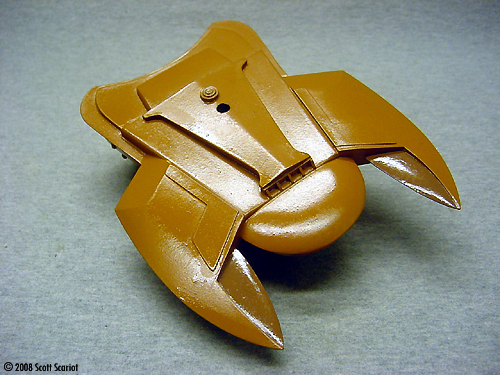
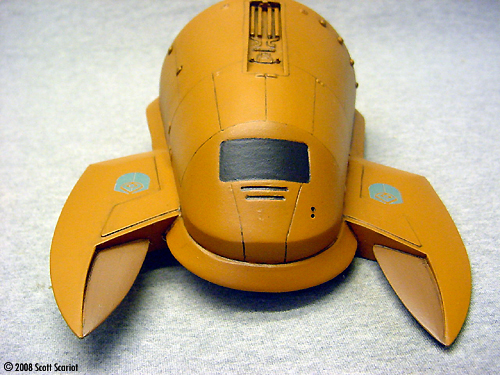
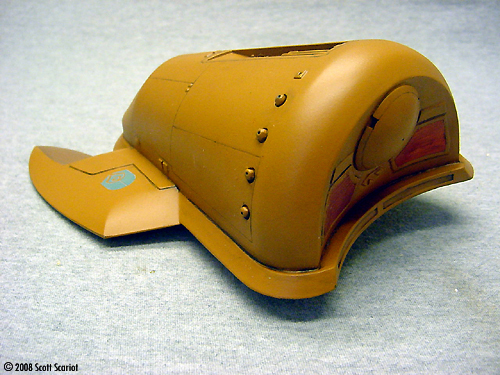
By Scott Scariot - images & text © 2008 What is resin? And how do you build a model made from it? I hope to provide answers to these questions in this chapter and show how I built the Ferengi Pod of Acquisition. Let's start with the basics. The model kits manufactured by the large model companies and found in local hobby shops everywhere are made from Polystyrene plastic. The plastic is melted down and injected into steel molds and the parts emerge on their plastic trees ready to be assembled by the modeler. |
![[Please click to enlarge]](ss_resin/01_model_and_stand.jpg) |
|
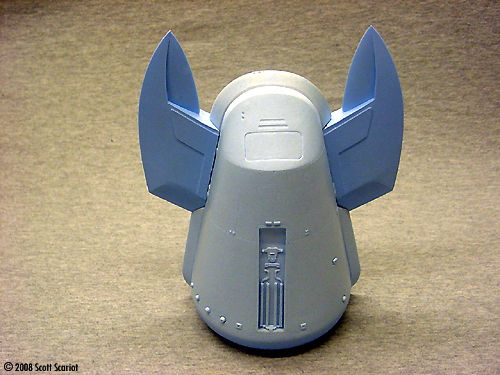
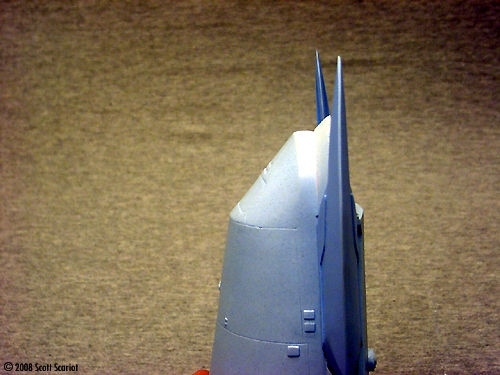
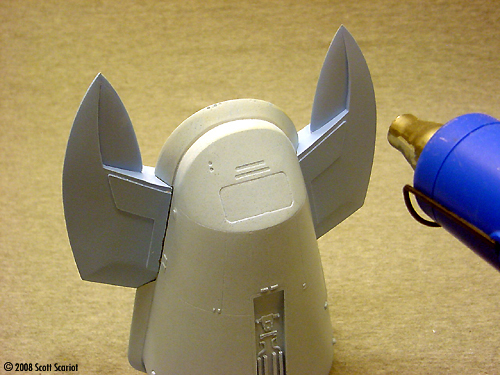
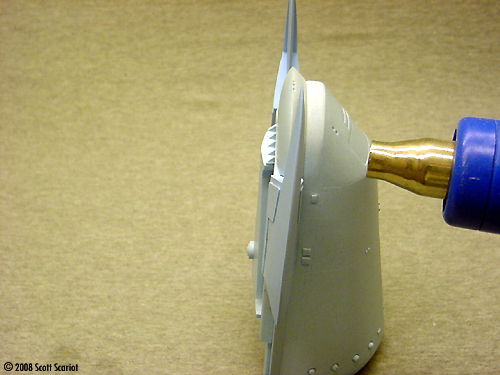
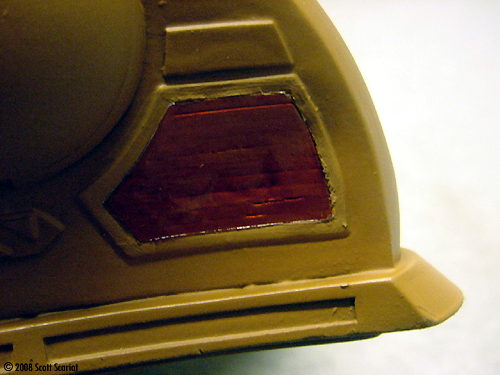
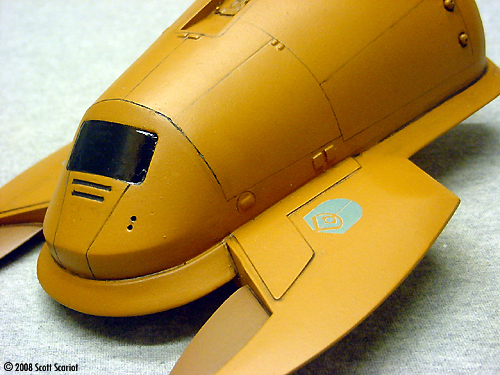
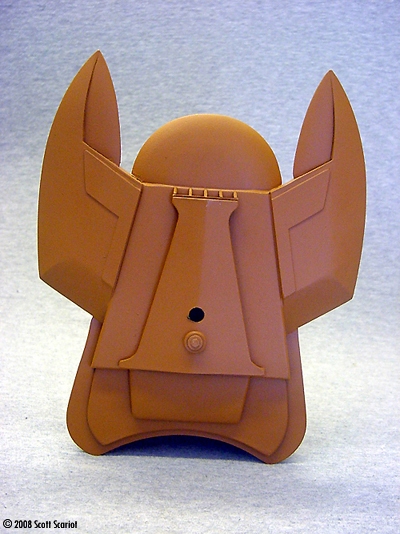
Image: Main body, out of the box Image: Underneath Image: Front Image: Rear Image: One of the two wings Image: Small ding on the wingtip Image: Bubbles are the result of air trapped in the mold. Image: These are the cleaning products I use Image: Cleaning the hull .... Image: ... and the wing Image: Another, on the side Image: One on a wing ... Image: ... and on the opposite wing Image: Side stub sanded Image: Using a file to restore definition to the lip around the bow Image: That's better Image: Wet sanding a wing Image: The pour stub is gone Image: Cross-hatching gives more surface area for glue to "bite" into Image: On a wing Image: My favorite CA Image: Glue on Image: Basic assembly is complete Image: Underneath Image: But first, the uneven wings Image: Heat gun Image: Heating a wing Image: Heating the other wing Image: Now they are even and aligned Image: My putty of choice: Aves Image: First dig out equal amounts of A & B ... Image: Roll them into ropes ... Image: Twist the ropes together ... Image: And knead until the combined ball is a uniform color Image: My puttying tools Image: Filling the bubbles up front Image: Top view Image: Top of the wing root Image: Now let it sit until fully cured - at least 8 hours Image: Done Image: Sanding the wing root Image: Done Image: Last bit not least, drill a hole for the stand Image: My primer of choice Image: Some further sanding was necessary Image: Paints used Image: My Paasche VL airbrush Image: Underneath Image: Top Image: Rear Image: First coat of detail paint Image: Detail painting complete Image: Underneath Image: Masking off the engines Image: Silver paint applied Image: First coat of clear orange Image: Closer look Image: Engine painting complete Image: Future Image: Topside, after Future Image: Nice and glossy Image: Decal, trimmed from the sheet Image: Dip in warm water, not coffee .... Image: Brushing on more Future Image: Decal in place Image: Wash, on top Image: In the panel lines Image: Underneath Image: I use Model Master Acryl Clear Flat .... Image: ... it kills the Future shine nicely Image: Left/rear view Image: It may look a bit milky when first sprayed Image: Rear view Image: Engine, closeup Image: Front/left Image: Underneath Image: Simple pine plaque for a base Image: Brass tube for a stand Image: Motor tool with a cutting disc Image: A hacksaw would also work... Image: Blowtorch Image: Drilling a hole for the stand Image: Base after burning Image: Plaque in place Image: Sealed and ready for display Image: Right/rear view |
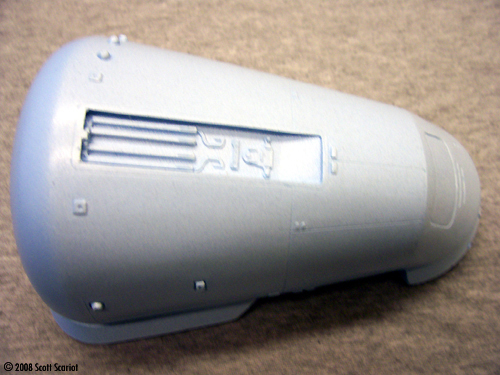
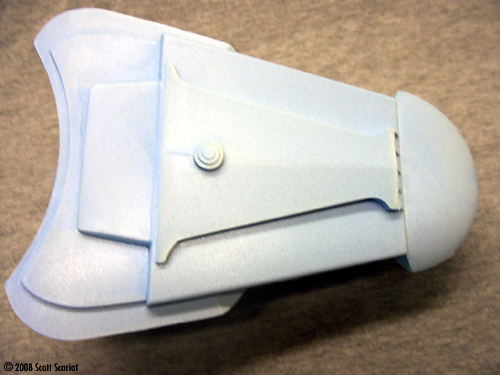
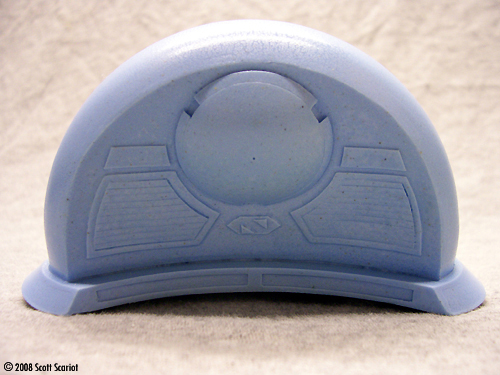
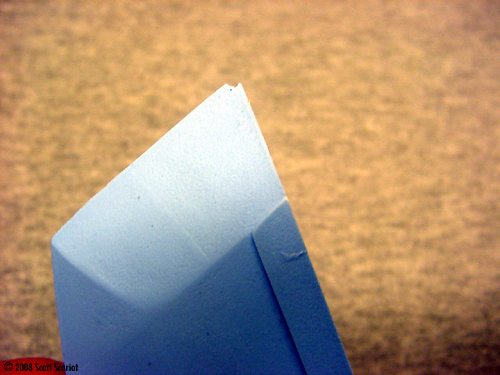
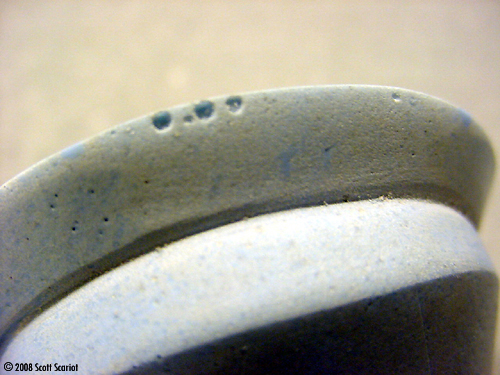
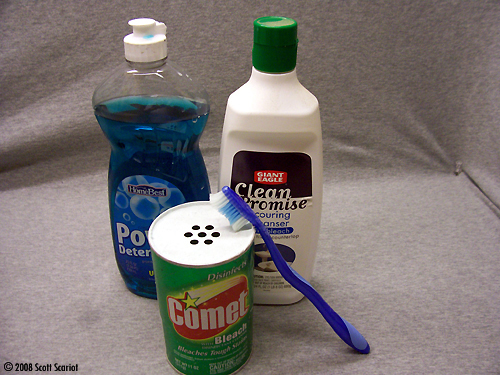
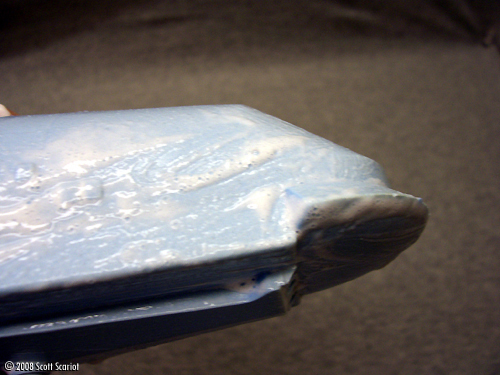
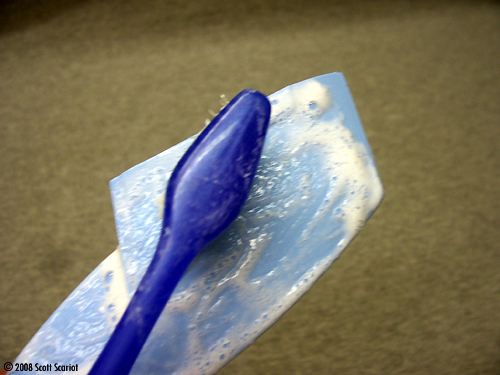
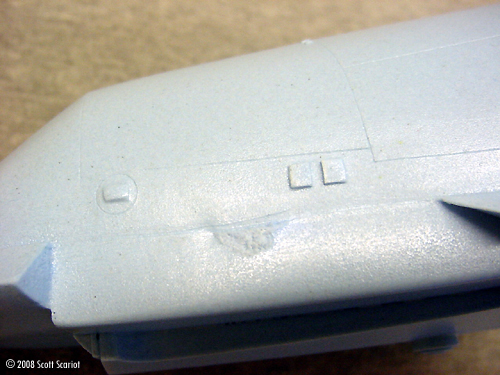
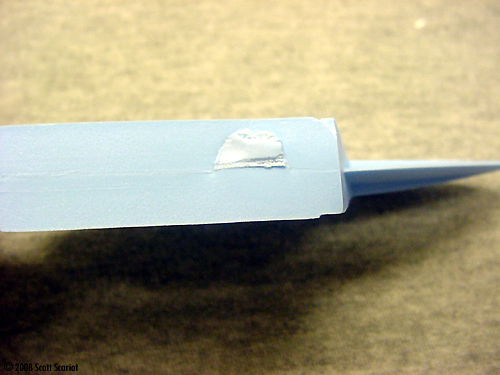
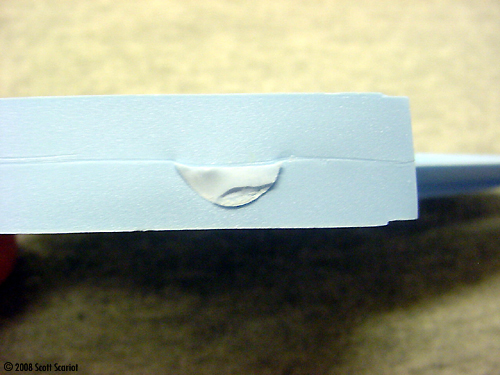
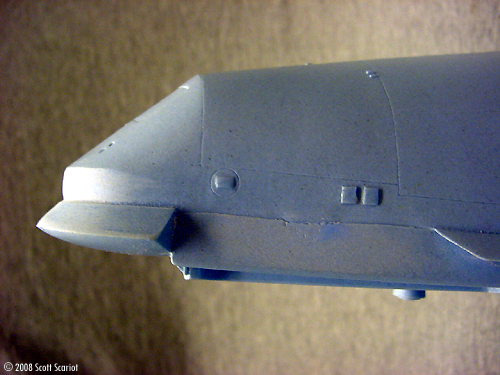
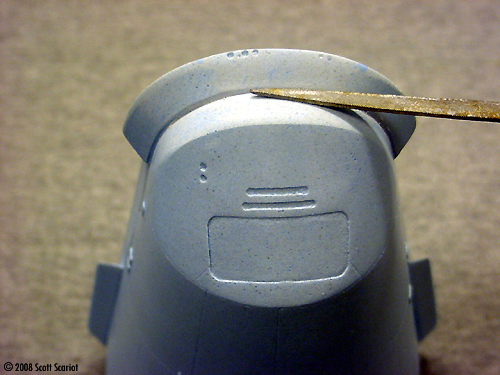
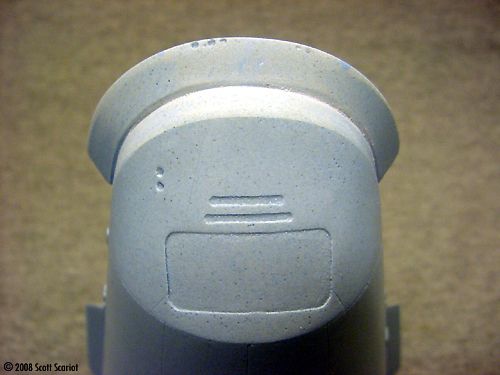
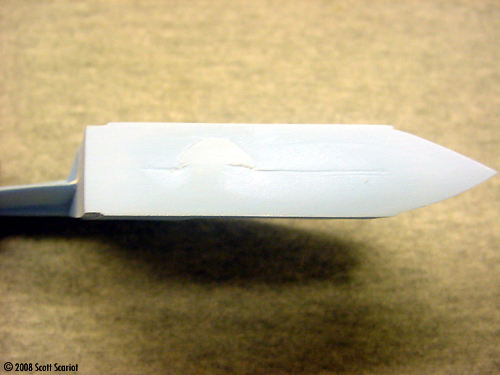
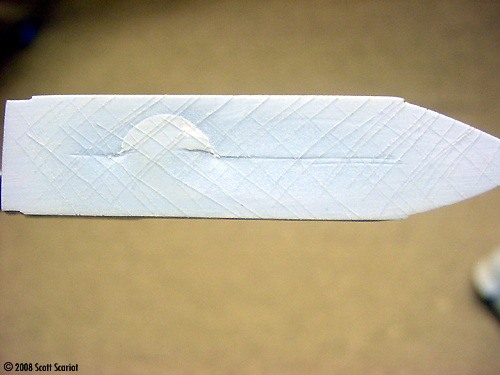
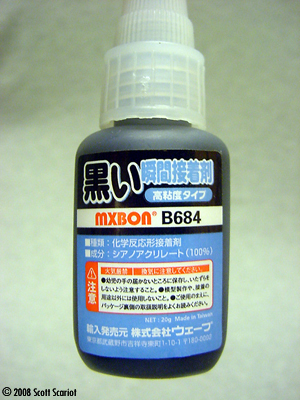
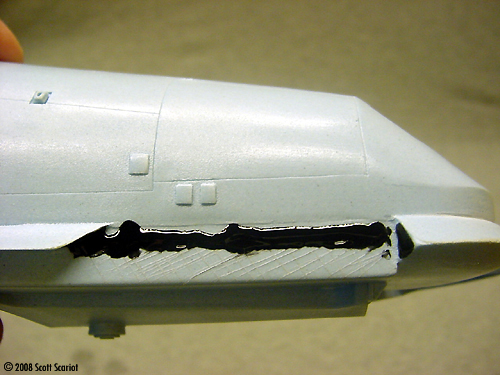
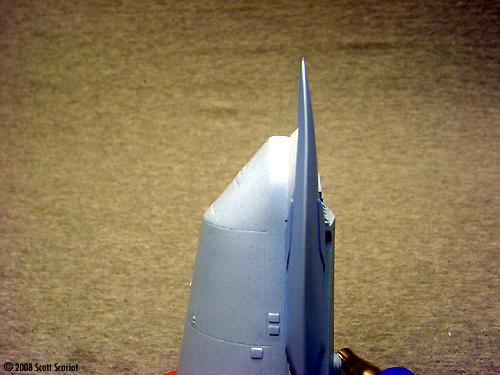
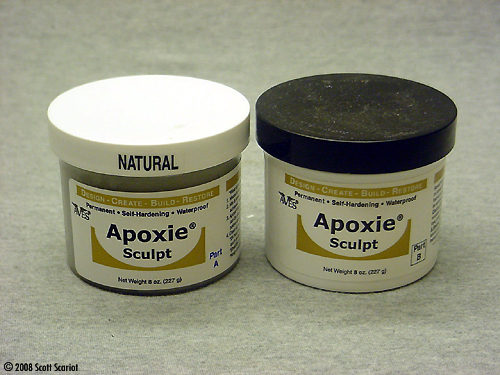
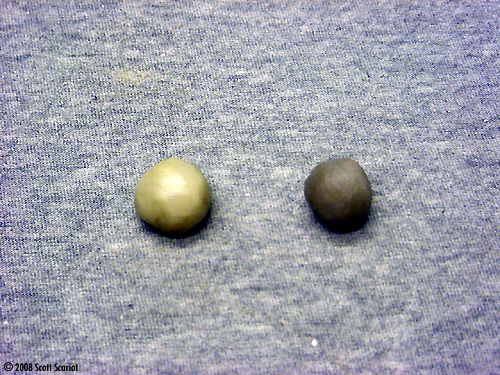
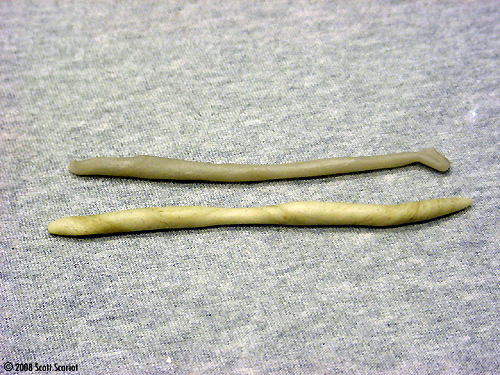
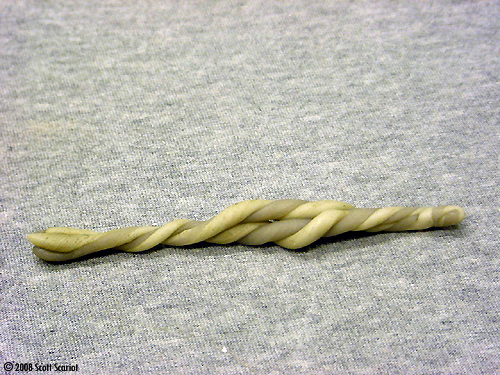
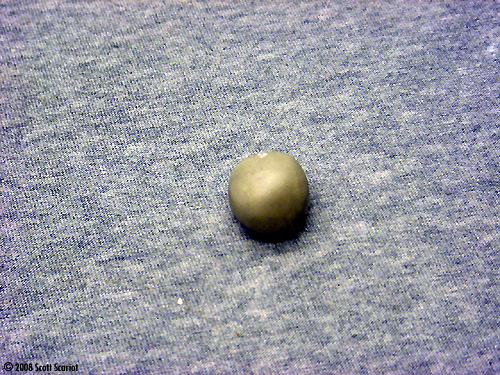
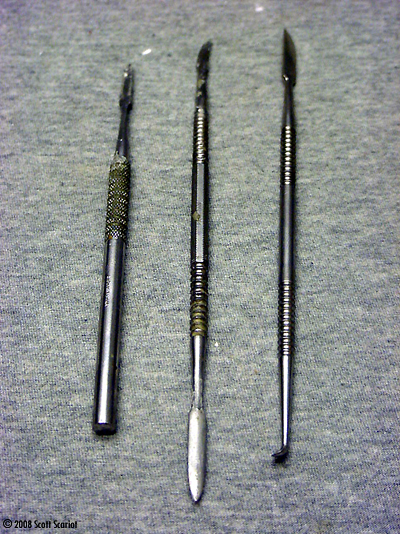
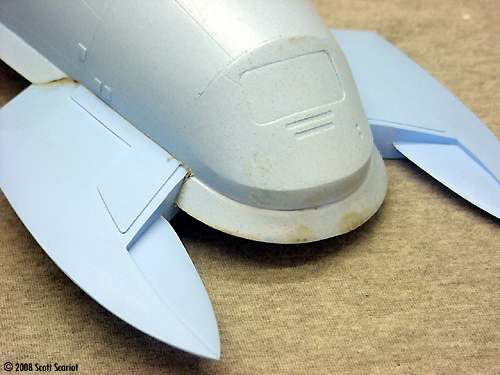
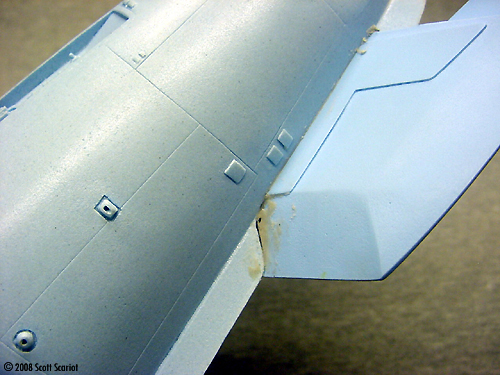
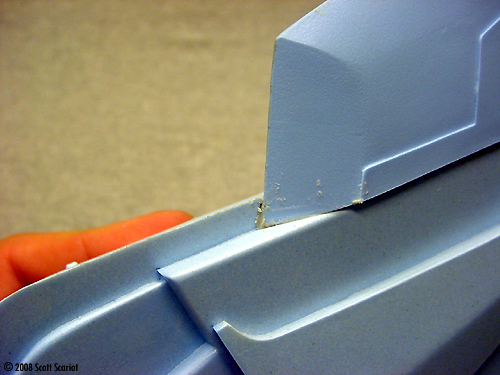
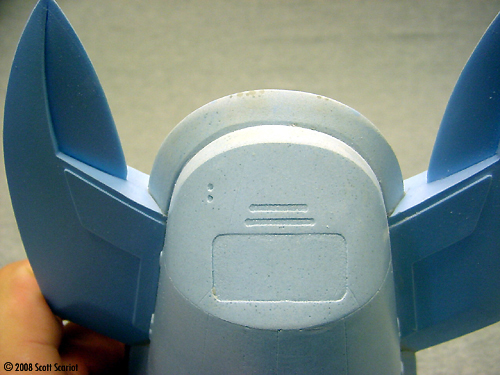
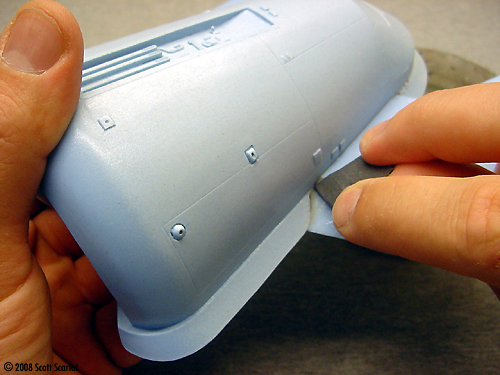
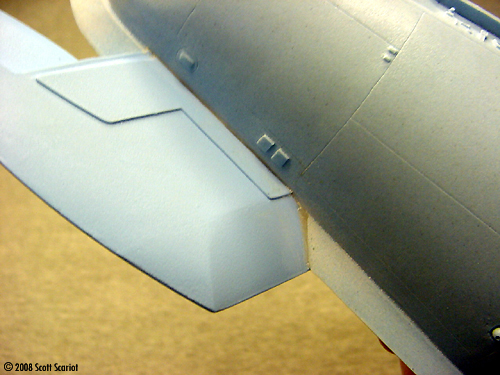
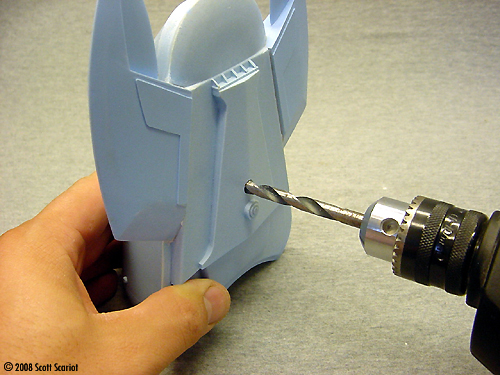
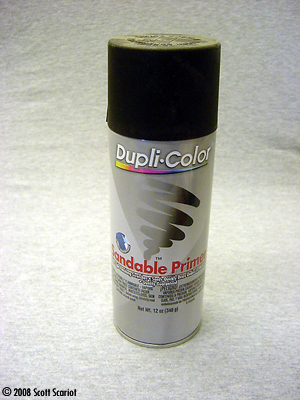
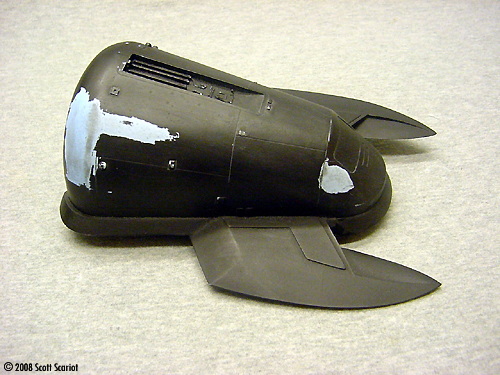
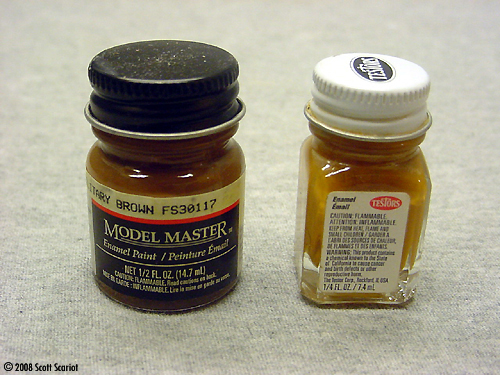
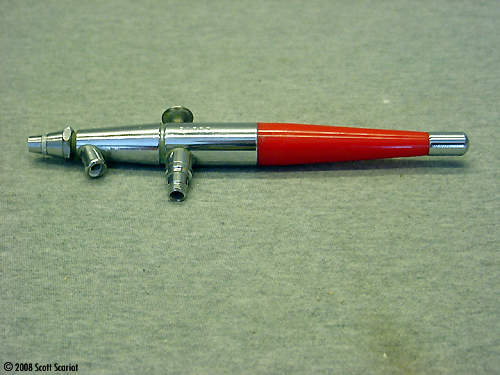
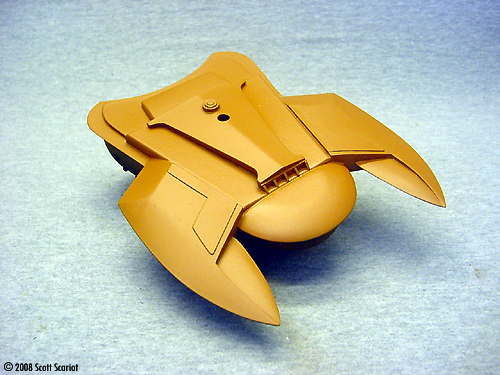
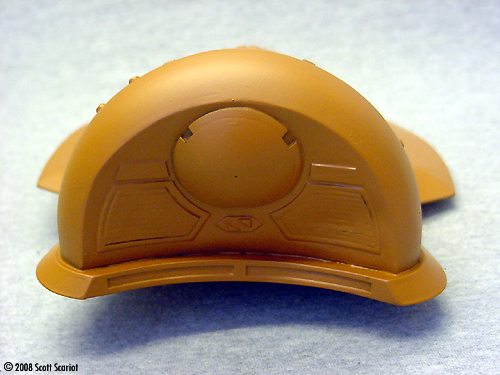
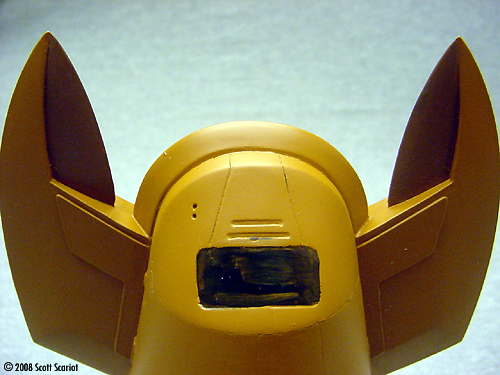
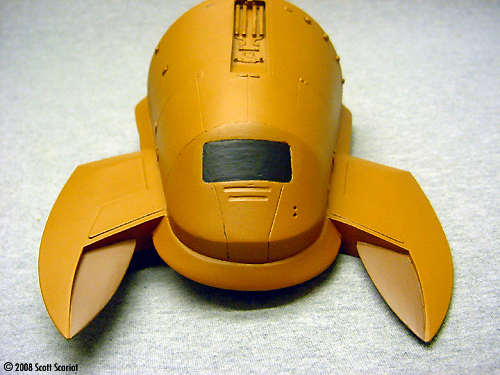
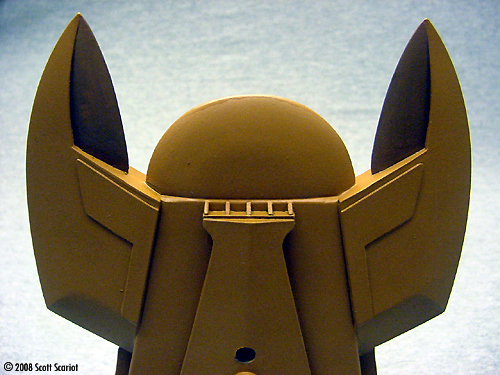
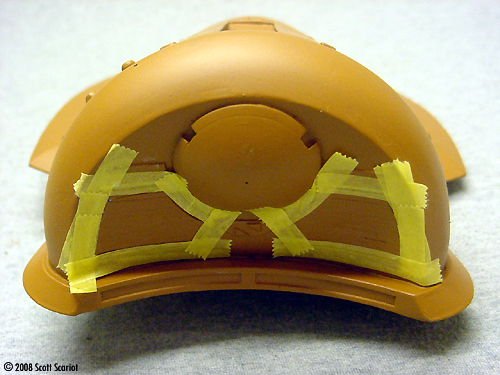
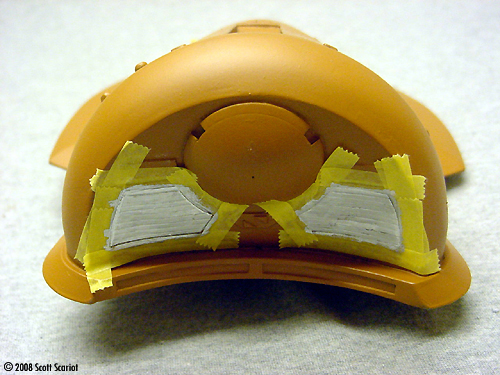
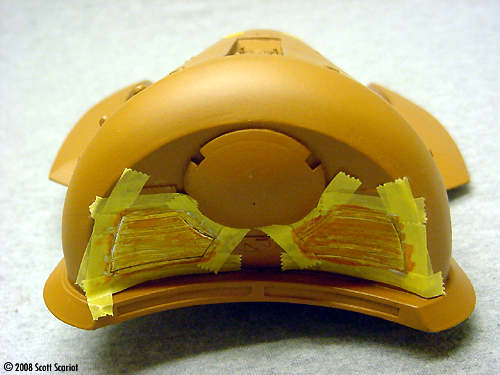
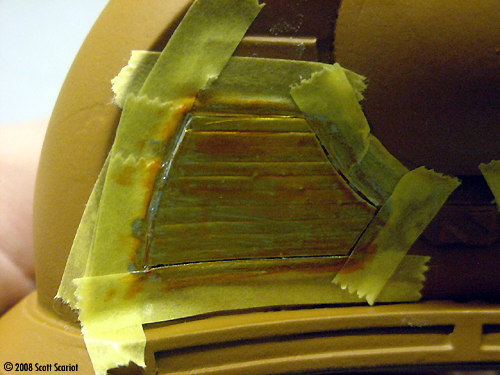
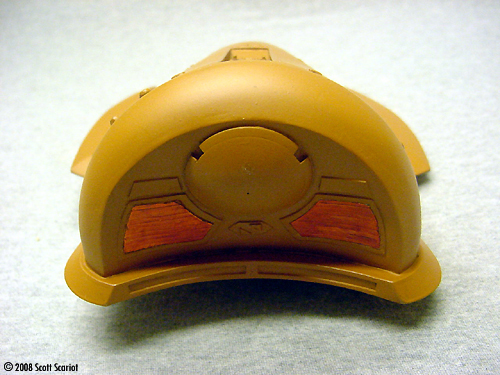
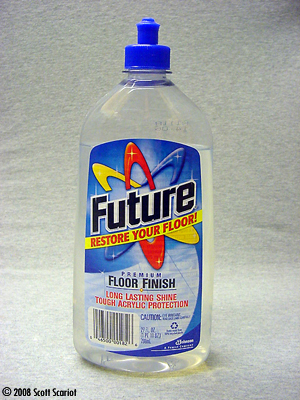
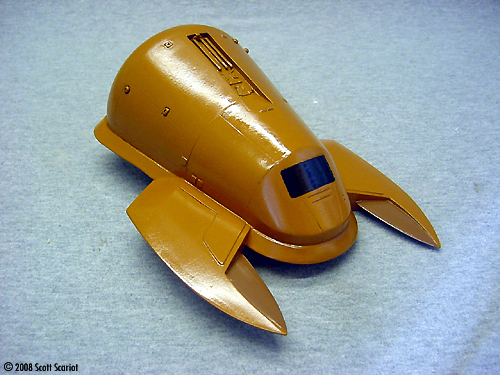
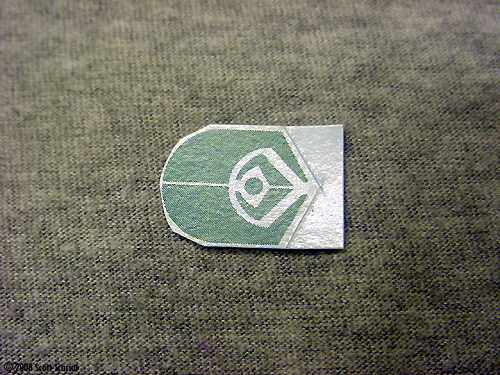
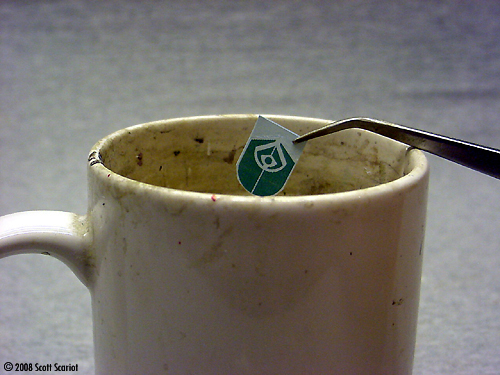
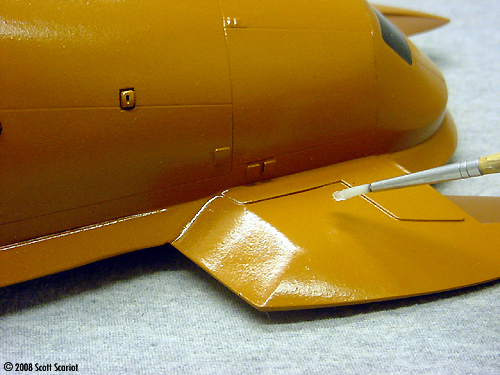
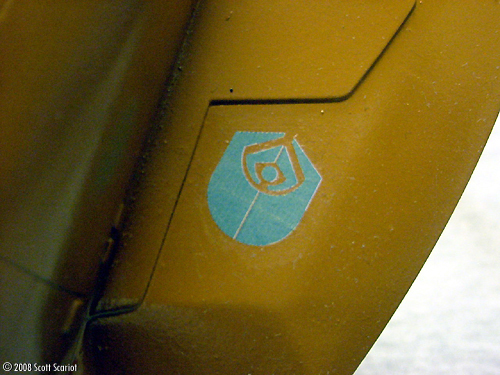
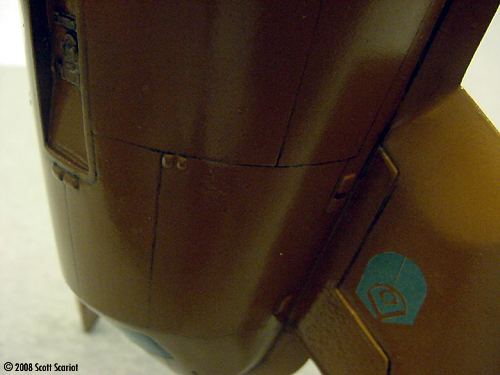
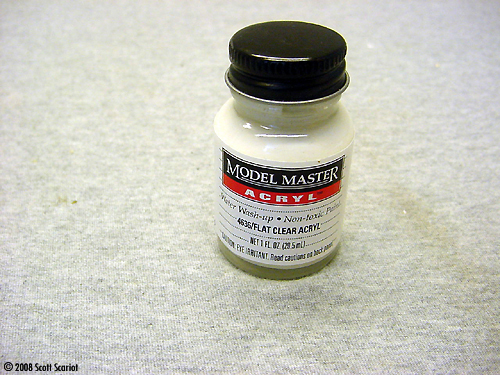
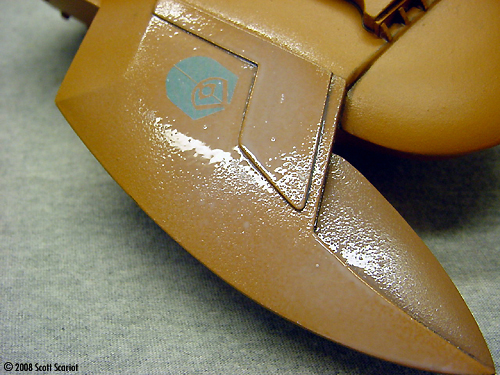
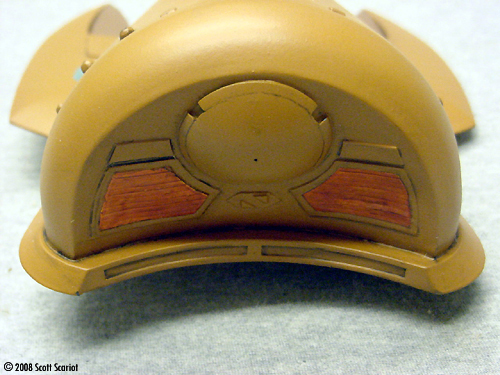
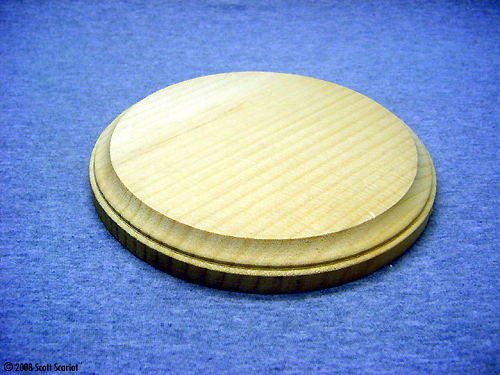
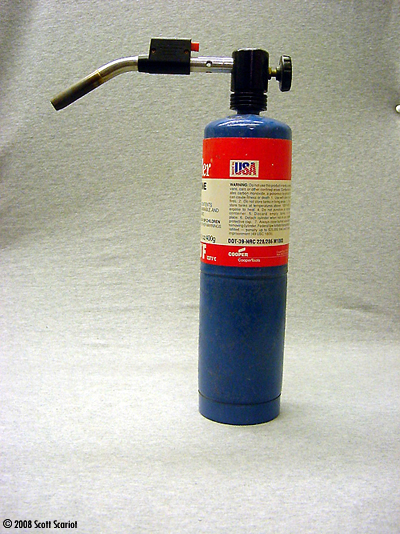
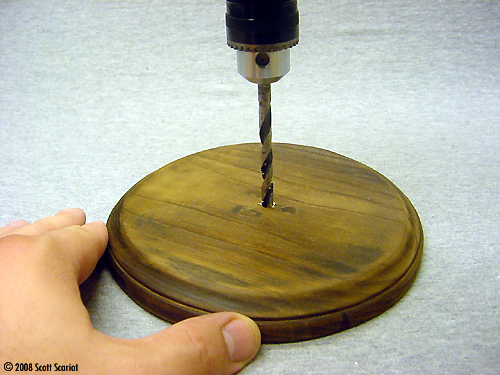
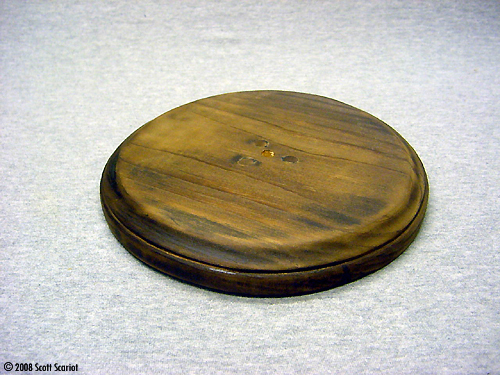
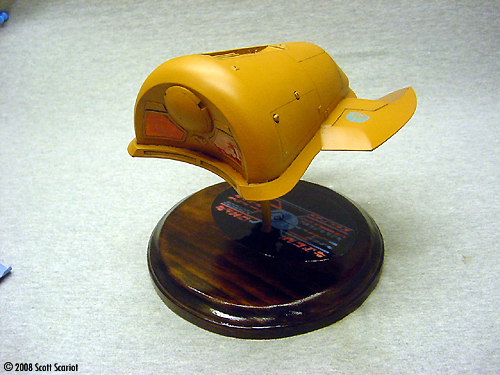
Styrene kits have the added advantage of being light and hollow allowing the modeler to add internal lighting to the completed model. Because styrene kits are mass-produced their price is relatively low. OK, so how do resin kits differ from their styrene cousins? Resin kits are very often hand-made in small batches by small companies called Garage Kit Manufacturers (GKM). Consequently, resin kits are more expensive. GKM's produce kits of many obscure ships seen in Sci-fi and resin is the easiest way to produce these kits. To make a model the GKM will mix the two parts of the resin together. Then the GKM will pour the resin into rubber molds. The catalyst causes a chemical reaction that produces heat, and the heat makes the resin harden. Resin kits generally have fewer parts than a typical plastic kit does; this means that there is less assembly required compared to a plastic kit. Resin kits will also have fewer seams than a plastic kit will. I like both of these facts, because I really don't like filling and sanding down seams. The downside of resin kits is that they can be heavy because they are solid and often cannot be lighted. Ferengi Pod as Example Despite these differences building a resin kit requires most of the same skills as building a styrene kit. Let's look at how to work with resin using the Ferengi Pod of Acquisition from the Starship Modeler Kit factory (Editor's Note: This kit is no longer in production as of this writing). The kit consists of three parts: One main hull and two wings. Also included are decals and instructions. Preparing for Assembly To start the Ferengi Pod the model has to be cleaned. The parts from a new resin kit may feel slightly greasy. Resin kits often have mold release agents on the surface. All of the mold release must be cleaned off. This releasing agent allows the parts to be easily pulled from the rubber molds. Any release agent that remains on the parts will prevent paint from adhering to the surface. To prepare the model for assembly and painting, first wash all of the parts in warm soapy water. Any grease-cutting dish soap will work well for this job. I usually let the model parts soak in the warm water overnight. The next day I gently scrub the parts with a brush (a scrub brush or an old toothbrush will work great). After the parts have been washed with soap and water, I clean the parts a second time with a mild abrasive like Comet or Soft-scrub, again using a brush. I make sure I rinse the model parts very well. Once the parts have been cleaned they should feel clean. This might sound funny but the parts will actually feel different. If they still feel greasy or slick don't hesitate to wash the parts again. Once the parts are clean set them aside and allow them to dry overnight. The next step is to remove any mold seams and mold pour stubs that remain on the model. A mold pour stub is a little bit of resin remaining on the finished model from the area on the mold where the resin was poured into the mold. On the Ferengi kit there are pour stubs on the wings and two on the hull. Pour stubs are very easy to remove. The easiest way is to sand them off by wet-sanding. Not all sandpaper is made for wet sanding, so make sure any sandpaper used is specifically marked for wet sanding. Sandpaper also comes in varying grits. The lower the number the rougher the sandpaper. The lowest grit/coarsest sandpaper I use is 220 grit. Sandpapers can go as high as 6000 grit, which is used for polishing. I get my sandpaper at Wal-Mart in the automotive section. I generally buy a �variety� pack of sandpaper with 5 sheets of sandpaper in 220, 320, and 400 grits for $3.00. To wet sand dip a piece sandpaper into water. The water lubricates and helps to keep the resin from clogging up the sandpaper. While sanding resin it's important to stop frequently and check the progress because it can be very easy to sand away too much of the resin. OK, now back to the model. To remove the pour stubs on the wings, I lay a wet piece of sandpaper on a flat surface and pull the wings back and forth over the sandpaper, gently removing the pour stubs. The stubs on the hull needed a little more attention. The largest stub was on the bow just below the forward window. To remove this stub I gently wet sanded, making sure to follow the contours of the front of the model. While sanding off the pour stub I uncovered bubbles in the resin. This is not uncommon in resin models. Bubbles form from air trapped in the resin. Pressure casting usually removes most of these bubbles, but sometimes a few remain. The bubbles are easily filled; I'll get to that a little later on. Removing the pour stub on the lip of the pod softened the detail. The stub was gone but the angle wasn't as crisp as it was before sanding. To fix this issue I used a small file to reshape the area and add a crisper edge. This was an easy fix. Once the pour stubs were removed the seams on the wings were also sanded off. At this point I also drilled a hole in the bottom of the model for the display base. Then I looked over the rest of the model to see if any other mold seams were visible. I couldn't find any, so it was time for the next step. Assembly With all of the pour stubs removed and the seams sanded off, the model is now ready for assembly. To begin assembly I ran a sharp x-acto blade along the wings, and the hull where the wings would attach, in a cross-hatch pattern. These cross hatches allow the glue to hold the parts better. Standard model glues will not work with resin. To glue resin models either Cyanoacrylate (CA) �Super Glue� or a two-part Epoxy can also be used. I use either depending on the size of the model and the weight of the parts I'm gluing. If the parts are heavy, I will use epoxy because it is much stronger. I may also "pin" the part for extra strength - that is, drill holes on either side of the joint and glue a piece of brass or steel rod to span the join. Since the wings on the Pod are small and relatively light, CA will work fine. I attached the wings to the side of the hull using rubber impregnated Cyanoacrylate glue. The rubber in the glue gives it some flex, and helps the joints to resist breaking. With both wings on the hull, assembly is complete. Fixing Flaws Once both wings were on the model it became obvious that the tips of the two wings were not straight. The easiest way to repair this issue I have found is to use a heat gun to gently heat the resin so that it can be bent into shape. However if you don't have a heat gun, a hair dryer, hot tap water or placing the part into a pot of boiling water will do the same thing. To use a heat gun on a resin model, turn it on and then run the gun over back and forth over the area. The resin will heat up and will become malleable and can be bent into shape. Once the left wing was the proper shape the right wing needed some attention, so I heated and bent that area into shape. Once both wings were symmetrical I ran cold water over the wings to set both wings to the new shape. That's it! The wings are symmetrical, straight and look good. Now the seams around the wings and the bubbles on the bow have to be filled. To do this I like Aves epoxy putty. Epoxy putties have two parts: the putty and a hardener. To mix up a batch for the pod measure out two even sized balls of putty (the portions don't have to be exact but they should be close in size). Then roll the two balls into ropes. Then twist the two ropes together. Finally, knead the twisted ropes together until the putty becomes a uniform color. To apply the putty, spread a small amount into the seams using any type of tool at hand. Pick a starting point and work your way around. To fill the bubbles on the lip simply press the putty into the holes and smooth it out with a tool or the tip of your finger. Once all of the seams and holes have been filled, set the model aside to allow the putty to cure. I usually give the putty overnight to make sure the putty is completely cured. Now that the seams are all filled and the putty is cured, it's time to begin final sanding. Again the best way to sand down the putty is again to wet sand. I started sanding at the bottom of the model at the wing root. I worked my way around the model, again making sure not to over sand the resin. The areas that needed the most sanding were the top wing roots and the lip where the bubbles were. Now even though I'm wet sanding I have to stop and cut a fresh piece of sandpaper, and then continue on sanding. All totaled I think it took 45 minutes to sand down all of the seams. This is one of the reason I like Aves. It can be shaped while the putty is pliable and this helps to cut down on any sanding. Priming The next step is to prime the model. Applying primer is important in two ways. One, it will show any seams that need more attention and two, it gives the paint something to bite into. I use Duplicolor Automotive Primer. Duplicolor is available at most Wal-Marts and other large discount stores. This is a great primer for resin. I like the black primer because it fills light scratches. Duplicolor also dries quickly; in 15 minutes it is dry enough to handle. However, I generally give it an hour before I work with it. I sprayed the pod with a light coat of primer. The coat did show a few areas that needed some sanding. To sand down a primed model I wet sand with 400 grit sandpaper. After I sanded these areas down I sprayed another coat of primer on the model. The second coat of primer did the trick. I gave the model another light sanding with 400 grit sandpaper and then the model was ready for painting. Base Coat To paint models I prefer to use enamels. I like enamels because they give a nice tough finish - they don't scratch as easily as acrylic paints. Ferengi ships appear dark tan to brown on screen. The color I choose for the Pod was Testors Flat Brown. This is a great color for the pod because it has a more orange tint than some of Testors' other colors, and I think it matches the color seen on the studio model very well. To paint the model I used my trusty Paasche VL airbrush. I thinned some of the Brown paint so I could shoot it through the brush. Before airbrushing paints need to be thinned because they are too thick out of the bottle to be shot through an airbrush. I started painting the bottom of the model. I applied a light coat to the rest of the model. I let that dry and repeated the process twice. Once the paint on the bottom of the model dried, I flipped the model over and started painting the top. Both sides of the model received three coats of paint. Painting took about two hours to complete. Detail Painting I started detail painting with a coat of black paint to the viewport (I wanted to call it a windshield, but there's no wind in space so�). I prefer to detail paint with a brush; however, detail painting can be done with an airbrush. I painted the recessed areas on both wings Military Brown. The view port required multiple coats of paint to cover it properly. Make sure the Black paint is thinned properly otherwise the thick paint will leave heavy brush marks. The recessed area on the wings simply needed two coats to get the proper look. For the engines I had a different plan. Since the hull was solid cast I could not light the engines. However there is a way to paint engines so that they look like they light up. This process is called candy coating. The first step is to mask off the area to be painted. I used Tamiya masking tape to do this. Tamiya tape is great because it is low tack. It will stick to a model, but won't pull up paint. After I masked both engines I painted them Silver. Once the Silver paint dried, I applied thin layers of Tamiya Clear Orange. The trick to candy coating is to apply many thin layers of the clear paint, otherwise the clear paint may pool making it look really bad. Several coats of paint are needed to get a nice even finish. Once the engines are candy coated detail painting was done. Decals The next step is to prepare the model for decals. All decals require a smooth surface to get good adhesion. Flat paints, however, do not provide a smooth surface. To give the model a smooth surface it needs to be gloss coated. There are several commercial gloss coats available. I use Future. Yes, Future, the floor polish. Future makes a great gloss coat for models and you may airbrush it straight from the bottle. And one bottle last will last a very long time. To gloss coat the model, I loaded up my airbrush with some Future and sprayed a light coat on the bottom of the model - it has to be applied in very light coats. If not applied lightly, it will run and leave large streaks and pool. This will ruin the model, or, at the very least make more work. Future is also self-leveling and will puddle in the lowest points on a model, filling in details. I usually let the Future dry for 15-20 minutes between coats. Once the bottom was coated I turned the model over and began spraying the top, again with very light coats. The top of the Pod was more difficult to spray because of its curved shape. I was able to get the top of the model gloss coated without the Future running. With the entire model gloss coated, I let it sit overnight. The following day it was time to apply the decals. The decals for the Pod consist of four copies of the Ferengi dog-eat-dog logo for the top and bottom of both wings. To start I trimmed the decals down, cutting as much of the decal paper as I could away from the logo. This helps to hide the edge of the decal. Once I had all four decals cut out and trimmed, I used my hobby knife to slice into the decal paper. I do this to leave an area for my tweezers to hold onto so I can wet the decal and place it on the model. The tweezers I use for decaling are locking tweezers. This means pressure needs to be applied to open then. These are great for decals because they will grip the decal paper without a need for constant pressure. With the decals ready, I heated some water in a mug in the microware. The water needs to be warm, not scalding. To apply the decals I dipped a decal in the warm water for 5-10 seconds and set the decal aside. Then with a brush I apply a small amount of Future to the model. The Future will help the decal to adhere to the model and cut down on silvering. Silvering happens when air gets trapped under the decal. To apply the decal I just positioned it on the model in the Future and gently slide it off the paper onto the model. I use an old brush to do this. With the decal on the model it can be slid into its final position. Once there I use a damp rag or towel to gently press the remaining Future out from under the decal. If wrinkles appear in the decal the towel can be used to smooth them out. I repeated this process with the remaining decals. Once all the decals are on the model, a decal setting solution can be applied to all the decals. Decal setting solution will soften the decal film and allow the decal to settle into place. But since the wings don't have any features on them I didn't use any setting solution. I simply let the model sit overnight to allow the decals to set. Highlighting The end is in sight! For the next step, a wash needs to be applied to the model to bring out the surface detail. The general rule of thumb for washes is if Enamel paint was used then an Acrylic wash should be applied, and vice versa. If the same type of paint is used for the wash as the base coat, the thinner in the wash could damage the paint on the model. So I mixed up a wash made of a small amount of Black acrylic paint and water. To apply the wash I first moistened with a dab of water the area where I wanted to apply the wash. Then, using a brush, I applied the wash in small amounts to the top of the model, making sure that the wash was settling into the panel lines. Once the wash dried, I ran a wet Q-tip over the panel lines to clean up any remaining wash that was on the surface of the model. Washing the model was done in sections. After the wash was applied to the top, I repeated the process on the bottom. I had to be very careful while handling the model so that I did not mar the finish with fingerprints or rub off the wash. To seal the wash and the decals to the model I sprayed the completed model with another very light coat of Future. The model was left overnight to let the Wash and the Future set. Final Finishing Ferengi ships are not shiny, so to cover the Future and tone down the sheen a clear flat paint was applied to the model. I like Testors Acryl Flat Coat. It dries clear and matte and it sprays well from an airbrush out of the bottle. So I loaded up my airbrush with flat coat and sprayed three light coats onto the model. Any parts on the model that need to stay clear can be masked off so the flat won't cover them. I hate masking so I flat coat the entire model and come back and re-gloss the areas that need it later. The flat coat will go onto the model milky, but it will dry clear. When applied in light coats flat coat will dry quicker and only 10 to 15 minutes between coats is needed. I was able to get the entire model flat coated in about an hour. The final step was to apply gloss coat to the viewport and the engines. I used Future to do this. Using a brush, I painted on thin coats of Future giving these areas a nice shine. It will take a few coats to build up the shine. With the final coats of Future applied, the model was complete! Display With the model done, I needed a way to display it. The easiest way is to just put it on the shelf, but there is a structure on the bottom of the model that prevents it from sitting flat, so I opted to display the model on a stand. I bought a circular pine plaque at Michaels. I marked off the center and drilled a hole into it. From here there are all kinds of things that can be done to the base. I like to burn the wood with a blowtorch. It's faster than staining and when a glossy finish is applied to the singed wood it has a luster to it that I really like. After the wood is burned I generally sand the base down with 400 grit sand paper. Then I rub the base down with a towel to remove any remaining loose particles. |
|
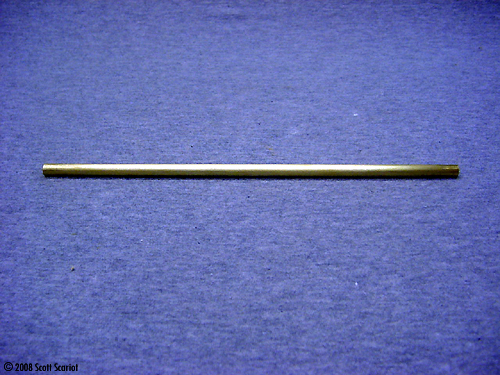
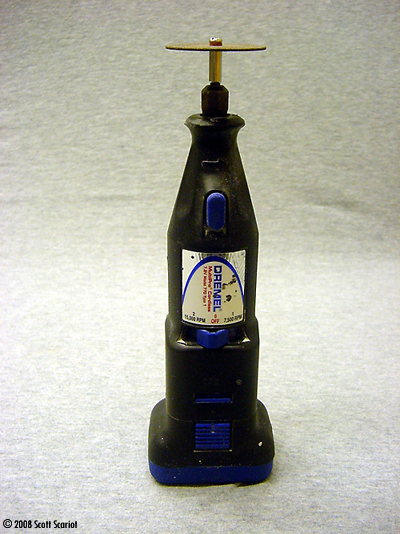
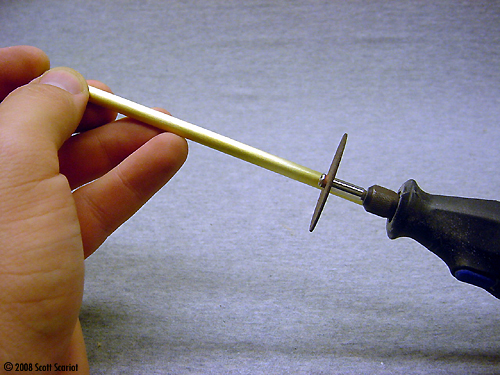
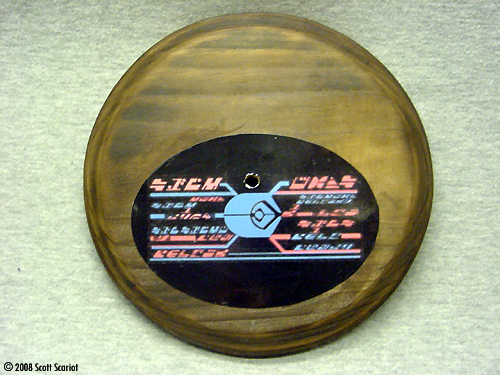
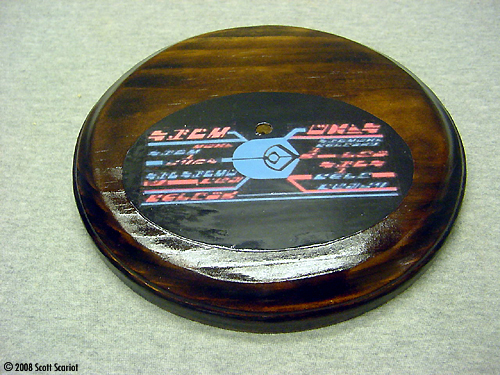
I like to add custom Dedication Plaques to my bases. It has become a kind of signature for me. I make my Dedication Plaques on my computer with graphics and fonts I find on the Internet. I then print the plaque out. I laminate the paper so the ink won't run. Then I cut the plaque out and glue it onto the base. After the glue dries I apply a glossy wood finish to the base. To attach the model to the base I cut a length of brass tubing with my Dremel tool. Then I inserted the rod into the model and put the rod into the base. The model was ready now for display. Conclusions That's it! How I build resin models. Resin models are just that, models. In fact the skills used in building resin models are basically the same used to build styrene models. My goal for this project was twofold: one, to build a nice model, and two to show others that resin models are nothing to be afraid of. I feel I accomplished both goals. |
![]()
This page copyright © 2008 Starship Modeler™. First posted on 23 september 2008.
![[Please click to enlarge]](ss_resin/02_ferengi_sony.jpg)
![[Please click to enlarge]](ss_resin/03a_BATHTIME.jpg)
![[Please click to enlarge]](ss_resin/06_Mold_pour_stub.jpg)
![[Please click to enlarge]](ss_resin/11_Stub_removed.jpg)
![[Please click to enlarge]](ss_resin/31_putty_along_the_wing.jpg)
![[Please click to enlarge]](ss_resin/36_Sanding_the_lip.jpg)
![[Please click to enlarge]](ss_resin/40_After_1st_coat_of_primer.jpg)
![[Please click to enlarge]](ss_resin/43_Front_base_coated.jpg)
![[Please click to enlarge]](ss_resin/56_Applying_Future.jpg)
![[Please click to enlarge]](ss_resin/62_Applying_the_Decal.jpg)
![[Please click to enlarge]](ss_resin/66_Top_washed.jpg)
![[]](ss_resin/71_Bottom_Flat.jpg)
![[]](ss_resin/72_Completed_model_from_the_front_top.jpg)
![[Please click to enlarge]](ss_resin/83_All_your_base_belong_to us.jpg)
![[Please click to enlarge]](ss_resin/86_Model_and_stand_side.jpg)