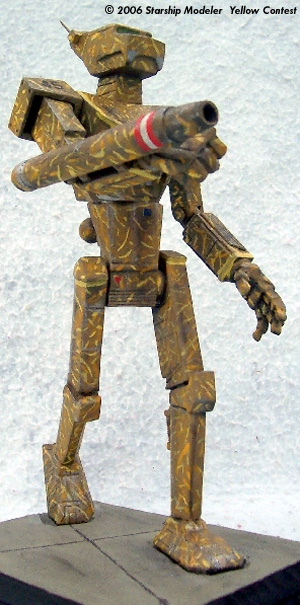
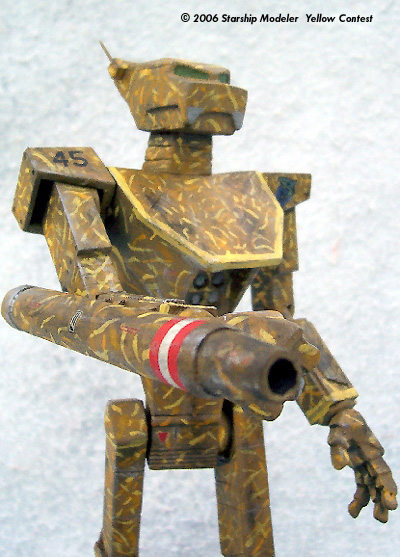
Slowing rounding the corner is a 'Mech. But not just any 'Mech. It's a PNT-9R Panther that is coming down the street, slowly eating up the distance between the corner and the defenders' puny roadblock. 35 tons of armor-plated fury, with an SRM-4 and a light PPC mounted on the right arm.
As the 'Mech marches closer, the first defender screams and runs in terror. Then another, and another, and soon most of the line is falling apart. And then, as it bears down on the remaining defenders, the Panther begins to open fire. It's hunting season, and the big cat is ready . . . . “
I was sitting around thinking about what to build for this contest, and I spotted this kit on the shelf. The basic kit is Ravenstar's 1:60 Panther from the Battletech/MecWarrior universe.
Assembly was pretty straightforward, especially considering that there are only fourteen pieces in the kit. I decided early on to pose the kit in an action pose, so I started with the feet and legs, and worked my way up from there. To start the posing process, I drilled a hole down through the left foot, using the mounting hole as a guide. I then glued the foot to the leg, and then attached the lower abdomen. After the foot was dry, I drilled a hole up through the mounting hole, through the connecting post, and into the leg itself. This allowed me to insert a one-inch-long wooden peg to balance the 'Mech on the base. After that was done, I attached the right leg, using some Insta-Set to lock the leg in position.
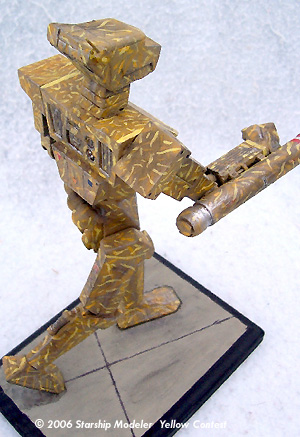
Once the legs were done, I moved on to the torso. I posed the torso for a “left torso twist” and let it dry. Then the neck and head were attached, and the left shoulder was glued on. The left arm was angled out a little bit, with the lower arm swinging forward. The right shoulder was a little more difficult, because I wanted to have the arm swung out as if the pilot was taking aim and preparing to fire.
After the Panther had dried for about a day, I primed it with light gray sandable acrylic auto primer. Then came an overcoat of Testor's Flat Black in the good old-fashioned rattlecan. And this is when disaster struck. I had left home for a meeting, and when I came home, I found that the 'Mech had unbalanced itself, toppling off the desk (in spite of the 5x7 styrofoam base I had it sitting on), onto the floor, while some of the paint was still wet. The neck snapped off, and the right arm was broken at the elbow joint. A few shots of super glue gel and some tense moments later, the 'Mech was back together, the only evidence of its trip being some black paint spots on the carpet.
Another application of Testor's Flat Black covered the repairs, and then I “misted” the kit from overhead with Model Master Afrika Mustard (FS 30266). I was trying to keep as much of the black intact as I could, to make it look like the overall paint scheme might have been hastily applied just before the 'Mech left for the mission. Some of the underside areas of the 'Mech still appear mostly black, with only a very light dusting of the new base coat.
Other colors used included Polly Scale CP Yellow (F404058), Model Master Insignia Yellow (FS 33538), and Floquil Wisconsin Central Gold (F110280). The yellow camo scheme was brush-painted over a period of several days, randomly placing stripes here and there on the 'Mech.
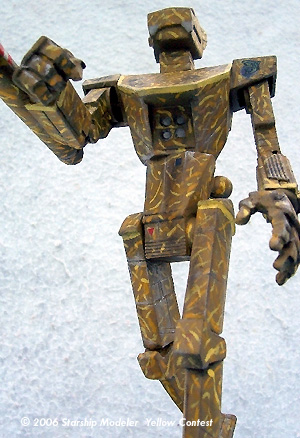
I applied Future floor polish to the areas where decals would go, and, after scrounging through my decal stock, I found what I was looking for. The shark logo on the left shoulder is from the Small Animals set sold by Starship Modeler. Other decals were from a mixture of armor and aircraft sets. After the decals had dried, I weathered with pastels (black, brown, and white), sealed everything with Testor's DullCote, and then dry-brushed some Model Master Chrome Silver on the 'Mech to simulate wear.
The base is a simple 5x7 plaque from Michael's. I scored two lines through to simulate concrete seams. Then I traced around the Panther's feet, and used an Xacto flat blade to remove about 1/10 inch to make it look like the weight of the 'Mech was crushing the pavement. The base was painted with Floquil Concrete (F110082), “stained” with a little dirty brush cleaner, and then scrubbed with some pastels. The seam lines were drawn in with a fine point Sharpie marker. The black edging is Model Master Acryl II flat black.
Image: Right/front view
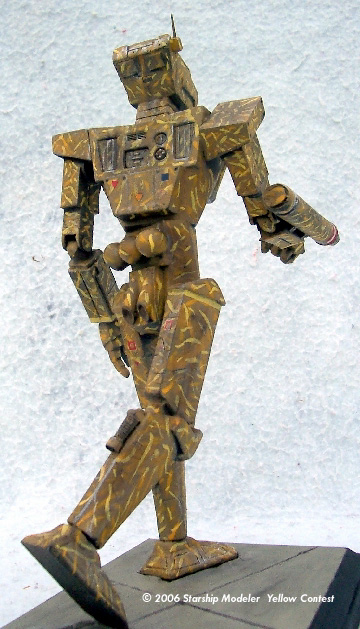
Image: Right/rear
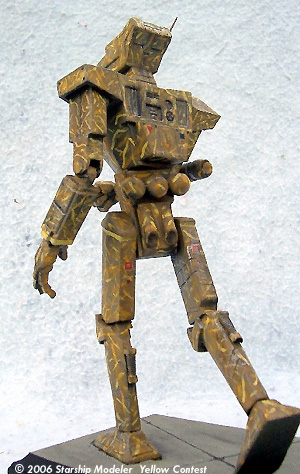
Image: Left/rear
Image: Grunt's-eye view
Image: Closeup
Image: Above, right/rear
![[Yellow]](Yellow-banner-6fs.gif)
![[Scale Solutions]](SSOL_banner.jpg)
![[Hi-ho, hi-ho, it's off to slaughter I go.....]](images/kit_06_2936.jpg)