Building the Diorama
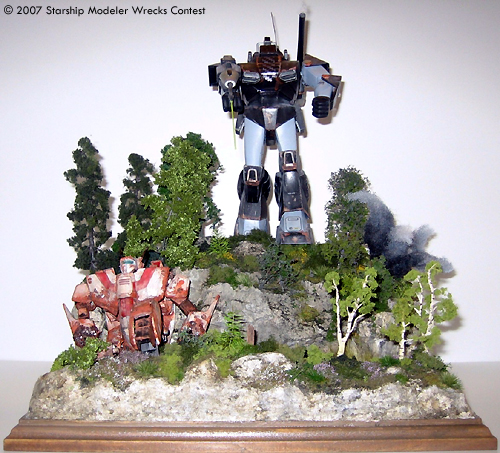
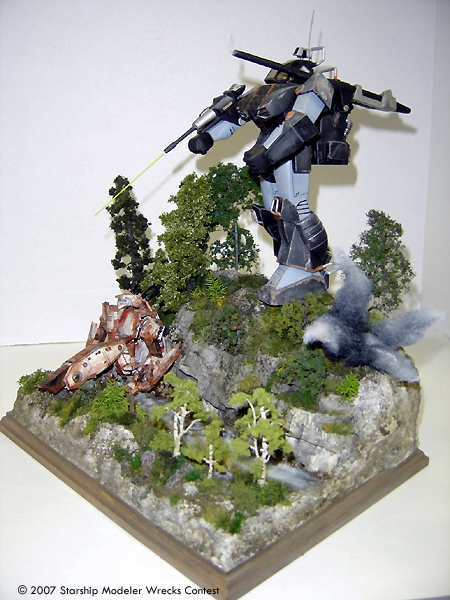
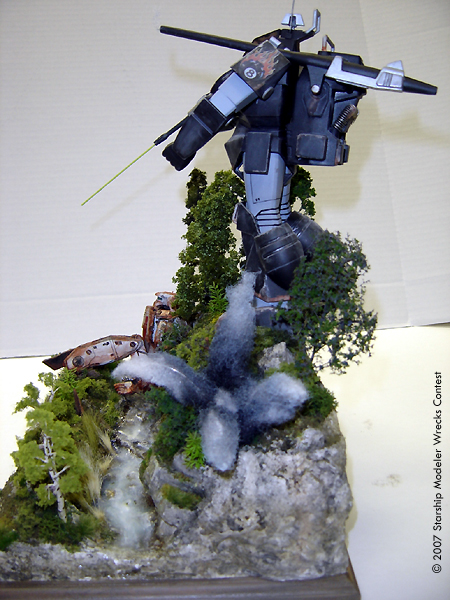
The model base was built up with layers of foam board in the pattern of the ridge and river bed. Next layers of Plaster cloth were placed to smooth out the foam board. Rocks were created by both molding and free form cutting using a dull knife. These were then fitted and placed into cuts in the plaster cloth and sealed using more hydro-cal mix. A molding plaster then was used to completely free form the entire base to cover all areas and fill in gaps, build additional rock formations and cover the wood display base. This was then all stained in 4 colors Raw Umber, Umber, Yellow Ocher and a Black Wash to bring out the detail of the rock formations. Boulders were created out of Talus and broken Hydro-cal bits.
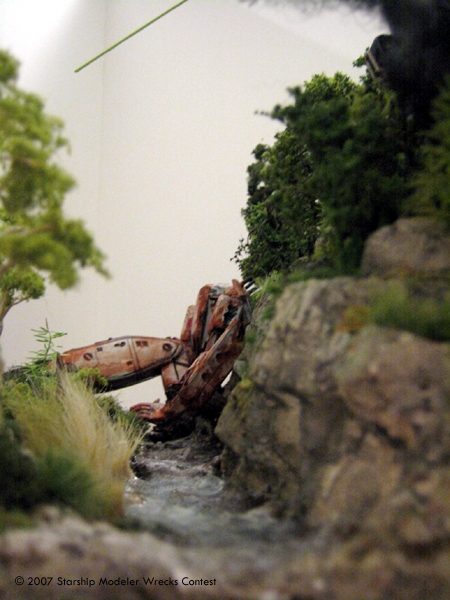
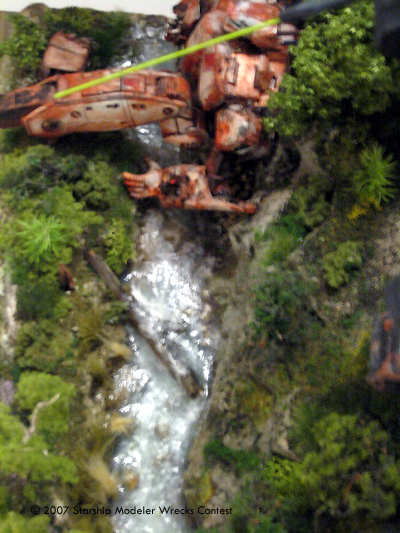
Scenery is a mix of old carpet fibers shredded and spray painted, trees hand made in addition to Premium trees from Woodland Scenics and a variety of grasses, bushes, real plants such as air fern and foxtail fern, and a variety of textures and colors to really blend everything together. The Water was the most pain staking and time consuming piece. Consisting of 8 poured layers clear and one with a hint of green finally stippled with Realistic Water Effects mixed with white water color paint to produce the fast moving water / rapid effect.
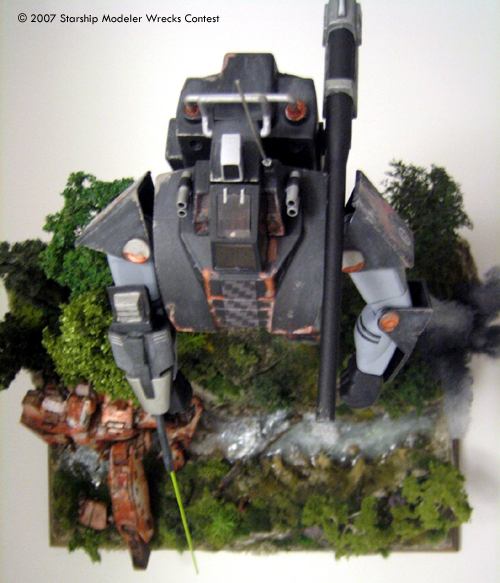
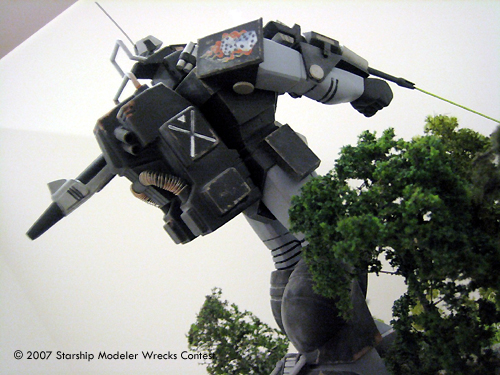
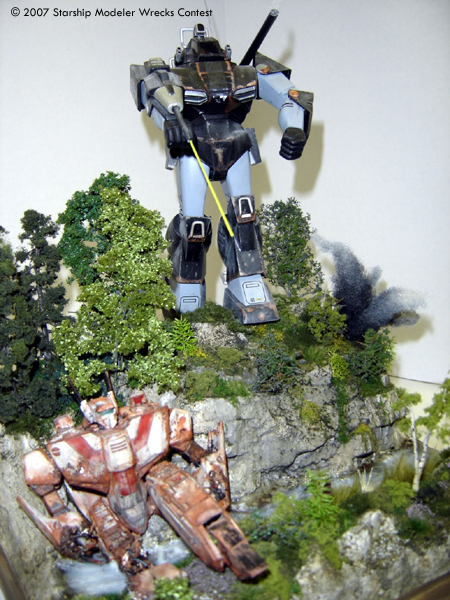
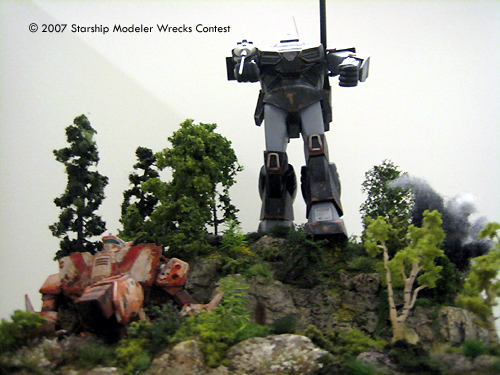
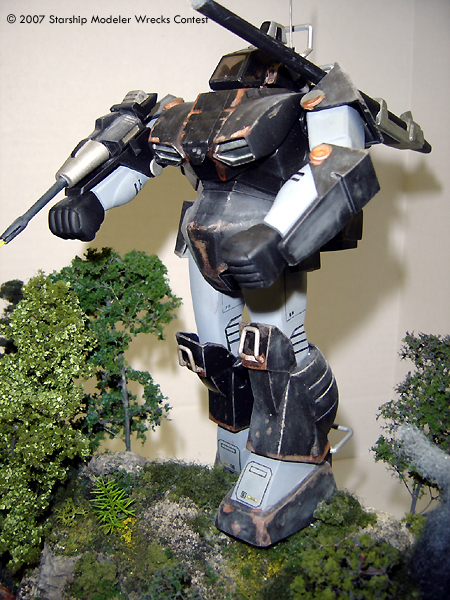
Both models are Revell 1/72 Robotech Defender models discontinued probably more than 20 years ago which I purchased off of EBay. Although I had built both of these same models 20+ years ago it was fun doing them again. Both models have different challenges but for the most part lots and lots of gap filling and sanding where desired to make the parts look seamless went into this. The Wasp was painted a classic white then sealed then being followed up with a black wash for panel lines and details. A classic Draconis Combine red color was used for detailing its simple color scheme.
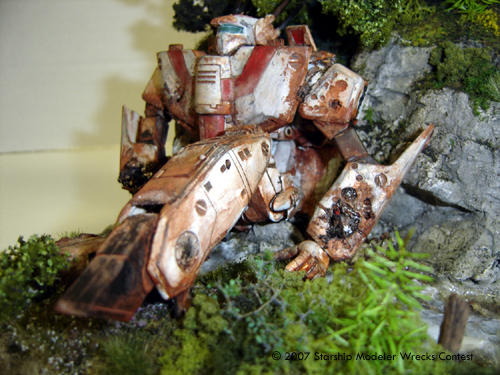
The internal areas I knew I was going to destroy were all built up prior to gluing and I used a variety of things such as hacked up metal tubing, junk parts, transistors, wires, a cigarette lighter wheel made a great actuator for the arm servo and both metal and aluminum foil built up and rolled for extra thickness was used and torn for the armor tears. Laser scorches were done with hot metal rods, Auto cannon rounds made with heated metal balls and armor penetration done with various drill bits of different sizes. Rust was created using washes and rust build up was done by taking foam to 400 grit sand paper then added to the same wash to give it a texture and then moved into various holes, cracks, etc to look like build up and peeling. Burnt areas in addition to a black wash were dabbed with baking soda. Flat clear spray and rubbing alcohol were used to weather the paint and multiple layers in areas where additional fading needed to occur. Metal area shown under the paint was created with a lead pencil and pencil dust.
The Shadow Hawk was painted with a light gray, black metallic and black pearl paints primarily, although the subtle color difference between armor, body panels and weapons does not show really well in pictures. Lots of paint masking was done here. various steel, silver metallic, gun metal, exhaust paint was used for detailing, Clear flat seals the model followed by a black and silver metallic wash to bring out detail in panel lines and elsewhere. Rust to steel bolts and exposed chipped armor was used in addition to fading. Colored chalk was then brushed to add highlights, faded and scratched paint. Cockpit was detailed as well as pilot who is barely visible in the tinted cockpit. However, that was the intended goal. Final addition was small gauge wire for the antenna in lieu of the plastic one in the kit and small gauge wire wrapped around the hoses attached to the back armored auto cannon weapon system as armor and reinforcing from being easily damaged susceptible. Dull coat and rubbing alcohol was dry brushed for additional weathering. Models were secured using heavy metal tubing drilled and super glued to both the base and inside the models.
The Passion
This is my first model built in over 20+ years. I plan to build additional Battletech dioramas from other kits I have also purchased on eBay of these rare and discontinued kits over the coming months. This was a great contest that inspired me to get back into modeling after all these years and shows my passion for Battletech, its fictional universe and history all into one diorama. Thanks for the fun!
Image: From behind
Image: Front/left
Image: Looking up
Image: In the creek
Image: Right/front
Image: Right side
Image: Must ... control ...fists ... of ... death
Image: Creek
![[SSM's 15th Contest: Wrecks]](rex.jpg)