Research was key and there are a lot of external views of the capsule but only a few showing the interior on the net. For the interior I added quilting and draped material that seems to cover most of the internal surfaces. This was from 2 part putty rolled thinly between sheets of sandwich wrap. Some cables from solder were added under the quilting being visible at joints. References showed an odd assortment of other boxes that were made from spares. A lever was added also. Around the inner lower hatch with the VISOR,( the Soviets' name for the main window) bolts were made from slivers of a plastic lolly stick.
The rails as modelled on the chair support were totally wrong, replacement done with evergreen channel, springs added at the base. When painted it looked a lot busier around the control panels but the chair still seemed plain so two handles and two lifting eyes were added as well. While not present on my references they helped increase the finesse of this plain area of the seat. I doubt that the additions are 100% accurate as the distortions of my reference pictures caused by the fish eye lens used to take them meant I had to judge the distances between items. Before sealing the capsule I used a pin to scrape through the paint on the switch console and the main display to reveal the white primer. This was to suggest the Crylic instructions.
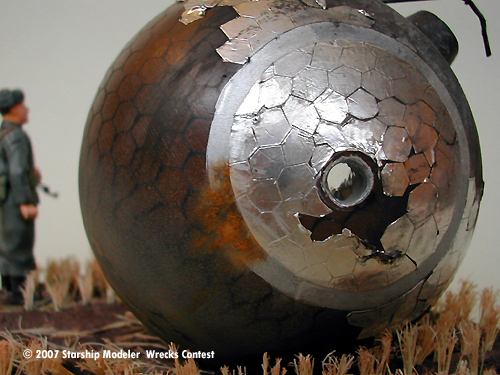
I combined two different external views of the Vostok after landing. One was more burnt, thus blacker and matted than the other. Both showed the ablative metal skin removed from the top and bottom. More than one type of skin has been seen on the Vostok but as my version had the Hexagonal plates rather than the strips I had to attempt this effect. Before the skin was placed on I wanted to show the markings on the main body were the burnt off hexes had been. This was done by painting the Vostok black then making a mask from some thick square netting. When pulled tight it deformed into Hexagonal shapes. This was airbrushed in brown and revealed the geometric design. I then cut by hand each hexagon trying to match the size of the already painted surface. This was cut from self-adhesive plumbers tape, cutting about 9 hexes at a time then fitting then as one piece.
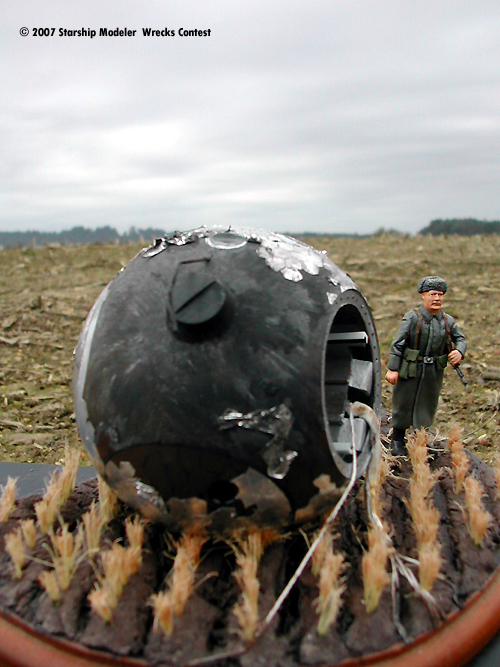
To get the onion effect on the base, which entered the atmosphere first, different circular jar lids were painted around the lip and then stamped onto the base, this was repeated with Maskol before over spraying. Other weathering was done with ground pastels, mostly mixed thickly with spirit to mimic the sooty deposits on the upper part of the capsule. Finally a ring of thin sheet plastic was cut to fit the opening and holes around the edge drilled to show the explosive bolt locations.
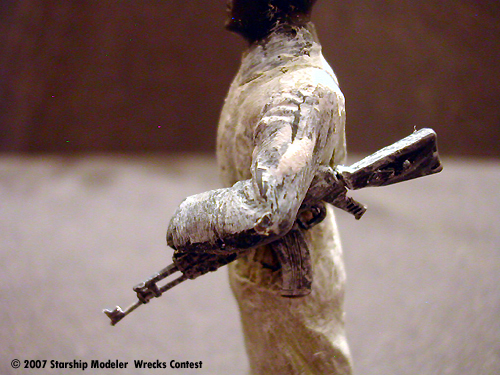
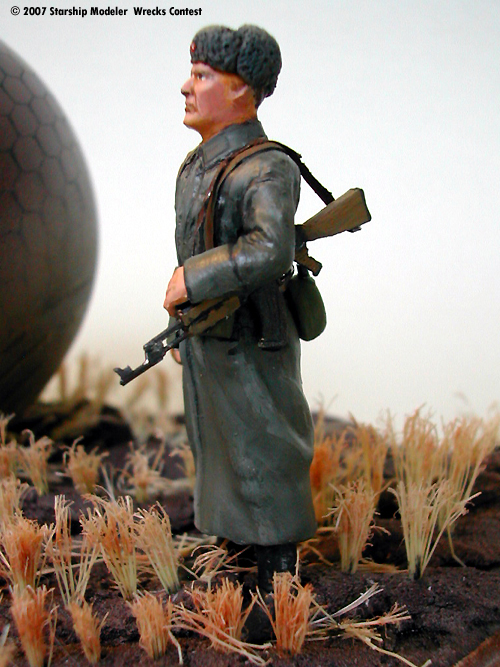
The soldier was the hardest element to find references on. 1950's Soviet soldiers are not very well documented and this caused 3 rebuilds. The figure started as a 1/25 Tamiya German kindly swapped to me by a member of the SM boards. Detail was ground off as well as the top of his head and a greatcoat, new webbing and fur hat made from putty, lead foil and plastic card and rod. The AK47 was done by eye and is made from 13 parts, the MP44 giving the trigger and receiver.
The base also matches the real landing zone, planted with tufts of wheat from a decorators' brush.
Image: Overall
Image: VISOR
Image: Interior
Image: Converting the soldier
Image: Completed
![[SSM's 15th Contest: Wrecks]](rex.jpg)

