by Adam Jones
Scale: N/A
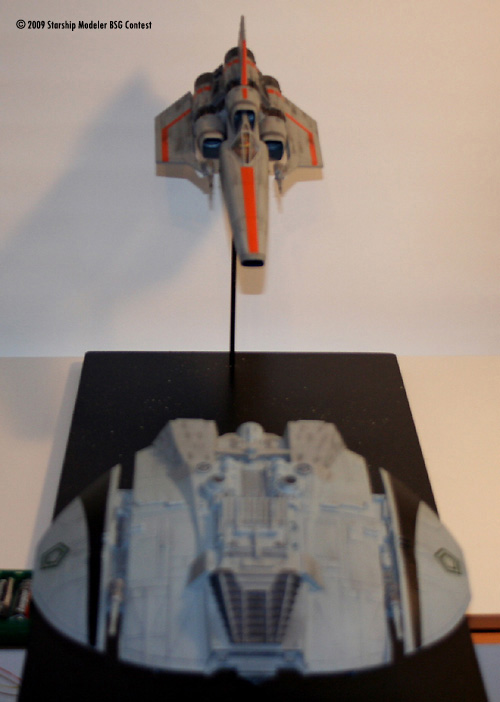
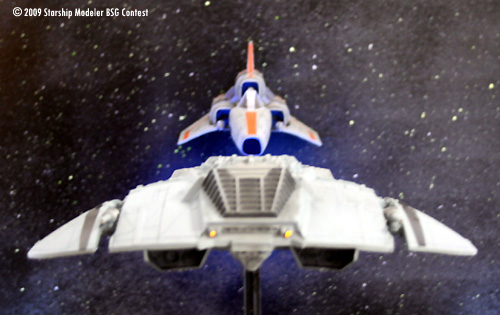
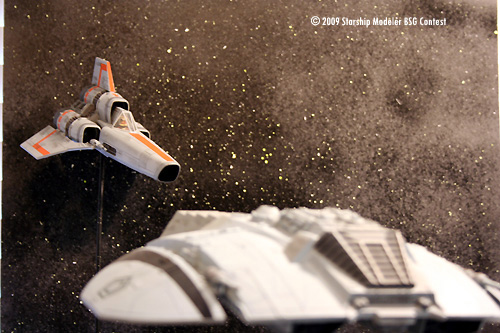
I picked up the re-released Revell-Monogram Viper and Raider from the local Hobby Lobby with a fondness for the old ships that I watched on Sunday night as a kid. The idea was for a diorama that combined the two with something besides digitally adding a background so that it would be able to stand on its own. After some searching on the web, I came upon a site with some DVD stills of the show and used that as reference for one of my favorite scenes, the Viper lining up behind the Raider for the kill.
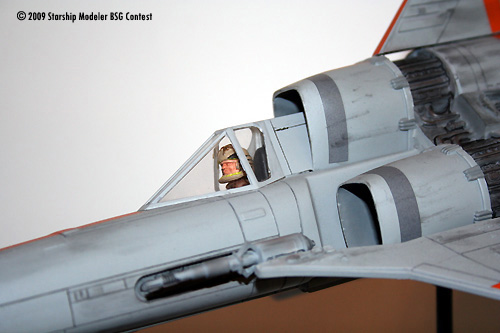
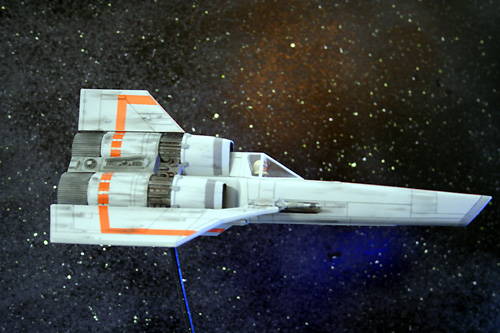
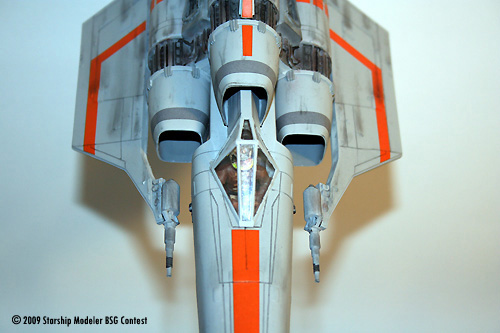
The Raider was started out first with the process of scribing the raised lines. After a couple of lines and a loss of patience, it was put away again until I read an article involving the use of label tape to aid in making a straight line. The Viper was pulled out since it had straighter lines and was scribed. Once the entire model was scribed, the next item to be worked on was the pilot figure. I used the knife to open up the jacket, drilled out the laser cannons, and opened the triangular pieces on the cannon so that they reflected the actual look. A base coat of white followed by a coat of neon yellow was used to simulate the lights on the helmet. I used a box of $5 LED Christmas Tree lights that I had bought a couple of years ago to light up the interior scanner. Using reference photos, I just painted the rest of the cockpit since the lighting of all the buttons might light up the cockpit more then I wanted based on the photos. Utilizing three blue LEDs lit up the engines. The clear parts for the engine were frosted with some spray can glass frost to help displace the light. The rest of the model was built stock, then airbrushed Light Ghost Grey. Using the photos, I decided to leave the decals intact instead of the chipped look and proceeded with some weathering with chalk pastels. The scribed lines were ran over with a mechanical pencil, then a coat of matte clear.
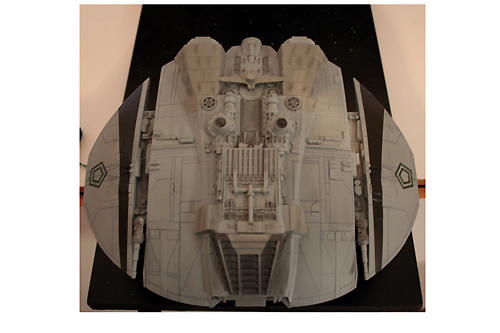
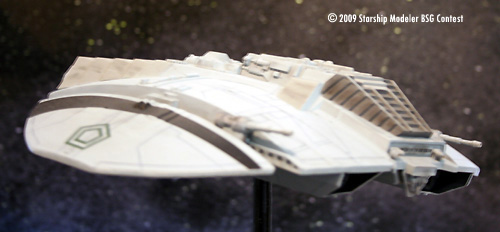
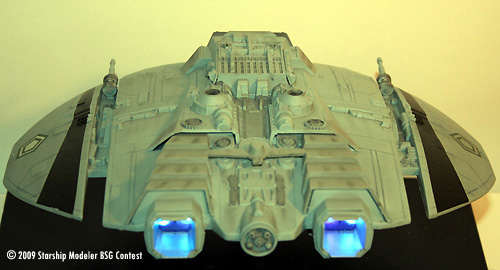
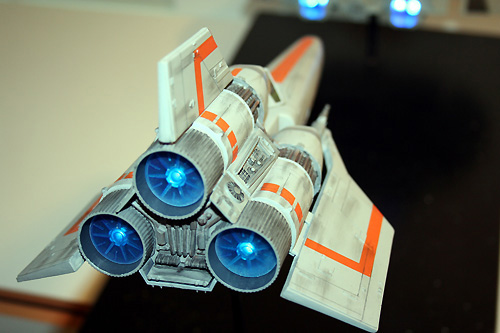
Now it was time to break out the Raider. Instead of scribing the whole model, the raise lines were sanded down, then retraced with a thin black sharpie. A mix of Light Ghost Grey and Navy Blue Grey was airbrushed over the model, allowing the sharpie lines to show through. The model was built stock, with the laser cannon drilled out and the covers for the engines being left off to allow the 2 LEDs per engine to shine through along with the two yellow LEDs in front of the cockpit. The clear pieces were frosted as with the Viper. Weathering was kept light and the model was cleared.
![[Starship Modeler's 17th on-line modeling contest: Battlestar Galactica]](bsgbanner.jpg)