I decided to give it a try. After four days of soaking in Ziploc bags of oven cleaner and some vigorous scrubbing with an old toothbrush, practically all of the old paint was stripped from the parts. I was really surprised how well it worked.
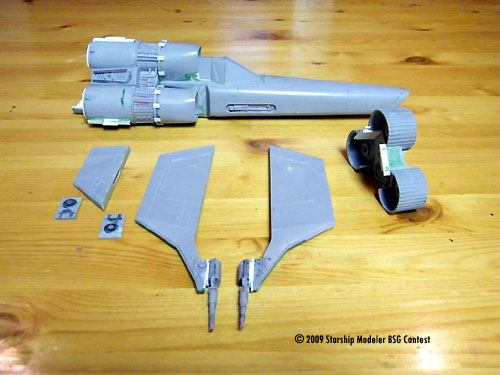
Next I cut away the sections that had cracked or been otherwise damaged. Sadly the original turbines did not survive the deconstruction. Using 0.030” & 0.060” styrene sheet as well as some extruded shapes I rebuilt the areas that had been cut away. When I was happy with the new parts, I glued the nose, intakes, engine section and burner cans back together. Picture “WIP 2 Repaired Parts” shows the rebuild parts in white, and most of the scribing done. I used a #11 X-acto blade with a broken tip to scribe the panel lines. Scribing the lines that go length wise were no problem, however the ones around the curved surfaces drove me crazy. If someone has a good method for this, I'd love to hear it...
At this point the model was painted. I airbrushed it using mixes of the following Tamiya paints.
- X-2 White
- X-10 Gun Metal
- XF-1 Flat Black
- XF-16 Flat Aluminum
- XF-24 Dark Grey
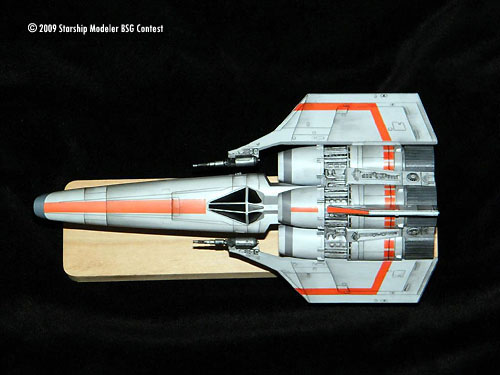
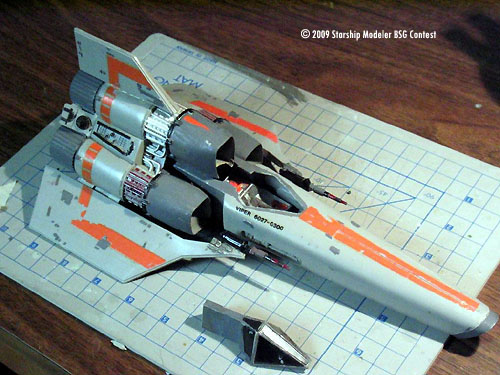
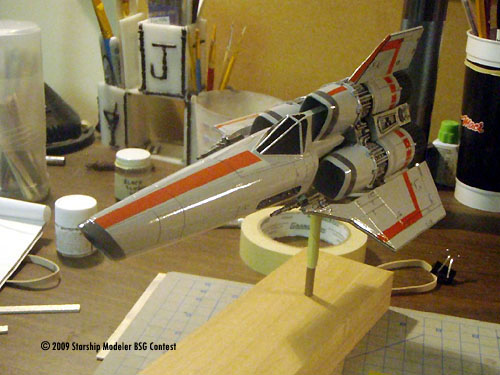
I thin my paints with Isopropyl. I followed the painting with coats of Future. The decals I used came from a new issue Viper kit that I had picked up (on sale) after starting the project. I used MicroSol & MicroSet on the decals to get them to conform to the details on the wings. After the decals had dried, I covered the model with more Future. Then I washed the panel lines and raised details with a water thinned black paint wash. When the wash was dry I coated the model again with Future (I'm glad Futures cheaper than any other gloss coat - see picture “WIP 3 Gloss Coat). Then I sprayed a clear flat from a can. Next I ground up small amounts of black & dark grey pastel chalks using a fine sand paper. Using an old fairly stiff bristled brush and post-it notes as a mask, I brushed on the chalks. My main goal was to make it look used and dirty, but not to distressed. A couple of times I was not happy with the way the chalks had gone on, and found them fairly easy to remove with a damp cloth. When I was happy with the chalk streaks, I sealed them in with a final coat of clear flat.
The stand was made from some scrap wood we had in our garage.
This project was so much fun and I'm really happy with the results. I'm really thinking that I'll try a resin cockpit kit, lighting, and the painting masks on the new Viper kit that is waiting for me downstairs.
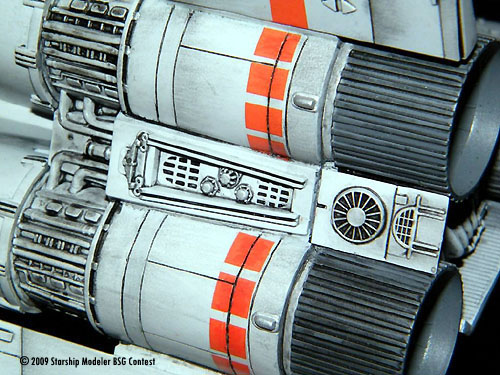
Image: Engine detail
Image: Cockpit area detail
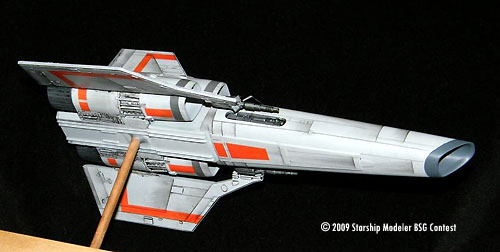
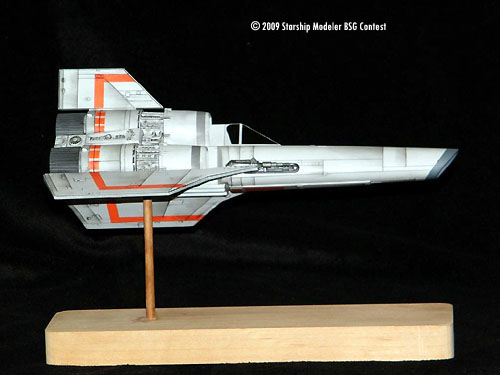
Image: Left side
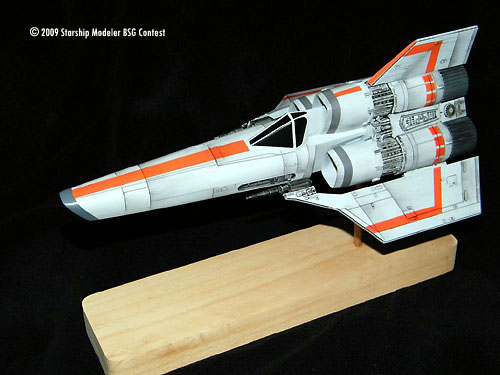
Image: Top view
Image: Top/front
Image: Starting point
Image: Cleaned and repaired parts
Image: Gloss coat
![[Starship Modeler's 17th on-line modeling contest: Battlestar Galactica]](bsgbanner.jpg)