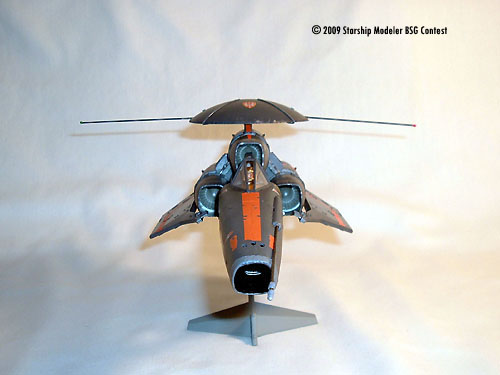
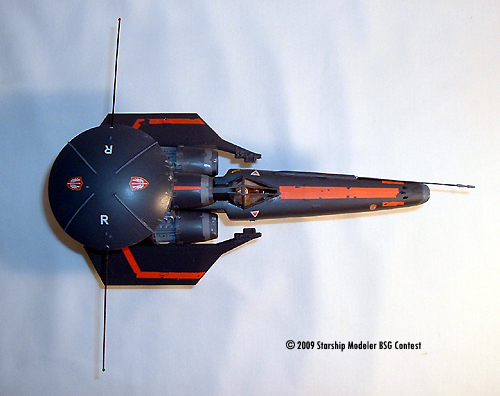
The Wolfhound shown here belongs to Silver Spar Squadron of the 1st Tactical Reconnaissance Wing. It was so named by Commander Adam at the suggestion by the squadron's commanding officer, Lt. Bojay. His craft bears the markings of his former ship the Battlestar PEGASUS in honor of his mentor and former commanding office, Commander Cain.
Modifying Revell's Colonial Viper into the Colonial Reconnaissance Wolfhound
I got the idea for the Wolfhound after seeing the Raptor on the new Battlestar Galactica series. The fleet should have logically had have some sort of AWACS type vessel, and the current Colonial Shuttle was way too big and clunky to do the job. Stealth and speed was the key, so a fast, one man, recon ship with FTL jump capability made sense. I decided to keep as much of the Viper's original design to give the impression that the Rag Tag Fleet had not yet constructed a brand new design from the keel up but relied on what was at hand.
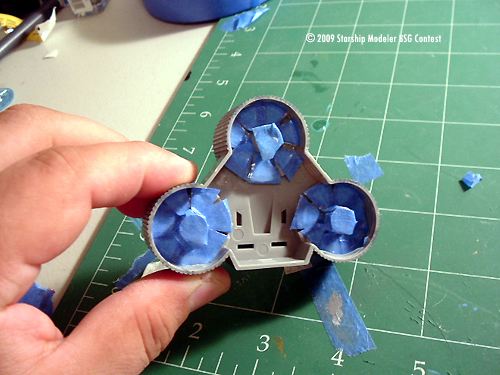
Main Sensor Array
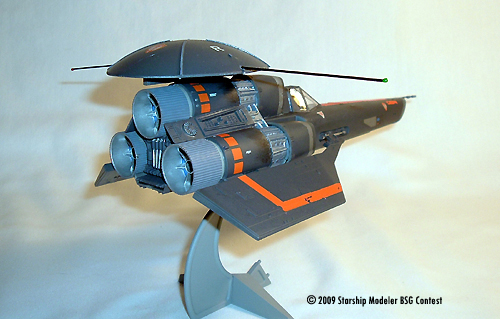
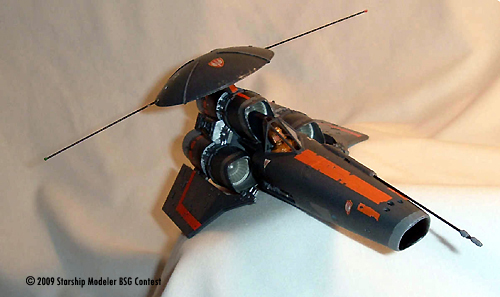
I was thinking that a �Naval� fleet should have some sort of surveillance type craft. I rummaged through my parts box and found the base stand of my old Revell X-3 Stiletto test plane. I was able to use it now courtesy of my cats, which knocked it over more that once until it was totaled. It looked like an AWACS ray dome. Next I traced a circular pattern on a scrap of sheet to make the bottom of the sensor array. Then I traced and cut out a groove to allow the vertical stabilizer to fit in. I found that the stabilizer would have made the array sit too high, so I cut off � inch from the stabilizer and test fit the entire assembly. I used decal remover to take off the X-3 logo and filled in the gaps with putty and sanded the entire surface. I next used pre cut strips of styrene and glued them at 90 degrees to each other creating an X shape when looked at from above. I used strips of sheep styrene to test fit the antennas and forward sensor boom. I then went back into the parts box and took one half of a 1/48 scale Sidewinder missile from an old Revell F-15 kit. I cut off the exhaust section and winglets then sanded it smooth. I now had the housing to sheath the sensor boom. Since this was to be a possible precursor to the Raptor in the new Battlestar Galactica universe, I decided to replicate the RCS thruster nozzles similar to the Mark II Viper in the series. I drilled the RCS nozzle jets in similar places around the nose section and the engines.
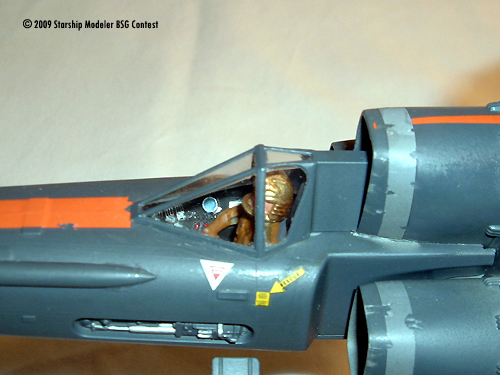
Cockpit
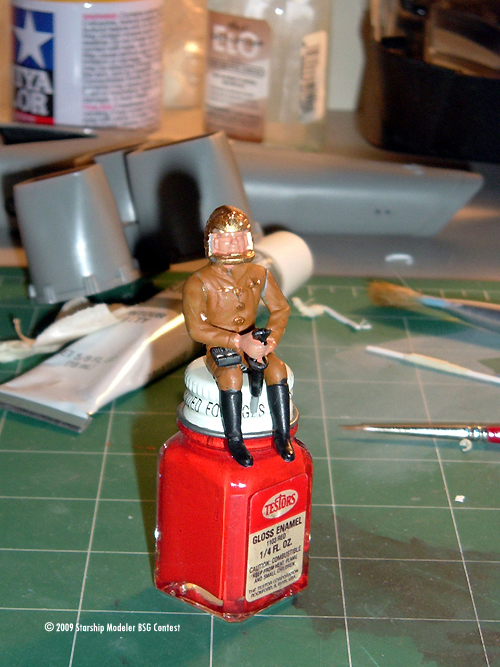
I was surprised that Revell provided a very decent detailed cockpit and pilot. I especially liked that the head could be positioned to make it more lifelike. At this point, I was undecided as to which version of the Galactica Universe to choose so I opted to paint the pilot in the original series type uniform. I figured that the old flight suits from the First Cylon War would be similar to the original series as depicted in the X Box game. Once the cockpit and pilot were painted, I assembled the forward fuselage. I next masked the canopy and trimmed it. Then gluing it over the cockpit.
Engine Section
Oh boy, I sure wasn't prepared for the headache this sections was going to be. It was fairly strait forward at the beginning. I joined both halves of the engine section and masked the exposed piping of the engines with Microscale Micro Mask. The most difficult part was the exhaust. The exhaust piece didn't act like a plug like the old Viper kit piece did and that piece didn't quite fit on the new retooled Viper. This retooled part had the space between the exhaust vanes hollowed out exposing the hollow interior. Since I wasn't going to light the darn thing, I cut triangular pieces of blue painters masking tape stuck them to the inside of the exhaust vanes. Once all exposed areas were covered I coated the entire taped area in Elmer's White Glue to seal it in. After the paint dried, I removed the Micro Mask and detailed the engine piping.
Painting
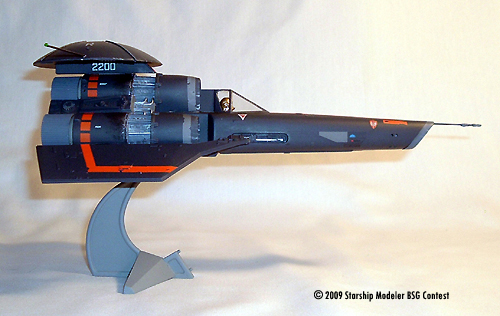
Once the glue was dry on all parts of the fuselage, I pained the hull, array and intakes as separate parts in Tamiya's Gunship Gray (TS-48). The outside exhaust was painted in flat gray enamel. Both the compressor blades and the exhaust interior were painted in silver. Then I used enamel paint to simulate navigation lights by placing drops of white glue until they hardened like a bulb one the ends. The ship that dark would need such navigational aids since it would be virtually invisible in space. Coming in for a landing or just trying to keep other Vipers from crashing into it would be hair-raising without them. Both antennas and the boom were painted flat black. For the end of the boom, I used thing strips of masking tape on wrapped it around the end and painted it flat gray to simulate the sensor probe. I then went on to simulate weathering by using a dry brush dabbed in silver and flicked across the leading edge of the viper and array. The display was simply painted in Tester's Model Masters Navy Aggressor Gray (FS 36251).
Decals
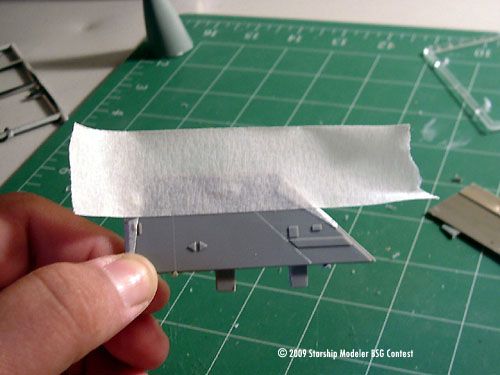
I gave the Viper and the array a coat of gloss coat to provide a good surface for the decals rest on. I also prepped the decal areas with MicoSol decal setting solution made by Micoscale. Unfortunately, the quality of the decals, in my opinion, isn't the best. They did not come off the decal sheet as easily as other Revell decals and they tore easily. I had to scrap more than one of the wing strips. I scavenge replacements form my old Viper kit. Once dry, I took my hobby knife and scraped the decals here in random areas to simulate paint chipped by constant use in deep space. After everything was in place and dried, I applied a second coat of MicroSol and gloss coat. Man did that stuff stink up my hobby room. Once dry, then it got its final coat of Dull Coat, effectively sealing in the decals.
Final Assembly
In keeping with the tradition of unarmed recon planes, such as the U-2 and SR-71, I opted to leave the turbo laser cannons off. Now, with all sections painted, I assembled the Wolfhound but left the sensor array for last. I recommend anyone to use a very ventilated area and a painter's respirator. This was the second time that I had used the stuff and I had forgotten the smell. The stench was cross between burning hair and the business end of a skunk. I mixed and poured the epoxy into the cavity of the array. I inserted the Wolfhound upside down and taped it down to make sure it stayed horizontal propped it upside down while the epoxy cured. I then drilled two small holes were the antenna booms would extend out of the array. For the array's antenna, I cut two lengths of K&S Engineering #502 Music Wire and another for the forward boom on the nose section. With small dabs of Testor's model glue I fed them through the holes by twirling them so any execs glue wouldn't mar the surface. When they dried, I put two small dabs of white glue on the ends to dry and look like bulbs.
Conclusion
Overall it was a great kit to build and modify. It was a great challenge I couldn't pass up to make up a brand new type of Viper. The kit was on the whole simple and strait forward to assemble with plenty of room to modifications or to just build it strait from the box. If you want an affordable version of the Colonial Viper, Revell's copy is really a great place to start.
Image: Rear view
Image: Cockpit
Image: Another look
Image: Radome
Image: Right/rear
Image: Top
Image: Right/front
Image: Major assemblies
Image: Tail mods
Image: Pilot
Image: Engines
Image: Intakes
![[Starship Modeler's 17th on-line modeling contest: Battlestar Galactica]](bsgbanner.jpg)

