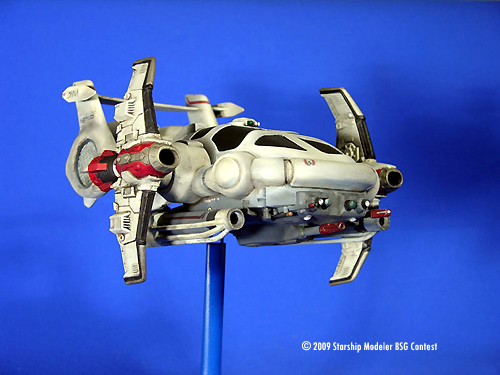
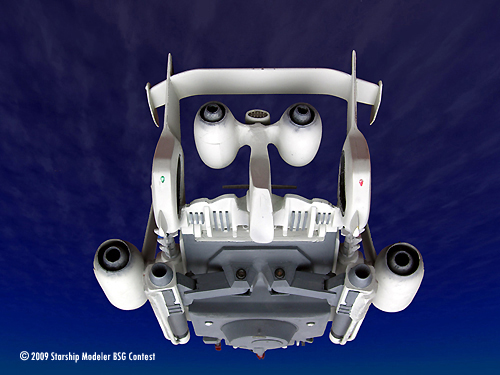
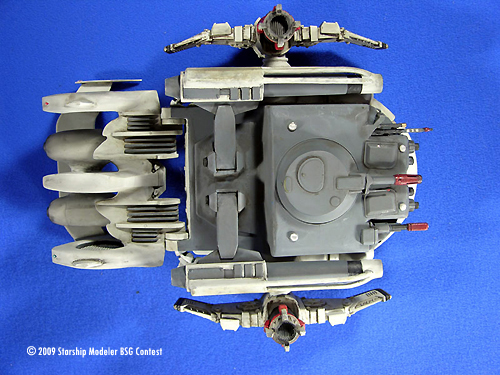
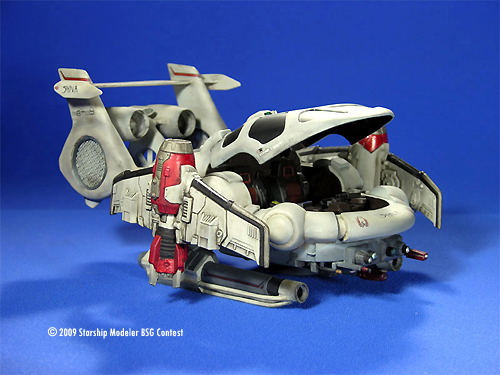
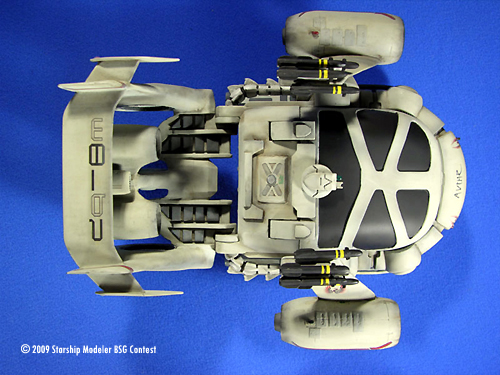
I covered the underside with the top half of an APC vehicle with a turret. I think the hatches look like access panels and kept them. I wanted to keep the two front structures for attaching lights and so cut and reduced them in size from the original toy. I then added a couple more guns underneath and four more lights facing forward also created from Starfury engine nozzles. I had some round clear plastic lenses from some unknown model and combined them with APC parts to make the four lights underneath. Lights seem like an 'extra' on a model but having found myself camping in the dark without any light, I know that light is really important. So my kitbashes usually have ample sources of light.
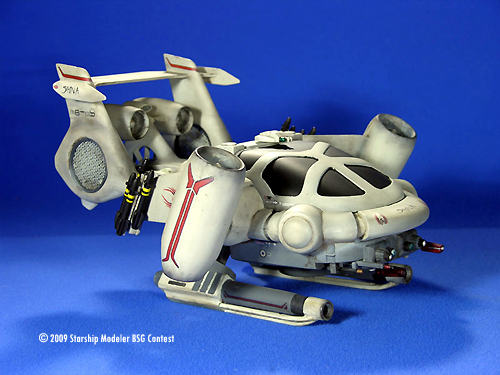
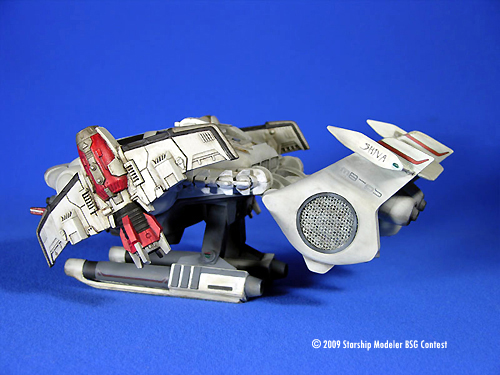
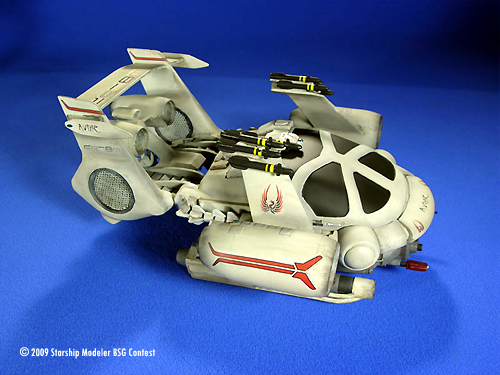
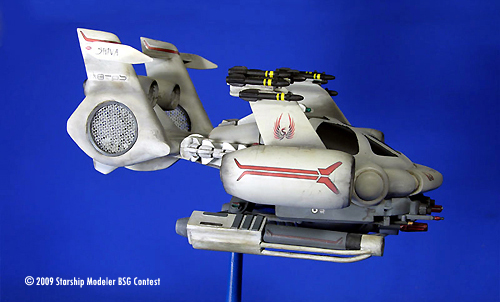
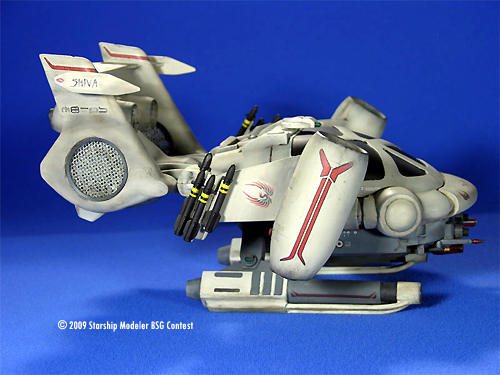
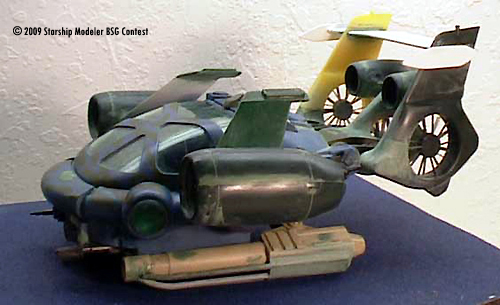
I originally attached a single RAH Comanche helicopter tail rotor to the rear platform but I wanted a jet that could hold its own under severe wind and weather conditions. So I added a couple more tail rotors and it came out looking powerful. It also occurred to me that redundancy is a good thing, so if one rotor goes out, you've got backup. With the rotors sucking inward as well as thrusting outwards, I imagined all types of things getting pulled in - tree limbs, birds, mechanics, etc., and so combined a pair of screens on each side of each rotor hole and lined it with a strip of styrene. I was using a pair of Warthog engines for the sides of the craft and so bought another smaller scale Warthog to acquire two more small engines to mount on the back. These are dedicated forward thrusters but when the tail is pitched downward or upward these engines would maneuver the craft up or down quickly. This pair of engines begged for something to fill the void between them so I added a missile launcher from a Regult Soldier Tactical Pod. I built the rear stabilizer from styrene. I added to tie-down hooks to the underside of this rear assembly and a red and green indicator lights to each side of the stabilizer.
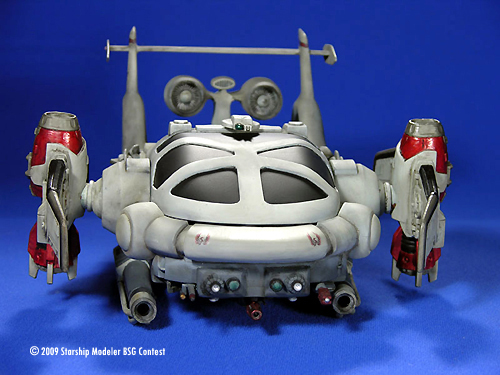
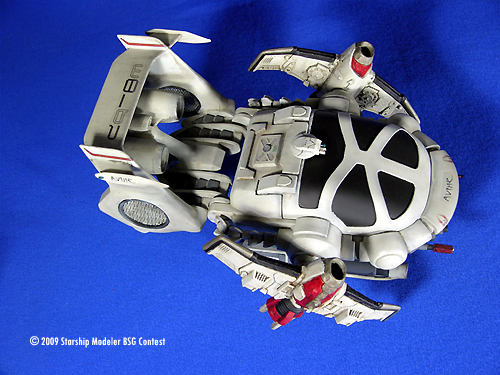
On the top of the craft I covered a hole with a rectangular part and inserted a radar assembly. I think it took away from the aerodynamics and so just covered the hole instead.
The main engines came from a Warthog. I filled much of the insides with green putty and then pushed each engine with the still soft putty onto the extending 3/8th inch tubular extension (part of the original toy). Much to my amazement as the green putty had no airflow inside it took forever to dry. And it melted and deformed the engine casings for months! I had to fill the outside of the engines with putty and sand them round again. And again. After finally drying the engines fit loosely and so I built up several layers of glue until they fit snugly. The craft needed some sort of wings so I made two winglets from the tail assembly of a Thunderbird 2. I sort of hated to plunder this otherwise complete kit. These wings were too thin however and so I added a layer of styrene. I used the connecting TB2 pieces of these wings and attached a missile rack and missiles from the warthog model. They're not glued on and so are removable.
I had another pair of engines that I thought looked really cool and they already had holes in their sides to fit onto the tubular extensions. But the wings were curved the wrong way - outward instead of inward. So I cut off the wings and reattached them so they would curve around the craft properly. I'm glad I did this extra work even though I already had suitable engines because they give a different look to the craft. And they have all these different facing rectangular nozzles that might be helpful in zero-gravity. So they must be space-flight enabling orbital engines!
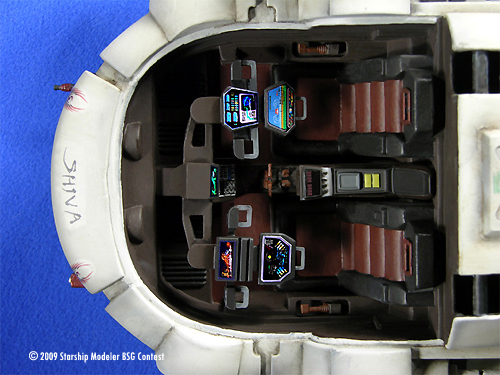
The interior of the craft is simple but has nice controls. I added some joysticks and levers and a central column. I spent some time in Photoshop and made some detailed decals. Because the shapes are easy to cut out I printed them on a white decal sheet and they came out well. I think now it might be fun to detail this interior much more.
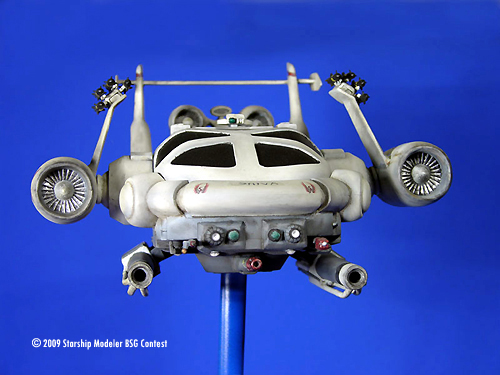
Moving parts: the outboard jet engines are fully articulated with a ball joint. The tail moves up and down. The landing gear have two joints to extend down and out. The turret rotates. The hatch opens and the controls swivel. Length is 9 ˝ inches long.
The insignia is a phoenix and it represents the rebirth of humanity, rising from the fire and ashes of its destruction. The text on the rear spoiler identifies it as M8-P5, meaning it is the 5th Piranha from the 8th Manta (a large dirigible airship). I built the aircraft with four engines and three tail fans for flying in adverse weather and high-velocity winds. It is small, fast, and heavily armed.
Image: Right/front view
Image: Underneath
Image: Front view
Image: Same, in flight
Image: Interior
Image: Landed, canopy open
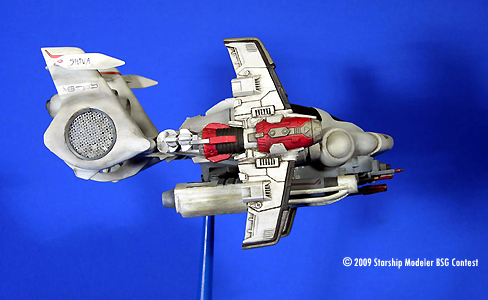
Image: Right side, in flight
Image: Another configuration
Image: Landed
Image: Top view
Image: Top/right, landed
Image: Starting point
Image: Before paint
![[Starship Modeler's 17th on-line modeling contest: Battlestar Galactica]](bsgbanner.jpg)