by Tim Hosford
Scale: 1/72
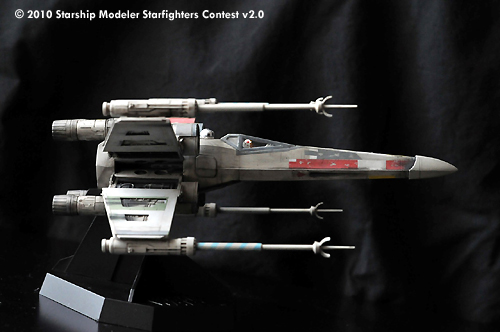
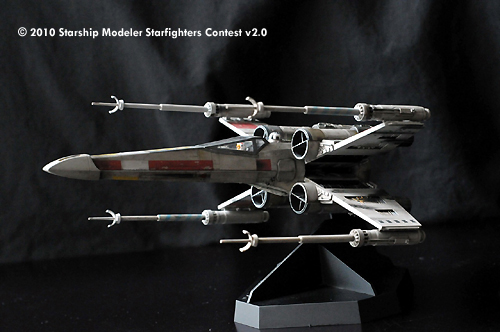
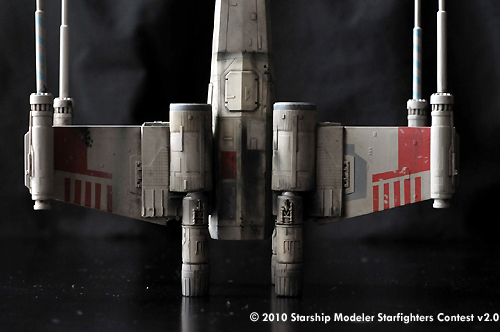
Here is my 1/72 Fine Molds X-Wing model of Luke’s Red-5. This model was the first model completed in my journey back into modeling about 2 years ago. I completed it based on the marking instructions for Red 5 as indicated by Fine Molds. I painted all markings, and only used the little triangle decals.
Two years later, I recently got this model out of storage. I was a bit appalled by how inaccurate the marking were based on the Fine Molds guide sheet, so I decided to do a repaint on the model to match the pictures of the studio Red-5. I used the photos over on www.modelermagic.com for my reference. I also had way under weathered and battle damaged the model compared to the studio.
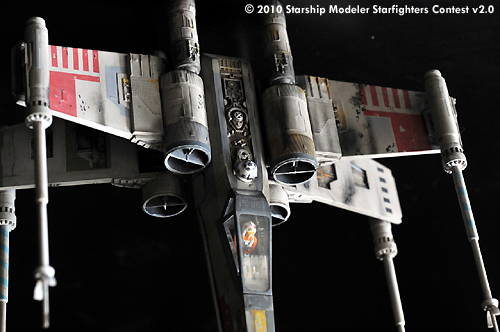
During the construction of the model, It was straight from the box with the exception of one modification. I opened up the angle at which the S-Foils sit in their “attack position.” The angle that the kit comes with looked way too narrow to me... At least for Red-5. I also glued them open, as I’m not a big fan of the X-Wing with closed S-Foils, anyway. I also drilled out the laser cannons.
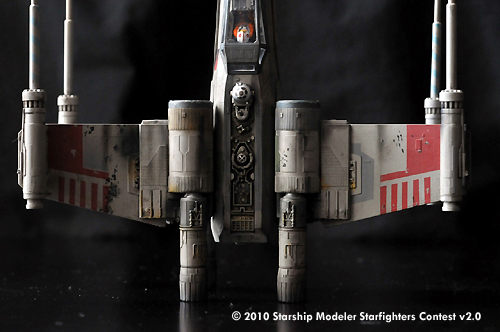
During my re-painting of the kit I used Tamiya Acrylics all around. I tried to match the various panels that seemed to be off color on the studio model. From my reference photos, I noticed that the entire underbelly was a much warmer color than the light grey of the nose section. I used Tamiya Deck Tan for this, and found that the color was perfect. I then air brushed smoke damage everywhere needed based on the reference photos. This was Tamiya NATO Black. On most of the sprayed damage, I also went in with a brush and added the actual damage hits. I was surprised how many different off-color panels there appear to be on the studio model. I may have missed some stuff, because there are some blind spots left by the various reference photos I could find… but the model looks pretty complete to me, so I am happy.
![[Starfighter Contest]](sf2banner4.jpg)