by Tim Hosford
Scale: 1/72
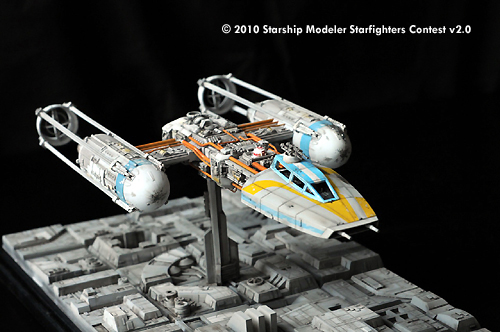
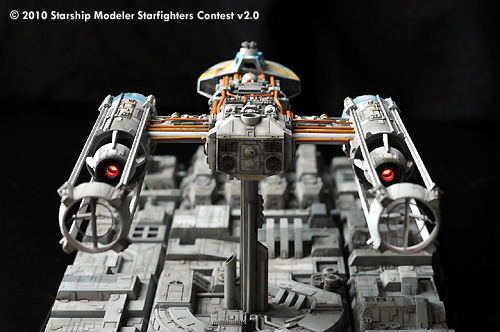
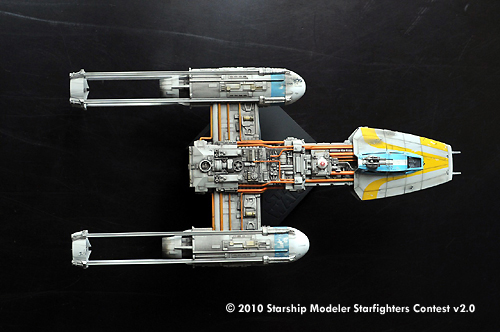
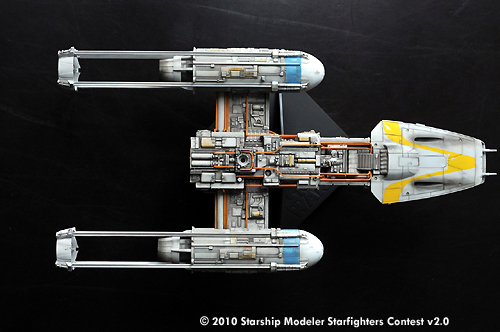
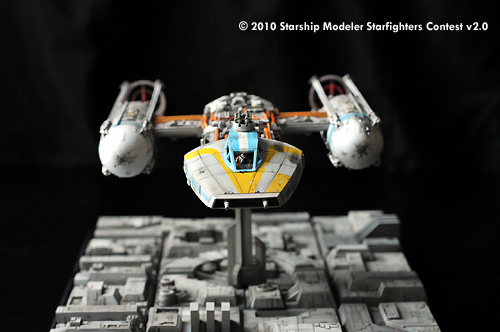
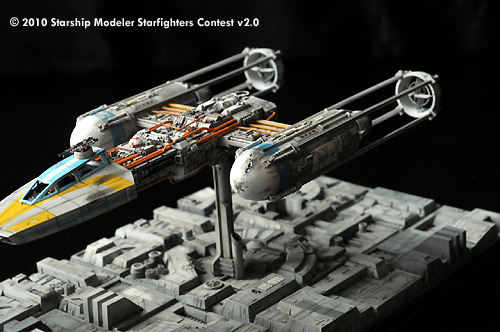
This is my model of Gold 2, and base, built from the 1/72 Fine Molds Y-Wing kit. This model was built straight from the box with the exception of a few things. I added some minor detailing to the cockpit pod, lighted the engines and cockpit, used photo-etch engine vanes in place of the kit’s, and changed some of the pipes according to a picture I found of the studio model.
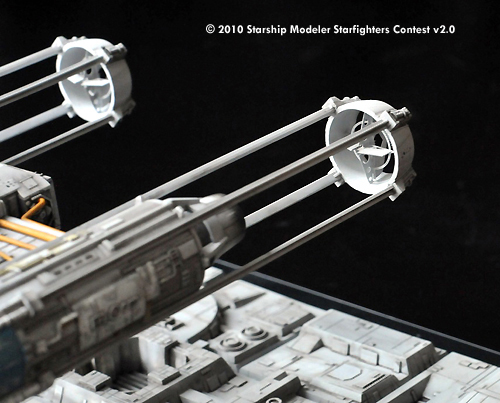
I chose to do Gold 2 because the pipes were orange, and I have always thought that looked neat. Because Gold 2 didn’t have those bumpers on the back of the fuselage, I did not include those pieces and covered over the holes with putty. I also added some strip styrene details to the cockpit capsule area. On the rear of the studio model, I noticed that one of the pipes shoots off in an odd direction, so I duplicated that on my kit. Other than that, I followed the instructions. I did use a pin vice to drill out the gun barrels, and a Dremel to put some damage on the engine cones.
I purchased the Photo Etched Vanes from the Starship Modeler store and used those instead of the Fine Molds poorly molded versions. Incidentally, those vanes are not complete. There are little flaps that need to be added to the leading edge. I made those from strip styrene.
This was my first adventure in lighting a model. I used three LEDs. One red LED in each engine, and one white LED sitting under the R2 unit that feeds the cockpit lighting’s fiber optic strands. The thing that I thought was really cool, was that I went to an electronics store and bought a cell phone power jack connecter kit. I used these parts as the connecting point for the model’s electricity. There is a little recessed area at the bottom of the main fuselage that I drilled out and put the female connector inside the kit there. So, when the model is off the stand, it is very difficult to see that there is a hole at all.
The model is painted with Tamiya acrylics. I did not primer this model, but rather just washed the plastic and sprayed the acrylics directly. For the main color, I used a Tamiya Sky Gray and White mixture. The pipes were painted using half-and-half flat red and flat yellow (for some reason, Tamiya doesn’t have flat orange).
![[Starfighter Contest]](sf2banner4.jpg)
