by E.C. Drapela
Scale: 1/48
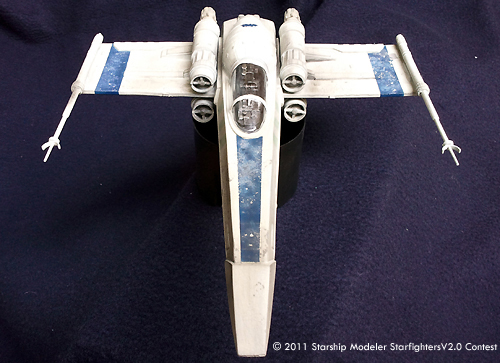
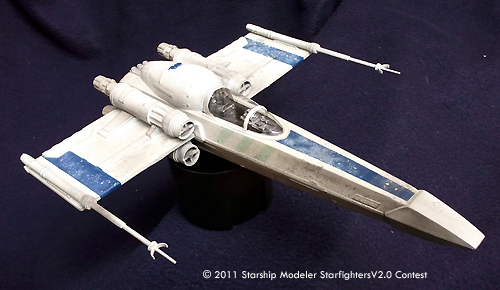
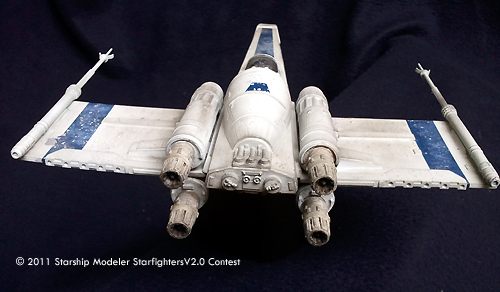
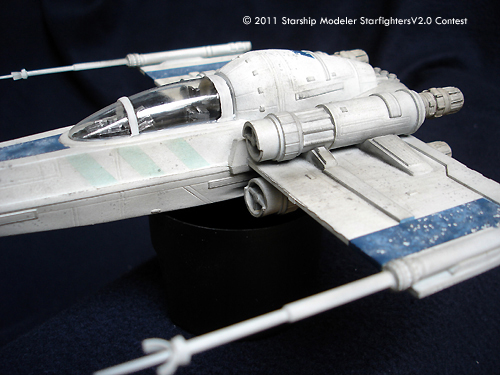
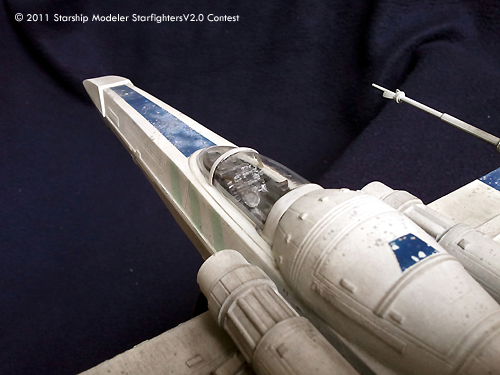
Regarded as the "old work horse" of mercenary groups across the galaxy, the Z-95 Headhunter proved to be just that, and then some. With constant modifications always on the market, the Headhunter proved to be a formidable starfighter and served for many years beyond its original service life.
This model was built from the Zarkus 1/48 Z-Hunter that I purchased from the SSM store. I built this kit alongside another one, so the build went pretty easy. The kit itself was pretty well made, so little to no real work had to be done to get it to look great. Following the standard directions, the kit went together rather quick. I used one of the extra parts to detail the bulkhead behind the pilot since the plain flat area looked like it could use some greeblies. Instead of using the supplied gun cannons, I used the ones from a Fine Molds 1/72 X-Wing since they looked about the same size and were more sturdy.
Painting was the fun part! I primered the kit with Tamiya Surface primer, and then painted the model with a 50:50 mix of Tamiya Japanese Navy Gray and Sky Gray. Originally, I had hoped to achieve something like a light warm gray with that mix, but it ended up more greenish. From there, I applied a liberal salt wash, then painted it straight Testors flat acrylic white. From there, I chipped off the salt revealing the under coat which now looked like chipped paint. From here, I gave the entire model a wash with artist oils, mixing black with raw umber. Overall, this gave the model a warm hue. From there, I taped off the blue sections and did another salt wash before spraying Testors acrylic Blue Angel blue. After that dried, I removed the salt. An interesting side effect was that wherever there was water from the salt technique, the paint ended up a lighter hue. While not my original intent, it did give it a well worn look. The interior was painted Testors interior black, and given a dry brushing of silver.
![[Starfighter Contest]](sf2banner4.jpg)
