Assembling the craft was pretty straightforward. Since this is a stock build, the only real variation was the paint. From this point on, I used Tamiya paints almost exclusively. I primed the model a light grey, and then pre-shaded using X-1 gloss black. I was also fortunate enough to acquire the Graphic Encounters vinyl masks for the canopy.
I then airbrushed the entire model using a 2/1 mix of XF-2 Flat White and XF-19 Sky Grey. Once that was done it was time to do the faded yellow markings. Using the “hairspray” technique, I first coated the fighter with a solid layer of GW's Purity Seal (A Lacquer Satin Varnish). After masking off the appropriate areas for the worn yellow and grey paint, I then sprayed the areas with two layers of hairspray, letting it dry between the coats. Following that, I sprayed the areas with a mix of XF-3 Yellow and XF-59 Desert Yellow, and the grey areas with a mix of XF-53 Neutral Grey and XF-63 German Grey. I removed the masking, took a few progress pictures, and then used warm water and a soft brush to dissolve the hairspray, giving the yellow and grey paint a worn look. This worked very well, almost too well... so before progressing to the next stage, I used Yellow Ochre oil paint to help where too much of the yellow had worn away. After sealing this with Dullcote, I was ready for the next stage for the red markings. Masking off the appropriate areas, I then sponged on masking fluid to handle the chipping on the red areas before airbrushing those areas with XF-7 Flat Red. Now it was starting to look like Red 2. I then masked off smaller areas to handle the light grey panel on the right side of the forward fuselage (airbrushed with XF-53 Neutral Grey), the canopy (XF-19 Sky Grey with a hint of XF-63 German Grey), and the freshly repaired panel on the top left engine (XF-2 Flat White).
I wanted to add some variation in the panels, so I used Titanium White oil paint to give some additional variation in the colour of the panels for both the main hull and the neutral grey panels. I used a mix of red and yellow oil paints to give some variation to the markings, and then I used white, red and yellow acrylics to provide some emphasis on some of the small details.
After this, I sealed the model with gloss varnish and applied the decals from the supplied sheet that were appropriate. I used decal solvents and brush-on gloss varnish to eliminate the silvering. After sealing the model with Dullcote again, I used MIG's Brown Filter for White-Yellow Camo to warm up the white, and unify the colours. Once dry, I sealed the model with a Clear Gloss Lacquer to prepare it for washes.
The detail washes depended upon what area of the model I was working on. MIG's Neutral Wash was used for off white/yellow areas, while the Dark Wash worked well to bring up the panel lines on the red markings. After applying the washes as pin washes, I still had to let it dry, and then use paper towel or a dry brush to rub off/blend the washes into the paint. After a second coat of clear gloss laquer, I then used blue, red, rust and “starship filth” oil paints to add some variation, especially around the engines. A paper towel was used to wipe off any excess.
After a final coat of dullcote, I then masked off the light panel in order to simulate a recently repaired panel with carbon scoring still around it. I used airbrushed XF-1 Flat Black around the panel in a blast pattern. Using various weathering powders I finished off the model, hand-painted the Astromech droid's dome, and painted the stand.
I had a lot of fun painting this model. Curiously enough on the day I finished it, the 1/48 Scale TIE Fighter arrived. Just in time.
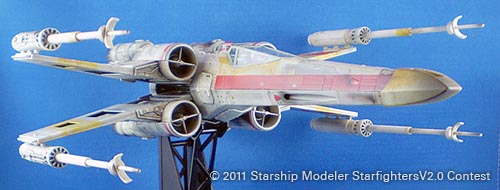
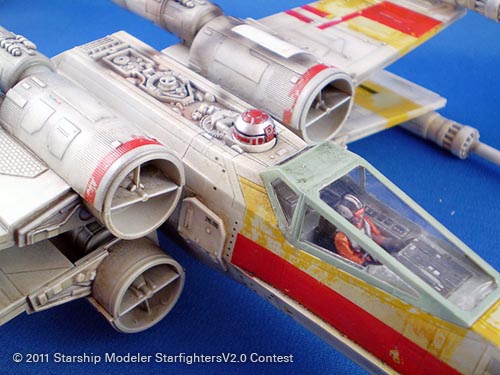
Image: Right side
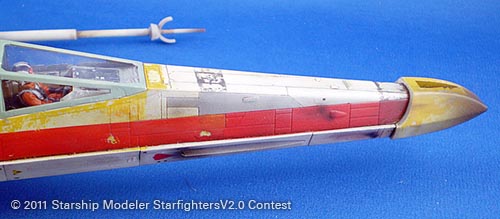
Image: Nose
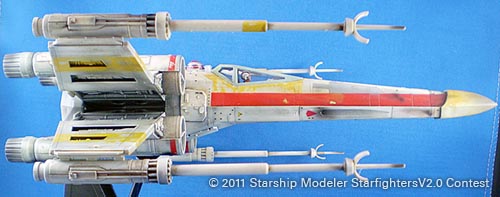
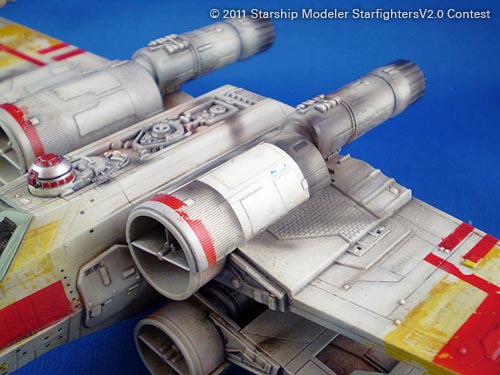
Image: Amidships
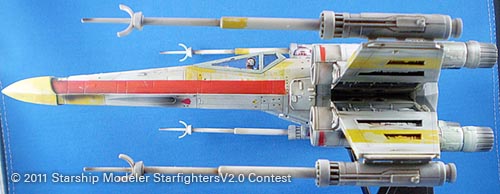
Image: Other side
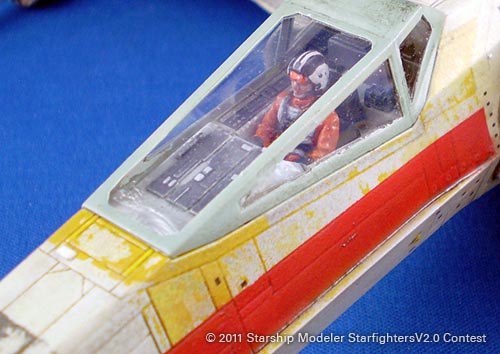
Image: Pilot
Image: Looking down
![[Starfighter Contest]](sf2banner4.jpg)
