
By Dominic Handl - images & text © 2004
|
![[Click to enlarge]](dh_faDuel_FrontView.jpg) |
|
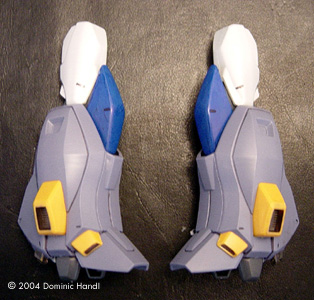
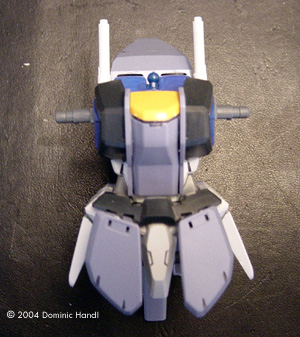
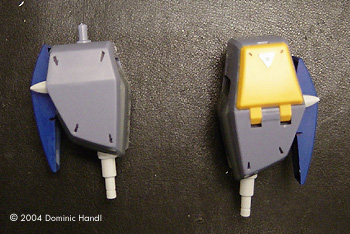
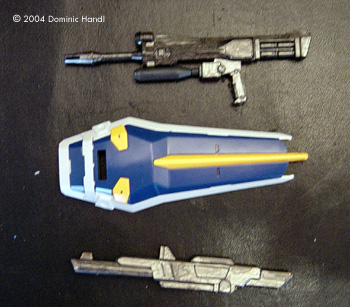
Image: Sprues Image: Lower legs, assembled Image: Torso Image: Shoulders Image: Weapons and shield |
Another great release from Bandai in the 1/100 scale is the Full Armor Duel Gundam. The Duel Gundam is one of the mobile suits that appear in the Gundam Seed series. I was looking around the online catalog of HLJ and I came a cross this model. It looks just as impressive as previous models. I like how it looked, so I ordered it. The Kit The model is a high quality injection plastic. It comes in a thick box containing-
The detail on this model is very crisp, like every model Bandai has ever produced in about the past decade. The box art is very nicely done. Painting and Detailing The model itself is molded in color so very little painting has to be done - mostly touch ups in certain areas. On most of the pieces, I first went over the panel lines with a micron pen. This makes the detail show up better. Then, I did some touching up on some parts like the boosters that go on the back plate of the armor. I painted these in a steel color on the outside, and flat black on the inside. I did the same with the verniers on the leg armor. I used a paint marker to do this. Then, I painted the cannon that go on the right shoulder gun metal, and the tip a steel color. I also did this with a paint marker. Then I brushed on a thin wash of flat black paint as a weathering effect on the tip, to make it look like it was burned from the beam discharge when being fired. I did the same with the beam rifle. I set those aside and let the paint set up overnight. Trimming I used the scissors on my Swiss army knife to cut each piece off each sprue. After each piece was cut off, I used a steel file and sanded them smooth, taking off the little bits of flash that remained. Then I put them in Ziploc bags, all labeled according to sub-assembly. There were a lot of pieces, so this presented me with a challenge. |
|
Assembly Like every Gundam model - or any mech model for that matter - it was to be first made in sub-assemblies. I did as the instructions suggested. Unlike the usual 1/100 scale Gundam models I have done in the past, this one had to be done starting with the head first. Okay. No problem. I did the face first. Taking the eyes, I painted the recessed areas around them black, then metallic green on the raised areas, using paint markers for both colors. I put the “Vs” on the front part of the head. I set the face guard in with the eyes I had painted and inserted the poly cap for the neck joint. Then, I closed the whole thing and it aside. At first, I was thinking of eliminating the “Vs” on the head and smoothing the forehead, making what is called a “Hexa” type. Making the part where the Vs go on the forehead smooth. It was a good idea, but it would require more work than I cared to do, so I scrapped the idea. The Hexa type head wouldn't match a Gundam of this type anyway. The main body was next. First I had to put the shoulder joints into the front half of the upper body, then assemble the lower body. Just three pieces to it - a straightforward assembly. After that part was ready I put the grill vents in the chest. I next put the body on, then put the back half of the upper body and closed it together. That was put aside. The arms were just as straightforward. I went from the shoulders and worked my way down. I had to put a cover on the elbow joints before I joined upper arms to the shoulders. Then I put the hands on. This model had a wrist cover on both arms. The first time I ever saw something like this. Still, I liked the idea. This may seem odd in making a model of this type, but I had to join the head with the main body and put the shoulders on, as the instructions indicated, before continuing. First time I had to do something like that. Then I had to do the back pack. I first touched up the boosters that go on it. I painted them on the outside a steel color and on the inside, a flat black color, again using a paint marker. Then I put them in the backpack and joined the whole whole thing to the main body. I did the legs next. The assembly was done in sections starting with the feet. Those were affixed to the ankle joints then the main part of the legs. Next I put the knee joints on and connected the legs to the ankle joints and the feet. Then I assembled the thighs and connected them to the knee joints. After that came the pelvis section. After that, I joined the legs to the pelvis and put on the side skirt armor. Then I joined this whole thing with the main body and put the whole thing aside. I inserted the beam sabers into the holsters on the back pack and assembled the shield, and beam rifle, plus the extra hands it came with. Next I assembled the shoulder cannon and mounted it onto the right shoulder armor. Then I assembled the rocket launcher and mounted it on to the left shoulder armor. The rest of the armor pieces were also a straightforward assembly, with only very few pieces to some of them. This model gives the option of making it with or without the armor, and I opted to put it together with its armor on. I think it looks better like that, all decked out for combat. Final Assembly The crucial parts are done. Now to complete the whole thing. For this procedure, I just started from the legs nd worked my way up to the head. I put the shin plate on, then the leg armor. The front skirt armor went on next, with the chest armor. I put the wrist guards and the arm protectors on, then the shoulder armor, then the back plate and boosters that go on the back pack sort of covering it. Now it was starting to look more like a weapon as it was intended, like every other mobile suit. I posed the model in a few ways, to see what it can do before it joined the rest of my Gundam army on my shelf. Conclusion I had fun doing this model. The armor certainly enhances the appearance of the model a lot. A model like this, would normally take me about three weeks to do, but I decided to take my time on it. I spent a whole month to assemble, and do a really good job on it. Its not the last Gundam seed model I will be doing. I will recommend this kit to a modeler of all levels, or to a fan of Gundam Models or just someone who enjoys doing mech models. |
![]()
This page copyright © 2004 Starship Modeler™. First posted on 30 June 2004.
![[Click to enlarge]](dh_faDuel_FullAssault.jpg)
![[Click to enlarge]](dh_faDuel_Crouch.jpg)