
By Dominic Handl - images & text © 2010
|
![[Please click to enlarge]](dh_strike_682.jpg) |
|
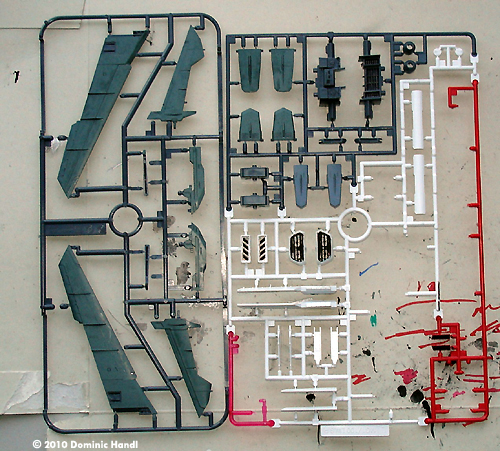
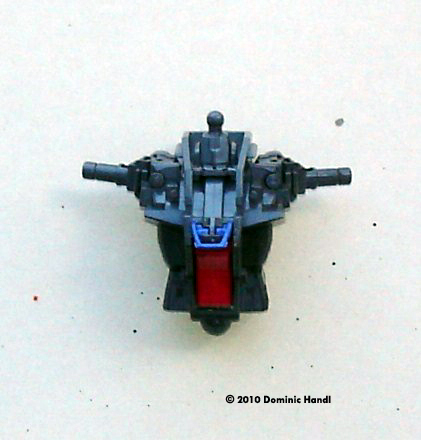
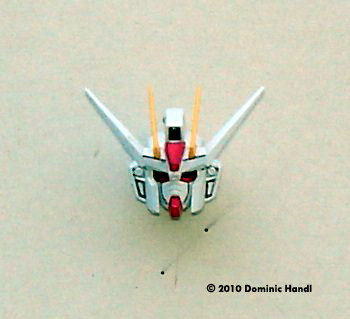
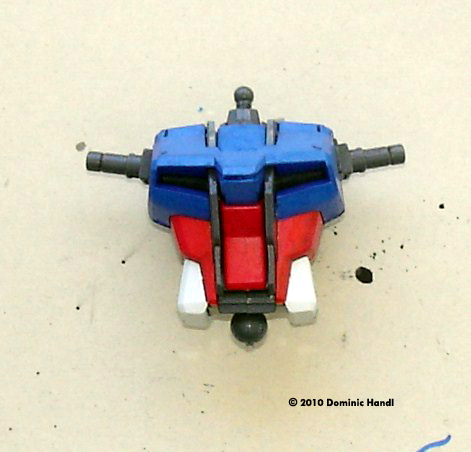
Image: IWSP sprue Image: I started assembly with the chest Image: Completed head Image: Torso Image: Completed chest Image: Arms Image: Legs Image: Half way there.... Image: From the back Image: At the ready Image: Aile strike unit started Image: Done Image: IWSP Unit started Image: Bottom half Image: Almost there.. Image: Done Image: Weathering Image: Weapons (sans paint) Image: Painted Image: With swords Image: Beam rifle and sabre Image: From behind |
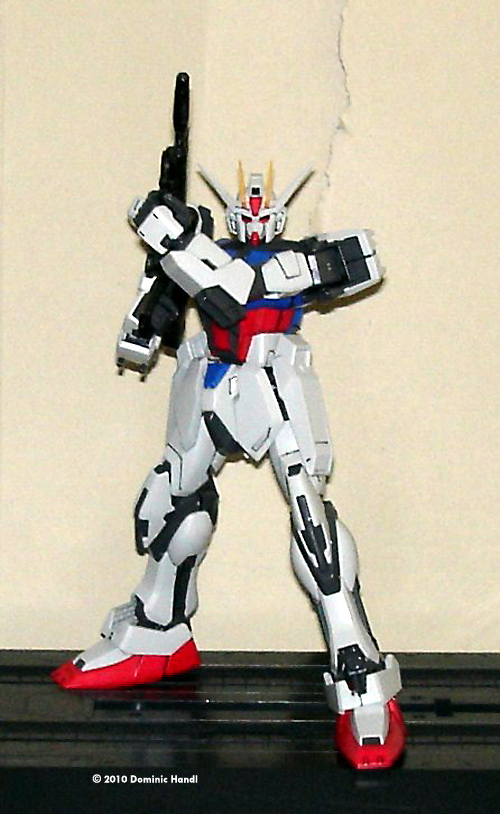
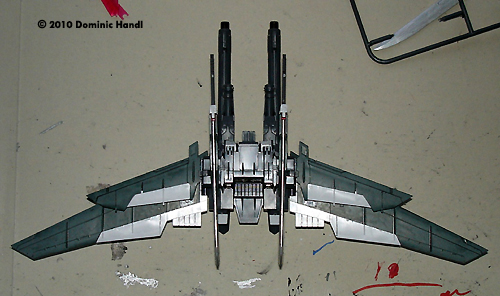
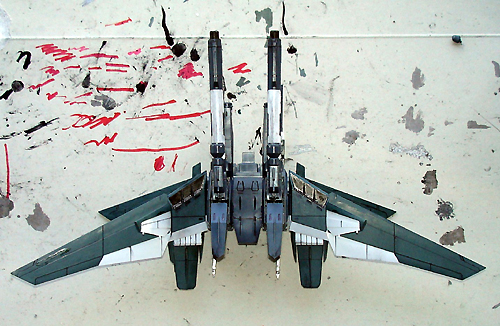
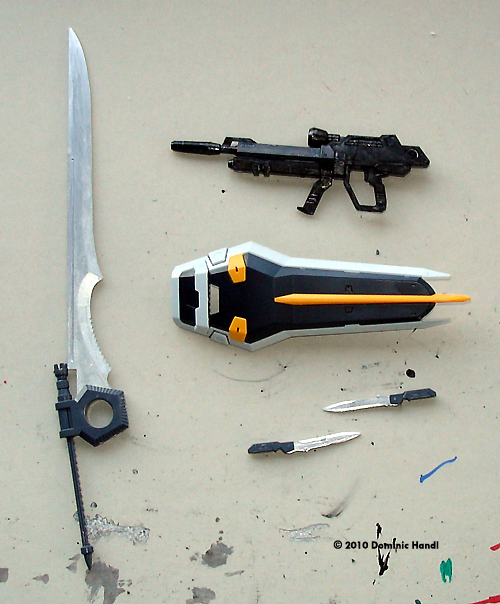
The Strike Gundam is nothing new to me after building the High Grade versions of the Aile Striker and Sword Striker back in 2003. Three years later the Master Grade model of the Gundam was released. I present today this new MG model as my topic for this review. I got the model year ago at a shop here in Hawaii called Toys n Joys. So lets get startedģ First, I checked all the parts to see if everything was accounted for or if anything was broken. This way I know I have all the parts in the package and I'm able to do the model without any problems. Next, I painted the parts . PaintingI started with the Gundam itself: the Strike Gundam frame. It's the usual multi-purpose prototype mobile suit. Weapons can be installed onto it depending on the conditions of battle. I took all the sprues out of the box and lined them up on the table deciding how to go about building the thing and what to start with. I started with all the sprues containing the skeleton pieces. There were plenty of them: legs, arms, shoulders, and the body frame. I know people have different ways of making models like this. I like to add a bit of realism to my Gundam models, like they have been through some action. As much of it I'm able to do, anyway. To do this, I took some soot black paint and dabbed some of it on an old toothbrush. I used the toothbrush to smear the paint onto the legs, arms, etc. The black streaks give a more real effect to the whole thing, enhancing the appearance of the model. I put those aside and went on the next step, which was the outer covering. The feet and rib pieces I painted red, then used a Real Touch marker (which is a thin ink) in the respective colors of the parts that are being painted to apply a little bit on to the corners of the pieces and spread with a q-tip. This gives it a sort of 'dry brush' effect and it brings out the details more. I did the same with the chest and back pieces, painting them blue and using the blue Real Touch marker. Before adding the dry brush I had to put two to three coats on each piece. I put those aside to dry. I had pieces of the Aile Striker unit from an extra kit that I decided to use on this model. The thing is mostly black with some red parts. The detail on the pieces are pretty good, right down to the boosters. I started off painting the pieces molded in red, the booster pieces, the wing leading edges and the vanes that go on the ends of each of the lower boosters. It took some time to do this, because after painting and dry brushing these pieces I had take a thin brush and paint the boosters inside in a burnt iron/steel color, then thinly apply some soot black to them to make it look like they were burned. After waiting for the pieces that I painted earlier to dry, I took my toothbrush, dabbed some soot black paint on, and I spread the paint on the outer edges of the boosters and going along the length of the vanes of the lower boosters. That was set aside for later. The blackness really shows, making it look like the engines have burns on them. The stock kit's IWSP (Integrated Weapon Striker Pack) unit is molded mostly in white and grey. I had some Zeon grey color I haven't used so I decided to use it. The unit has 4 set of wings and two tailfins. I painted the two main wings first, applying two to three coats on each surface. I moved on to the tail fins and did the same thing, repeating the process on the canards, engine assemblies and the top surfaces of the fantails. Flipping those pieces over I painted the under side with a burned iron/steel color, then applied some soot black color to make it look a bit dirty from the exhaust flames. The boosters were also painted in a burnt/iron steel color on the outside. On the inside I painted that part all black. The vent grills for the engine assemblies I painted a burnt iron/steel color because I didn't like how it looked being red. The intakes were molded in mostly white. It was a bit tricky to paint. I couldn't do the silver and steel tone on them so I just painted the while thing, fans and grills in burnt iron. After that, I did the weapons. The IWSP comes with a gatling shield. I it just caught my eyes. It looked like quite a weapon. The barrel comes in three pieces. I painted each one in a gun metal/steel color. I did the same with the tip of the barrel. Then streaked some burned iron and soot black paint on. In the set were two swords as well. To get the metal effect, I first painted the blade metallic grey then painted the edges a shiny chrome silver color. I did the same with the massive grand slam blade. From there, I went onto the basic weapons. The standard beam rifle I painted that in a gun metal color. I put everything aside and decided to do the other stuff during assembly. Assembly This part can sometimes be hard to decide where to start and what to assemble I was having that trouble. All the parts make it hard to decide. I started by assembling the Gundam itself, with the biggest part first: the chest. The chest is molded in two large halves and has at least five poly-caps inside for the back, abdomen, shoulders and neck. After that, I closed the torso up and put on the outer covering, touching up with paint where I cut the pieces off from the sprue and putting the black panel line details using a micron pen. The lower back and abdomen covers went on first, then the back and chest covers. Then a collar piece and something that looked like a roll cage that went in the middle of the chest. Another neat feature I tried out a few times was the opening cockpit - one of the improvements made from the 1/100 scale High Grade molds. Same with the skeleton and outer shell style of assembly. On to the head. There was no skull to this part so it was a very straightforward assembly. I painted the eyes before I put the face guard on. Then I put the neck joint into the back of the head, put the front over it and closed the whole thing. Lastly, put the ōVö on the top. The shoulders were easy: two sides, the brackets that connect to the shoulder joints and the two outer covers. |
|
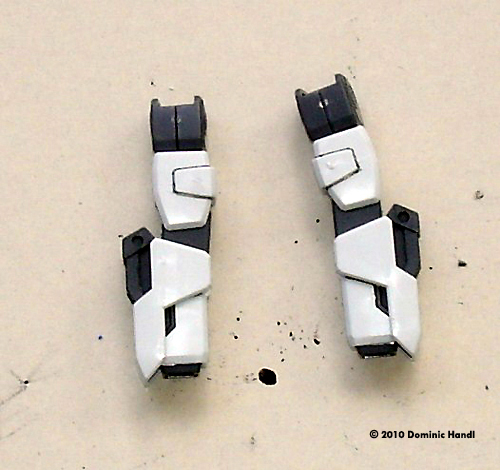
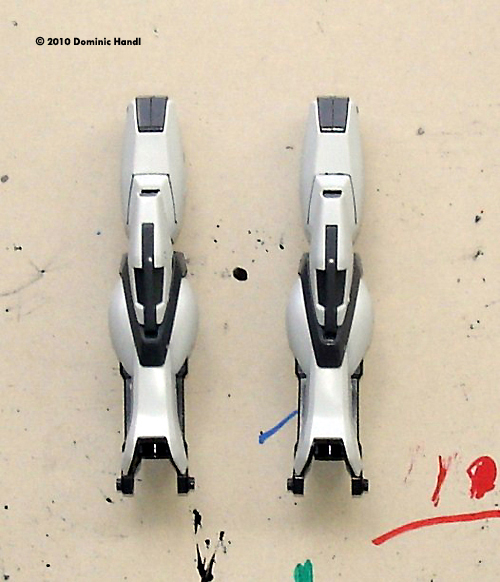
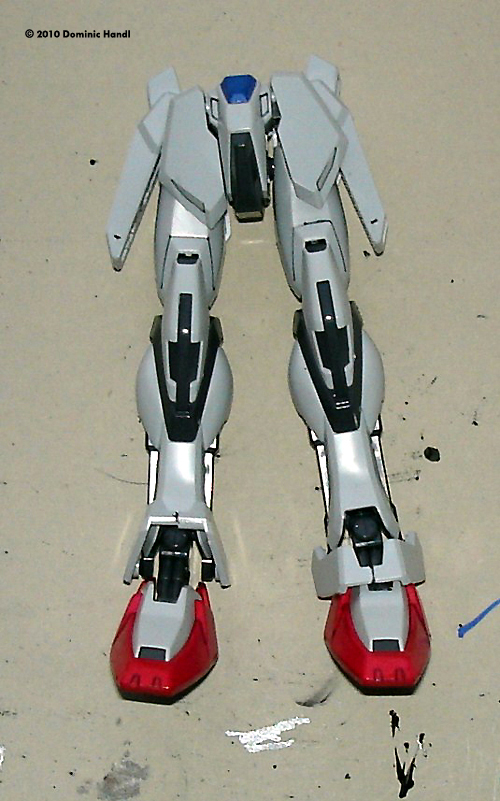
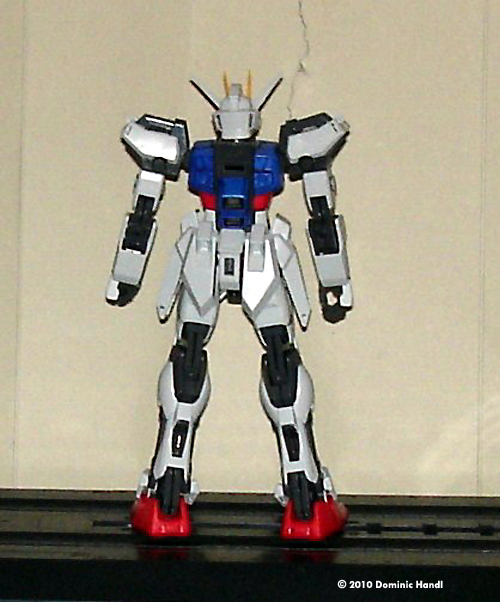
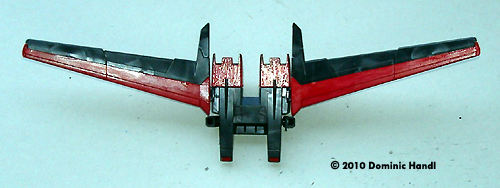
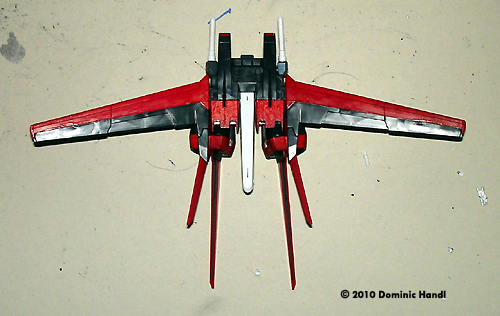
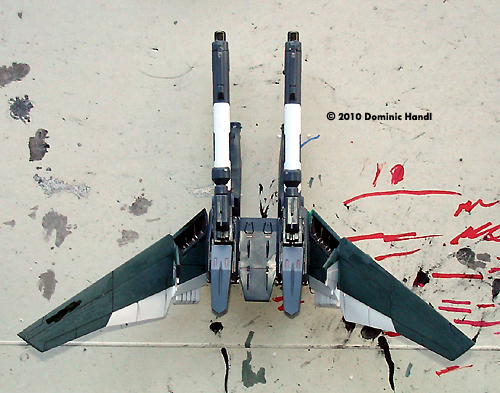
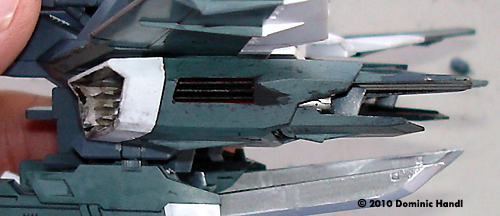
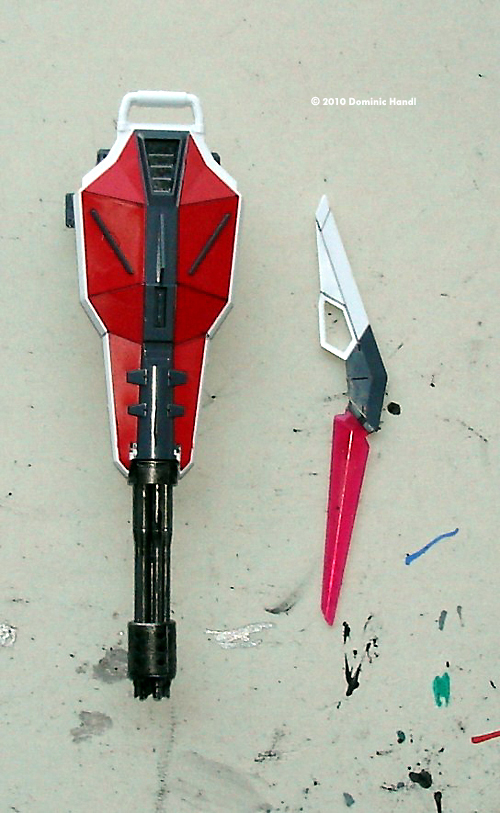
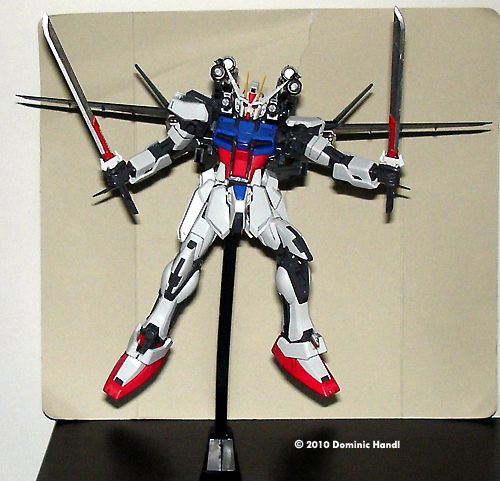
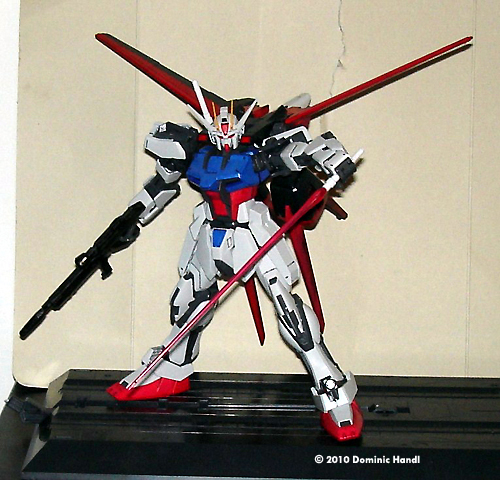
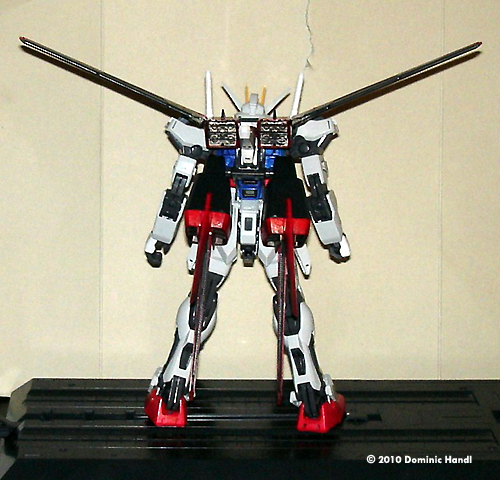
After I did that, I had a whole arm to do. First I had to do the elbow joints. I had to pay close attention to this part to make sure the poly-caps were in the right positions and that the joints worked properly after putting everything together. I tried the parts out a few times to see if they worked. Everything worked properly. The black weathering streaks look real good. Some of that will have to be covered. The outer coverings for the arms are shaped in such away that each piece fits exactly right and only for that particular part. I don't see anyway of making a mistake when completing the arms. I tried moving the arms with the cover on. Everything worked well like it did previously. I set those aside. The feet assemblies were very straight forward as well. I did a few touch ups on the details on the ankle joints and the feet. The legs are like the arms. I had to do the inner skeleton first. With the amount of pieces, it took me a few minutes to do the skeleton alone. The thing has movable knee caps. That's a pretty neat feature - an extra detail they added to this Master Grade kit. I had all the legs' outer covering already cut off the sprues. I just had to make sure what piece goes where; first the thigh covers, then the calf, then shin guards. All that weathering on the legs will also be partially covered like the arms. I tried the legs out a few times, even in a crouching position. I was impressed with the way this model did that. Then I put the legs aside, standing up and already connected to the feet. The lower body is one big piece with two halves and the hip joints in the middle, plus skirt armor on the back and front. On both sides are knife cases. After building this sub-assembly, I connected the legs, then the torso, arms, shoulders and head. The basic Gundam frame was already completed. I still had a lot more to do, though. Aile Strike Unit As mentioned earlier this part was not included in the kit, it was just extra parts I had from a previous kit that I decided to use for this project. Assembling the Aile happens in four stages: the top part, wings, mid-section and the lower boosters. The top section was a big piece, two large halves and the two boosters that go on to them. Before I was able to mate the boosters with the unit I had to put a joint for the wings. After mating the boosters with this top part I connected the wings, which are two separate pieces (the main spar and the leading edge cover, which was a long red piece that almost goes from in spars to the wing tips). The wings move. They fold pointing downwards then come up again to the fully spread position. I then mated the top half with the mid-section and put the assembly aside. The lower boosters were a bit tricky. The front of this part houses a joint that connects to the bottom of the mid-section. I had to do that first then put an end cap on. I had to make sure this was on tight so that it doesn't come off when I'm handling the model later on. Next, I had to put the vanes that stick out from the boosters on the boosters themselves, then mate them with the nacelle assembly. After that was done, I connected them to the mid-section and the Aile was complete. IWSP Unit This part came with the kit. There were a lot more parts to it than the Aile. The center of this unit, where the twin beam cannons are mounted, was the biggest part. Even with the beam cannons on, this part doesn't look like much. It's just a block, a square platform with two beam cannons on top. I weathered the white part that goes on the top of the beam cannon barrels a little. I just thought it looked good with some carbon streaks. The barrel tips I painted and streaked with some soot black paint over the gunmetal/ steel color. The center of the IWSP has two booster units. I left these as molded in white and grey. I painted the insides burnt iron, put a thin layer of soot black on, and installed the assembly onto the center unit. The main wings were comprised five components. I did the tail (the vertical stabilizers and the rudders) first, then the main wings (the leading edges, in spars and flaps). Next, I mated the tail with the wings. Putting those aside, I worked on the main engine assemblies: boosters, fantails, nacelle halves, and the intakes. The boosters - two on each side - I painted a thin layer of soot black on the outside. I did the same with the inner surfaces of the fantails. The intakes were white and streaked with some soot black, even along the sides of the intakes. The nacelle vents I painted in a steel color and streaked the area around them with some soot black paint. I mated the completed boosters with the wings and set that on the table bottom facing up. Then I went on with the bottom half. This part was pretty straight forward to do. It had grills on the front which I painted in a steel color. ThenI put the canards on, one on each side. Unlike the wings, which fold upward, they pivot downward. I had to put on two other pieces to connect to the bottom half of the IWSP unit. They looked like two sword racks. After that, I joined the two parts together, trying out each part to ensure they functioned properly. (They did). Okay, only a little bit more to go. Weapons The very first thing I did was put the gatling shield together, touching up the barrels and the tips with soot black to make it look like its been used a lot. Then I did the shield part. It is white with two red plates that go on either side of the gun assembly, which the shield is connected to. On the inside of the shield, a hard point connects to the arm. I put the grip on just behind the barrels of the gatling gun. A dagger-like energy boomerang went on the top in the center of the shield assembly. The beam rifle was straightforward to assemble. I only had to do some minor touch ups on that part. The twin swords looked like katanas. The shiny silver color gives it that blade-like appearanc. Most of the touching up I did on the grips before I mated the blades with the grips and put them onto the racks on the IWSP. The grand slam blade and the knives I assembled earlier, and put them into the knife cases during the time I was putting the Gundam frame together. The shield was also straight forward: a hard point, grip, a white piece, black center piece. That was easy to put together. I managed to get everything done as best I could. TrialsThese were more a test of compatibility to see if each system would fit on the back of the Gundam. Taking the Gundam frame, I put the Aile Strike unit on. It fit. I put the IWSP unit on after removing the Aile Strike unit. Then I put the gattling shield on the arm. Conclusion This is a slick piece of engineering. Bandai did a good job with this model. I had fun putting it together despite it taking some time - i was necessary to get that real effect I put on it. But there will be more of these models I will be doing later on. Do I recommend it? Yes I do, to any one who wants a challenge or enjoys model building. |
![]()
This page copyright © 2010 Starship Modeler™. First posted on 6 January 2010.
![[Please click to enlarge]](dh_strike_630.jpg)
![[Please click to enlarge]](dh_strike_651.jpg)
![[Please click to enlarge]](dh_strike_655_lil.jpg)
![[Please click to enlarge]](dh_strike_685.jpg)
![[Please click to enlarge]](dh_strike_691.jpg)