
By Sean Brannin - images & text © 2006
|
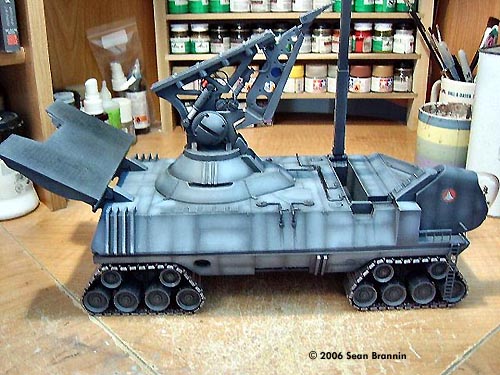
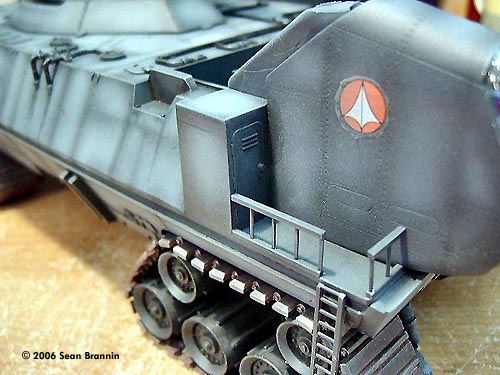
![[Please click to enlarge]](sb_crawler_001.jpg) Only seen for a total of about 5 seconds of screen time in the episode "Viva Miria" of the Macross television series, this vehicle has generated 3 model kits. |
|
Image: Right side Image: Rear Image: Blast deflector Image: Such detail! Image: Closer look, launch pylon Image: More fine detail Image: Great canvas for every weathering trick in the book Image: Cab detail Image: Closer look, crew entry Image: Ground-pounder's view Image: Size comparison (all three models are 1/72 scale) Image: From above |
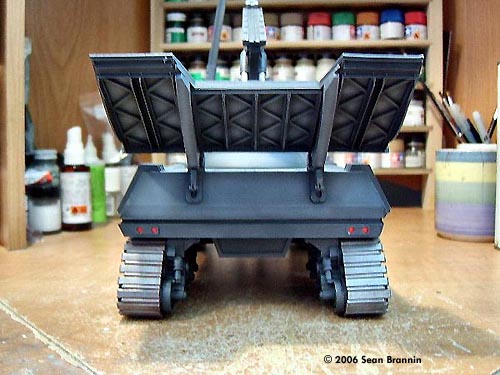
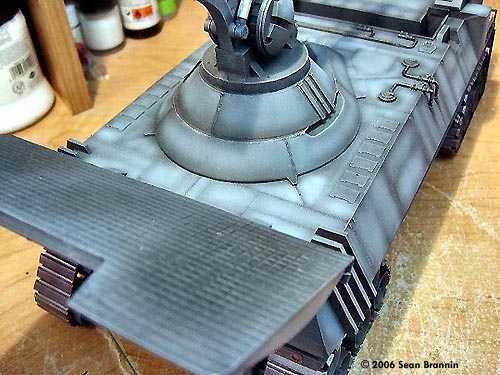
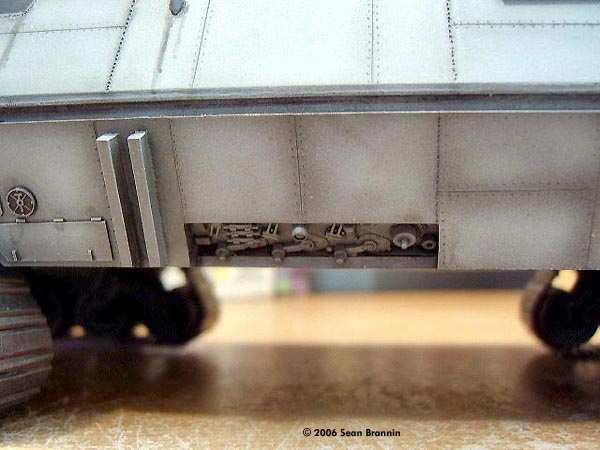
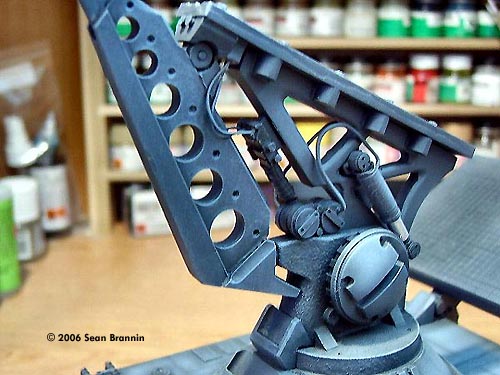
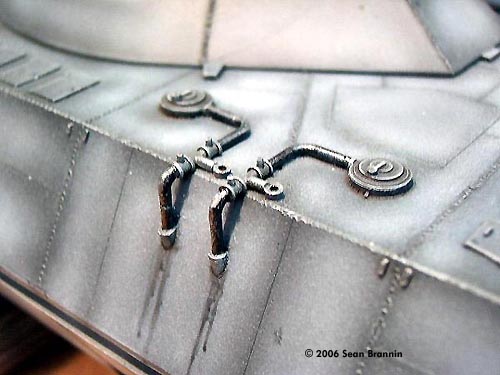
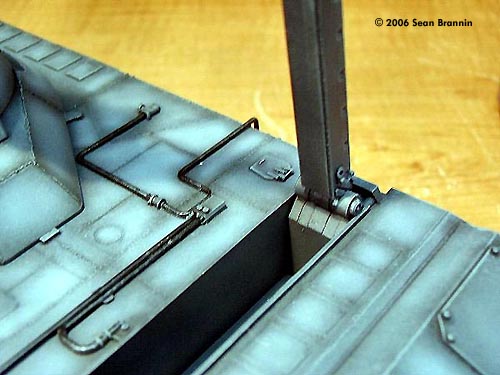
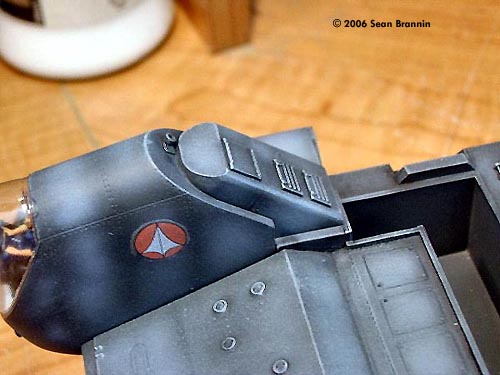
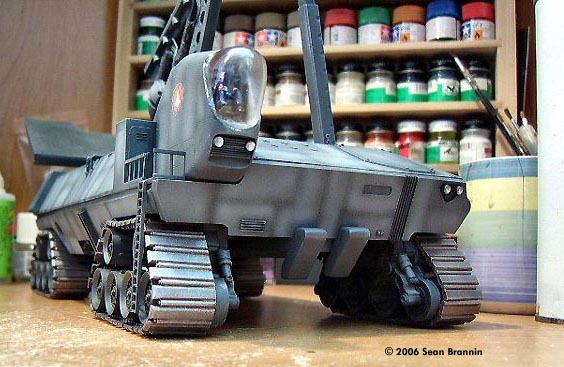
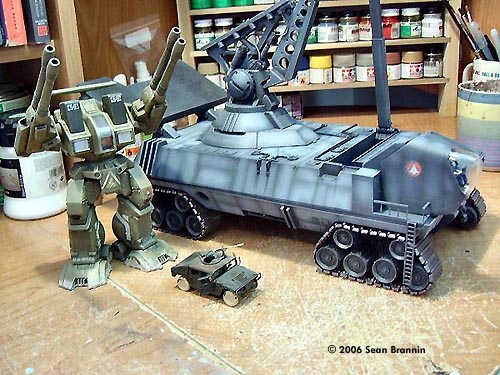
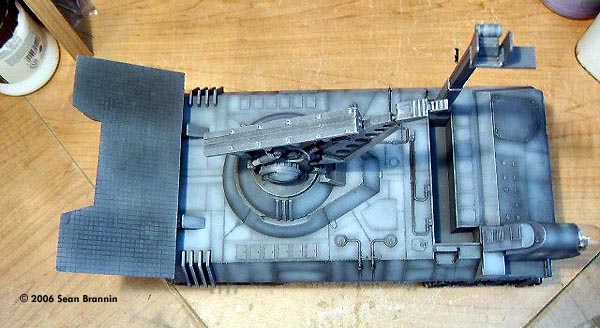
Back in 2004 John Moscato gave the model building community the Atmospheric Booster, quickly followed by the Launch Pylon for use as a display stand. It was planned at that point to create the Launch vehicle as well. Finally the model gods and the skills of Mr Moscato have joined forces once again to bring this rarely seen and highly sought after vehicle to life. Kit Breakdown My kit came in 64 pieces. The Launch Vehicle was made for sale individually so those who had the launch pylon already didnt have an extra pylon lying around. I didn't have a pylon so I bought one along with the vehicle. It is molded in a medium grey resin. The upper and lower hull halves are SOLID, and make up 80% of the kit's total weight. Detail on the parts is extremely delicate. The pylon as a kit itself is excellent and falls together with minimal cleanup. The parts are molded using a high strength resin to resist sagging over time from the weight of the Booster vehicle mounted on it. On the pylon are various hydraulic pistons and other details which scream for a good wash and drybrush session. The pylon base has wonderfully sharp details and excellent weld bead detail that really pops once painted and weathered. The upper hull is festooned with details, from heavy weld beads and extremely fine panel lines to various pipes and tubes which actually stand away from the hull. John made extremely good use of a 1/72 scale Warrior IFV to do some of the greeblies. Considering that the line art for the vehicle shows only a front 3/4 view and a rear view, the rest of it was fleshed out nicely and realisticly. Be extremely careful when you paint this kit since the scribed detail is light and can easily be clogged. The cockpit assembly has a little notch it fits into and is a wonderful little assembly. There is a seated crew figure, foot pedals, control chair , display and clear vacformed canopy that go onto its construction. The blast deflector is made of 3 pieces, The plate of the deflector is well detailed on both sides. One side has a reenforcing structure molded on it and the other side is scribed to represent heat resistant tiles. The Lower hull again makes use of the Warrior IFV parts for greeblies in recessed ares to great effect. There are various exhaust vents and little hatches running down both sides of the vehicle. The mount points for the track assemblies are very simple and lock in place with notches on the suspension. Track assemblies are broken down as a plate with the wheels and return rollers molded on which attaches to the back/mount for the hull, and a solid molded track piece which can be slipped on after painting. On the inside surface of the suspension there are 4 shock absorbers which are included seperately. Some of the track loops in my kit had cracked during shipping but were easily fixed with superglue. Once its assembled you begin to see how large this kit is. It dwawfs even a Destroid Defender in scale with it. Assembly is straightforward and cleanup is minimal. The larger assemblies all positively lock in place. All seams are along natural lines and no filler was required. Painting When I painted the Launch vehicle I base coated it in Testors Acryl Panzer Schwarzgrau. Once the base was dry the panel lines were postshaded with Tamiya nato black, the panels were then faded using PollyS Intermediate Blue. After thse colors had dried the details and panel lines were given a wash of Black and Burnt Umber artist oils and drybrushed with Intermediate Blue. The tracks were coated with Tamiya Nato brown for a base color then heavily drubrushed with Gunmetal and Steel to make them look like rusted metal which has been burnished on concrete. Conclusions This kit was very fun to build. It may seem a little pricey at first but once the parts are in your hands you begin to understand the time and effort that went into mastering it. This is a definite MUST for any macross or anime vehicle fan. If you have a booster kit, why not get a Pylon to display it on. If you have the booster and pylon why not get the Launch vehicle. It makes a very striking impression in the middle of any model collection. |
![]()
This page copyright © 2006 Starship Modeler™. First posted on 14 November 2006.
![[Please click to enlarge]](sb_crawler_002.jpg)
![[Please click to enlarge]](sb_crawler_007.jpg)
![[Please click to enlarge]](sb_crawler_008.jpg)
![[Please click to enlarge]](sb_crawler_011.jpg)
![[Please click to enlarge]](sb_crawler_015.jpg)