 |
|
|
|
By Seth Spaulding - Copyright © 1999
This is the first "mecha" kit I've ever built, and it was a blast! I was a bit disappointed at first seeing that the kit was "snap together", but my initial fears were allayed by the quality of the mold. Further, I realized that snap together sub-assemblies were far more forgiving of my modeling mistakes. I dove into the kit with a great deal of confidence, after all, the instructions seemed straightforward and there weren't forty-eight road wheels that needed immediate attention. However, the instructions include a few different options for construction?and if you can read Japanese, I'm sure it says "Optional" all over the place. If, though, you are building this kit, not looking ahead in the instructions, nursing a large Internet download, while watching a rerun of ER, you should expect to make a few mistakes... Like, "you need a BIG-@#$ pair of pliers now" kind of mistakes. Tip: Plan ahead for the variant/position of your mech. Read ahead in the instructions…to the best of your ability. Luckily, the kit is pliers-friendly, and after getting my attention, we had a fine time together. 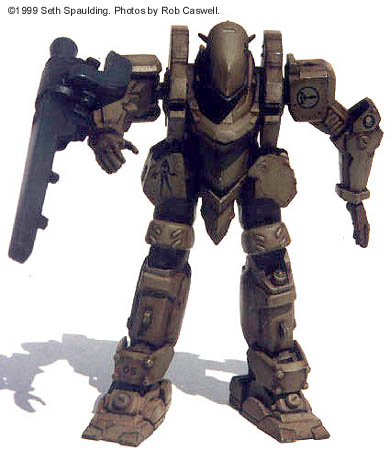
Assembly All the limbs are well articulated and I choose to leave mine fully pose-able. The subassemblies were glued as well as snapped in place and then the seams were sanded down. I only had to use putty as filler in one location (the aforementioned "pliers" incident) but after painting I found some smaller nooks that could have stood some as well. Proper attention to sealing the assemblies in the first place will probably eliminate the need to use fillers at all. The only really weak area, I felt, was in the interior detail level. I chose to model the mech sans figure and with a closed top for this reason. With the addition of some minor scratch greeblies from a more patient modeler, the cockpit could probably be livened up a bit. Decals The kit supplied markings are self-adhesive, and thick. I only used one (on the back) to see what it was like. I did not like it, so I used three custom ones (thanks to Jay Adan at Tangents and his decal-rific printer) and some Warhammer Imperial decals. The decals included in the kit made up my mind not to build a Raiden from the series, but a war-surplus vehicle of an indeterminate origin some 10 or 15 years old. Painting The kit was sprayed a drab green and weathered with oils and pastels. Danger: once this kit is assembled, certain parts are there to stay (me and the pliers notwithstanding), so, if you want to do some detailed weathering: Paint the subassemblies before they go on. There are some areas of the kit that no human-made paint application device will ever get into. Given that, painting was still the part of the kit I had the most fun with and only scratched the surface of what I'd like to do in this genre. |
^ Since the program, Gasaraki, was relatively new in Japan when I built this kit, little reference was available. That, coupled with the unappealing, self-adhesive kit decals, led me to do this kit up using my own marking and fictional background. 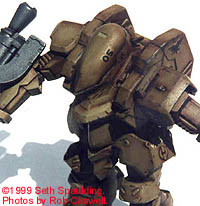
^ In this close-up of the main body, you can get a sense of what my weathering looks like. I used oils to create my washes. That process is very time-consuming if you try to apply it after putting together the subassemblies. 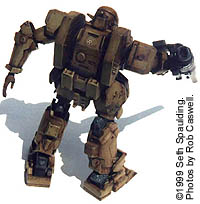
^ Here's the backside, showing the cockpit access hatch. This can be opened to view the (limited) interior. 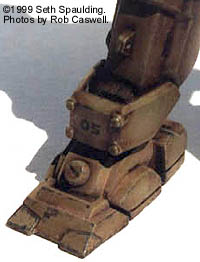
^ A close-up of the foot, showing the paint chip detail. My modeling staple is armor kits. I used many of my standard armor modeling techniques to paint and weather the Raiden. 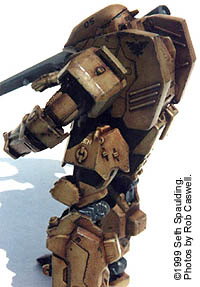
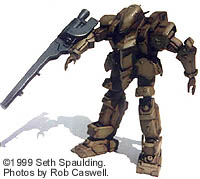
^ In this view, you can see a few of the custom markings I created, using an ALPS printer, as well as stock Warhammer markings. |
![]()
This page copyright © 1999 Starship Modeler™. Last updated on 8 July 1999.