
|
The projects in this section are presented as step-by-step journals. Our intent is to delve deeper into the nuts and bolts of constructing and finishing a particular project while giving a sense of how long it takes. The subjects will range from simple kits to complex dioramas and everything in between. Authors will range in skill level, and include hobbyists and professionals. If you have a project you would like to share here, please drop us a line to discuss it. |
| Maschinen Krieger Gustav |
|
Project type: Kit with extensive weathering
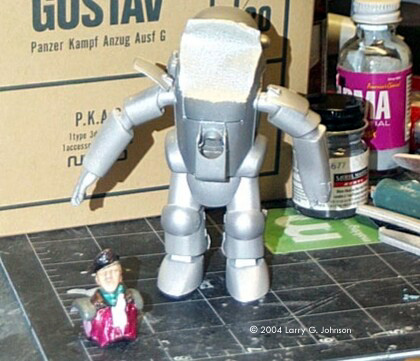
by Larry G.Johnson - images & text © 2004 This project comprises the basic OOB build of a well engineered sci fi kit enhanced with two detailed weathering techniques. The kit is the Nitto 1/20th scale Maschinen Krieger (formerly SF3D) Gustav. I have always loved combat suits, be they human-sized, tank-sized or giant fighting robot-sized. The Maschinen Krieger kits depict mostly the human-sized with a couple of tank-sized. These kits are simply outstanding. This will be the second I have built; I have collected about two thirds of all the ones Nitto ever produced. I am composing a diorama in the Maschinen Krieger universe tentatively titled "Ardennes 3058". The year is the sujective part but basically four combat suits will be depicted in a woodland scene with snow freshly fallen. One suit, a Prowler, will be moving ahead to scout while three other suits, a Gustav, AFS II and PKA confer in the rear. |
|
|
|
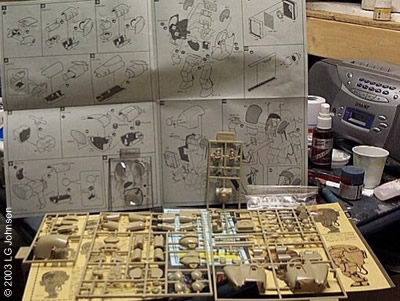
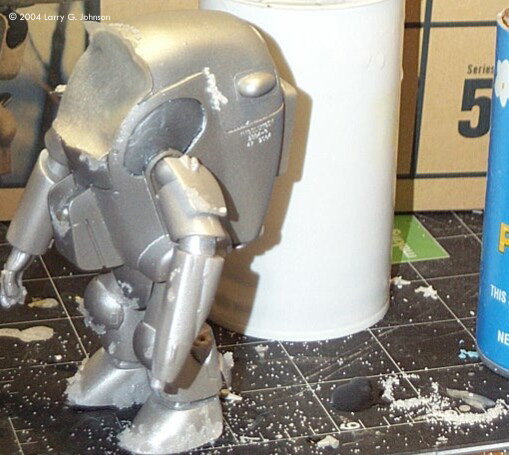
Image: The kit revealed |
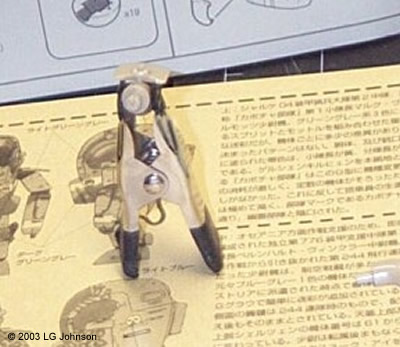
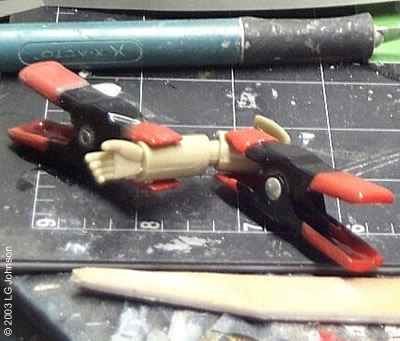
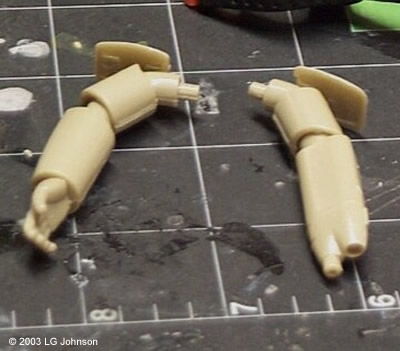
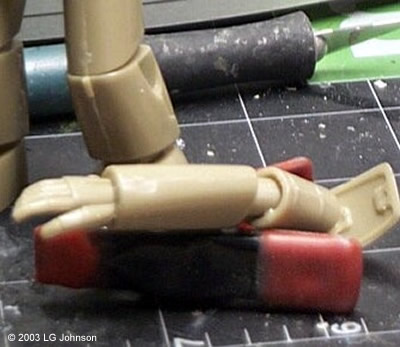
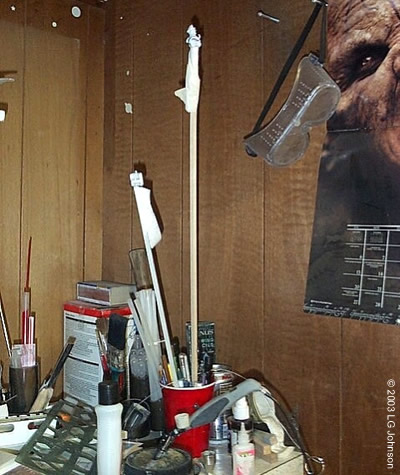
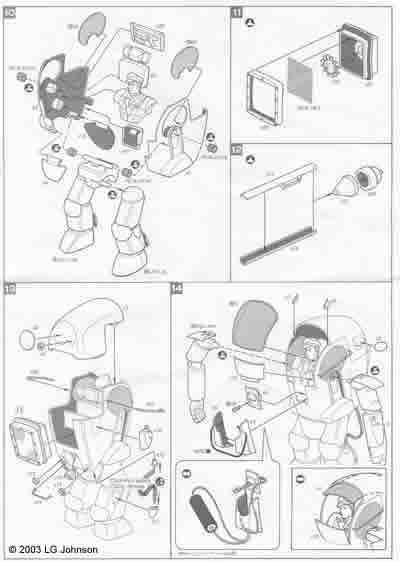
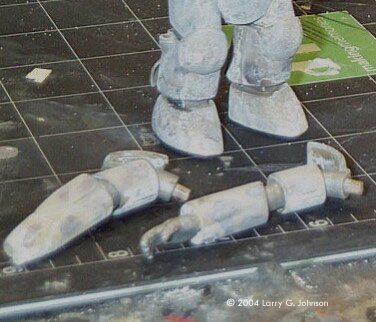
Day 1 The kit is composed of four threes of tan plastic parts, one of clear parts, a bag of multi-media bits (spings, wire, wire mesh and poly caps), decals, instructions and two cards with Japanese text describing various camo schemes and decal placement. I started this project by reading the directions to see what I was in for and then washing the parts trees in warm water with dishsoap to remove any residual release agents. My tools for the contruction side of the project include: an exacto knife, Testors sprue cutters (dull and rusty), clamps, a Flexi-File medium grit sanding stick, Tamiya super thin model cement and thin hobby shop brand CA glue. I popped KISS into the CD player to jam to and started cutting parts for step one. Starting with the arms, many of the assemblies of Maschinen Krieger kits are layered, i.e. inner joints are assembled and then used in the assembly of the forlimb and lower limb. I assembled the joints, in the case of the arms this comprised a shoulder and elbow each. These were clamped (see image) and left to set up. |
|
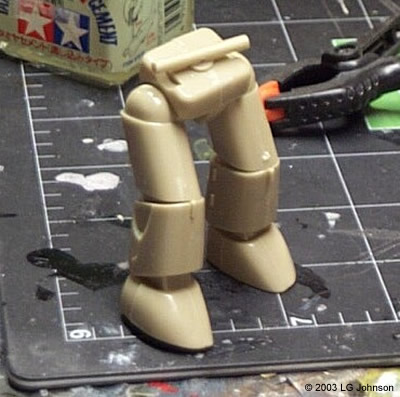
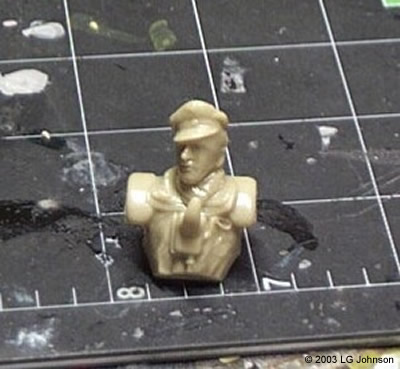
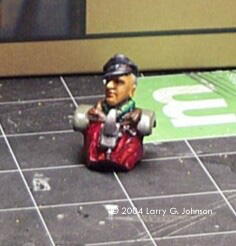
In the meantime I turned my attention to the leg joints and feet using the same procedure. When these were setting, I returned to the arms. The joints were cured enough to unclamp and then I proceded with the assembly of the upper and lower arms and in the case of the right arm, a hand. These too were clamped and then the same treatment was applied to the legs. A point to mention - the hips (a ball and socket affair), knees and ankles include a poly cap to give the model a wide range of movement (a feature prevelant in much of the kit's design) The only problem with this is the ankle joint is a one way joint. The Gustav can put his left toe in and his left toe out and his left toe... well you get it. On the AFS II the ankle are ball and socket joints and thus the foot can swivel to set flat regardless of the position the leg is in. While waiting for the various arms and leg assemblies to set, I busied myself assembling the three piece groin (two halves and a waist joint), and the three piece pilot. Somewhere in that time I had heard all of the the KISS CD that I wanted to hear (a couple songs twice) so I switched to Dvorack's 9th Symphony. The pilot figure has optional heads (both Germaneqsue in nature): a common grunt and a officer. I chose the officer and thus the Gutsav will be the command unit in my diorama. Not a hard choice, really as of the four kits I plan to include, it's the only one that even has an officer. Three hours of work and half of the instructions are complete. I have the legs, groin, arms and pilot figure complete. This will be a good time to stop for the day as there will be some seam smoothing required on the limbs. |
|
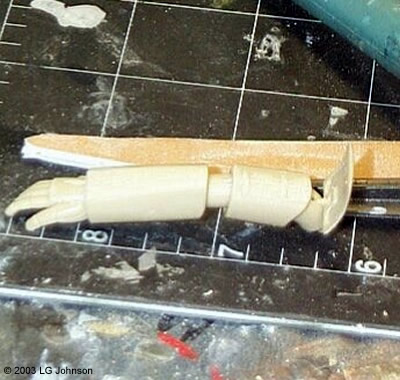
![[Click to enlarge]](lj_m/lj_mak18.jpg) ^Day 2 - Filled, sanded and primed. Image: Tools for dealing with seams |
Day 2 Onto the CD player went Disc one of the soundtrack to Star Wars, appropriate Sci-Fi building music, I think. This session was spent cleaning up the parts assembled during Day One. The kit goes together exceptionally well but I pride myself that I can mess up anything. I have modelers tell me they can glue a good kit together and never need attend a seam but I have never been able to replicate this alleged miracle. In the case of the Gustav, there were simply a few uneven edges between parts to be sanded down and polished and a few gaps to be filled with putty where the modeler, darn him anyway, was a little hasty in his build and didn't pay attention to clamping parts properly as they dried. My tools for dealing with seams are primarily the Flexi-File sanding sticks. Squadron also makes a set but I find the former more readily available in my local hobby shop. The parts on the Gustav are mostly rounded edges and sanding sticks are perfect for this. A little adzing will sometimes take care of the problem, adzing being the scraping of a seam with a hobby knife. Then a little sanding with a fine stick to make sure the part is still smooth. Otherwise, start with the coarse stick to sand the joint level and then move on to medium, fine, very fine and then the polishing stick. When done, the seam is invisible and the plastic is as shiny and gleaming as freshly out of the shrink wrap. |
|
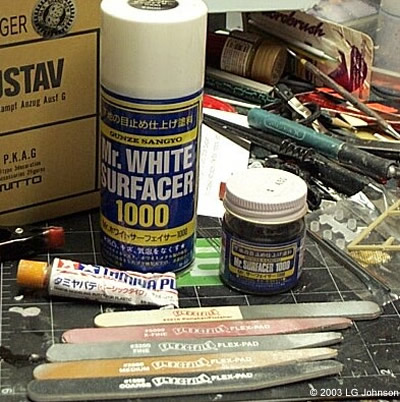
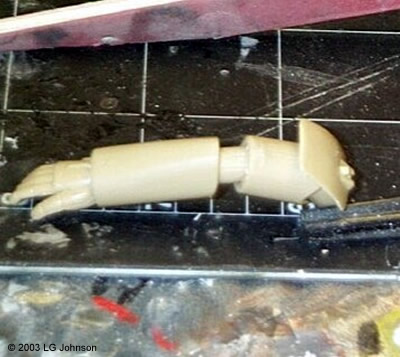
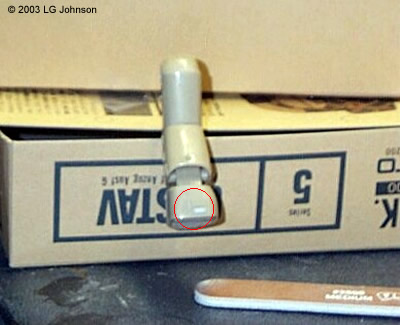
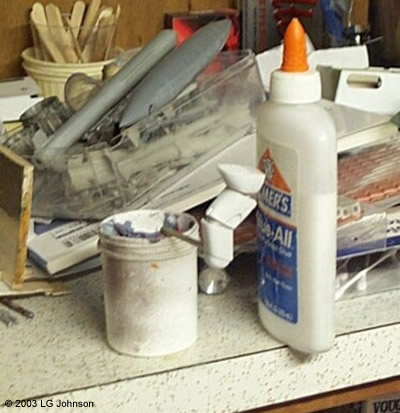
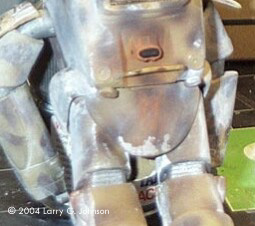
Molding seams might also be apparent on parts where the mold halves come together. This kit seems well engineered and I have found only a few mold seams which can easily be adzed off. The main two were on the pilot's head and body. A little scraping and attention of a fine sanding stick and these lines, not easily noticeable on the assembled kit anyway, disappeared. In the image of the mold seam, you can see the seam on the shoulder and back - left side. I've already cleaned up the right side of the figure. He also has the practically standard mold seam on the ears and sideburns associated with styrene figures. For gaps, two chemical compounds are perfect for the job: filler putty and Mister Surfacer. I prefer Tamiya putty, not the polyester kind but the regular, silver/grey stuff in the small tube. Apply it to the gap or sinkhole and wipe it smooth with a q-tip dipped in acetone. If this goes over well, no additional work is required, otherwise back to the sanding sticks. Mister Surfacer 1000 is good for fine lines, such a scriber gone astray. I didn't use any (yet) on the Gustav. I only had a few small gaps where one foot and the weapon's arm didn't seat well under the clamps (or I set the part down wrong or didn't leave it clamped long enough). A final coat of primer will highlight any additional faults that might need attending to. A couple of drying tips: I either mount the part with a piece of tape on a wooden dowel or scrap plastic and then stick it in a pencil holder to dry, or if it has a mounting hole in it, stick a piece of sprue in it, paint it, and then stick the sprue in clay or perhaps that fake flower planting/sticking green foamy stuff they have at craft shops. Day Two sees the full completion of the legs, groin, arms and figure. It took about 2 hours and both discs of the Star Wars soundtrack to complete. Day Three will finish up the second page of assembly and hopefully I can start painting the figure with oils. |
|
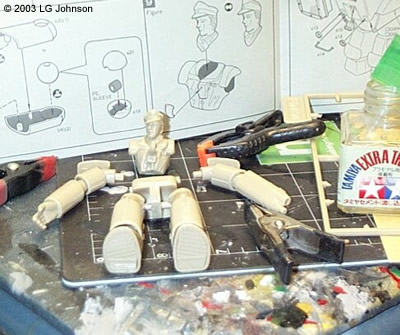
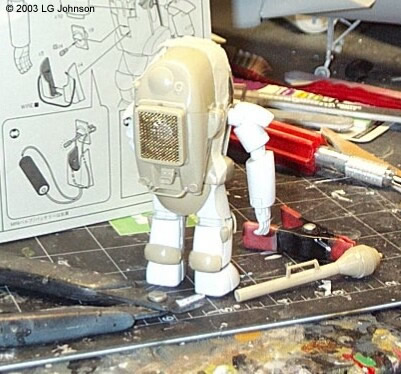
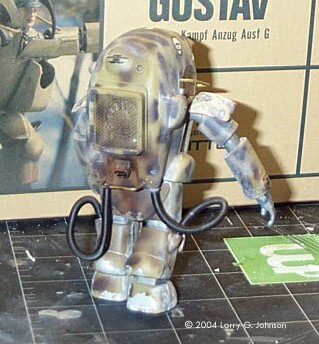
![[Click to enbiggen]](lj_m/lj_mak21.jpg) ^ The finished (nearly) Gustav suit Image: Task for Day 3 Image: Subassemblies Image: The suit from behind |
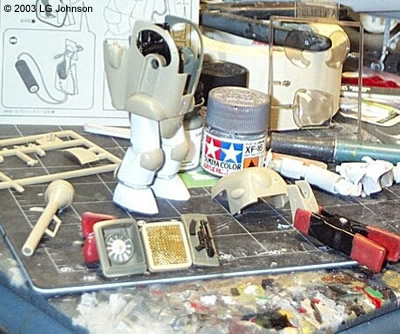
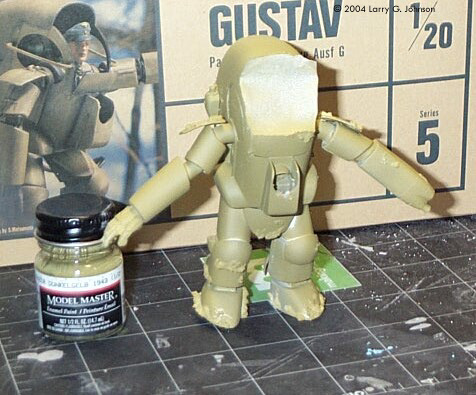
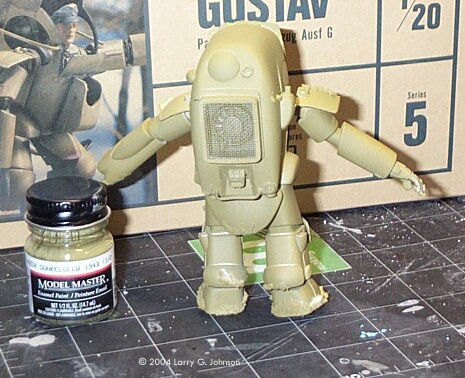
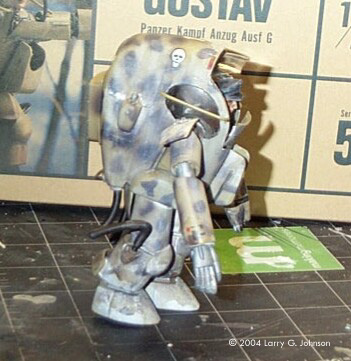
Day 3 With Sweet's Greatest Hits in the CD player, Day Three completed all assembly except for the grab bars across the side view ports which I chose to leave off till after painting. This will make it easier to mask the clear windows. Paying attention to the instructions, but not following the order, I built the Panzerfaust first - four parts, nice and quick. Then I tackled the backpack (a cooling unit I believe). I put the wire mesh screen in the front half and then pressed the parts together to fix the mesh in place. Then I snapped them apart to assemble the fan and paint the interior. I decided to honor the fact that this suit is of a Germanesque design and used a Model Master Acryl color, Dunkelgrun, RLM 71as the interior color for the inside of the suit, the handgun mount and the inside of the backpack. I know Luftwaffe aircraft interiors were RLM 66 but this was too dark. |
|
Besides, I wanted to keep with the German theme but face it, would the FS standard color system had survived a nuclear winter or whatever it was that drove the people of Earth either off it or underground? I gave the interior of the suit a quick spray as well as the inside of the backpack and handgun mount. After a quick spray of Tamiya flat aluminum to the fan, I CA'ed it in place and finished the backpack, leaving the halves snapped together though for painting later.
The handgun mount got more attention since it would inaccessible in the suit. I painted the gun and clip flat black and when dry, rubbed some pencil graphite on the raised portions. That looking nice, I was frustrated to find that the piece is completely invisible inside the completed suit. When the paint had dry, I put the main suit halves together, sandwiching the pilot's seat back (painted satin black), groin, groin plate and butt plate in between. Then a few greeblies - antenna mount, exhaust port, other odds and ends - were attached. I then attached the few greeblies - sensor covers it looks like - on the suit's top cover. Gluing together the two halves of the chest back completed the subassemblies. These subassemblies done, I then finished the suit by sliding the handgun mount in behind the seat back, pushing the arms and shoulder polycaps in their sockets, fitting the back and chest packs in place, gluing the headlight mount on the machine's chest (leaving off the clear bulb until after painting), white gluing the side windows carefully in place and gluing and taping the top of the unit in place. Last, but not least, for painting I white glued the access plate on the chest in place. I used white glue so I could rip it off later and pose it in the open position - in the final diorama the three suits in the rear will be conferring without the danger of EM interception, hence, their suits will be open. |
|
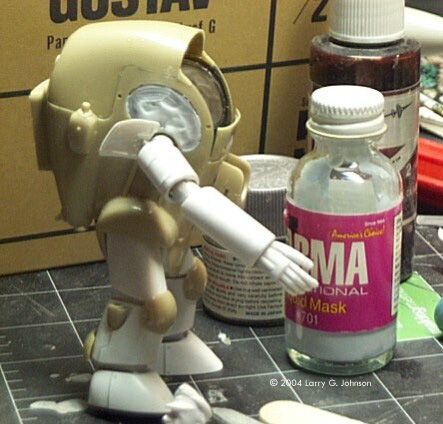
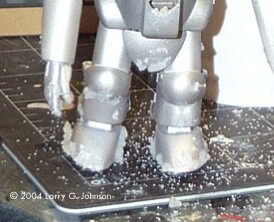
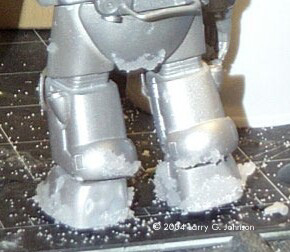
![[Click to enlarge]](lj_m/lj_mak406.jpg) ^ The tools for paint chipping with salt Image: Masking the glass Image: A simple oil paint startup set Image: A use for those AOL discs Image: Metal undercoating the Gustav Image: Finishing up the pilot Image: The feet heavily salted Image: The back of the feet Image: Salty old Gustav |
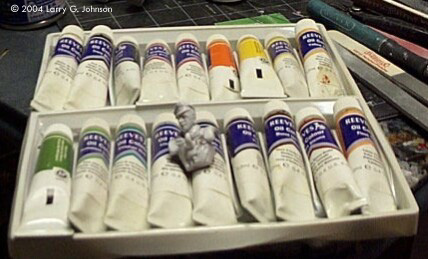
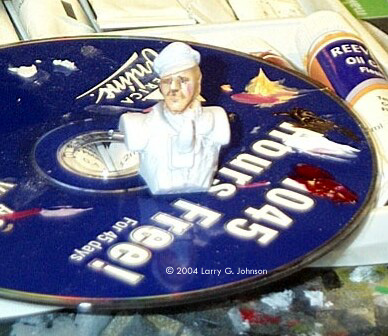
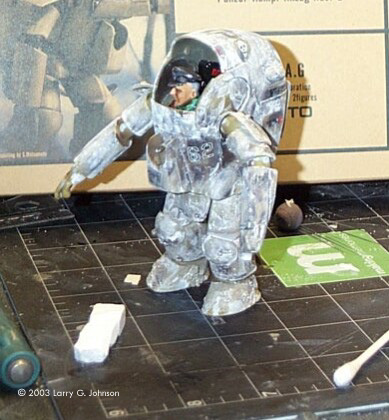
Day 4 Day Four involved preparing the model for painting, including a kool technique I found in FSM for simulating chipped paint. I need music so I popped Billy Squier's Don't Say No in the machine. I started by masking off the side windows with liquid masking compound. Now anyone who knows me, or followed threads discussing this stuff in which I have commented, knows I HATE LIQUID MASKING COMPOUND. But in this case is seemed okay. The windows are framed by the suit's body and that makes 'painting' them with the infernal devil spawned substance from hell much simpler. No trimming, no complex patterns, just gloop the stuff on the windows using the window's frame as a guide. Set aside and let dry. While that was drying well enough for me to hose on a coat of aluminum, I turned my attention to the pilot. Unless too small to really notice, I try to do organic forms in oils. You can really achieve outstandingly realistic finishes in oil when doing figures and clothing. At least I hope to one day. You can get a nice cheap starter set of oils at any art store. I got my set for $20 at a local art store and this should last me for nearly ever. It has just about every color you could ever need and when they do run dry, replacing one tube isn't too bad. You can also see I have put all those AOL CD-ROMs to good use. They make nice paint palettes. |
|
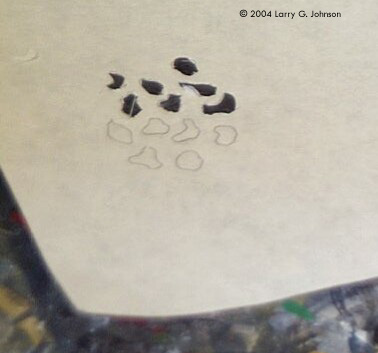
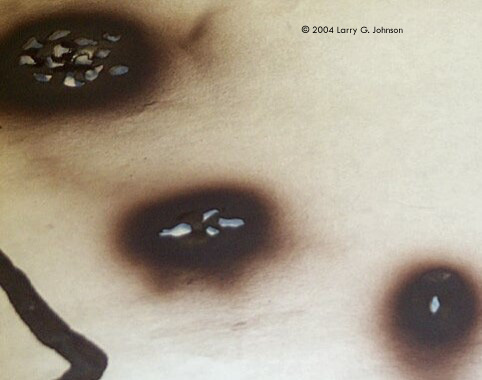
So, starting with the face, I squirted a little flesh, burnt sienna, brown, red, and white onto my palette. Not to cover the art of oil painting too deeply, the general idea is blending. The figure itself becomes a canvass on which you mix and blend your paint. I painted the entire face in a thin coat of flesh. To correct an error you might make that I did at first - you don't want too much paint. You might think you need a lot if you are going to be blending and mixing but just a thin coat to cover the area you are working on is enough. Now with the whole face and neck flesh colored, a took a liner brush and gave a stripe of brown in the eye sockets, under the neck along the sides of the nose, along the cheeks and the upper lip cleft . Now I simply dab the brown lightly and it suddenly changes from a different color on the face to shaded areas. Dipping a small brush in burnt sienna, I lightly dabbed the areas of the face that are not recessed but not raised. This darkens the face to that of a rugged, battle weary combatant. Leaving the cheeks and chin the lighter flesh color you get more depth in the appearance. The eyes are simple black lines. If they appear too big, you can blend the shadowed flesh up covering the black slit and making the eyes a narrow sun-squint. A little pink to the upper lip and a thin streak of white on the nose as a highlight and the face is done. The clothing is done in much the same way. With this figure I opted for a very flamboyant commander. A regular bluish-grey cap is the only regular thing about his clothing. He wears a striking red leather jacket with fur collar and a gaudy green scarf given to him by a loved one, maybe his wife. The shoulder pads are Dunkelgrun like the interior of the suit since I am guessing they are the openings to the suits arm access and not shoulder pads. The communicator on his chest I did with acrylic aluminum with a black wash. In my planned diorama, these machines would be battle weary warriors and thus I figure their suits would be well worn. To me this screamed out PAINT CHIPPING. Using an article in the July 2003 FSM as a starting point, I use this method to simulate paint chipping. I start by painting the model a metallic color. I used to use Testors Metalizer non-buffing aluminum but this makes for too smooth a surface to work this technique on. So now I used Model Master Acryl aluminum. I like MM's Acryl line as in a previous model I tried to strip some off to reveal gray primer underneath and no tape I had would strip this paint off either the gray undercoat or even clean bare plastic. And this was after only an hour of drying. Tough paint. So I hosed the Gustav with MM A aluminum with my Aztek and then set it aside to dry a bit while I continued working on the figure. When the aluminum had dried an hour or so, I got out the chemicals necessary to simulate chipped paint in an excellent manner - H2O and NaCl; water and salt. Ignore that my salt is popcorn salt. It's just the container I use to hold regular table salt but I will mention popcorn salt in a bit. Now the original plan is to wet the model in the area you want the paint chipping and then brush on some salt. This turns into a nightmare quickly. I just load a brush up with water, dip it in the salt and lay the mixture on the model where I want paint chipping. If it's too wet, add more salt. If it's too dry, dip the brush barely in the water and touch it to the salt. In the proper consistency, you will be able to move the salt around, shaping it to the paint chipping pattern you desire. Using a hobby knife, you can carefully remove excess salt. When dry, especially under a base coat of paint, the salt is pretty durable. Now I mentioned popcorn salt. Discussing this method with modeling buddies, we came up with two hints. Popcorn salt could be used on smaller scale models or to simulate finer paint chipping. Likewise for large scale models or larger areas, kosher salt (pretzel salt) could be used. Where to lay salt? The best reference is your references. Look at combat machines or even construction equipment (there's a section here at SM) and study the patterns of chipping. For a few general guidelines, protrusions that might scrap against other things, seams of maintenance hatches or crew access panels, motivators (feet or tracks) that are in contact with the ground, lights arms fire, etc. With this in mind I figured my Gustav would be less chipped up than the other units in the diorama seeing as it is the command vehicle and might receive special care. So I concentrated the salt heavily around the feet to account for movement on the rough terrain, and some simple chips around a few hatches, pilot access and maintenance. I also can't help but put some chipping on the various shields about the suit. I dunno if it's realistic but they BEG for it. I set the Gustav aside for the salt to dry completely before starting Day Five, which could be subtitled: Painting. |
|
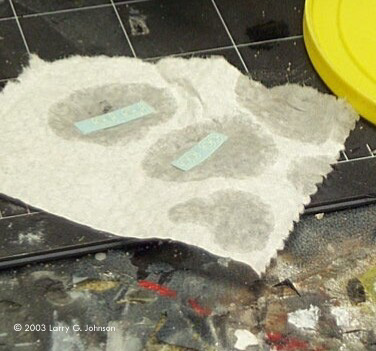
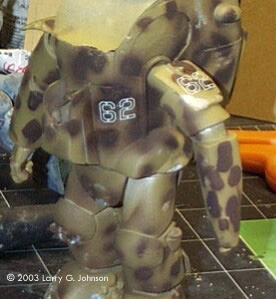
![[Click to enlarge]](lj_m/lj_mak505.jpg) ^ Spotted Gustav Image: Cardboard options Image: Gus showing off his coat of Dunkelgelb Image: And the backside Image: Paper masks for spots Image: Three different masks |
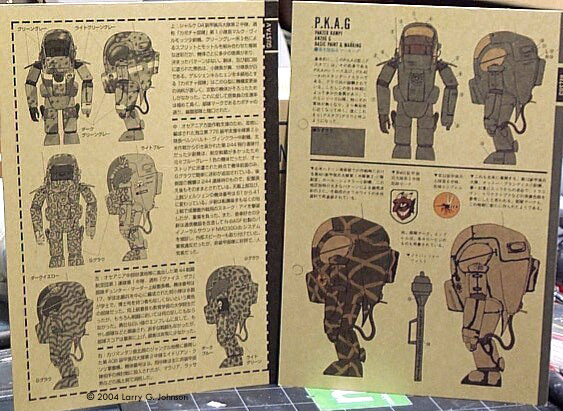
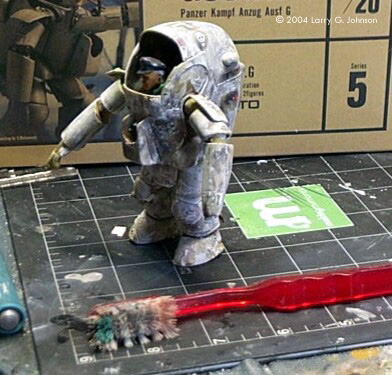
Day 5 Day Five involved painting the Gustav. Into the CD player goes Ravel's Bolero for Bolero is for love and I love painting. Really I do. If only I keep repeating that… The kit comes with two cardboard sheets suggesting various camouflage patterns for the model as well as specific decals for the given scheme. Nothing is stopping the builder from mixing and matching. The camo schemes all reflect WWII German schemes. I chose a basic tan scheme with random dark brown splotches. A quick test to make sure my Aztek still sprays and I load up with Model Master Enamel Dunkelgelb, a dark yellow in my collection for the few pieces of German armor I plan to build one day. I sprayed the whole model, tape mask still in place from the silver undercoat, using my hobby knife to move the various pieces to make sure I was spraying everywhere. I might have missed a spot here or there but since I plan to whitewash the whole model, this shouldn't be a big problem. Next, I cut a mask out of paper for the spots. I mixed some dark brown from Tamiya flat brown and flat black. I don't have any pertinent German color in my collection yet and I didn't want to run to the hobby shop. Holding the mask over the model (I removed the arms to have more level surfaces) I sprayed the dark brown over the mask and onto the model. I found I needed a couple more masks which I cut. The first was for a thin strip of spots rather than a big area and the other was an individual spot for those small neglected areas. I wasn't worried about using the same mask over the whole model as spray angles and distance from the model made a nice variety of different looking splotches. Likewise, the final whitewash will hide a lot of mistakes. Tomorrow I will apply decals, let them set a bit and then whitewash the model. |
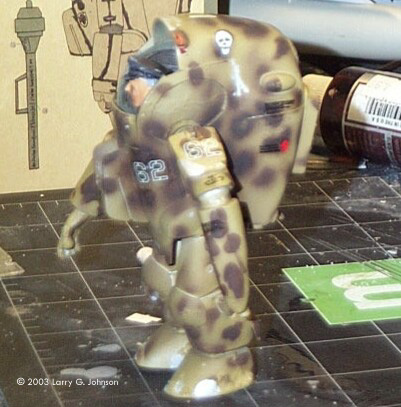
![[Scruffy!]](lj_m/lj_mak607.jpg) ^ Whitewashed Gustav Image: Decaling materials Image: Decals a wetting Image: Decals a softening Image: Furure based decals in place Image: Decaled Gustav Image: Whitewashing materials Image: Decals, unwhitewashed |
Day 6 Day Six - Decaling and Whitewashing. Enya's Watermark sounded good for the day. Calming after painting, as I got out my materials for decaling. As a kid building models I never had a problem decaling. Then when I got back into the hobby after a 5 or 6 year hiatus, it was the nightmare of modeling. Fortunately it was just a bad experience. Must have been some bad decals in that kit. Still it's not as easy as when I was a kid which leads me to believe if I saw my earlier works as a child I would see the light - reflecting from behind the silvered and peeling decals. I'm in a hurry so I am using the hurry up decal method. In my hurry up method of decaling, actually quite a fine method overall, you don't waste time hosing the model down with Future or whatever gloss chemical's your poison. You need regular water for soaking the decal and a small amount of Future in a cup. Soak the decal normally. It flipped upside down? Don't worry. Phone rang and you left it in the water for three days? Don't worry. Soaking for ten seconds backside only is to loosen the paper and leave the glue. We want the glue gone so it doesn't matter how long the decal is in the water. Slide the decal from the paper (I slide it on my finger - probably bad but it works) backside up. Then wipe the backside repeatedly with a wet cotton swab. This removes all traces of the decal glue. Now with the decal ready to be placed, on the end of a brush or hobby knife, brush Future either on the back of the decal or onto the model completely covering the area where the decal will go. Place the decal and then roll a swab over it carefully to press it firmly to the model. Give it a few minutes to get tacky then with a wet swab, go back and carefully wipe up the excess future that was squeezed from behind the decal. |
|
Whallah! I mean Voila! No silvering, as you have a gloss coat behind the decal and when you spray your final dull finish chemical of choice, you have an undetectable cheat in applying decals. I set the model aside for a few hours for the decals to dry while I amused myself with other projects. Then onto the whitewash.
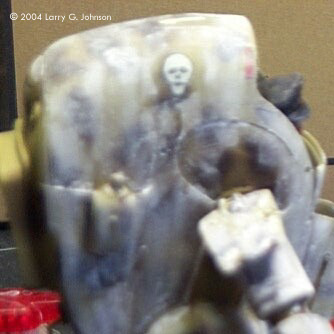
Since I am planning a winter diorama for my four suits, the suits need a whitewashing. At least three of them do. I plan to leave the forth un-whitewashed to simulate the confusion of war. It either slipped getting its whitewash or circumstances have prevented it. So anyways, for this whitewash technique you need pastels and water. Using a hobby knife, shave a pile of white pastel dust. With this in a cup add a drop of water. We don't want too much water, just enough to make the dust brushable. Any dust left in the cup? Add another drop of water. Wash running badly on model? Add more dust. With this compound, we now paint the model again. I left the backside un-whitewashed. In the field this was often neglected as camouflage during retreat was rarely considered and time and materials were often short. It also leaves some of the original paint unmolested as it were. In the pictures you can see some of the silver undercoat that had been salted. Yes, some of the salt rubbed free. I wasn't concerned about preventing this. By letting some of the salt come off you get a better effect with the whitewash. This way there is some old chipping that was covered up with the whitewash, and some new chipping (when I rub the rest of the salt off) after it had been whitewashed. Once the model is painted white and given a few minutes to set, go back and using a wet swab, not dripping but wet, clean the whitewash off of areas you want exposed. In the Gustav's case, I wiped clean most of the decals. I left some covered so as to indicate haste and confusion of war, once again. Now to let the whitewash dry. Day 7 will include reducing the whitewash a bit, some final painting, washing the model, finishing the model and (after a cheating 24 hour wait period) final coating. |
|
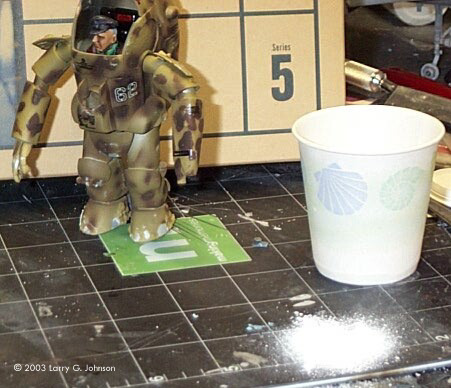
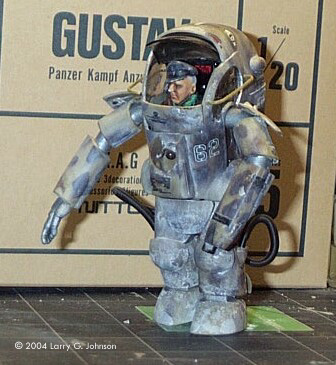
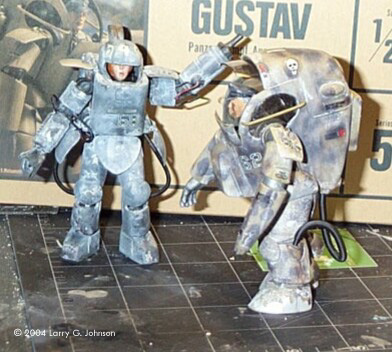
![[Click to enlarge]](lj_m/lj_mak707.jpg) ^Finished - Front view Image: A toothbrush for cleaning up Image: Before cleaning the whitewash Image: After cleaning the whitewash Image: Painted skeleton Image: Pastel rust on the exhaust Image: Ingredients for a wash Image: Finished - Right side Image: Finished - Left side Image: Finished - Back Image: Finished - With suit 58. |
Day 7 To the big band sound of Glenn Miller and his orchestra, I finish the Maschinen Kriegar Gustav today. The first step involves using a toothbrush to tone down the whitewash. Right now you can see the grit of the pastel and the stark lines of the brushing. By going over the model with a toothbrush in an up and down motion, we make the whitewash effect more subtle. It strikes me that this whitewash method might be a perfect method for fading paint on other models such as airplanes. I'll have to give that try soon. Second, I wanted to do a little detail painting, mainly the skeleton (joints seen between armored body parts). Being the mechanics that work the suit I thought these should have a metallic color, but not shiny, so I went with Tamiya Metallic Gray. I brush painted these carefully. I also did the spring part of the antennae holder the same color. Now for a wash. I chose oils for this, a thinned down dark gray. With a liner brush, I very carefully ran the wash into recessed panel lines and larger recessed areas, such as under the arms. Since I chose not to gloss the model for decals, I didn't want to be bothered now so a little care is required applying the wash. Continuing with the construction, I decided that since no more color was going on the model, I would install the hoses that run from the legs to the back pack. Most Maschinen Kriegar kits have this feature (as well as other wires and such running here and there - but not on the Gustav). They consist of wires guides inside of springs to represent the hoses. The one other MaK kit I build had regular electrical wire inside of the springs. |
| The Gustav has brass wire. This was very difficult to bend into shape and I wound up ripping off and re-attaching two of the mounts trying so I tossed them and got some regular electrical wire. I supposed I could have annealed the brass wire for better flexibility but it was easier to grab the electrical wire. Cut to length and inside the springs, I CA glued these into the mounts.
I gave these details a few hours to dry while working on that other project (Trumpeter's P-40B just so I'm not accused of being mysterious). I then hit the model with a nice light even coat of Polly S flat finish. Then I removed the masks from the side windows. Nice and easy. Yeah right. I HATE liquid masking compound. With that finally off and the one window re-attached, I then CA'd the side grab bars protecting the side windows in place as well as white glued the bulb into the belly mounted headlight. Finally, I white glued the main windshield in place, recessed into the hood. Again, I want these suits open for conference. I final little touch of Dunkelgelb onto the grab bars and I declare this model finished. I hope I haven't left anything out. It's one thing to build the model but quite another to come down after the day's work and remember what you did in what order and include everything. For example, it's nagging me did I mention when and how I installed the pilot figure. Oh well, hopefully my omissions are obvious and self explanatory. I hope I have successfully demonstrated a few modeling techniques I have picked up. Feel free to email and I will answer any questions I can. |
|
![[More Stuff from SSM]](http://www.starshipmodeler.com/resource/cafepress4.jpg ) |
| Visit our sponsors! | Advertise with us |
![]()
This page copyright © 2004 Starship Modeler™. Last updated on 26 February 2004.
![[Click to enlarge]](lj_m/lj_mak01.jpg)