
By Eli Steenput - images & text © 2000
|
![[Click to enlarge]](es_nau_gun05.JPG) I don't consider myself much of a modeler, but I really like Miyazaki Hayao's Kaze no Tani no Nausicaä manga, so I simply couldn't resist the Tsukuda Nausicaä kits. I got this kit from HobbyLink Japan. |
|
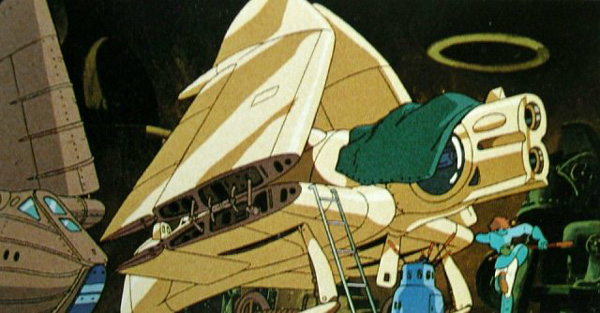
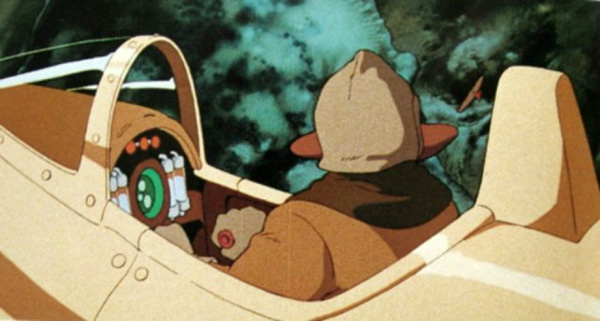
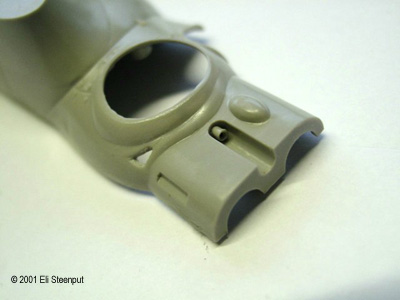
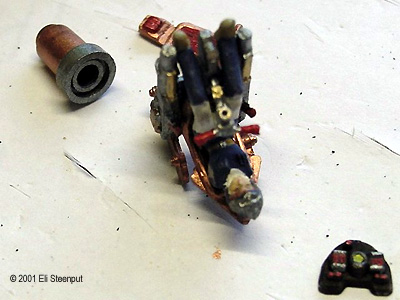
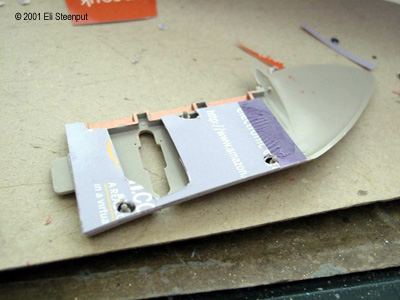
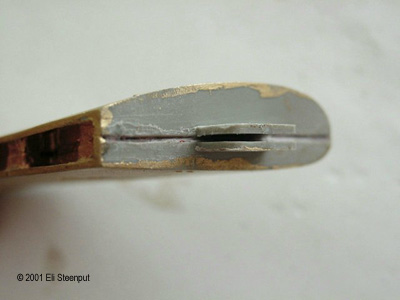
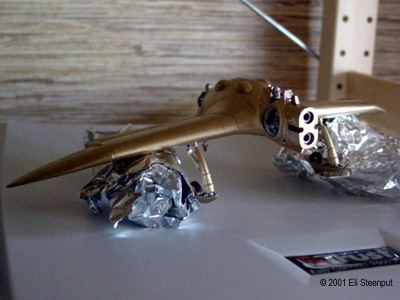
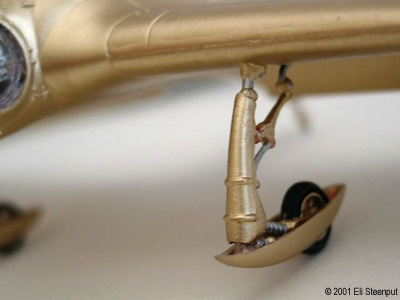
Image: Reference material Image: Front cockpit .... Image: Rear cockpit. Image: Machinegun barrel added and window cut out Image: Nausicaa painted. Note the pointless detail added to control stick Image: Enlarging port wing Image: Note added thickness Image: Landing gear drying Image: Close-up of the finished landing gear |
The Kit The kit has parts for the gun ship, which can be shown with landing gear down or in flight (a stand is included but fortunately you have to cut the hole yourself). As the landing gear is so interesting, it would be a shame not to build it. There is some cockpit detail and there are parts for a Nausicaä pilot and Mito copilot. Most detail is crisp, engraved panel lines, nice rivets, but there are plenty of ejector pin marks. The clear parts were rather scratched up from rolling around in the bag. The model seems to be mostly based on the first half of the manga rather than the anime. The most noticeable difference is in the rear cockpit; in the movie and later manga, there is a hump on the hull behind the rear cockpit, in the first part of the manga and on the model, there is just the seat's headrest sticking out. The most obvious inaccuracies are the totally bizarre panel detail on the wings, and the general shape of the rear of the plane. Most of my references indicate a much larger windscreen for the rear cockpit. This cockpit should also be more angular, and more forward (it should be immediately after the engine bulges - the entire rear end is probably too long). There is a color guide (in Japanese only) but I'm not sure what they based the colors on. The box shows a painted model in some brownish color with darker smudges. The only color reference for the ship that I'm aware of is the movie (there are a few watercolors, but nothing conclusive), and in the movie the gun ship is always shown in a shiny metallic gold-like color, with no weathering at all. While the gun ship is a very old plane in the story, the people of the Valley live next to a forest of poisonous molds and fungi, and meticulous hygiene is a matter of survival for them, so it would seem reasonable that they keep their planes very clean. Construction The instructions recommend that you first assemble the pilot, pilot's chair, control stick, and the two machine guns. I think this is not such a good idea; it is almost impossible to correctly fit the pins on the machine guns in their proper holes when assembling the hull, especially if you included the pilot. The assembly of the plane's body is tricky since at the same time you will want to install the front cockpit, the rear seat and instrument panel, and the barrels for the main cannons. If I were to do it again I would try fixing the right machine gun to the right hull half, and the rest of the front cockpit to the left half - I think that way things would come together more easily. Maybe it's also easier without pilot figure. I didn't install the front instrument panel as it would be invisible and I already had enough difficulty with the front cockpit. Note that there is very little clearance for the control stick, so be sure not to make it longer than the instructions indicate. The two clear canopies don't fit very well. The rest of the plane's body is relatively straightforward. The only other difficulty is with the two fins under the main cannon; the slots for these are ridiculously oversized and will need filling. I added some detail for the machine guns; first I simply made holes as shown in the movie, but that didn't look so good so I added barrels from stretched sprue. I also cut out the little windows/exhausts/ammo loading ports/whatever below the 'eyes'. I left them open as I have no evidence that they aren't. |
|
There are two "bullet" parts for the main cannon, which I didn't install.
I accidentally broke the pin of the front windscreen while removing flash, so I ended up placing it more forward than is accurate. Test fitting the wings had revealed a problem for the port wing; the wing base on the body is about .5mm thicker than the wing. Rather than removing material from the body, I decided to thicken the wing by adding a few layers of paper between the two wing halves. This worked rather well. I installed the ailerons/thrust vectoring flaps while attaching the wings to the body. Note that the orientation is important as the flaps are not symmetrical. The landing gear was straightforward except that the front strut doesn't really fit into the landing gear opening. The port wheel had a tendency to take a slightly different forward angle, probably a side effect of enlarging the wing. Colors I didn't translate the color guide, and I didn't like the box colors either. I chose gold as the main body color, and copper for the interior, engine and wheel bays, and other details, with some silver for landing gear parts, gun barrels, and the machine guns and control stick. The seats, control handles and weapon controls were painted red, tires and instrument panel black. Colors of the instruments were based on movie stills in "the art of Nausicaa." All colors used were enamel paints from Revell. Conclusion If you manage to fit it together, this kit will give you a model that looks definitely "different". REFERENCES:
|
|
![]()
This page copyright © 2001 Starship Modeler™. Last updated on 30 August 2001.
![[Click to enlarge]](es_nau_gun45.JPG)
![[Click to enlarge]](es_nau_gun47.JPG)
![[Click to enlarge]](es_nau_gun61.JPG)
![[Click to enlarge]](es_nau_gun70.JPG)
![[Click to enlarge]](es_nau_gun80.JPG)
![[Click to enlarge]](es_nau_gun83.JPG)