
|
By Marco Scheloske - images & text © 2008 I must not fear. Those lines, taken from the novel DUNE by Frank Herbert, are a perfect match to the old sandworm styrene model kit from Revell from 1984. Easy looking when you open the box you'll soon discover that it looks very, very strange when build as it is supposed to be. You read a review once about that kit, telling that it is crap? That review is right… So what is to do? Put it back in the box, and deep into the storage locker? No! Face your fear! Turn it into something special! That's what I did, and here is the story about how it was done. |
 |
|
Image: Boxtop Image: Straight from the box, courtesy of Bruce Bishop Image: Head, mouth & tail Image: Body segments Image: Little people Image: Base Image: Covering up the excess worms Image: Gaping maw, stock Image: Cavernous throat Image: Closing the hole Image: Maw, finished Image: Filling the gaps in the body Image: Closer look Image: Body/head segment Image: Head and tail in place Image: Base coats Image: Mu'ad Dib at the helm Image: Top view Image: From the back Image: Top/rear |
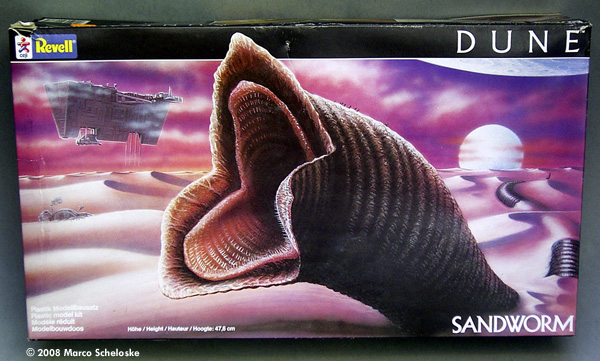
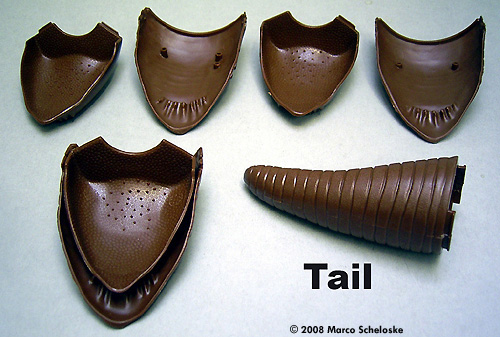
For those who don't know the kit, the box contains
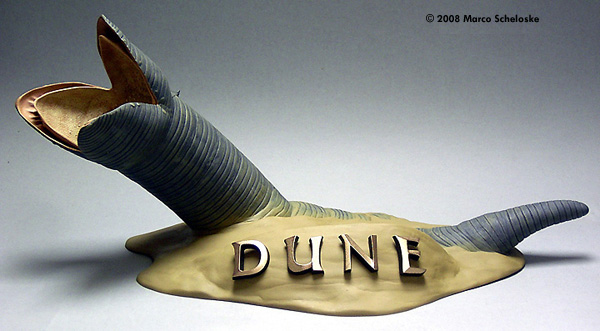
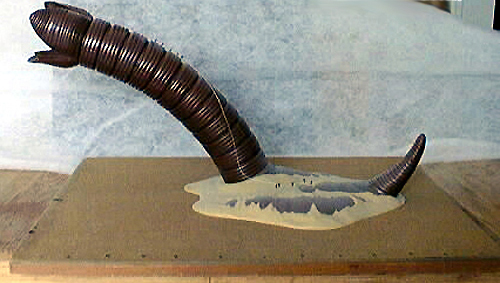
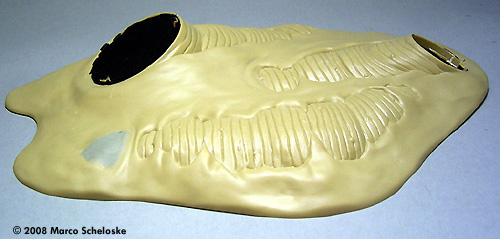
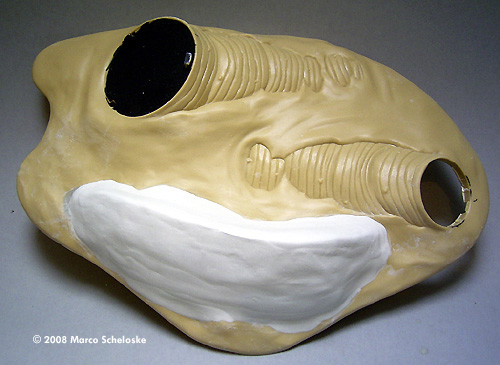
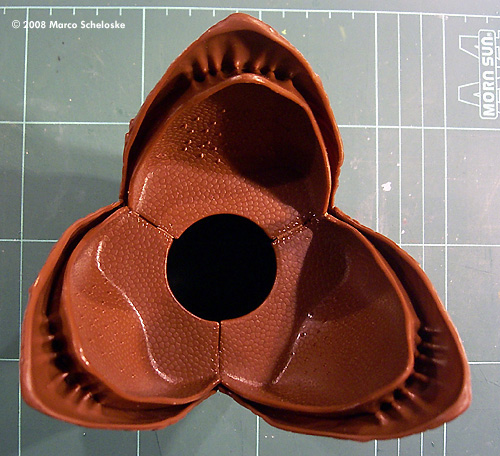
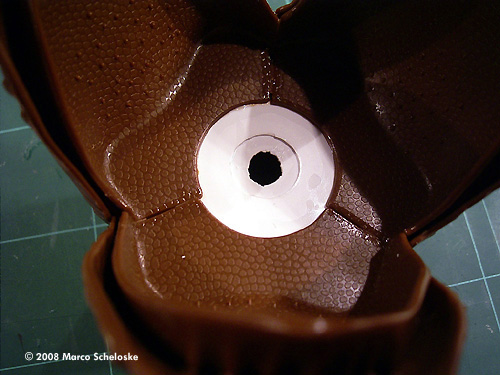
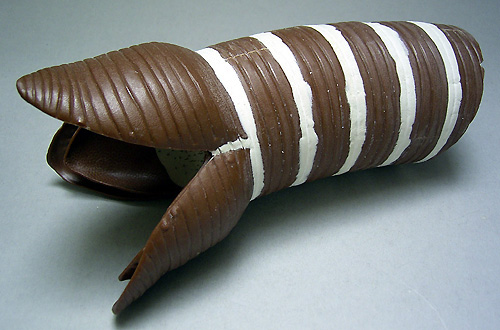
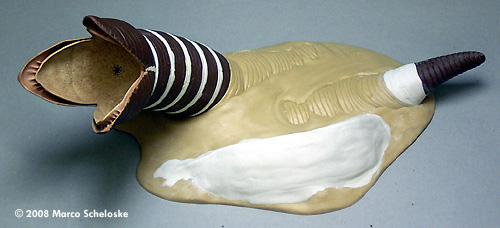
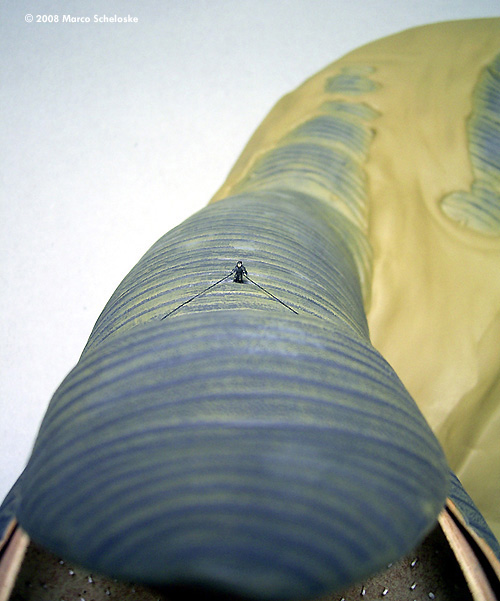
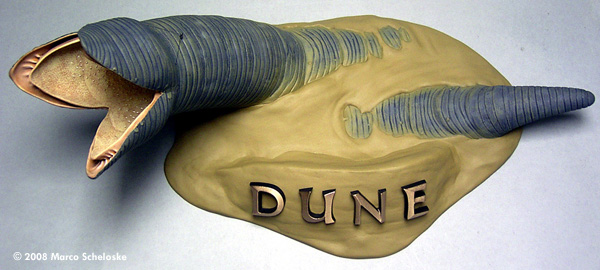
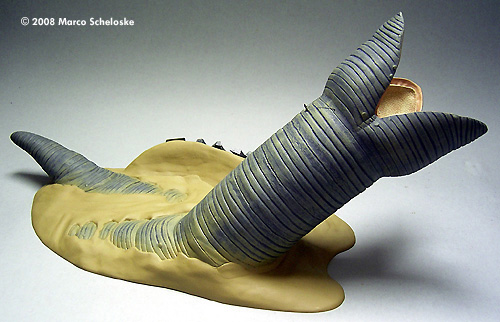
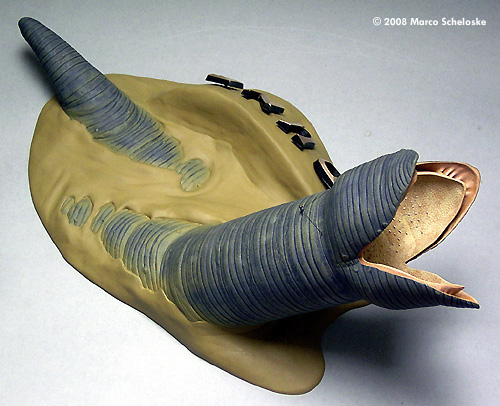
The first decision I made was that 3 worms, as intended by the base, are too many. So I made a dune-core from Styrodur for the worm at the front of the display base, and covered it with Aves Apoxy in a second step. The Aves will become a very important part of the final model, by the way. Ok, the plan for the base was clear now. Let's take a look at the mouth now! It was glued together quickly, and the result was… well, see for yourself. So, what did I have there? Three huge gaps, and a large hole in the middle. When you looked through that hole you're able to see the inner structure of the main body segments. Interesting, but not really what I was looking for… so I called Mr. Aves to the rescue! I reworked the inner mouth completely, first closing the large hole with some sheet styrene, and then using Aves for a new shape, and short steel rods for new teeth. That was the result. Now color came into the game, 2 different flesh tones, “Desert yellow” and White, all dry brushed and all from Games Workshop. The final mouth looks a lot more like the David Lynch movie version now. When the mouth was done I continued with the main body. It was clear for me that I would use only a few of the segments, and that I have to alter the angle of the worm coming out of the desert sand. When you watch the movie you can see that the worms NEVER raised so steep and high out of the ground as it does built out of box! So I attached only 4 complete segments to the head, and fixed their position with spacers made from styrene rods. The fifth segment, finally, was cut to the desired angle. Once again Aves had to be used to get rid of all those nasty gaps and seams, and then new details were scribed into the half-hardened putty. The complete body was glued to the base, as well as the tail of the second worm. I altered the angle it sticks out of the ground here, too, because the out-of-box appearance looks more like a rattlesnake-tail than anything else. The usual gaps were once again treated with Aves Apoxy. Now, as everything came together, I worked a bit more on the dune in the front to smooth things up a bit. Painting & Finishing Time to move on to the fun part - painting and finishing the beast! First came the paint job. The base was painted “Desert yellow”, while the worm (and the second one who is just digging himself into the sand) got a basecoat of Revell #78 “Panzergrau”. At this time I drilled some holes for a purpose I'll explain later. Then I dry brushed the sandworm with Revell #77, making obvious streaks and some larger dots - in close-up sequences in the movie you can see that the skin of the worms have those details. I did the same with Revell #79 - all three colors are close together tones of grey. Both worms were heavily dry brushed with the same "Desert yellow" I used for the base, more on the segments that are still into the ground, less on those that are raised up more. Ok, now I had a nice painted display, but two things were still to do: Something to show the size of that thing, and something to add that special touch. The size comparison was easy; I made a worm rider from on of the included Fremen figures. And what is that “special touch” now? Well, I always try to make some sort of interesting display out of my models, and my idea for the sandworm was to use bronze letters in front of the molded dune: “Shai Hulud”. Well, when I got the price for those letters I decided to simply use “DUNE” instead… |
|
Conclusions Finally I have to say that it was a lot of work, but I guess the result was worth it. I cannot recommend this kit to a beginner, but if you like the subject and don't fear a lot of molding work it is a good starting point. |
![]()
This page copyright © 2008 Starship Modeler™. First posted on 21 August 2008.
![[Please click to enlarge]](ms_sworm_pic_06.jpg)
![[Please click to enbiggen]](ms_sworm_pic_11.jpg)
![[Grrrr!]](ms_sworm_mouth_top.jpg)