
|
BY John Lester |
|
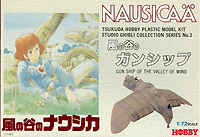
 When I stumbled across Gavin Jacobi's review of this kit (now, sadly 404) I had no idea what a great story Nausicaa is ... I was simply captivated by the Gunship's design. Looking like a Saturday-night special with wings it's unlike any other sci-fi craft I'd seen to that point. For those who don't know (and that's probably a large portion of the folks reading this) Nausicaa of the Valley of the Wind is Hayao Miyazaki's epic tale of a messiah-like princess and leader in a far-future, post-ecological holocaust world. (Hayao Miyazaki is considered the George Lucas of Japan). The complete story runs 7 volumes of "manga" though the movie only covers the first two volumes. It's a solid moral tale that's not preachy, and something that kids and grown-ups can both watch ... which sounds really lame, until the lush animation catches your eye and the story draws you in. Tsukuda has recently re-released their line of Nausicaa kits and I was able to get one from HobbyLink Japan for $3.50. Yep - under five bucks with shipping (with a number of other kits in the order for economy's sake). It's also available from Rainbow10, for those who get impatient with HLJ's long processing times. I didn't expect much when I opened the box - but was I pleasantly surprised! Even though these molds have been in use for over a decade, the parts are clean and crisp with very little flash and no alignment problems. You get 42 parts on three sprues (one clear, two grey) including a generic stand and two figures (Nausicaa and Mito, her pilot and main palace henchman). With the exception of the figures - they're too small and poorly detailed - the kit is well detailed. Unlike American kits from the same period, panel lines are engraved (yes!) and parts fit is pretty good. Accuracy appears spot on - the finished kit looks like what you see on the screen. The box says 1:72 scale, though how they arrived at that is a mystery to me. Building went quickly with few problems. I had to trim the gunners (forward) seat and frame to get it to fit. Other than that, I needed only the smallest amount of putty and sanding to make the seams disappear. The only difficulty I had came when I accidentally broke the tailwheel off ... and could never get it repaired satisfactorily. |

|
|
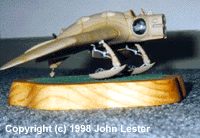
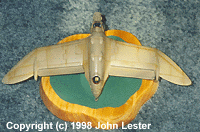
Ah, well. I started with the cockpits, painting all the details before fitting them in place. I was stumped on interior colors until Ledon Cook was kind enough to forward me some scans from a book he has. The instrument panels were painted Flat Aircraft Interior Black with red and green details (as usual, all paints I used are Testors Model Master brand). The seat, frame and stick were painted black as well. Seat cushions were painted tan. The gunner's stick should have more knobs and levers, but they would be too small I decided they were more trouble than they were worth to scratchbuild. The interior of the cockpits is shown variously as a black, dark brown or reddish brown - I painted mine a dark, chocolate brown (RLM 61). Before gluing the fuselage halves together, I dipped the clear parts in Future acrylic floor polish to make them shine, and to smooth out some of the distortion in the big "Omu eyes" in the forward cockpit. These I installed with thinned white glue after the Future had dried. Gun barrels were painted steel and glued in place. The rest of the craft practically fell together. The wings went on with no need for putty. I probably should have inserted the flaps in their slots before gluing the wing halves together, but they were easy enough to (carefully!) bend and slide in position. Wheel wells were painted the same color as the cockpit. I should have probably painted the engine bays this color as well, but the drooping flaps hide this area so I didn't bother. Landing gear was painted with chrome silver (springs), aluminum (oleos), copper (knobs) and main body color (more on this in a minute). I stuffed toilet tissue in all openings and prepped the model for the base coat. In the story, the Gunships are made from a special ceramic material. To replicate this, I mixed equal parts of Flat Dark Tan and Pactra's Copper, thinned it, and airbrushed the whole model. After this had dried thoroughly, I applied a wash of Field Drab to all the panel lines. I followed this up with airbrushed streaks of Field Drab across the fuselage and wings in the direction of airflow). When all this had dried, I affixed the landing gear with superglue and glued the model to a specially-made wooden base. (Shaped with my bandsaw from 1/2" pine, stained, painted and sealed). The result is a real head turner - not so much because of any skill on my part, but because of the unique design. This was a fun kit to build and well worth the pittance I paid for it. The Mave should be just as good .... |

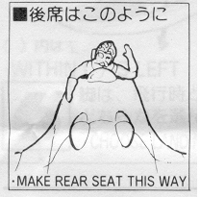
 Forget Mito-san!  |
![]()
This page copyright © 1997-2001 Starship Modeler™. Last updated on 30 August 2001