
By Don 'Stubbs' Bowers - images & text © 2005
|
![[Click to enlarge]](db_ss1_11.jpg) |
|
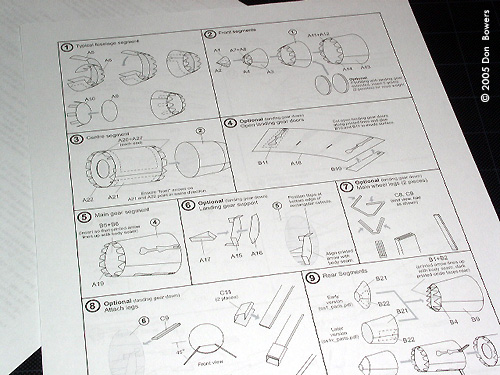
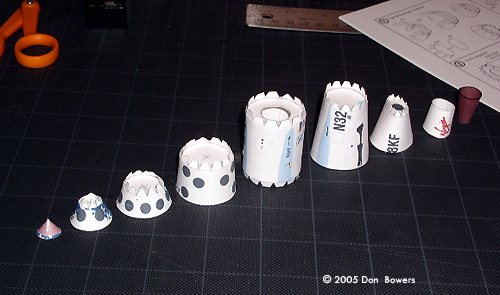
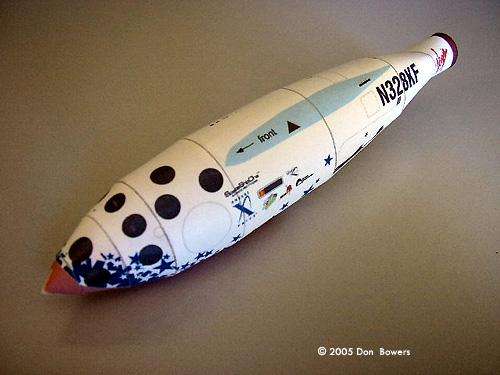
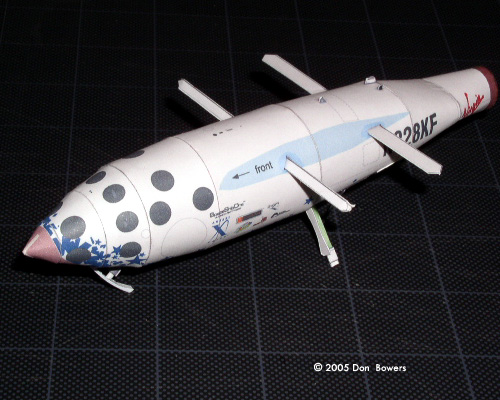
Image: Instructions are clear and comprehensive Image: Subassemblies Image: Fuselage? Hull? Whatever, it's built Image: Adding wing spars and landing gear doors Image: Closer look Image: Wings attached Image: Rear view |
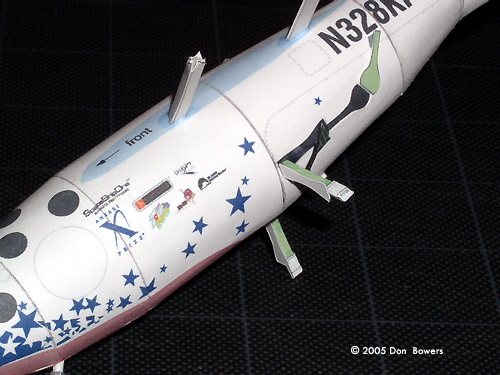
On October 4th of 2004, a small spacecraft ignited its rocket engine and launched itself into history as the first privately funded venture to put a man in space, thus winning the ten million dollar “X-Prize”. Ralph Currell however, was a bit ahead of the game. He had a 1/48 scale paper model of SpaceShipOne available months in advance of this moment, and it’s a wonderful little kit. With the appropriate card stock, a good printer, and some patience, you’ll have great results. The prints are gorgeous, the instructions surpass most of those provided by injection-molded kits, and the thought and design behind the model makes this one a joy to assemble. What You Get First, just taking a look at the three pages of parts is enough to make one appreciate this kit. The detail is crisp and clear, down to the individual rivets and screws that hold the body segments together. There are smaller instructions printed directly on the parts sheets indicating where to make smaller cuts that are important to later steps, as well as a number of markings that help in properly lining up the sub-assemblies. The instructions comprise five pages of crystal clear detail. The first two pages give a history of SpaceshipOne, as well as details and tips on what tools are needed, along with step-by-step construction information. The last three pages contain clear images detailing the twenty-two assembly steps. And unlike many of the injection molded kit instructions we tend to ignore, these are laid out in a logical order that I found no need to stray from. With all of this card-modeling goodness, there had to be a few drawbacks. I’ve got to admit that I’m nit picking with these, but here they are: 1. Step 9, part numbers B21 and B22 – This one takes some careful assembly and bending in order to get it to fit the fuselage perfectly. It’s not impossible, but does test the patience. 2. Step 19, part numbers A23, A24, A25, & A26 – These can be difficult only because of the small size of the parts. The largest one measures just under 5mm, and the smallest ones are about 1mm square. The small size makes them awkward to place perfectly but they do add a lot of character to the model. |
|
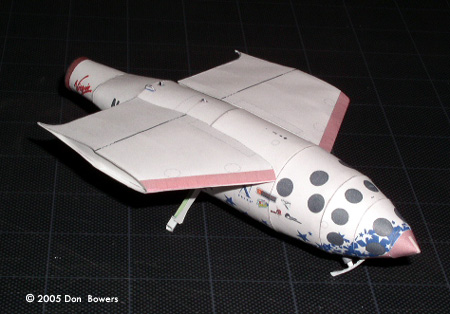
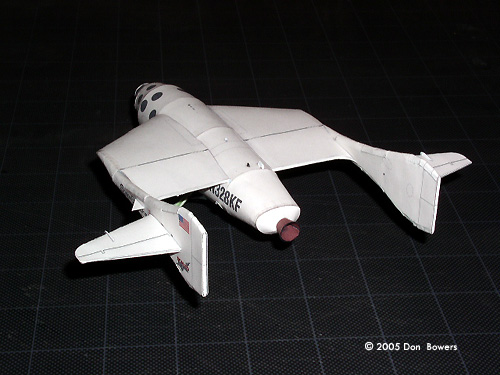
Other than those two little quibbles, the rest of this model was a joy to assemble. The design of the parts for the fuselage make for a very rigid body capable of withstanding some rough handling (zooming around the room; don’t lie, I know you do it too!). The main wings are built with three internal paper “ribs” to help keep the airfoil shape and make them rigid, and these attach to the fuselage by sliding onto two spars that run through the fuselage body. Surprisingly, they line up perfectly with very little effort and matched the contours of the fuselage without any trimming. Even the twin tail booms, which are by far the most complicated parts to assemble (each one is made of seven parts), went together in less than two hours each. Another version of the model is available, which sports M&M, 7-Up, and Virgin Galactic logos and coloring. This one also has the elongated engine shroud that housed the enlarged thrust nozzle. Conclusions On the whole, I would highly recommend these models to anyone with interest in the subject matter. I’m not a very experienced paper modeler and I found these to be challenging but enjoyable models to put together. Matter of fact, I almost felt guilty using my X-Acto blade to trim the parts free from the paper. Seriously, you just want to sit there and stare at the parts sheets because they were done so well! |
![]()
This page copyright © 2005 Starship Modeler™. First posted on 27 April 2005.
![[Click to enlarge]](db_ss1_01.jpg)
![[I crush you!!]](db_ss1_03.jpg)
![[Click to enlarge]](db_ss1_08.jpg)