
|
By Steven S. Pietrobon - images & text © 2004
|
![[Click to enlarge]](sp_ccmercury.jpg) Holy Moly! Not only is this the second real spacecraft kit of the year (after the Trumpeter 1/72 Shenzhou), but we get a real beauty: a huge 1/12 scale Mercury spacecraft and launch escape tower. |
|
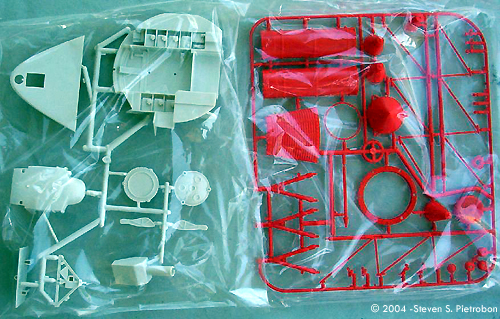
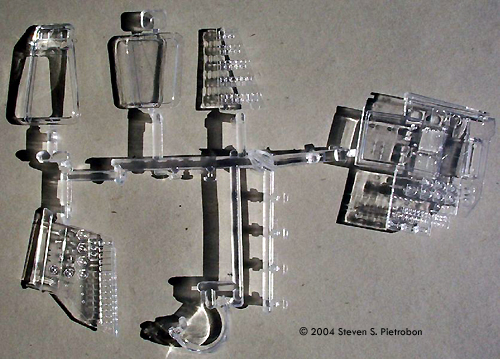
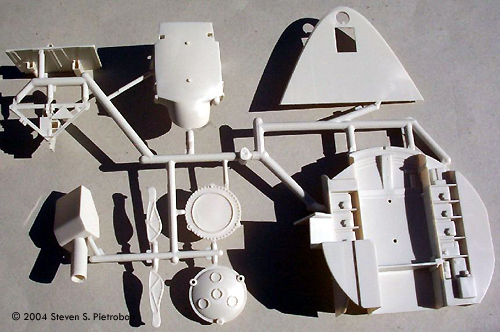
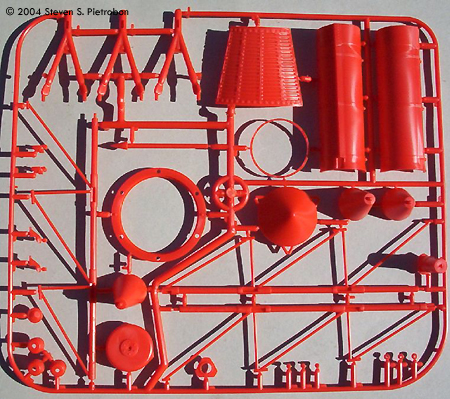
Image: More bags Image: The rest of the bags Image: Heat shield Image: Metal parts Image: Detail parts Image: Clear bits Image: Astronaut Image: More parts for the body Image: Interior parts Image: Red bits Image: Decals |
This is the first plastic construction kit from Atomic City, whose previous efforts were mainly large scale resin kits and models from 2001: A Space Odyssey. What You Get The kit comes in an equally large box, measuring 41x32x14 cm. Upon lifting off the lid, one is presented with a box packed full of parts. Each of the sprues, metal parts and instructions are in separate plastic bags. A cardboad spacer fills the bottom half of the box, with the single molded capsule in a lower corner. There are six separate sprues; two in off-white, clear, off-white polythene, off-black, and red. All the parts are crisply molded with fine detail. There are some punch marks in the seat, but these will be covered by the astronuat. Otherwise, you'll have some slightly difficult filling and sanding to do. There are also five separately molded off-black pieces; retropack, heatshield, capsule, antenna fairing and recovery compartment. These are a marvel of modern kit engineering. The capsule itself is molded in one piece! This is achieved with six mold sections surrounding a central core. The level of detail is exquisite, with every bolt, corrugation and washer accurately represented. The seam lines are hardly detectable and can be easily removed with a light sanding. The retropack, antenna fairing and recovery compartment are made with five section molds (four around and one on top). It may have been more economical to mold each of these as five separate pieces on a sprue (with six pieces for the capsule), but Atomic City have gone the extra step to make assembling easier. There is also a small bag with some metal parts and clear acetate. Three of the metal parts are the straps used to hold down the retro-pack. These parts have rivet detail and a central flange attached! A short metal rod is included (I got two of these). This is used for the deployable destabilizer. A clear acetate part is used for the outer window pane. The only fault I found was the window, where there was a visible seam-line where the plastic had joined together after coming from opposite sides when molded. The astronaut visor is very well done. The instrument panels are also molded in clear, useful for those modellers wanting to light up the interior. The Mercury astronaut is molded in a single piece in polythene (a flexible plastic normally used in 1/72 and 1/32 figures)! Normal 1/12 scale figures usually come in polystyrene kit form, like the Revell 1/12 Gemini Astronaut. The seam lines at the sides are visible, but not overly so. Careful removal with a heated element can be used (sanding is not advisable for polythene). The hoses are also in polythene. There are a few tricks in painting and gluing polythene. The Hat web site provides some useful information. |
|
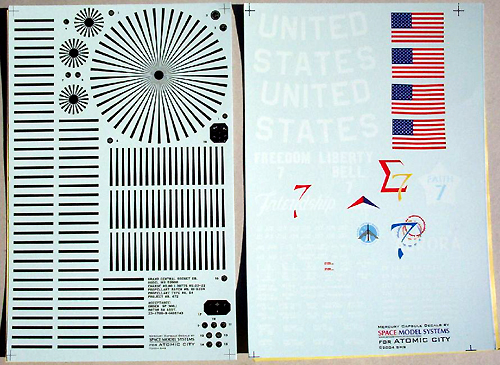
The decals are by Space Model Systems and are on two sheets, one sheet with black markings and the other sheet in coloured markings. Alignment is near perfect, although the red stripes in the US flag extend out about 0.5 mm on the right hand side. These can be easily cut off though. Symbols for all six Mercury missions are given. The instructions come on a single eight page sheet and an additional sheet describing decal placement for the retropack and some painting instructions. You can view the instructions on the Atomic City discussion board. The instructions are only in English, but this should not be a problem for anyone overseas who is interested in building a Mercury spacecraft. There are a total of 14 steps. One page is devoted to descibing how to convert to the porthole version used on the first Mercury flight, Freedom 7. It would have been helpful if instructions for adding rivet details for the new hatch were provided, instead of letting the modeller "using your preferred method." I certainly have no idea on how to do this (and I don't consider myself to be a novice modeller). Decal placement instructions are only given for Sigma 7 as the "only capsule we had satisfactory reference was Sigma 7." As its first plastic kit, we can forgive Atomic City for not providing instructions for all the capsules. However, if Atomic City is to go mainstream, it should provide full placement details. Instructions for Friendship 7, the first crewed US orbital flight could have been easily obtained as it is on view in the National Air and Space Museum. This is the spacecraft most modellers will build. I could also not find any placement details for the instrument dials (they are numbered from 1 to 17, but that is no help without instructions). These have a clear background and so the background will need painting white, as pointed out in the instructions. One discrepancy I found in the decal placement instructions were for the two "Caution Temp. P/U 1 16" decals. The instructions show squares around 1 and 16 while only one of these decals have the squares. Most of the other small decals have spares, which is handy. There are also two sets of US Flags, two rectangle and two curved. However, no instructions are given on which of these should be used. The painting instructions are very basic, with only one reference to a paint colour for the black (Model Masters #2949). For example, the interior is described as being "light gray" and the heatshield "brown primer". No detail is given for the instrument panel as these "changed from mission to mission" (a panel is shown in the Atomic City discussion board for MA-10 (Freedom 7 II). There are also no painting instructions for the astronaut. This is really inadequate for a mainstream kit. Colours should be highlighted during the construction steps, with reference given to some standard paint range, e.g., Humbrol. Cocnclusions Overall, this is really an outstanding kit, its the best real space plastic construction kit I have ever seen! The only let down is the decal and painting instructions where there is much missing information. The modeller will need to do a bit of research to get all these missing details. If you want to impress your girlfriend (or boyfriend) then this is the kit to get! If this kit is successful, Atomic City's next kit could be a 1/12 Gemini! Many thanks to Steven's wallet for providing the review samples. Manufacturers and retailers, interested in getting your wares reviewed and publicized on a site averaging 3500+ readers a day? Contact us! |
![]()
This page copyright © 2004 Starship Modeler™. First posted on 20 December 2004.
![[Click to enlarge]](sp_ccmercury_bags3.jpg)
![[Click to enlarge]](sp_ccmercury_capsule.jpg)