
By Tony Greenfield - images & text © 2007
|
![[Please click to enlarge]](tg_iss_BasicISSwithShuttle.jpg) |
|
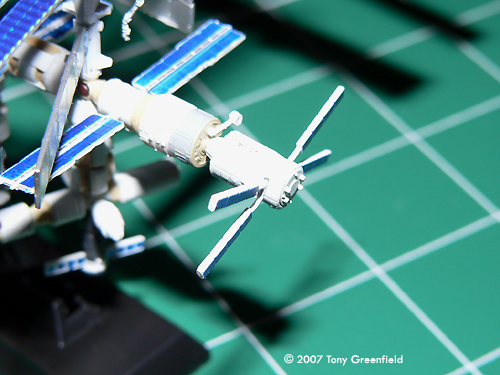
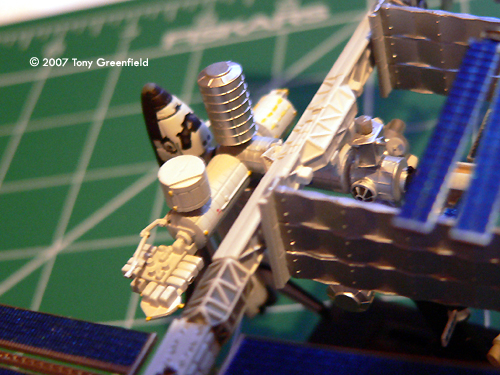
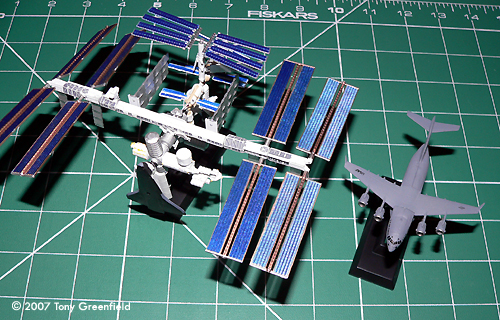
Image: Stuffed full Image: Instruction sheet Image: More Image: Shuttle pack Image: Basic ISS, other side Image: Another view Image: Completed ISS Image: Another view Image: Closeup Image: Top view Image: View along the main truss Image: Another look Image: Closeup Image: Columbus ATV Image: US hab, ESA Spacelab and NASA science modules Image: 747s, including one with piggy-back Shuttle Image: Shuttle and Buran stacks Image: ISS with C-17 Image: Shuttle, X-38 and Soyuz capsule |
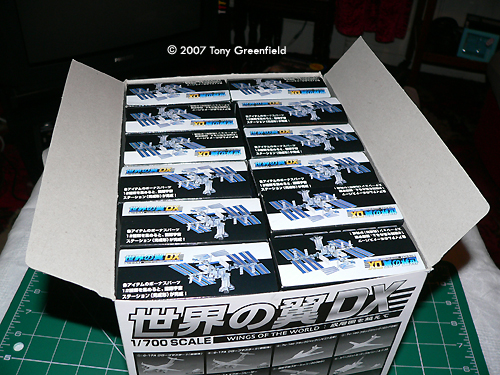
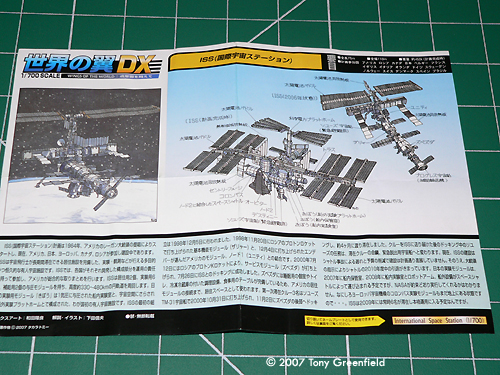
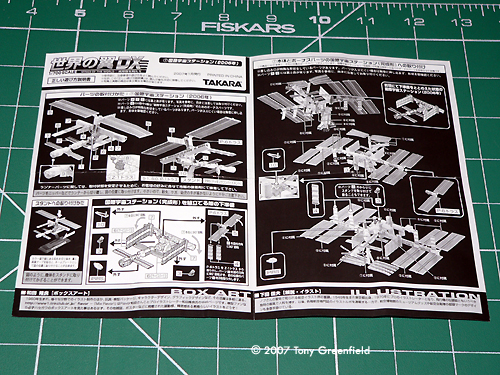
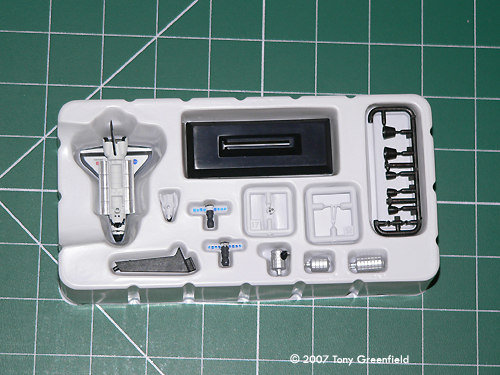
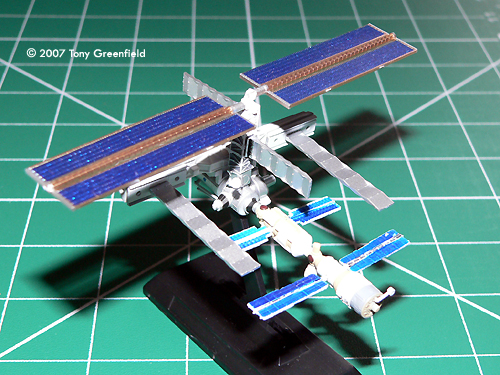
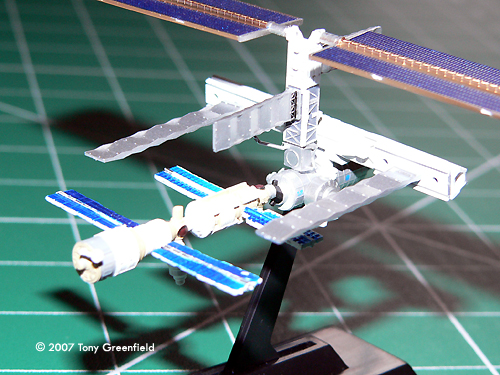
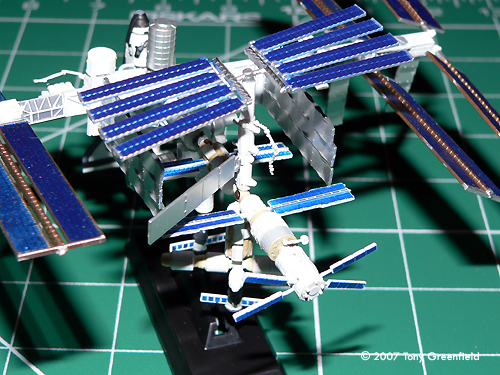
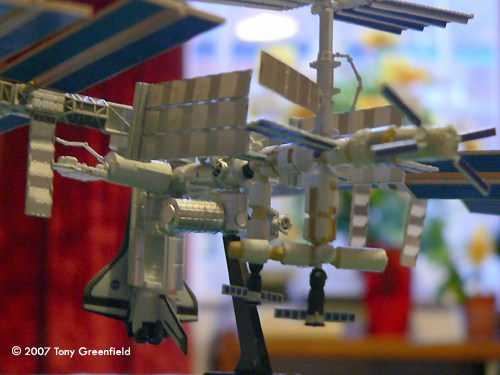
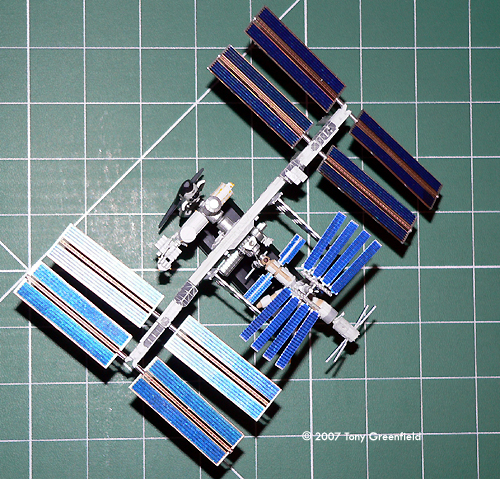
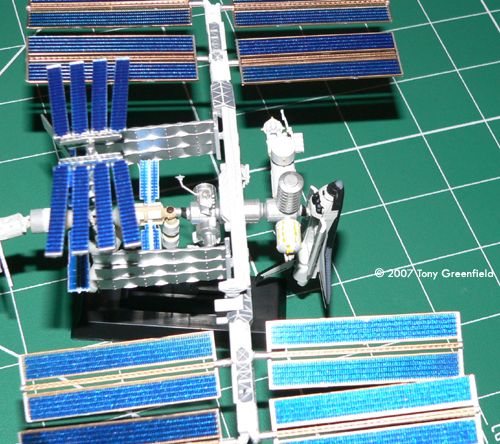
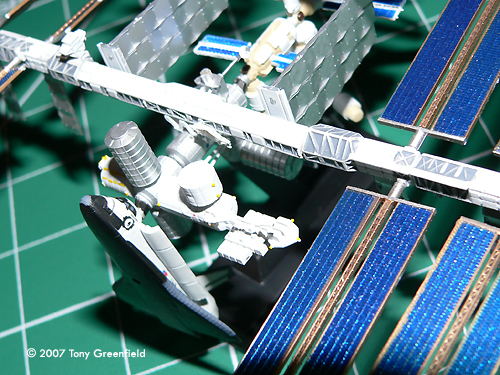
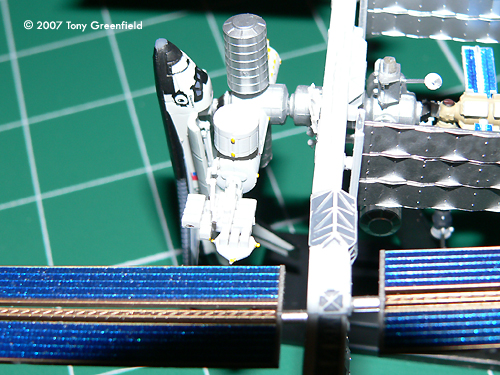
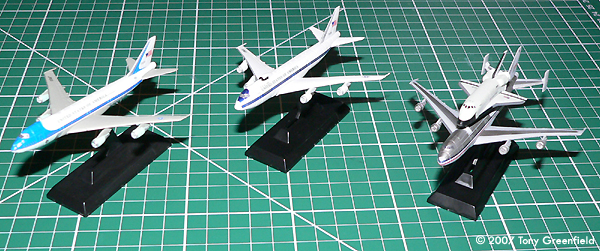
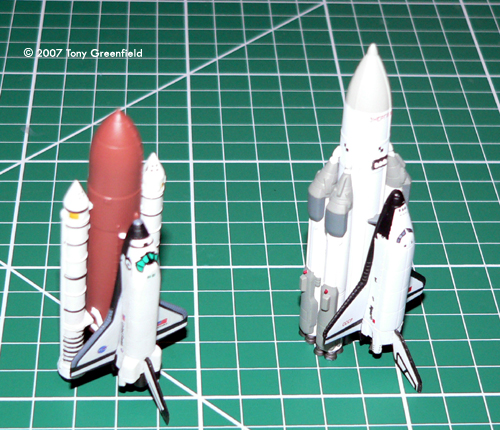
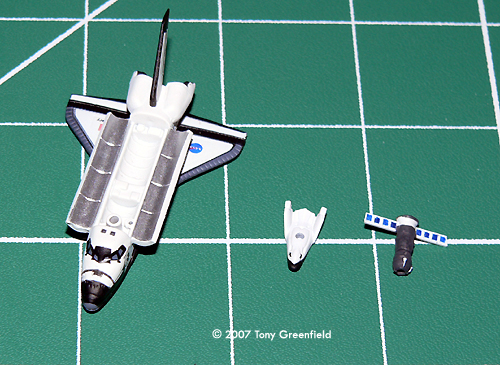
Takara have established themselves, along with a host of other Japanese model companies, as a producer of the often tiny but highly detailed “gashopon” type models. For modellers short on time and with limited space for storage or display, these little models can be a godsend. Amongst Takara’s more recent offerings have been the “World Wings” series, a range of 1/700 models of modern aircraft - a scale usually limited to warship models. Examples in the range have been the XB-70 Valkyrie, B-1B Lancer, B-52, B-2 Spirit, C-5 Galaxy, Antonov Condor, Air Force One, various blimps etc More Space/SF oriented items have been various full stack shuttles representing Columbia and Discovery as well as the Buran shuttle mounted on the Energia booster and the Enterprise riding piggyback on the NASA Boeing 747. However that is not all by a long way. All the models in the series 3 release come with additional components which, when put together and added to the basic ISS, allow you to build the station as it will in theory eventually look. In addition, there is another shuttle model in the range, this time with open bay doors and a mounting point so the shuttle can dock with the ISS. It even includes a tiny – and I do mean tiny – model of the X-38 CRV escape craft and booster unit (a two piece kit!). This can also be docked at the station or – if you want to go for a more SF look, attach it to the Canadarm of the shuttle and you have the opening scene from Farscape! The models all come in separate boxes – and as with all gashopon models it's pot luck what you get. The parts are securely stored in a vac form tray - two trays for the basic ISS - and a small information sheet that provides details for each model and – the important point – explains what the additional parts are and where they go. Given the scale, the parts are very finely moulded and many are incredibly small and delicate. Extra care is needed not to loose them and the use of a fine point set of tweezers is highly recommended. Care is also needed when separating the parts from the sprue as again the small parts may easily break. Paint finish is generally excellent. The metallic blue of the solar panels looks just about right. Some light scraping of overspray will enhance the look of the model and some limited touching up may be needed where the parts are separated from the sprue and cleaned up with a sharp knife or file. Building the Station Step one was to build the basic ISS. This was (a) to have the basic design to compare to the main station and (b) to get a feel for how the whole thing goes together. The model is deigned to clip together with most parts having snug push fit locators with a tab to ensure you get the correct orientation. In a few locations it was necessary to sand or scrape paint from the part to ensure a smooth fit. Once the basic station was assembled it looked pretty good. Small though. Very small. Next step was to raid the other models and make sure I had all the necessary parts. Fortunately I had ordered two complete sets from HLJ and everything was present and correct. Indeed I had enough parts to build two. I laid out the information sheets from each model on the largest table I could find and placed the relevant parts on the sheets to keep track of them. From there it was a relatively simple task to assemble the station starting with the basic modules and truss before working outwards. I quickly realised that making up subassemblies was not the way to go. Having added the larger solar panels to the extension units for the main truss, they proved a nightmare to handle and I stripped the delicate parts off and push fit the truss beams on to the main structure first. Various laboratory and hab modules were added (again working from the centre outwards). Next the smaller parts such as the various manipulator arms and antennae were added. These were fixed in place with white water soluble glue. Finally the delicate solar panels and radiators were added and the shuttle, X-38 and Soyuz/Progress modules were pushed into place. The model in its finished form is 15cm across and as such takes up a LOT less space than, for example, the Revell kit of the ISS in 1/144, the Heller in 1/128 or even the Start in 1/288. As in indication of how large the real station will be, I have photographed it with a C-17 transport alongside. Now I know what goes where and the most effective sequence for assembly I plan to take it apart again (which is possible thanks to the push fit assembly and use of white glue) and then re-assemble in a more rigid manner using proper glue. The use of push fit parts and white glue has allowed some distortion to creep in especially with the drooping solar panels. |
|
Following disassembly and reconstruction I plan to touch in areas where the paint was scrapped off to improve the fit of the parts and to build a display box to hold it, painted black with an Earth backdrop and mount the model on a wire stand not the plastic unit provided with the kit. I may even dig out some 1/700 photoetched ships' crew figures and have a couple of astronauts doing an EVA! Conclusion All in all this was a satisfying weekend afternoon project. |
|
![]()
This page copyright © 2007 Starship Modeler™. First posted on 16 May 2007.
![[Please click to enlarge]](tg_iss_TakaraBox.jpg)
![[Please click to enlarge]](tg_iss_BasicISS2.jpg)
![[Please click to enlarge]](tg_iss_ISSCentralTruss.jpg)
![[Please click to enlarge]](tg_iss_Shuttle-Docked2.jpg)
![[Please click to enlarge]](tg_iss_BasicISSwithCompletedStation.JPG)