
|
By Brian A. Byrne - images & text © 2000
For research, I watched a video of the old 'Voyage to the bottom of the sea' movie. It wasn't much help for details and color scheme. Also surfed thru the net for pics of other people's models of the sub and got a lot of various versions. |
|
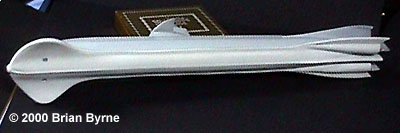
Image: Underside view of Seaview. |
Construction
I cut the pieces of the vac form out first carefully, trying not to damage the parts and cut myself in the process. The trouble with vac form parts is that sometimes you don't know where the part ends and the access plastic begins. So it's a good idea to cut the general part out first with a little bit of access then later trim to actual size. The worst cutting nightmare was cutting the square and rectangle vents on the sides of the sub's hull. This had to be done with a lot of patience to get all the vents in equal size. After all parts were cut out and trimmed to the actual size, I started sanding parts here and there to confirm a better fit together. Right after a washing and drying the parts, I glued the pieces together. Vac form kits give you the worst nightmares where fitting is concerned. I used a lot of rubberbands and paper clamps to hold the parts together while the superglue bonded the parts together. A lot of effort was also spent reinforcing the insides with scrap plastic and milliput to cover the gaps left at the seams. Fitting the Stabiliser fins and engines at the rear of the sub was difficult. The parts had to look symetrical and the angles had to be the same on each side. Once the basic parts were in place, I started covering the gaps on the hull of the sub with milliput and sanding when dry. When I was finally satisfied that the hull was 'seamless' I started on the details of the sub, putting on the missle silo hatches on the topside and working on the hatches and periscope antennaes. I remade hatches from milliput and glued them onto the very plain circular hatches of the kit for added detail. After installing the clear window parts, I sealed the hull with the underside part and started on the sides of the sub's bevelled edges. I glued and clamped the sides then using milliput to cover the gaps then sand papering the edges to get it smooth. Work on the minisub and diving bell also started with sandpapering and putting the parts together. Painting the model was pretty straightforward. I masked the clear windows and airbrushed on the first coat of paint. The instruction sheet was pretty vague on the colors. "Light Sea Blue Grey and 15% darker on this area". Huh? I referred to the net and came across pictures showing the top half of the sub was a medium Grey and the underside was a lighter grey. I used Testors Model Master Imperial Japanese Navy Sky Gray for the top half of the sub and Gloss Gull Gray for the lighter underside of the sub. I used a dark gray for the hatches and surface details, then went over that with a light coat of IJN Sky Gray to merge the color and simulate panels and a very little weathering. I used Gloss White for the rear running lights. I wanted the sub in gloss paints only to give it a slick undersea look. For a model this size, it took quite a bit of paint to cover all of it and a few more coats to get it even I didn't want to pierce a hole in the sub to make a display stand. I made a base from wood and milliput to simulate octopus tentacles reaching out to grab the submarine. This way the Seaview could rest in the centre of the tentacles and no plastic or metal beams needed to hold the sub upright. I used close to 3 boxes of milliput to make the tentacles and base. The display was also ideal as a diaorama for the diving bell and minisub. The color scheme for the minisub was actually dark orange in the movie but I chose to paint it bright yellow as the TV version's Flying Sub. I thought it was more contrasting against the seabed base and more in line with today's mini submersibles. The cables of the diving bell were made from milliput and a copper wire. I spent roughly about 2 months making the kit and base. Cutting and sanding is what took the most time. I wouldn't recommend this kit to beginners or people who are short on patience. Building Vac Form kits isn't that easy and it was quite a challenge for me to put together and research it on the net. In the end, however, , it was also fun to see the Seaview in 3D instead of recalling television images of this classic submarine. I'd give this project a 7.5 on a scale of 10.
|
![]()
This page copyright © 2000 Starship Modeler™. Last updated on 29 April 2000.
![[Rear view]](bb_seav_Sternvi1.jpg) After waiting in frustration for Polar Lights to re-issue the Aurora Seaview, I finally found a kit of the Seaview comfortable with my budget on the net from
After waiting in frustration for Polar Lights to re-issue the Aurora Seaview, I finally found a kit of the Seaview comfortable with my budget on the net from ![[Port Bow]](bb_seav_Svport.jpg)
![[Stern view]](bb_seav_Svstern.jpg)
![[Base]](bb_seav_Base2.jpg)
![[The bells, the bells!]](bb_seav_lil_Bell.jpg)
![[Lil sub]](bb_seav_lil_Minisub.jpg)
![[Closeup]](bb_seav_lil_Miniclos.jpg)
![[Beauty shot]](bb_seav_frontal.jpg)