
|
By David Ruther - images & text © 2011
I remember seeing a small photo of the Mole in an old Thunderbirds annual when I was a kid and got fascinated by the vehicle. I'd never seen it on TV at that point, but the design struck me as being so, well, practical that it could have been real! |
![[Click to enlarge]](dr_mole_molepod1.jpg) |
|
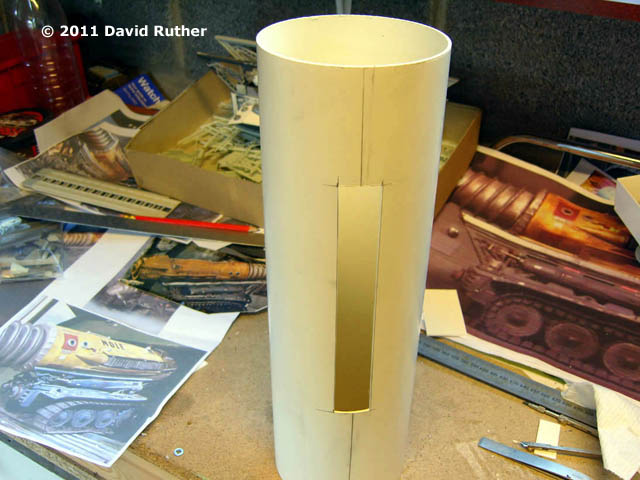
Image: Chassis box Image: The tube was a lucky find
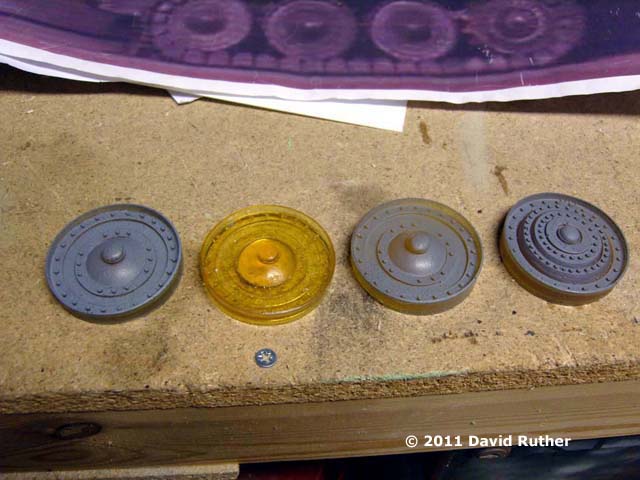
Image: Lots of rivets Image: Wheel master Image: Master mold Image: Wheel casts Image: Castings Image: Axels
Image: Tracks and wheels
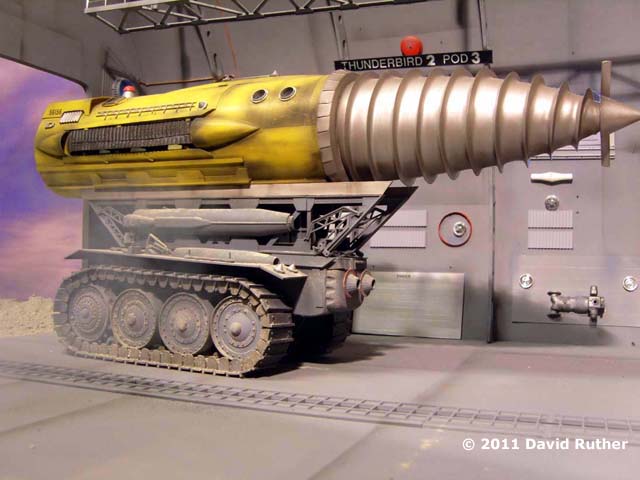
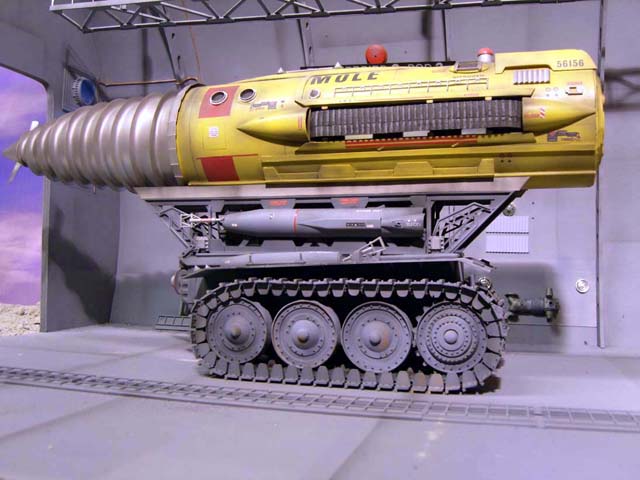
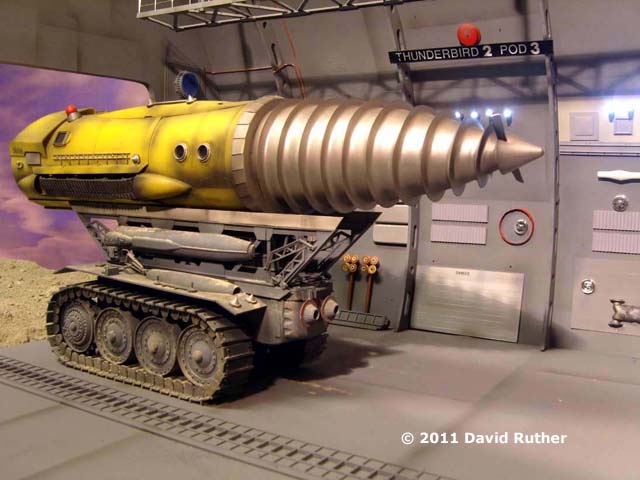
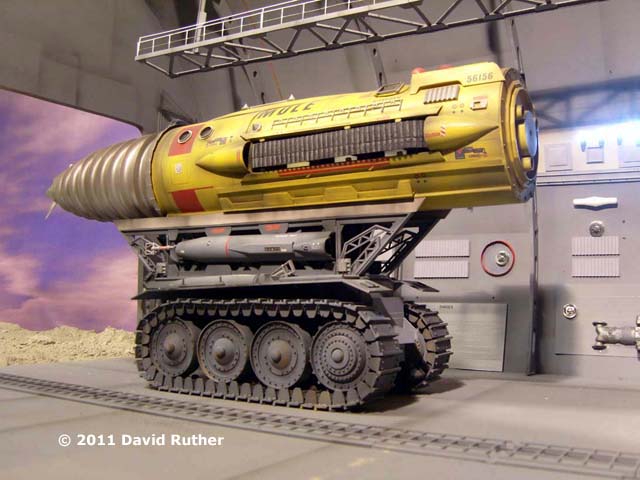
Image: Left side Image: Right side Image: Right/front Image: Another right
Image: Another left Image: More Image: More Image: More |
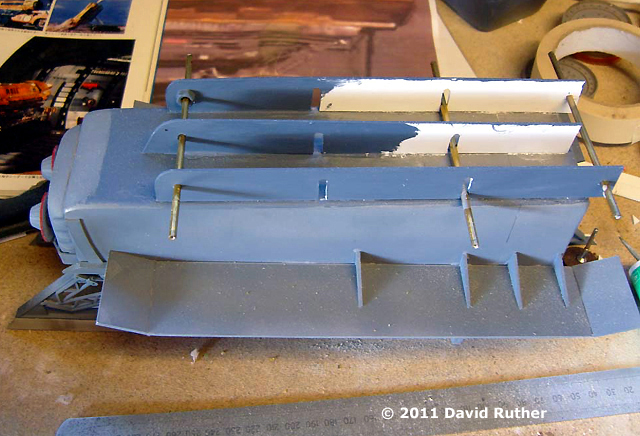
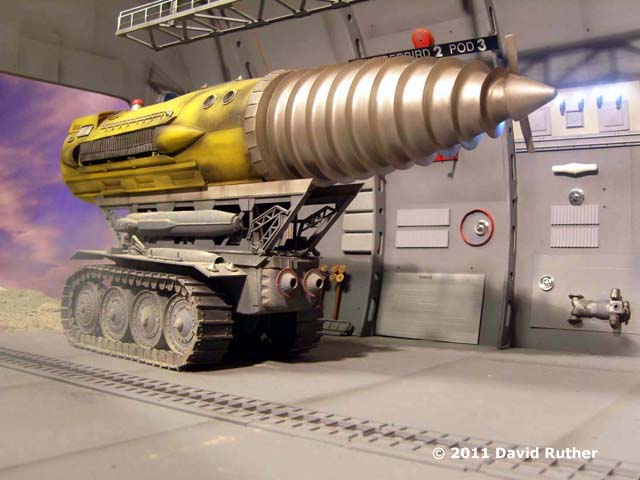
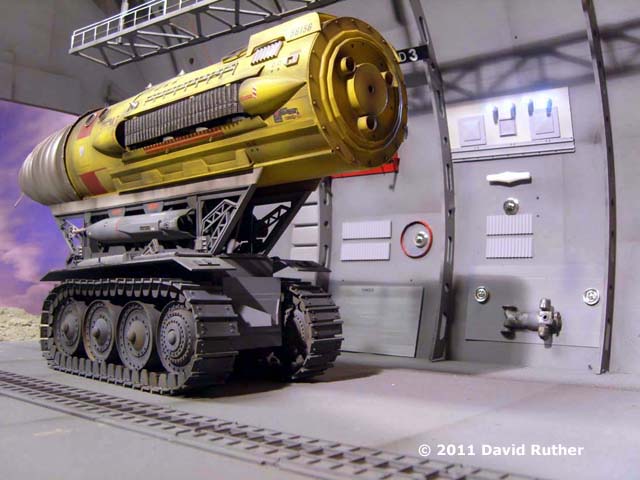
Being a typical Gerry Anderson vehicle, there were some notable parts on it to work out the size - mainly the Airfix Girder Bridge. My dad had one of these from his old model railway, so pinching this I had a go at building one. A bit of drainpipe, a cone shaped piece of paper and a cardboard thread finished off by a block of wood with wooden wheels (and nails for the rivets!) and old car cam belts as the tracks! Good for the attempt, I thought (I was only about 14) and that was that. Getting Started I always wanted a decent looking Mole, using the correct parts and without having to have a paper cone for the drill bit! The first thing I did was set about trying to track down all of the parts, made easier by ebay! Most of the parts are now vintage, with the exception of the Girder Bridge which is now made by a company called Dapol. So, I had to obtain 2 girder bridges, 2 Aurora B58 Hustlers, 1 Revell 'Everything is Go', 1 Faller B14/B15 Café and one Aurora Freedom Fighter for some of the decals. The one thing that is impossible to find is the wheels and tracks, which came from a Vickers Vigor toy. These would have to be made from scratch. Like most of the Thunderbirds models, there are several different versions, probably from where parts got broken off during production - in some photos the Mole looks melted (probably from the episode City of Fire). So, the first thing I did was pick the version I wanted to copy and using DVDs of the series found a decent side profile shot and take a 'screen grab' of it. This was scaled up to the girder bridge parts and printed out to use as my plan. I cut the girder bridge sections down to match the plan and made up a plastic box section for the chassis. Mudguards were made from plastic sheet and secured to both sides of the chassis. Then, daunted by the prospect of the wheels and the drill bit, the model went into storage for about 2 years. Restart One house move and one new workshop later, out came the parts that I'd started. The chassis was now virtually completed, with the 'Everything is Go' parts fitted to the sides of the girder bridge, B-58 bits on the top of the mudguards and other parts made to match the several screen grabs of the studio model. The front of the chassis was originally part of the Vickers Vigor toy tractor (the chassis of the original model looks to be completely from the Vickers toy complete with the wheels and tracks), so this was carved from wood. The main body of the Mole was quite a lucky find. After many trips around DIY stores with a tape measure (as you do!), I happened upon some tube used for extractor fans that was the right size (and virtually the right length too). This had slots cut in each side which would later be for the side caterpillar tracks. I struggled trying to find suitable tracks for the side of the Mole , but eventually found an old 1960's toy tank that was pretty close. The tank's axles were cut down in order to make the eight axles required. Each one was then fitted with one of the tank's wheels and secured inside the tube. A length of track was then fed around each set of 4 wheels. Around these slots were fitted parts from the B58, with a modified section of the B58 fitted to the top of the Mole . On the back of the Mole is a cowl made from plastic (set at a skewed angle like the original) and the capsule from the Everything is Go model on the top. Cut down steps from an Airfix Footbridge were also added, but I later discovered these should have been steps from the Faller kit (pretty much the same to be honest). Other bits were then added such as brass portholes and most notably the Faller Café kit, which had loads of parts for the Mole , such as the railings down the sides and the main part on the back. Scratchbuilding I then turned my attention to the wheels… A master wheel was made up from plastic and panel pins. A box was made up around this and a silicone rubber mould made. Six pairs of resin casts were required of this (front and back), as well as 2 pairs of casts (done the same way) for the drive wheels. I then had to make around 100 (ish) track plates, again fitted with rivets. Therefore, I made 10 masters and cast these in silicone rubber as I just couldn't face cutting all of these by hand! These plates were then glued onto a strip of thin card and had the blank side detailed with plastic strip and tiny plastic rivets. It was at this point of the project that I very nearly lost my mind! But, patient chap that I am, I carried on. More Details The bottom of the chassis was fitted with plastic strips and then brass axles. Slots were cut into the 2 middle axles and sponge fitted under the axles to provide a nice cushioned 'suspension' feel. The one technique I leaned towards (from my much earlier model) was the old car cam belts! I glued 2 of these back to back and wrapped them around the wheels. On top of the cam belts was then glued my tracks (to give the cardboard a bit of 'volume'!). Oh, almost forgot - had to also add the 'teeth' to the drive wheels out of little plastic pieces. These teeth then lock into the respective slots in the cam belt. A base plate was then fitted over the sponge to hide it all. Lastly, hinges were fitted to the girder bridge section for it to tip up, in case in the future I plan to display it in "action" mode. I made the drill bit by roughly carving the shape out of balsa wood sheets. I don't have a lathe, so then had to create a makeshift jig and use a power drill. I was then able to 'turn' the wood and using coarse sand paper (and taking my life into my own hands) create the shape of the drill bit. When I was happy with the result, I coated the whole thing in resin. I then cut many plastic rings and by trial and error glue these rings onto my wooden drill bit. Each ring joined the next, thus creating a spiralling drill. Filler was used to build up the plastic rings and hide any gaps/joins. During the sanding stage (using wet and dry to get a smooth finish) the drill got so sharp I ended up literally covered in cuts over my hands! I'm pretty sure you could actually cut through the ground with this thing! I struggled with finding the right colours for the chassis as in some shots it's grey whilst in others it looks blue. So I airbrushed on a grey blue to cover both bases. The Mole was painted using off the shelf car spray paints yellow for the body and silver for the drill bit. Decals come from the Everything is Go and the Hustler models. Tons of dirt was required, either airbrushed or black power paint. To set this model off, I then knocked up a set depicting one of Thunderbird 2's Pods. I tried to get this as close to the original as possible, using plenty of Airfix girder bridge and footbridge parts. The whole thing was finished off with a sky backing and dust. |
![]()
Go back up | Robots & Vehicles Index | Starship Modeler Home | Site Map | Feedback
This page copyright © 2011 Starship Modeler™. First posted on 15 July 2011.
![[Please click to enlarge]](dr_mole_chassis.jpg)
![[Please click to enlarge]](dr_mole_tracksstrips.jpg)
![[Please click to enlarge]](dr_mole_sponge.jpg)
![[Please click to enlarge]](dr_mole_bodyandchassis.jpg)
![[Please click to enbiggen]](dr_mole_tip.jpg)
![[Please click to enlarge]](dr_mole_mole22.jpg)
![[Please click to enlarge]](dr_mole_SS100875.jpg)