
By Lionel Kong - images & text © 2006
|
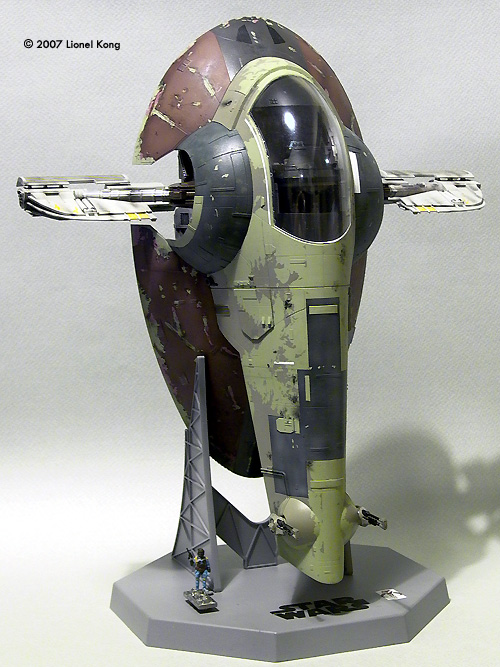
![[Please click to enlarge]](lk_fett_grayslaveleftview.jpg) |
|
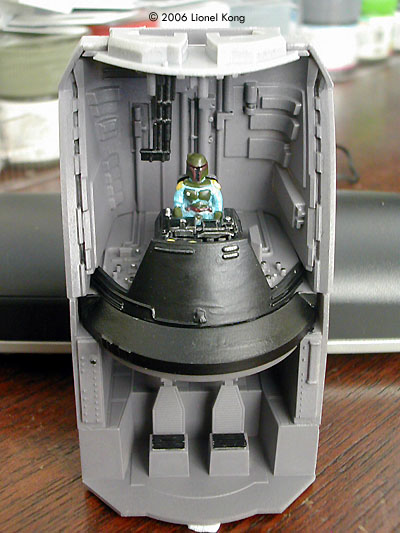
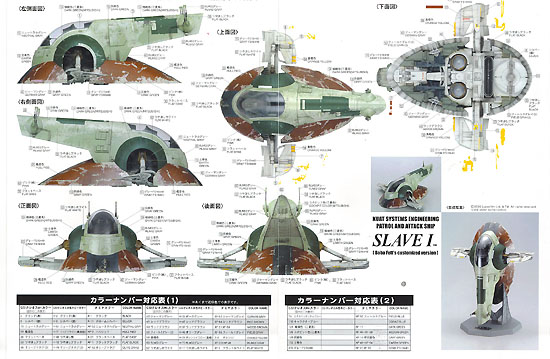
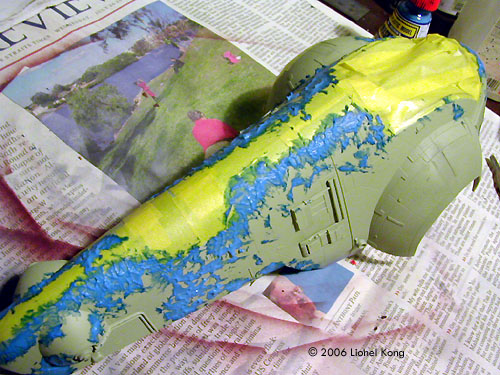
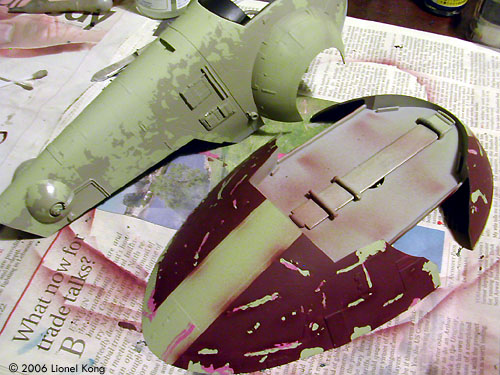
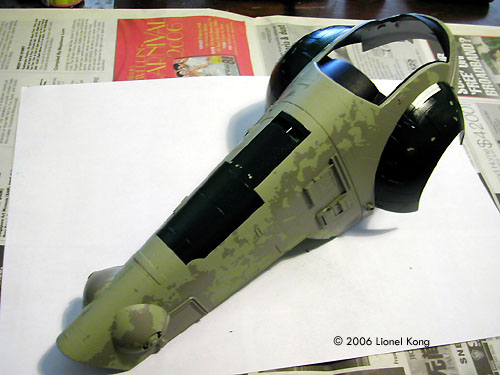
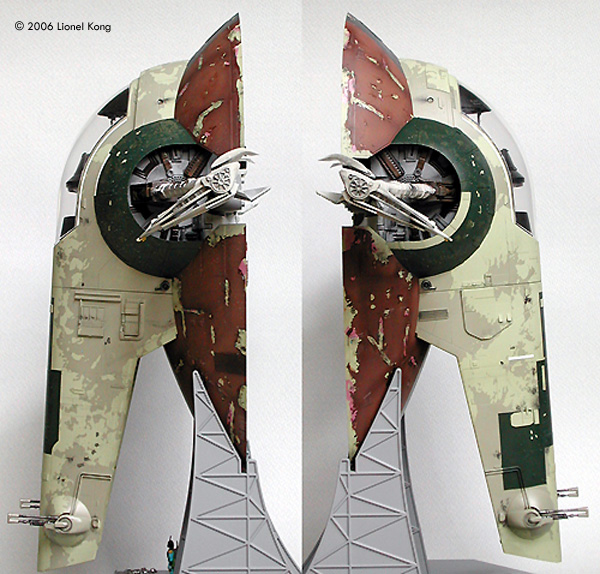
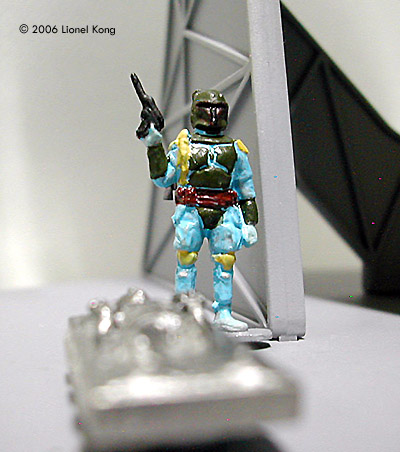
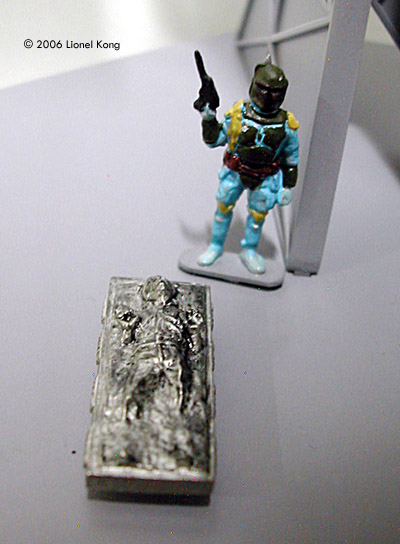
Image: The major parts of the cockpit Image: Completed cockpit Image: The paint guide is quite detailed Image: Masking the fuselage with masking fluid and tape for the initial accent grey Image: The initial layers of the body completed Image: Masking the fuselage to paint the dark green areas Image: After removing the masks Image: Side views, completed model Image: Boba Fett Image: Carbonite Han |
When Fine Molds introduced their Jango Fett version of the Slave I, some modelers who wanted their own Boba Fett's version of the ship went about attempting a repaint and modification. However, there are differences in the structures of the two version, most notably within the cockpit and in the details along the hull, which take some work to modify accordingly. When Fine Molds finally put out their own version of Boba Fett's infamous radar/dustbuster (depending on which way you look at it) shaped ship in August 2006, I jumped on the chance to finally build one that would far outclass the old AMT version. Packed in a spacious box with large, detailed instructions and a detailed colour painting guide, this is actually the easiest version to build, partially because the painting instructions gives you the exact paint numbers for Tamiya acrylics, Gunze-Sangyo enamels and Gunze-Sangyo acrylics. It is 90 percent accurate, but there are some minor problems which I will get to later. If you are not too keen to do some extra research to paint the ship, the painting guide and box images will more than suffice, but if you'e looking for that extra bit of accuracy, you can always look up images of the real studio model online or in books like The Art of the Empire Strikes Back. Whatever you do, do not refer to the Code 3 made die-cast model as a guide for that model is not accurately painted. The kit is not just simply the Jango Fett Slave I with one sprue exchanged. There are some minor modifications the some of the pieces as well. Chief amongst them is that the fuselage now has some extra countersunk holes that you'll need to drill through to fit the extra greeblies onto the hull. Assembly Like the earlier Jango Fett version, this ship should be assembled in subassemblies to make painting easier. There's the cockpit, main fuselage, skirt, wings, engines, and the wing mounting inserts. All the joints are well hidden, which is a testament to the designers skills in crafting this kit. The only major seam that requires putty is the long one running down the center of the fuselage. Putty and sand it well, but be careful not to overdo it and remove all the panel details there. The model is so well designed that when you finally join all the parts together after painting, there are no gaps to be seen anywhere. A few tips though: I suggest assembling the wing in three separate mini-subassemblies: the diagonal strut, the mounting bar, and the actual wing 'flap' itself. The wing flap is a multi-plane affair which looks complicated and you might be tempted to paint each piece before assembly, but I put it together then airbrushed it as a single item. What the paint cannot reach cannot be seen as it is too deep inside. Also, leave three things off to the very end: part K2, which is the gray horizontal piece on the front panel as it removes the need to mask it when painting the fuselage panel, the chin guns to reduce chance of breakage, and of course the cockpit canopy. There are two Boba Fett figures included in the kit, a seated pilot version and a standing version. I glued my standing figure to a small sheet styrene base and put it next to the completed ship as an instant scale reference, while the pilot version went into the cockpit. Also in the first production run a 1/72 scale white metal figure of Han Solo encased in carbonite is included. I painted over the front with a thin wash of gun metal and set it next to my standing Boba Fett figure. Despite the model's complexity, the engineering of the kit is superb and it really almost builds itself. Fit is near perfect, and tolerances are so tight that there is almost no chance of misalignment of any part, even on the complicated multiplane wings. |
|
Painting It is safe to say that due to the extremely complicated nature of this ship's paintjob, no two will ever look identical, even when built by the same person. All you can do is try to approximate the wear and tear in the same spots. The included paint guide is detailed, but not totally. The chief example is the colour of the skirting. Instructions call for Hull Red (Tamiya acrylic paint XF-9), which is the extremely dark red found usually on the hulls of ocean liners. I followed it to the letter, but upon completion discovered that it really didn't match the pictures, or even the actual studio model. This resulted in a tedious remask and repaint. The colour used for the green wing fenders and front panel (Tamiya acrylic paint XF-11) also seemed too dark when compared to the studio model. I went with the paint guide for the wing fender colour, and am now stuck with it. It is pleasing, offers a nice contrast, but is not entirely accurate. The cockpit was painted during assembly, a straightforward affair with grays and blacks. The details on the console where then picked out in silver and gun metal. Two round dials in there were also painted dark yellow to look lit. There is always a temptation to pick out all the round displays in shades of yellow, green and blue, but I held back to avoid making the displays too rainbow coloured. I did not even pick out all the switches in silver, leaving some black to keep things muted. The wings were painted a single shade of gray, then decaled with the highly intricate pieces that were nothing more then flecks of old yellow paint. This is Fine Molds at its best, replicating the details of weathered yellow paint on the wings! Weathering was done by shooting streaks of black and grays from the leading edge, simulating stains being blown backwards along the wing. Contrary to popular belief, the main fuselage is actually covered in only two shades of gray, not three. The only two ways to simulate the paint chipping is with masking fluid or the wet salt trick. I suggest masking fluid like maskol because you'll need fine control of where you place the masks, and there is a large area to cover. Don't even try all the other tricks like using scouring pads or paint removers. It just does not look appropriate on this kit, because these methods don't leave distinct, jagged edges, which is what we need to achieve. Sanding or using solvent to create the worn out look leaves soft edges, which looks exactly like someone rubbing the paint off, instead off looking like it flaked off. Use maskol in small amounts as we're trying to replicate paint chipping in 1/72 scale. A few tiny dots of maskol go a long way and they flake some extra paint off when you peel them, leaving a larger chip than the area originally covered. Keep the edges jagged by stippling it on instead of painting it on. There is one tedious area on the main fuselage, which is the masking of the side wing fenders. I really wished that they made them as separate pieces. As it is now, you'll need to mask along the curves, which is a slow process. I simply stuck tape along the separation line, and then used a new x-acto blade to cut along the borders. This takes much longer than you'll expect. The skirting has three layers of colour, being the gray basecoat, a pinkish gray middle layer, and a red top layer. To reduce the thickness of the paint, I applied only full coats of the base and top colour instead of all three. I sprayed on a basecoat of gray, then instead of painting on the pink middle coat (yes I know it's a strange colour, but that's what it is, a reddish gray. The paint guide actually calls for pink + flat base, but I used light gray mixed with a touch of red), I painted it in small amounts where I expected to chip off the top layer, primarily along the panel lines. After it was all cured, I applied the maskol, and then shot on the top layer of hull red. The maskol was then peeled off the reveal the chipping. This is where I will sidetrack a little, and fast forward readers to the end of the build. The skirting needs more than hull red. Upon completion of the whole model, I noticed that the skirting was way too dark, and did not match all popular reference images of the Slave I, and also did not match the painting guide! The studio model actually has another layer of colour over the skirt, which forms the primary perception of the skirt's colour. This is a dark, non metallic coppery red colour. To correct this problem, I had to repaint the skirt by arduously masking off my completed model, reapplying masking fluid to all the paint chipped areas, and apply another colour over the hull red. This dark copper was obtained by mixing Tamiya hull red with Tamiya desert yellow added a few drops at the time until it matched what I was looking for. I do not have the exact ratio as I did it by eye. I airbrushed the copper colour onto the skirt, mainly over the panels while avoiding the panel lines. This leaves some dark red along to panel lines to create a sense of shading. When done, I removed the tape and rubbed off the masking fluid for the final look. The underside of the model has a whole ton of greeblies that make up the engine detail. It is quite possibly the most accurate ever and really requires no additional work. Follow the paint guide, add weathering with your preferred method, and it is good to go. Just remember the paint the underside of the skirt and include weathering streaks there as well. The last item put onto my model was the canopy, tacked on with Elmer's (PVA) glue. The plastic is strong, clear and distortion free, though should you wish to polish it, it'll shine even better. Conclusion The Slave I is never an easy build, and the primary stumbling block for most is the paint job. Fine Molds have taken much of the guesswork out of the colour matching phase by giving you precise paint numbers, making the job much easier. You'll still have to watch out for minor colour mismatches though, like those I pointed out earlier. But beyond these minor quibbles, this is the most accurate and high quality kit of Boba Fett's Slave I that you can expect. |
|
|
UPDATE After staring at plenty more reference material and the full length photograph in the book 'Sculpting a Galaxy', I decided that the dark green fenders and front panel needed to be repainted. To give a better color match to the studio model, I mixed matte clearcoat with a tiny drop of light gull gray for a very transparent gray color. The model was masked off again, leaving the dark green portions exposed. Then with the airbrush, I very lightly misted the transparent gray over the exposed portions. I stopped when I felt that I had lightened and weathered the dark green color enough. I now consider the model truly complete. |
![]()
This page copyright © 2006 Starship Modeler™.
First posted on 6 September 2006.
Last updated 3 July 2007
![[Please click to enlarge]](lk_fett_grayslaverightview.jpg)
![[Please click to enlarge]](lk_fett_grayrear.jpg)
![[Please click to enlarge]](lk_fett_grayslaveguns.jpg)
![[Please click to enlarge]](lk_fett_000.jpg)