
|
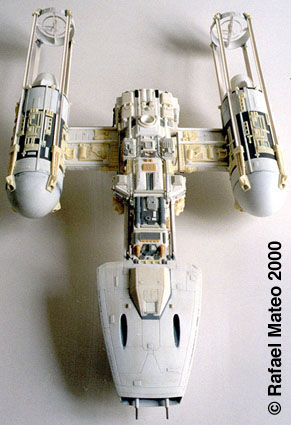
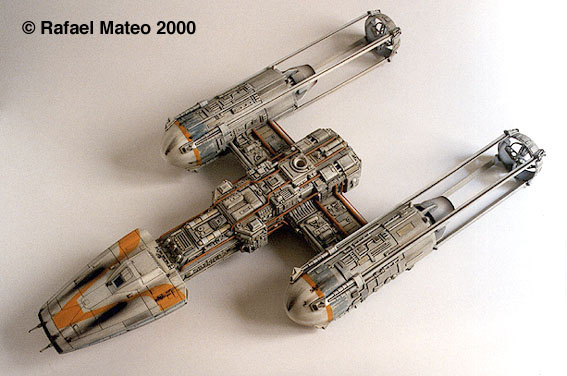
By Rafael Mateo - images & text © 2000 Since the first time I saw it in the first Star Wars movie, I have loved this starship. It plays an important role in the Yavin battle against the first Death Star so a Star Wars modeler like me must add it to his collection. Unfortunately, the commercial model kit by ERTL is really small and badly detailed. It's impossible to get a great model using its parts. |
Click any image on this page to enlarge |
|
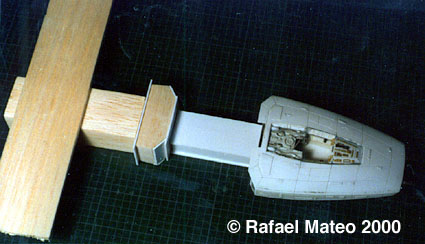
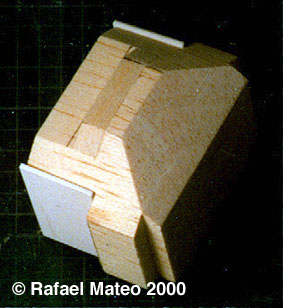
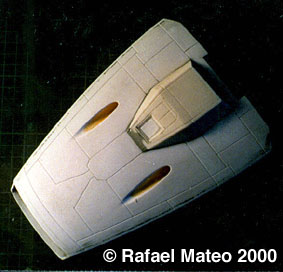
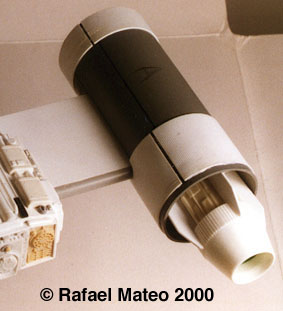
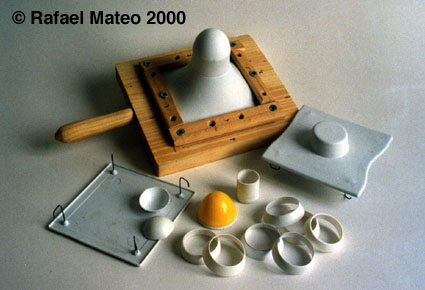
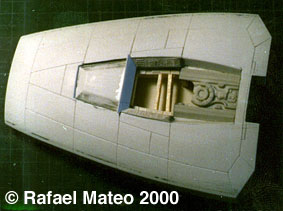
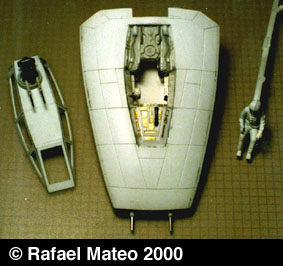
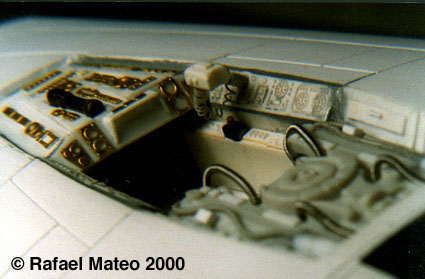
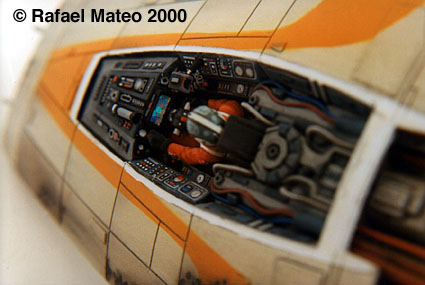
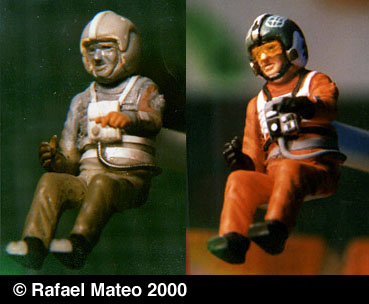
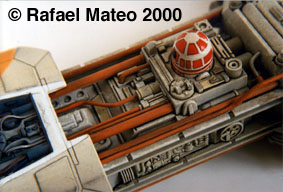
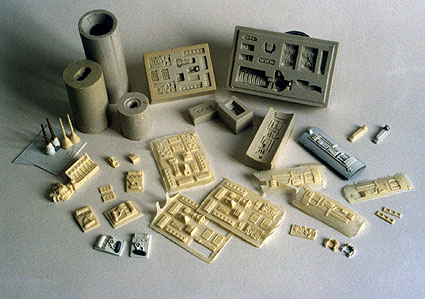
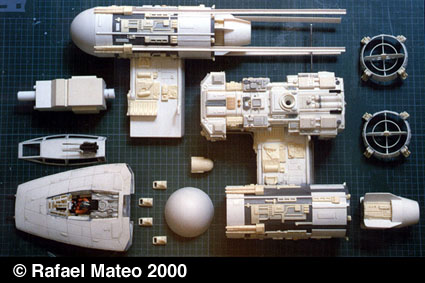
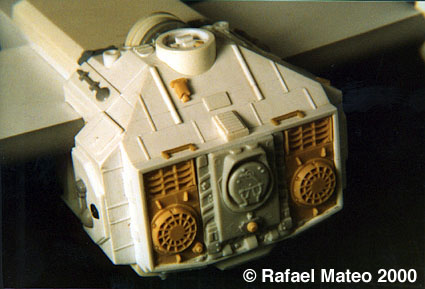
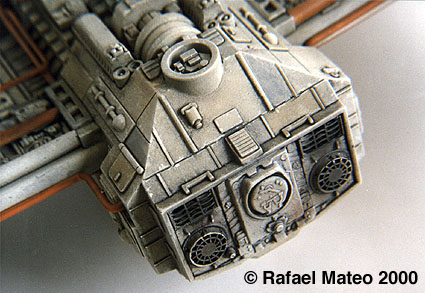
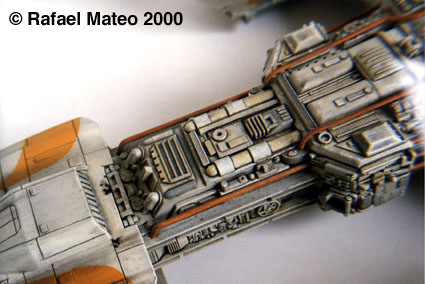
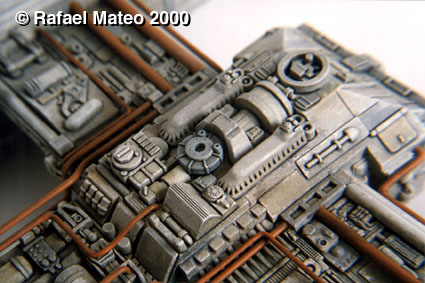
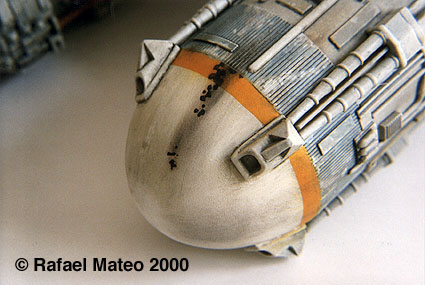
Ready for paint Image: Balsa "wings", with plated pine "head" Image: Basic shape, rear of "fuselage" Image: Underside of the "head" Image: Basic engine pod structure. Image: Vacuforming rings and engine domes, using a plastic easter egg as a master. Image: Roughing in the cockpit Image: Canopy, cockpit and pilot - ready for paint Image: Cockpit details before painting Image: Completed cockpit Image: "Dutch", before and after Image: Completed astromech droid, in position Image: "Guts on the outside" - in this case, engine dome detailing Image: Thrust vectoring vanes Image: Resin cast details Image: Underside of model, before painting Image: Starboard side of model, before painting Image: Major assemblies Image: Rear of fuselage: before Image: Same piece, after paint Image: More detailing, top side, aft of the droid Image: Same location, but underneath Image: Detailing, top rear of fuselage Image: Completed engine dome Image: Top view, port quarter Image: Underside |
I wanted to build a larger, accurate version. The project was simmering in the back of my head for several years, but I knew it would be a long and difficult project, so I kept putting it off. Finally, I felt ready to start the model in the middle of 1998 - and it took me about 13 months on the work bench to complete.
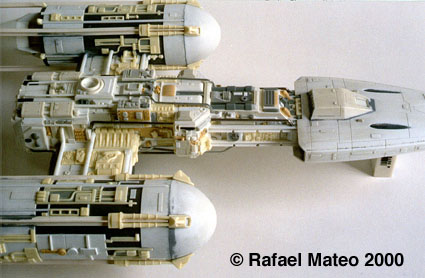
THE BASIC SHAPE The first step was to compile all the available graphic information about this ship and enlarge the selected images and maps to the size of the model. Then I calculated the basic shape dimensions and cut them out, using balsa wood for wings and main body, and pine for the head. I covered these parts with 1 mm. sheet styrene, getting a surface ready to add all the details ("the guts on the outside"). Other basic shapes and structures were added using several thickness styrene (from 2 to 6 mm.). For the two engine bodies, I use 40 mm. plastic water supply system tube, taking care to thin the rear edge from 3 mm. to 1 mm. I made the two front domes from 3 mm. sheet styrene, vacuum formed over a plastic egg toy. After the vacuum forming proccess, the thickness of the sheet was about 1 mm. The "T" rods were easy to find in hobby shops. NOTE: The templates for the basic shapes are available and ready to download here. Find the green text link "Armazón" at the left side of your screen and then find the text "pulsar aquí para formato ..." to download the files (EPS or JPG format). THE COCKPIT I felt free to detail the cockpit using my imagination where I did not have good references to work from. I made sure, however, to correctly position details like the Target Computer where they were seen. I detailed the rest of the cockpit inside with a part of the X-Wing snap-fast model, photo etched details, several scratchbuilt parts and electric guitar strings. On the front console I pasted a bit of hologram to simulate electronic images. The pilot came from a 1/48 helicopter kit, which I transformed and painted to get the look of the Rebel pilot Gold Leader "Dutch". The R2 unit is a resin cast copy from the large X-Wing model kit. THE TWIN ENGINES. I used the 40 mm. plastic water supply system tube for the main engines body and a textured "Evergreen" sheet styrene for the two main strips. At the rear I used two toys for the rockets and two resin cast parts from the "Alien" Halcyon kit of the Nostromo. The detailing was finished with resin cast parts, styrene bits and several styrene rods and tubes. The rings are sections of the same vacuum formed parts I used on the engines domes, with added details using resin cast parts and sheet styrene of several thicknesses. DETAILING A lot of commercial plastic kits parts were used by the IL&M modelers on the studio Y-Wing models. To this day, it is really hard to know all of what kind of parts were used as well as the kits they comes from. I know they used two Airfix 1/144 Apollo Saturn V kits for the engine bodies, and the engine grills from a 1/35 WW-II german Panther tank on the rear of the main body. However, my model is not the same scale as the IL&M model so most of the detail parts (about 90%) was entirely scratchbuilt by me, trying to match the photos as much as I could. I also used parts from several commercial kits on my model: A 1/72 WW-II german Panther for the rear grills, the X-Wing snap-fast kit for the cockpit and the rear of the main body, details sliced from the Millennium Falcon, Snow Speeder and TIE Interceptor model kits, and several 1/72 WW-II artillery guns kits. However, I nevered used these parts just as they came from the kits. I preferred to slice small details or cut them into different shapes. Through careful study of the IL&M models I found a lot of parts repeated along the ship. This was a great help because I only needed to make an original of these parts and cast it with polyurethane resin as many times as I need. In the photos of my model before painting, painting photos, it is easy to identify the source of the parts by lookig at their colors: White (scratchbuilt), Tan (resin cast) and other colors (kit parts).PAINTING There are two different paint looks on this model: CONCLUSIONS I can not get out of my head how the IL&M modelers worked so hard for only a few seconds on screen. It is really impressive the amount of high quality details and love they put into the models. Thank you very much to all the staff of IL&M for the great models you do! My completed replica is really a great piece I proudly added to my Star Wars collection. It was long and hard work but it was worth it! |
|
REFERENCE DOCUMENTATION |
![]()
This page copyright © 2000 Starship Modeler™. Last updated on 6 April 2001.
![[Click to enlarge]](rm_ywing-22.jpg)
![[Ready for paint - click to enlarge]](rm_ywing-16.jpg)
![[Cockpit]](rm_ywing-10.jpg)
![[Rear hull detailing]](rm_ywing-27.jpg)
![[click to enlarge]](rm_ywing-28.jpg)
![[click to enlarge]](rm_ywing-29.jpg)