
|
More reference images are online at Dan Grumeretz's Star Wars Reference Page. |
Rebel Ships | Imperial Ships | Other Ships | Miscellaneous Items
|
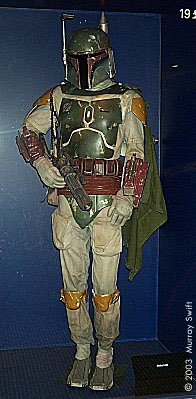
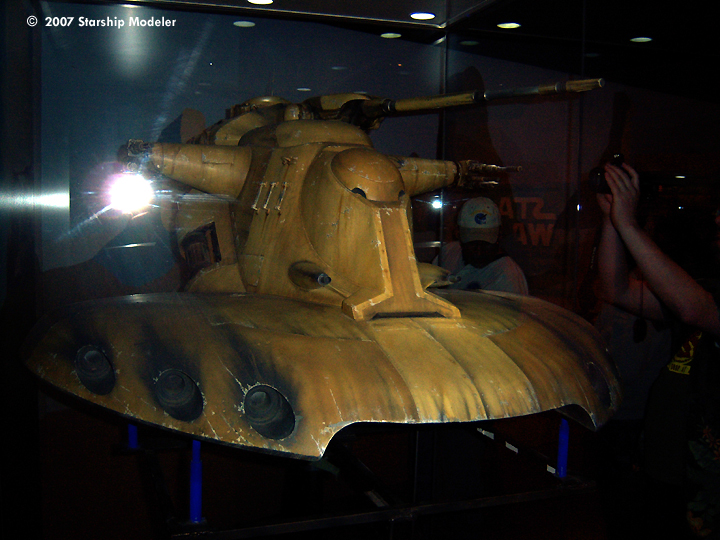
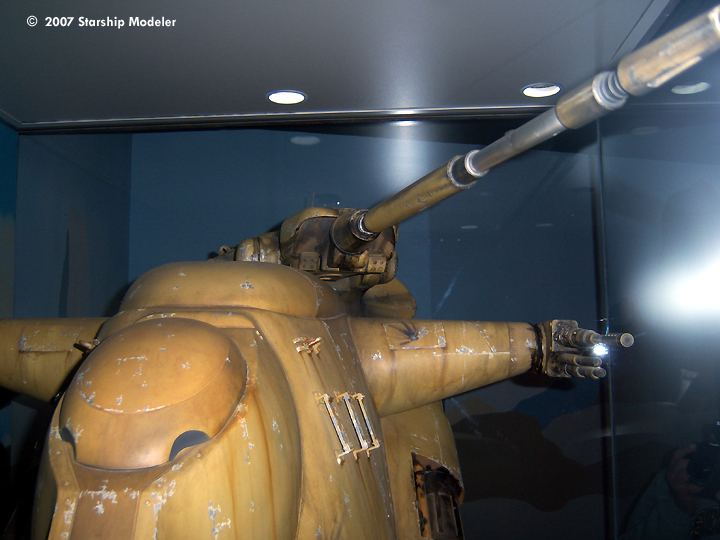
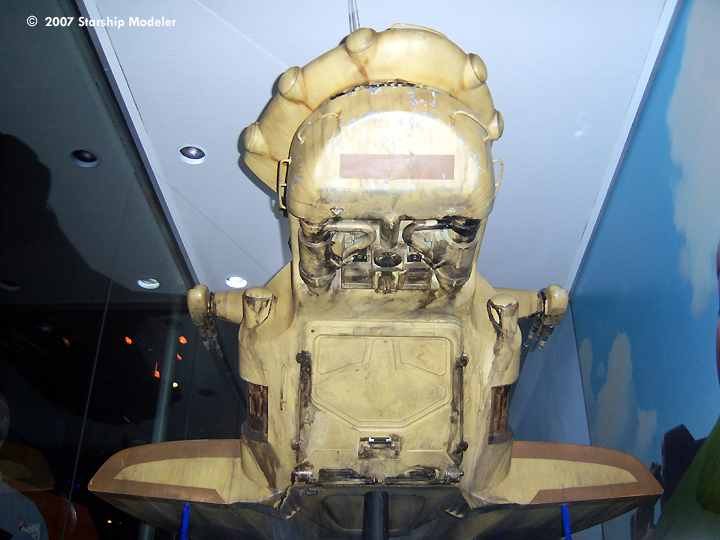
BOBA FETT'S SLAVE I | ||
IMAGES: |
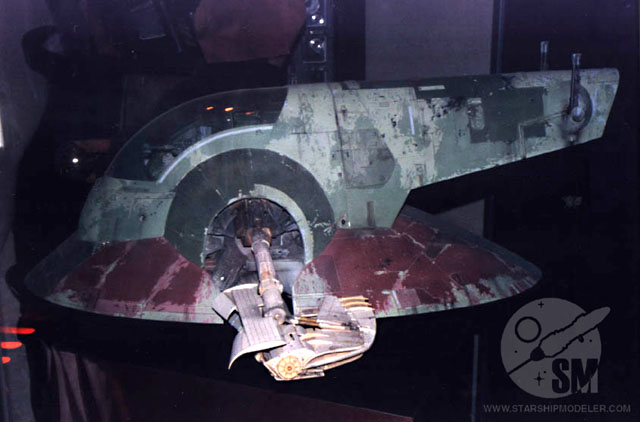
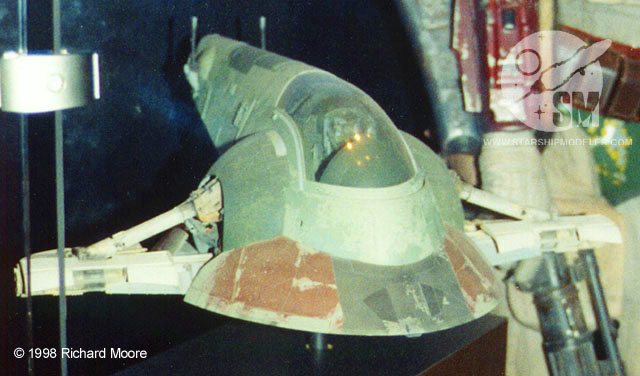
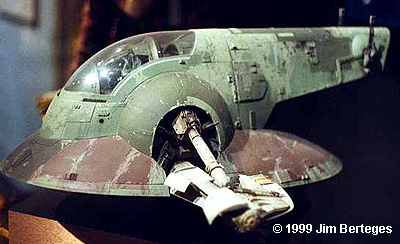
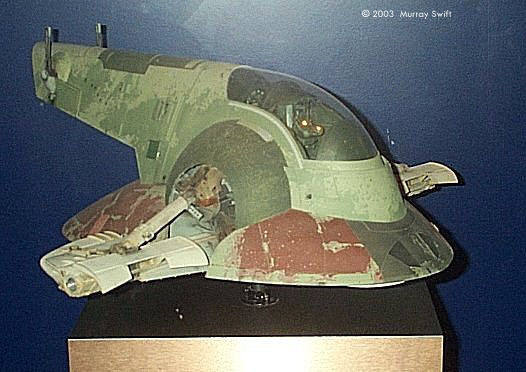
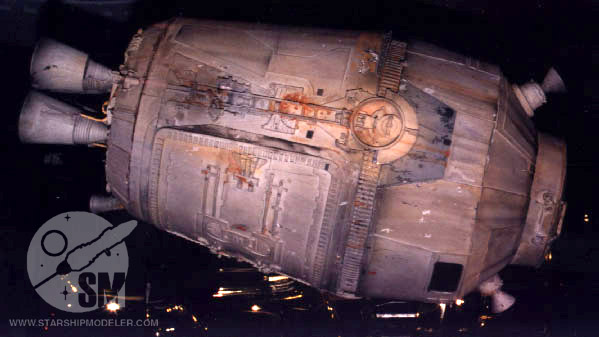
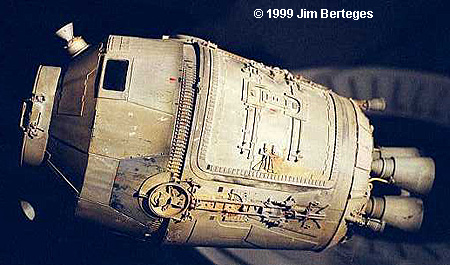
Star Wars made an impression on a number of levels, with excruciatingly unique ship design being among them. Along with the B-Wing and Medical Frigate, bounty hunter Boba Fett's Slave I was among the more striking. Looking like a dust buster or lint brush, this ship houses its engines in its base. While flying at full power, the ship looks like it's standing on end. Quite odd. AMT/ERTL's kit of this craft is one of the more accurate in the original Star Wars line. This was one of the more masterfully finished kits of the exhibit. The model is about 18" and features some outstanding weathering. Unfortunately because of where and how this kit was displayed, we were only able to get one quality image. It's too bad, since the quality of the model demands a more comprehensive treatment. | |
|
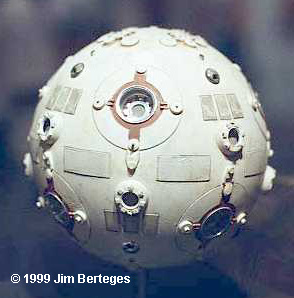
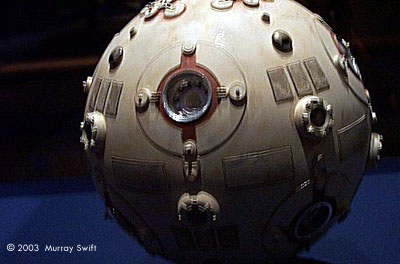
ESCAPE POD | ||
IMAGES: |
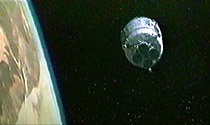
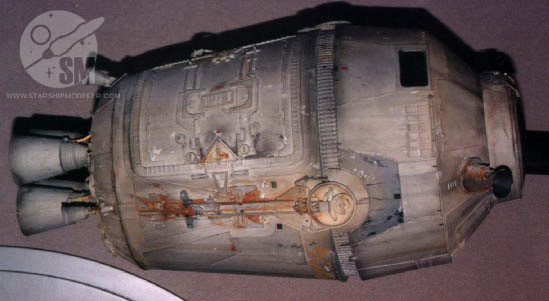
While it only appears briefly in the first film, the Escape Pod used by the two droids in the first film has a place in the Star Wars vehicular hardware pantheon. This model is a little over a foot long. As with most models in the exhibit, it was in excellent condition and shows the exception care and craftsmanship that went into the original movie's models. | |
|
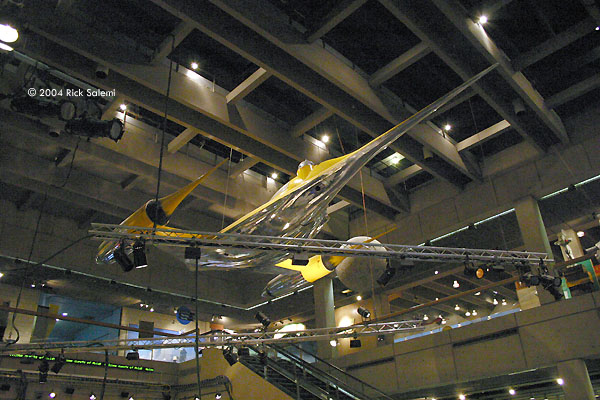
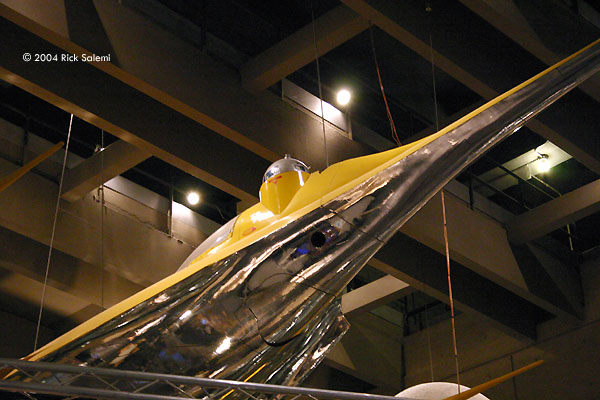
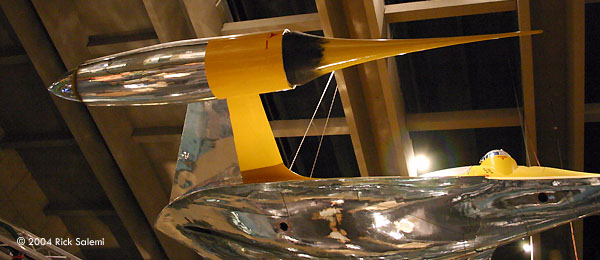
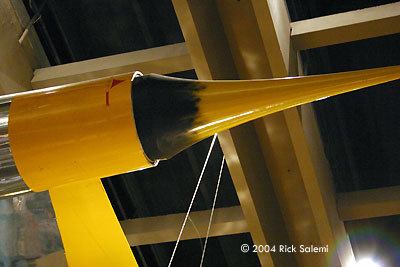
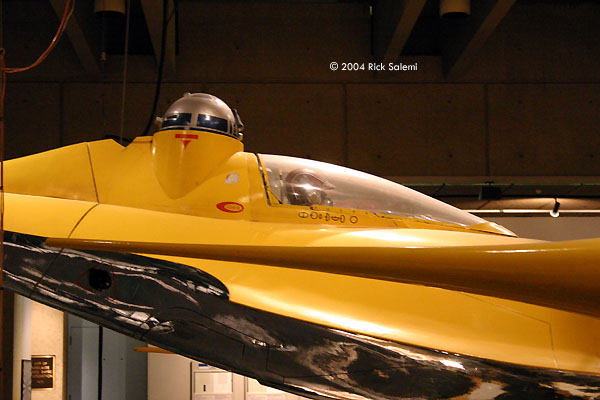
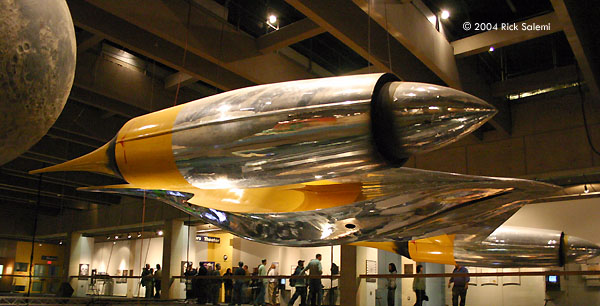
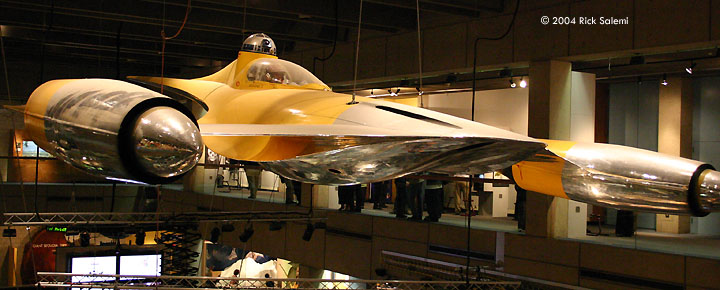
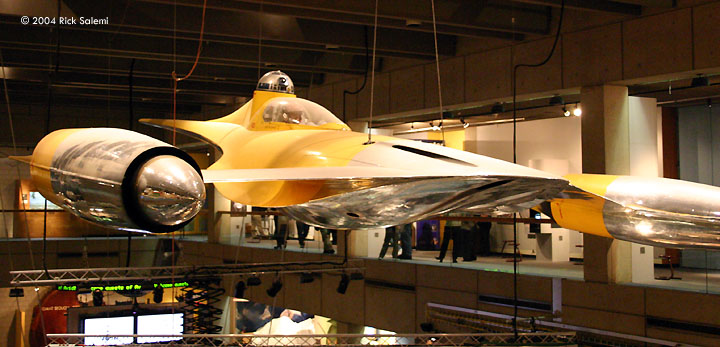
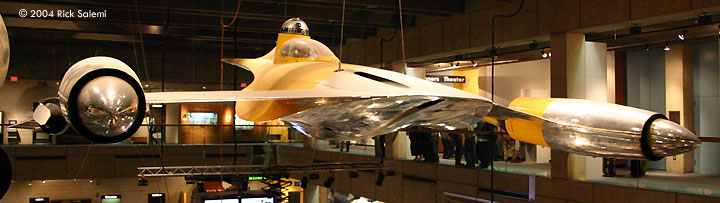
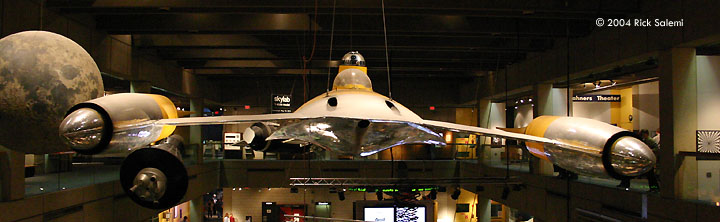
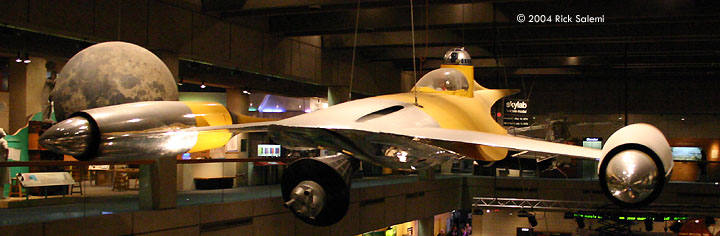
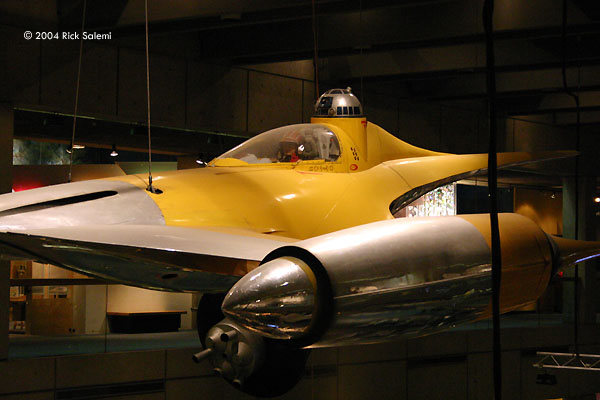
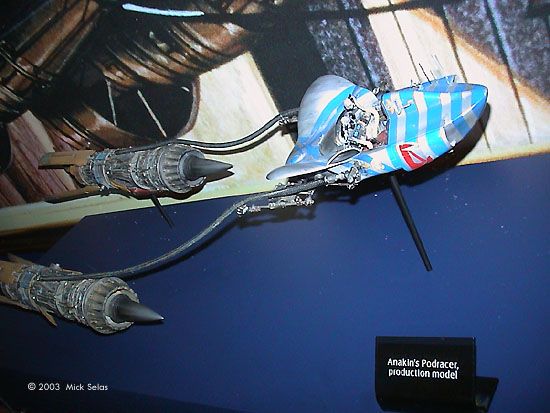
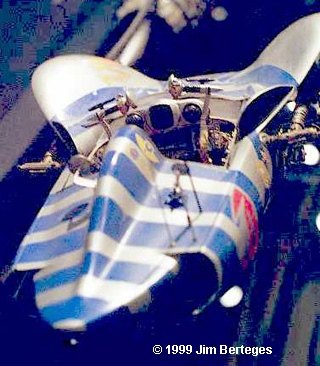
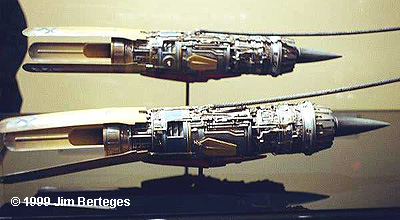
NABOO N-1 ROYAL STARFIGHTER | ||
|
IMAGES:
Image 1: Underneath, from the right/rear |
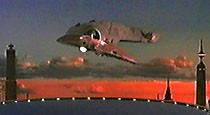
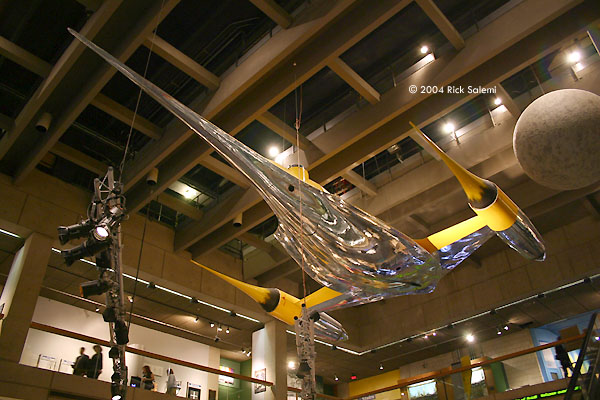
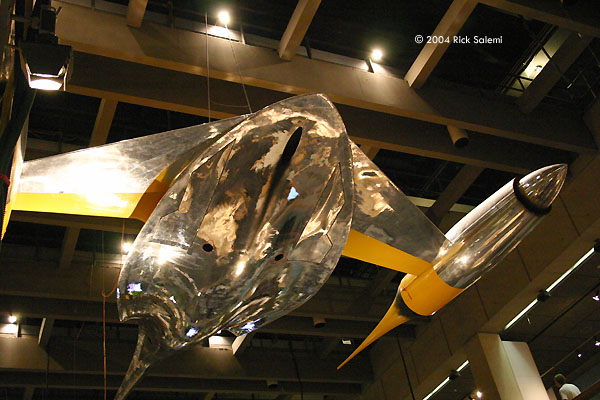
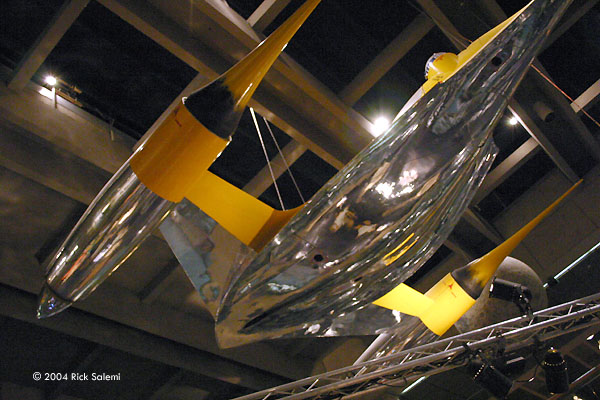
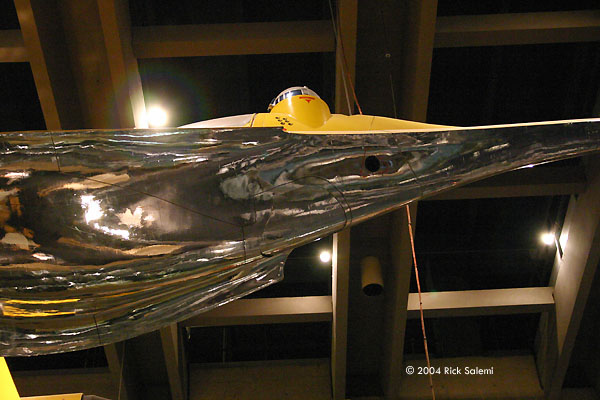
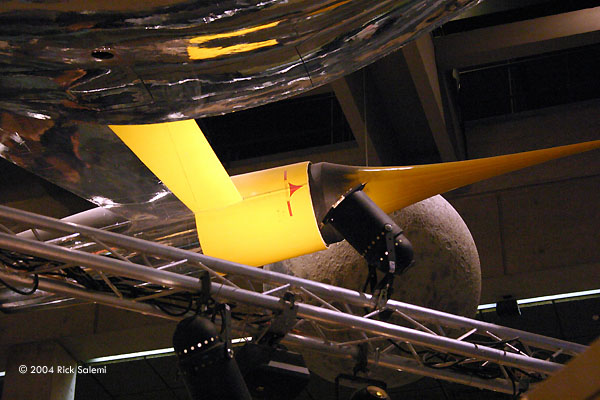
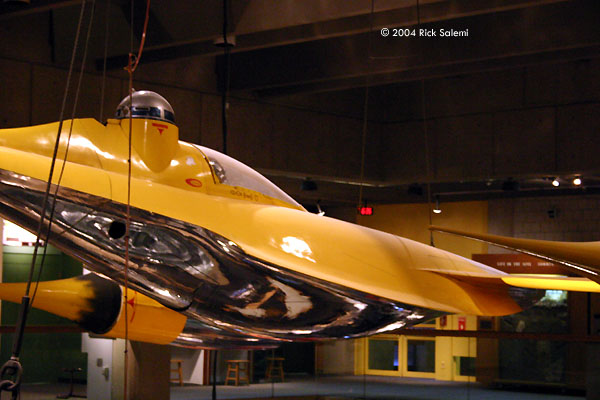
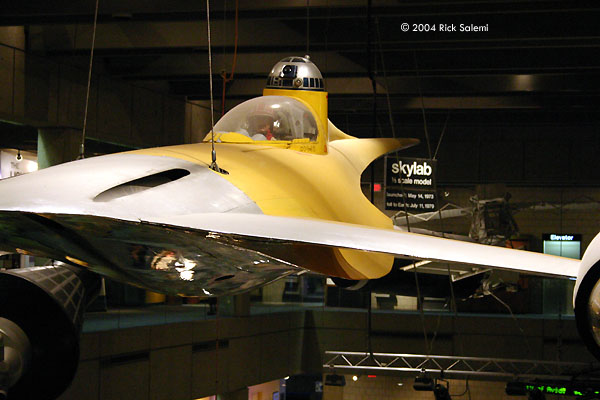
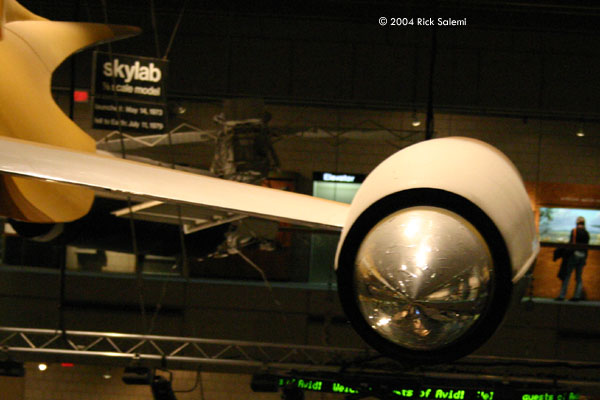
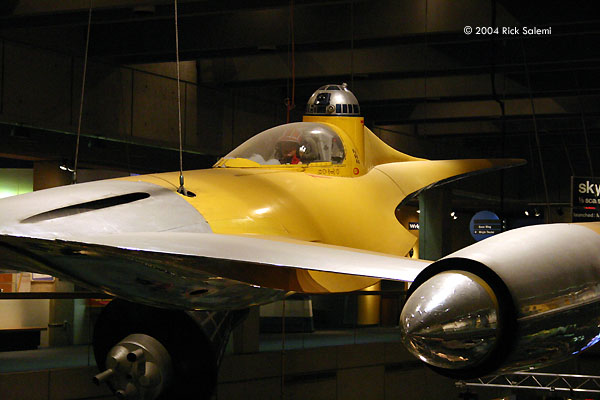
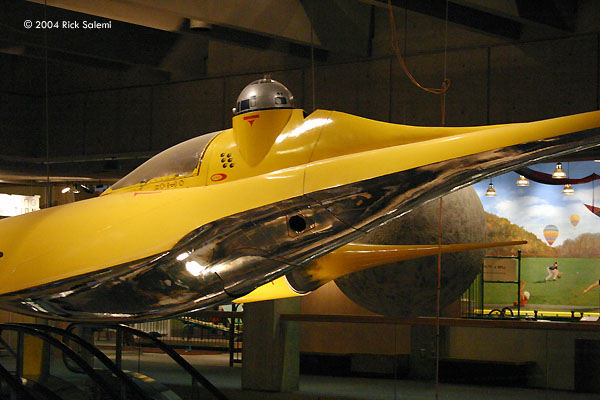
The Naboo are an old race, much enamored of art and elegance. Their cities, clothing and especially space craft reflect this. The Naboo Starfighter, their most well known starship, is a sleek, slippery, retro-looking design. The N-1 exemplifies the blending of art and function embedded in Naboo technology. It carries a single pilot, assisted by an astromech droid, and is armed with twin blaster cannon and twin torpedo launchers. The chrome plating is purely decorative and symbolizes it's Royal assosiation. Episode 1 designers had a real challenge. The film is set 30 years before the "original" trilogy, so while their ships needed to look futuristic, they also needed to look as if they pre-dated the familiar X-Wings and TIE/Fighters. Their solution was to adapt the style of the 1930's - 1950's, using smooth lines and flowing shapes. The full scale mockup used in Episode 1 was 34 feet long, 22 feet wide and 5 feet tall (from the top of R2-D2's "head"). Many thanks to Rick Salemi for the images, which were taken at Boston's Museum of Science in September, 2004.
Image 21: Head-on | |
|
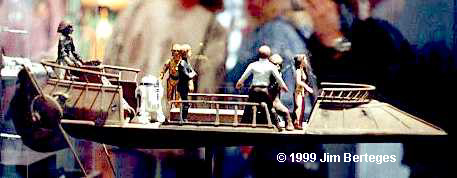
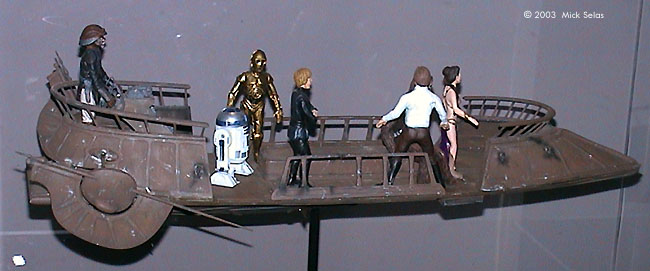
MISCELLANEOUS IMAGES | ||
|
IMAGES: |
Our listing only scratches the surface of the many vehicles and vessels seen in the four films. Here are a few more for which we have only one or two images. If you visit the show, and have more photos or details not seen here, please contact us - we're always looking to expand this section. | |
|
Star Wars names, characters, images, and all related indicia are © and trademarks of Lucasfilm Limited. This page is not an authorized publication of Lucasfilms Limited and does not intend to infringe on any of their copyrights, trademarks, or publication rights. This page is best viewed by a system carrying the 'Haettenschweiler' font. Please direct comments, questions, corrections, and picked nits to the Starship Modeler staff. Last updated 17 October 2007. This page copyright 1998-2007, Starship Modeler. |