
|
By William J. Blackmore - images & text © 2011
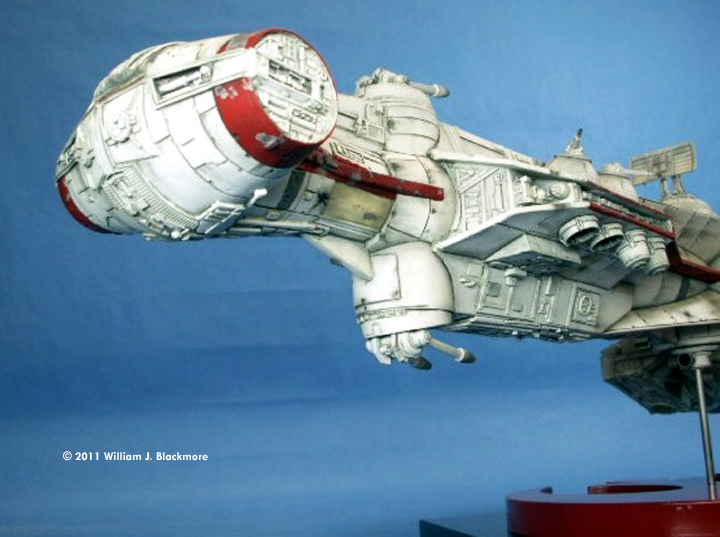
The first time I saw Star Wars in 1977, the Rebel Blockade Runner in the opening sequences of the movie instantly became my all time favorite starship. I loved the hammerhead design and the great lines of the ship. It just seemed to speak to my personal ideas of the way things should be. |
![[Please click to enlarge]](wb_Tan4ssm.jpg)
|
|
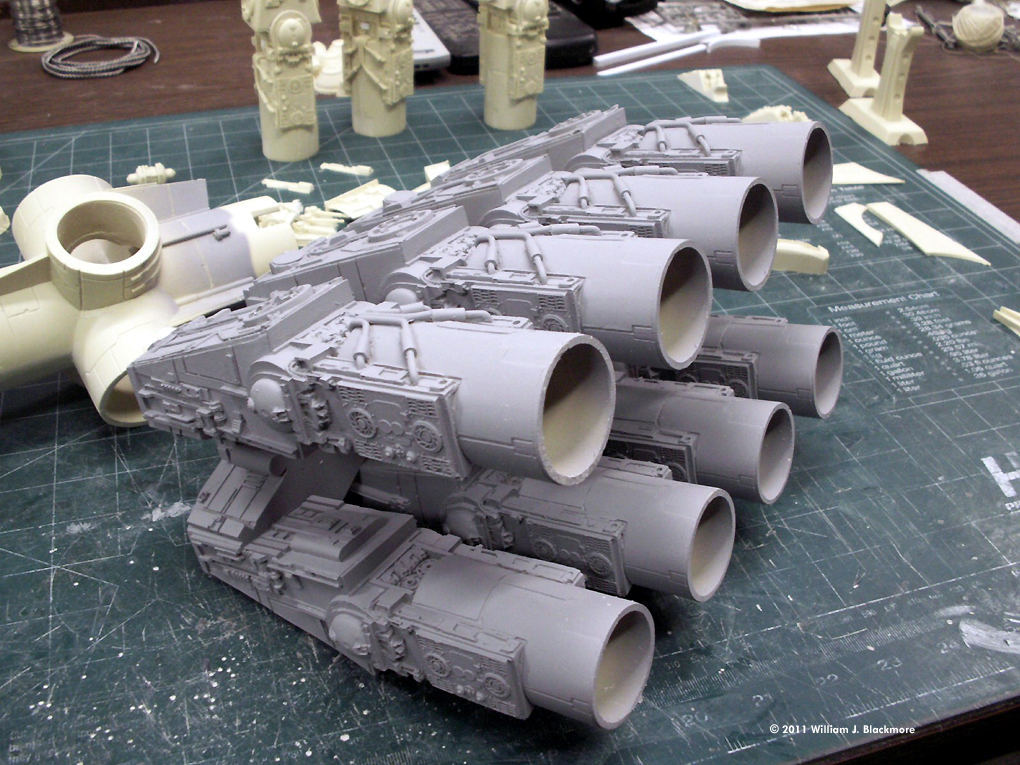
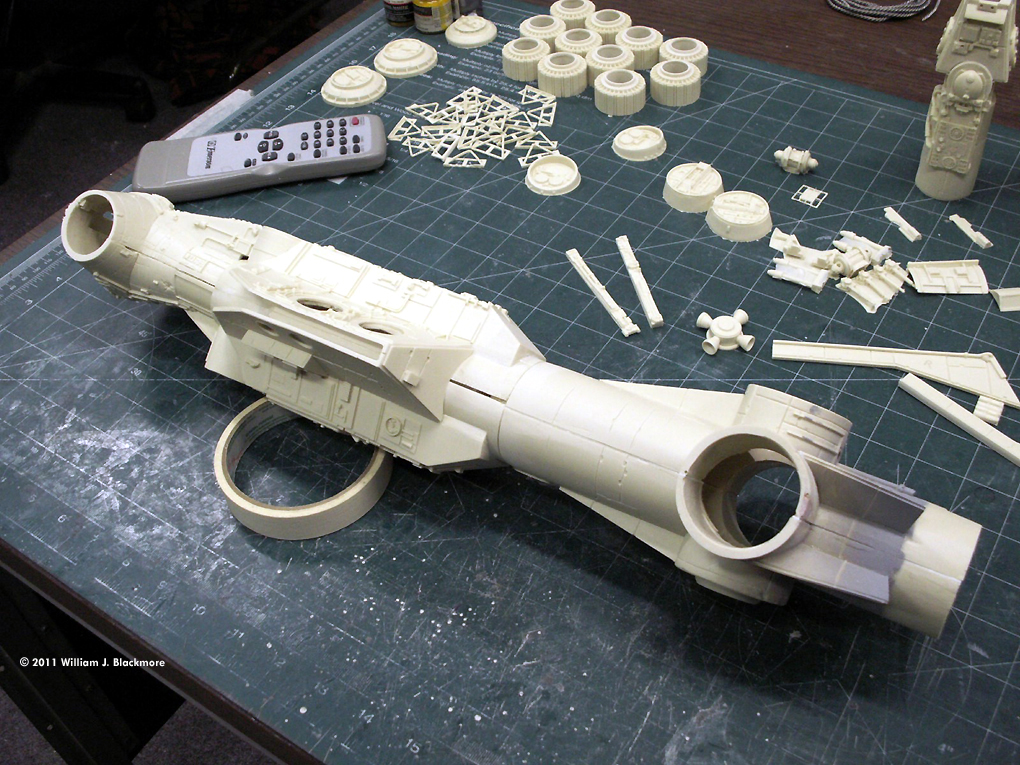
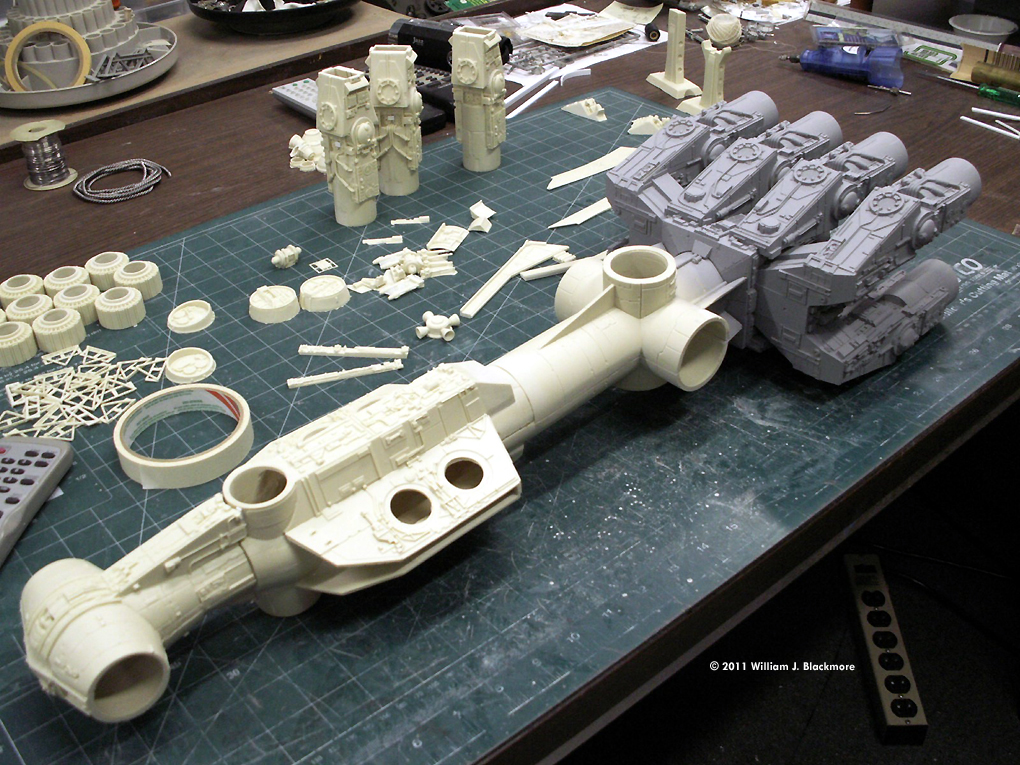
^ Lots of parts Image: Engine section sub-assembly. Image: Test-fitting the forward section. Image: More test-fitting.
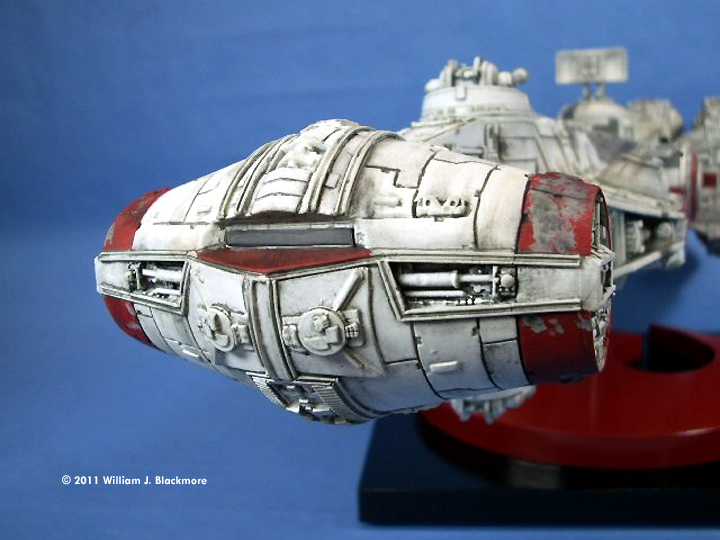
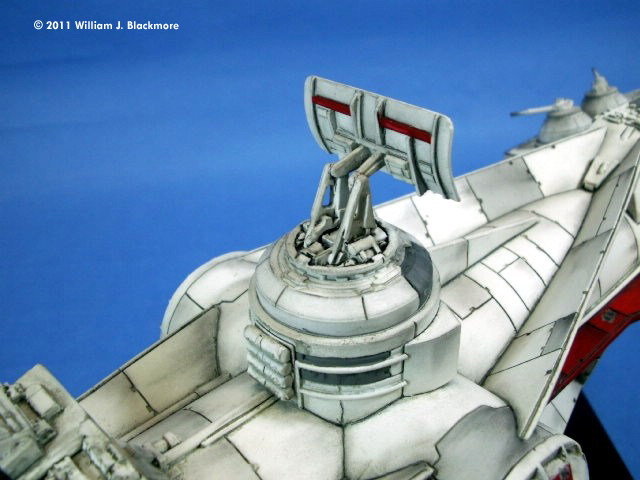
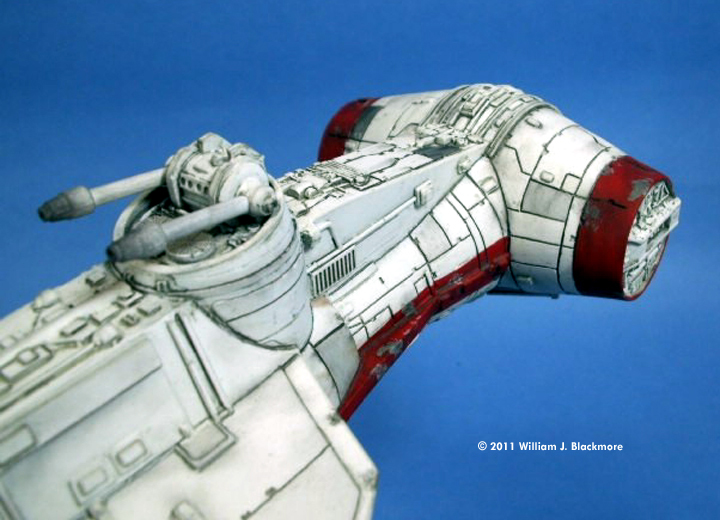
^ Completed model.
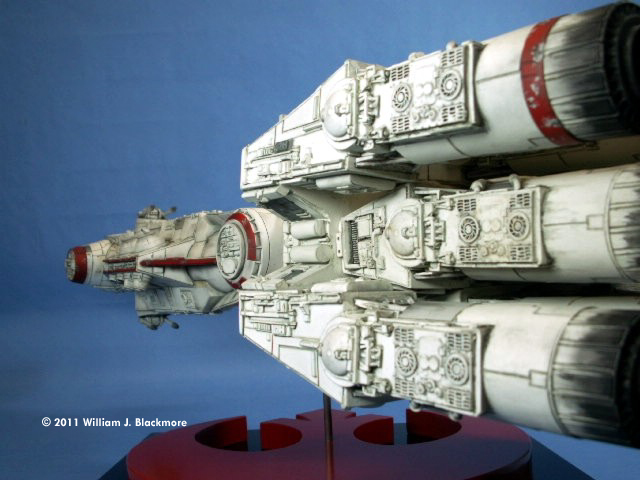
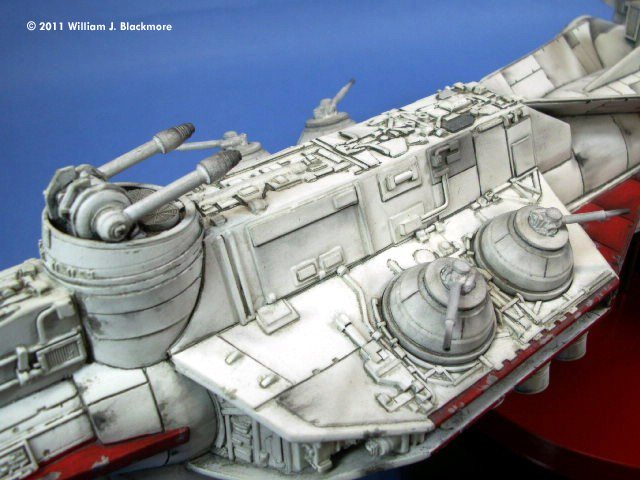
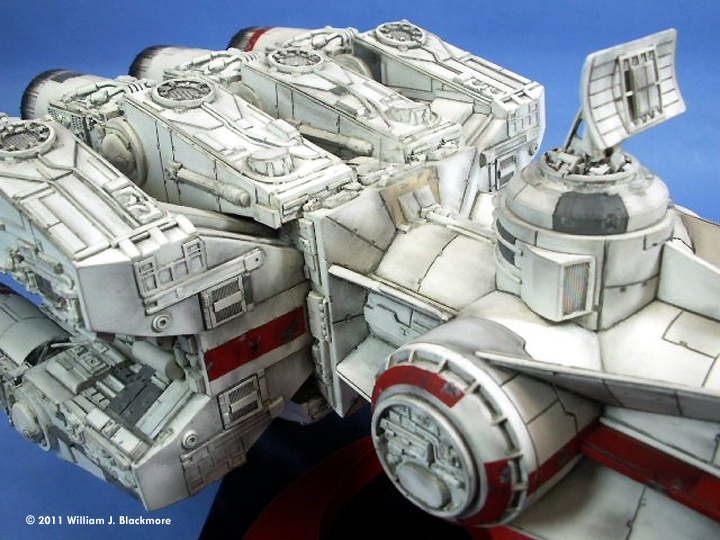
Image: Hammerhead. Image: Midships detail Image: Front/low view Image: Engine section detail. Image: Engine tops Image: Armament Image: Top/middle Image: Sensor Image: Front |
As a personal observation, it seems to me that some of the coolest ships in these movies have the least amount of screen time, and hardly ever get reproduced in plastic. Over the years I remember almost shouting to the four winds for the model companies to produce a Blockade Runner. When I saw Randy Cooper's kit of the Tantive IV I knew I HAD to have one. I followed his development of the kit online for some time and was totally enthralled by the detail of the parts, but the heavy price tag meant I had to wait. I considered scratch-building one, and even went through the motions of getting plans and other information I would need to do the job. I can tell you now that I am glad I waited to buy this kit. As a professional model kit manufacturer I can understand what Randy Cooper went through to produce this kit. The design of the ship was very complex, so reproducing it in resin would have probably made me throw a few tools across the room on more than one occasion. Simply trying to figure out where to disassemble the ship in such a way as to hide the seams would have been a nightmare. The fact that Mr. Cooper did so as well as he did, and was also able to produce incredible detail in the parts speaks volumes about his skill. If you are thinking of getting one of these little beasties let me say now THIS KIT IS NOT FOR BEGINNERS! (Mr. Cooper even says so on his web site.) In fact, if you don't have several years worth of resin kit building under your belt I would recommend you go practice some more before tackling this one. This kit is not terribly difficult to build; it just requires a lot of experience and finesse to get the parts to fit perfectly. Building Mr. Cooper says in the instructions that the hardest part is the engine section. I did not find that to be the case here. It was time consuming. There were a large number of voids and pinholes that needed to be discovered and filled. There were also molding seam lines that went across some of the detail. When cleaned up I decided not to totally assemble the engine section because doing so would make painting the inboard and undersides of the main engine parts difficult due to their close proximity to one another. Instead, I assembled the upper and lower rows, and left out the three engines in the middle. I also left off the engine nozzles until the end of the build. The plan was to build the ship with the engine section only partially complete, then paint everything at one time, and install the last three engines as part of the overall final assembly. The center and forward sections were actually the hard part. This model is hollow. The entire forward sections are cast as upper and lower pieces. The problem is that when pulled out of the mold the resin is not always fully cured, or the mold may distort over time, which results in distorted parts. Sometimes the parts get distorted during shipment on the hot mail truck. This was the case with my kit. However, it also appears that Mr. Cooper thought about this a little bit, and may have built in a little "fudge factor." When building the kit I, like most model builders, was inclined to sand the parts perfectly flat along the joints in order to glue them together. However, this kit is designed with parts and plates that cover the seam line almost completely along its length. I realized I was over-thinking the problem. I used Bondo to fill the areas that were not covered by the various detail parts. I also used strips of plastic to fill in other areas. My point is, while building this model, don't get too zealous about making it perfect along those seams. Much of it is going to be covered up anyway. The big item to remember is to make sure your bonds and joints are strong. At 27" in length, this model is big and heavy. Once the upper and lower sections were glued together I joined the forward and middle sections. Next I built the hammerhead portion and joined it to the middle section. There is a cockpit insert with some detail, but it is very hard to see anything once assembled, so I merely painted it in a basic way, and installed it. The glass shown in the pictures is clear, unlike the photo. The light reflection just messed up the shot. When I joined the engine section to the rest of the model I found out very quickly that it was very heavy in the rear. I did not want some huge armature supporting the ship so I decided to use a single support rod to mount it to the base. I added a large hardwood dowel to the junction in the fuselage under the rotating sensor to give the model a solid hard point for the stand, and drilled it to accept a piece of 3/16" steel rod. It also works out to be a good center of balance on this model. With all the main sections assembled I cleaned up my work to that point and began adding the other small parts to the ship. I used aluminum tube to replace all the gun barrels. I left off the rotating sensor until the very end to keep from breaking it. I also had to re-scribe many of the panel lines in various plates as I worked on the last parts of the kit, but nothing that caused a problem. Once satisfied with the assembly I primed the model with Krylon primer gray, and double-checked my work. Painting & Finishing I then painted the entire ship with Krylon gloss white. The red sections were painted with the wife's craft paints. I used Model Master Euro Gray for the chipped paint parts. I applied Warpigs Brand Grey Wash to make those panels pop, and sealed it all with Krylon Flat Clear. I weathered the whole model with pastels and sealed it again with Testor's Dullcote. I then attached the rotating sensor, gun barrels, and final three engines. The stand is made from the white shelf board Lowe's sells, and then painted with LOTS of Krylon gloss paints. Conclusions Overall this kit is a peach. It was a major build and very challenging to my skills, and I know what the heck I am doing so I have to say again that it is not for beginners. Although not perfect, the parts come out of the box with wonderful detail and are well cast. Assembly is not difficult, but must be thought out well in advance, and problems with the primary assemblies must be found and fixed before you have them. The instructions come on a CD, so you need a computer, but there are lots of photos and commentary by Mr. Cooper. Also, be prepared to do a LOT of online research, and collect a lot of photos. The SM Tech Library is great for this part. I found the pictures of the movie prop at the Chicago Museum very helpful. Otherwise, once the basic build is complete, painting and weathering is straightforward. This model is now taking up a nice big part of my office, and I stare at it all the time. This was a fun project. |
Please note that the opinions expressed in this article are those of the reviewer.
Read other reader's reviews of this kit ![]() Submit your own review of this kit.
Submit your own review of this kit.
![]()
Go back up | Star Wars Ships | Starship Modeler Home | Site Map | Feedback
This page copyright © 2011 Starship Modeler™. First posted on 2 December 2011.
![[Please click to enlarge]](wb_Tanparts.jpg)
![[]](wb_Tan1ssm.jpg)
![[]](wb_Tan2ssm.jpg)
![[]](wb_Tan3ssm.jpg)
![[]](wb_Tan5ssm.jpg)