 |
|
|
|
By Brian Dainty
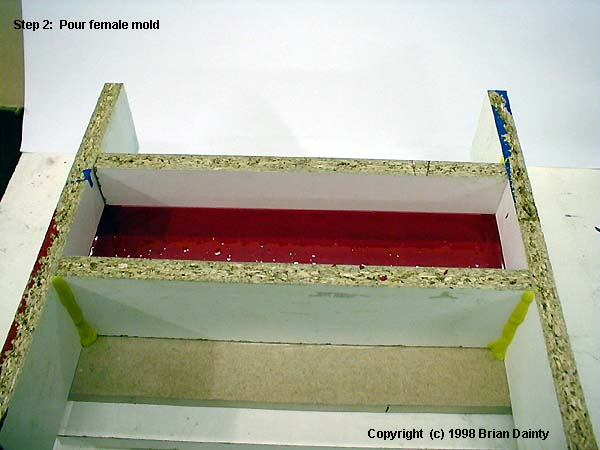
What I want to do here is more than just give you the instructions for making the subject of this article. I want to try to impart some of the theories and reasons for doing the things which have to be done, so that you will gain a better insight into moulding and casting techniques and hopefully have the confidence and knowledge to attempt bigger and more adventurous projects. That should result in better models! Here is the engine we are going to be making. On closer inspection of the drawings you will see that it is symmetrical about the horizontal centre line, so we only need make half the pattern then cast 4 parts for 2 engines. Was the component to be asymmetrical then the following processes would need to be duplicated for each half. The split line along the horizontal centre can clearly be seen, but it could also be along the vertical centre. The reason it isn't being put there is that it is always better to keep any mould cavity as shallow as possible, so as it ease removal. Firstly, the master pattern will be made from a solid lump of material; this material can be more or less anything, provided it is capable of holding a finish, workable, and non-porous. To prepare it for moulding it should have taper applied to all vertical surfaces. This is to allow the pattern to be drawn out of the mould easily. If there was a hollow or dent in a vertical side then this would be an undercut and so prevent removal of the pattern. This is why taper is applied. I suggest drawing out the end view of the part to see what difference having tapered sides will have on the final model. The degree of draught (taper) should be as much as the model can stand, ideally 2-5°, but this doesn't have to be consistent over the whole of the pattern, if you can increase it locally then do so. For this kind of mould, I would advise that undercuts be modelled out or blanked off or the split line altered in such a way as to avoid them if at all possible. I won't discuss here what to do about them, they can of cause be cast and moulded but a better appreciation of the basics will make understanding how to deal with them that bit easier. We are going to use a type of mould I call Suspended Core. It is different than the usual, single split, open and shut type closed mould, in that the core has no backing on it. This means that the cavity we wish to fill is completely open, allowing the best possible flow path for both air and resin. Suspended Core tools have another advantage too: they use less resin than a conventional closed mould! Another thing we will do which is not usual is to leave some selvage on the pattern. This will give room for air bubbles to rise into and hopefully away from our part! The selvage will be something like 3-6mm and is simply added to the back of the pattern before introducing taper. So when drawing out the end elevation remember to add 3mm to calculate finished pattern sizes. We are now ready to make the mould. The pattern has to be placed inside an open topped box into which the resin is poured. It needs to be held firmly in place to prevent the resin from pushing it over, and to stop as little material seeping underneath as possible. I like to use double sided adhesive tape to do this job. I cover the whole of the under surface of the model and trim it off around the perimeter. Make sure the board is flat, smooth and non-porous (a Melamine or Formica covered particleboard is perfect). An allowance of 25mm all round the pattern is about right. It is important to make sure the box doesn't leak, otherwise your hard earned hobby money will end up on the floor! So push a bead of modelling clay into the corners of the box to ensure that resin stays where it is intended to be. Paint the whole of the inside with two coats of a good wax-in-suspension release agent, which is better than a spray. Set the baseboard level, this will reap great benefits later on and will keep the resin even all over. I do this by sitting the baseboard on three balls of clay, then with a spirit level on top of the mould box I press down on the corners to level the box in. Now, at last the sticky stuff can be mixed and poured into the mould box. I would recommend a filled, fast-cast Polyurethane resin, second to this a standard filled resin, then a filled epoxy. If these are unavailable then you could use a filled polyester resin, or even plaster of Paris. If you use PoP please make sure the mould is very very dry and sealed before you use it! The quantity of resin can be calculated accurately, but that's far too complex an operation for what it gives you, so use a little eye judgement. If you don't mix enough be sure to top up the first mix before it gels so adhesion between layers is maintained. Let the resin set properly! I know the temptation to demould will be almost unbearable - but wait. It's easy to ruin a mould or casting by knocking it out too soon. Wait at least as long as recommended on the can, then a bit. The material used for the master pattern will have an effect on how easy the de-moulding will be. A soft substance like balsa will almost certainly be completely destroyed in the de-moulding process. Wood and bodyfiller, on the other hand, should come out intact. Remove the pattern from the mould by banging the mould down onto two pieces of 2x2 set next to one another. Inertia should have the pattern out in no time. When the pattern is out look at the inside of the mould carefully. You will see raised detail wherever there was a scratch or dent in the surface of the master model; the moulding process has inverted the surface imperfections! This is very much to our advantage. If the inside of the tool is now smoothed off when we cast our part it will naturally have an even better finish than either the pattern or the mould. |
![[Plans]](bd_det.jpg)
Leveling the mold box.
De-molding.
Master and firest (female) mold.
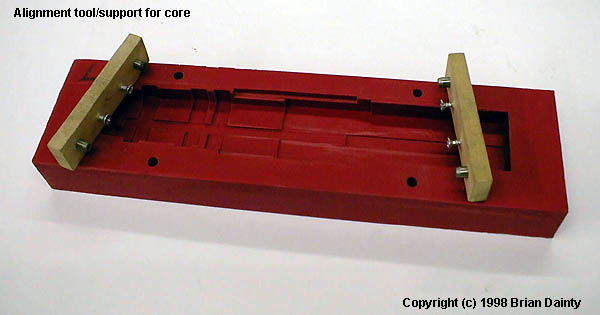
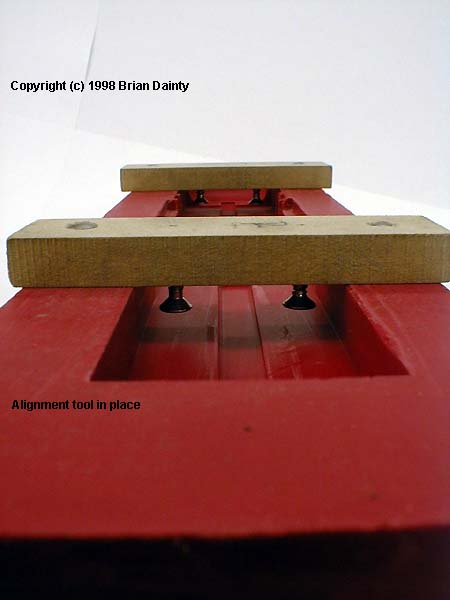
Core support/alignment tool.
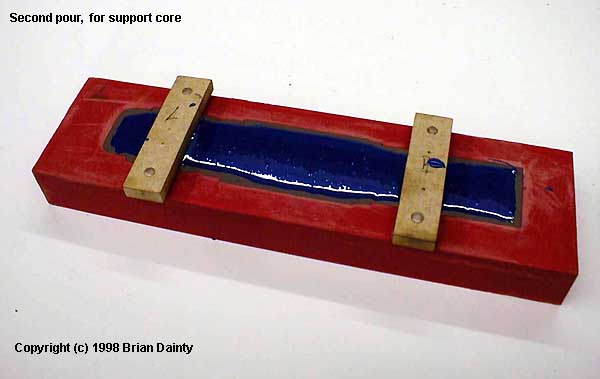
Fill the female mold with a clay layer.
Completed molds.
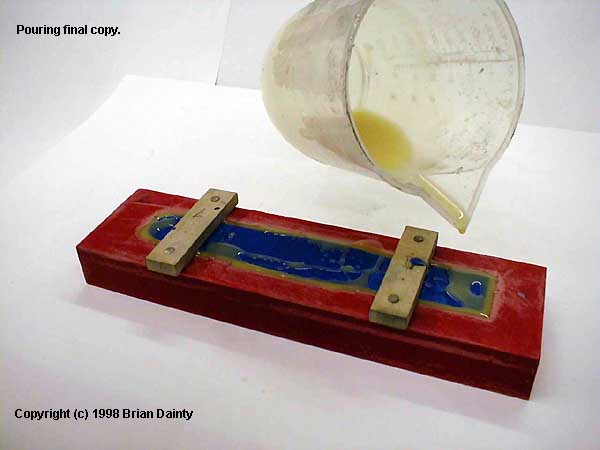
Pouring resin (displacement method).
Molds & finished product.
Completed project. |
|
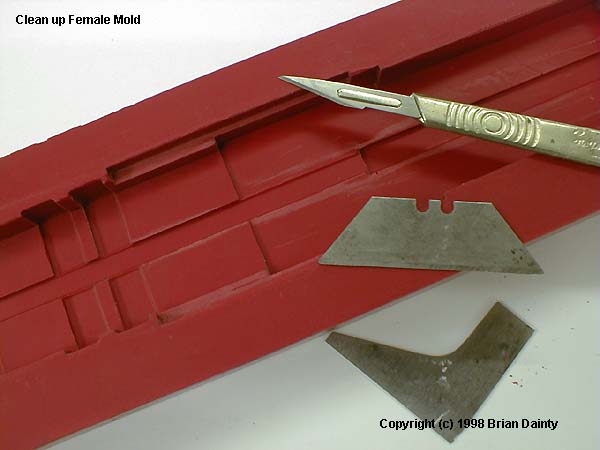
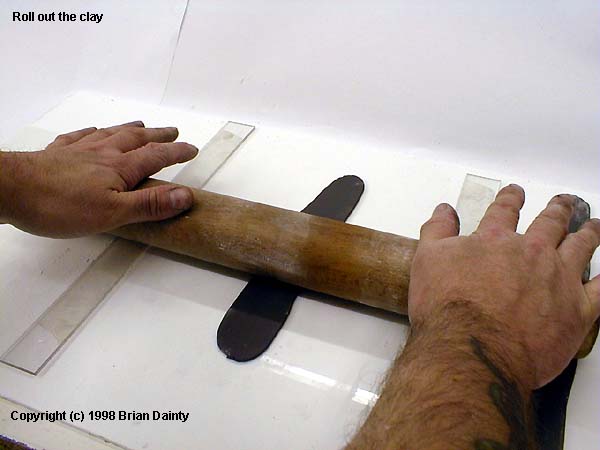
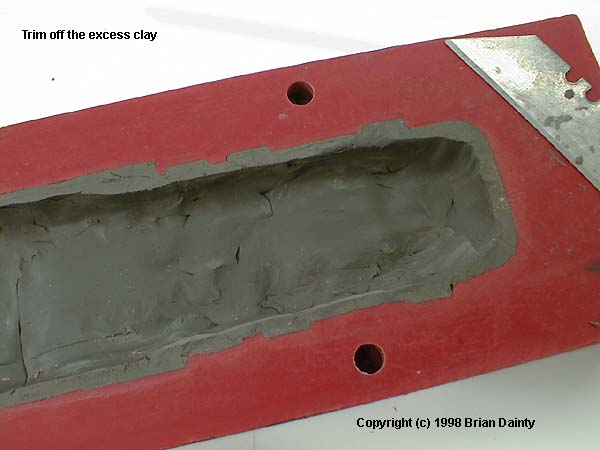
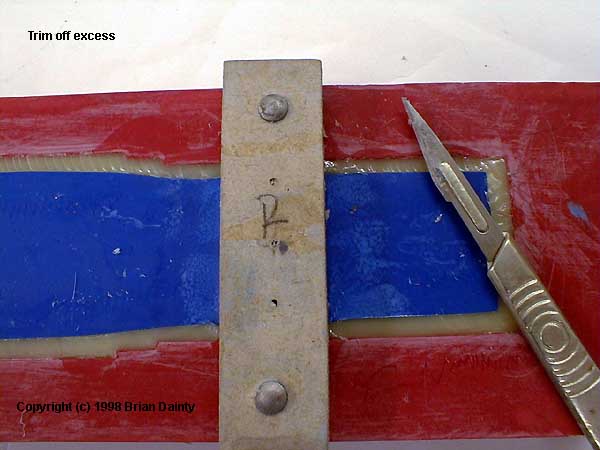
Take a small scraper and some 80 – 100 grade abrasive paper (sand paper), and work on the female mould until the finish is smooth. If there are any wildly deep dents then scratch them out deeper and fill with bodyfiller (a dent in the female is a projection on the male and will cause our casting to stick in the mould). That's the end of this stage of the work. The female mould has been made and is cleaned and ready for the next operation. If you wanted to make a solid casting now would be the time to do it. A hollow shell is the aim of this project though, and the way we produce it is like this: Roll out strips of Plastacine (a non-setting oil based modelling clay) to a constant thickness of 3mm. Do this by using strips of plastic or wood as height guides for a rolling pin. Keep it cool and if it sticks to the pin use a little talc on it (just like your Mum did with flour when making the apple pie!) Cut the strips parallel and press them into the inside of the mould. Start in the middle and work outwards to the ends. Butt each new strip to the last one but be careful not to thin the clay out too much or to mark it excessively. Allow the Plastacine to stick up over the top edge of the mould so that it can be trimmed of later. Trim the top off last with a sharp long bladed knife, don't worry if the inside top edge of the clay gets rounded off, this can easily be sharpened on the core. Now you should have a cavity with a 3mm layer of clay in it. What we have to do now is to prepare the core support strips, then pin them in place. For this you will need two strips of wood or plastic, four wood screws and four dowel pins. The dowels can be wood, plastic or metal, but most importantly should be smooth and parallel with a drill bit to match the diameter. Take two strips of wood (sealed) or plastic at least 6mm thick, and cut to the same length as the short side of the mould. Now find four wood screws, that are about the same length as the distance from the top of the mould down to the clay. Position the strips so that they are at 90° to the cavity and inboard of the ends by about Ľ of its length, one at each end. Mark on the strips four places where the screws could go without fouling the sides of the cavity, also mark around the strips onto the mould and identify each strip and its position uniquely. Remove the strips and drill holes for the screws. Fix DST to the underside of the ends of the strips, then reposition them on the mould. Fix the screws into the holes and check that they are clear of the cavity walls, when you are happy with this drill the pin diameter holes through the strips and into the mould. Doing this sequentially and putting a pin in each hole will help with alignment. If you are drilling by hand do everything possible to keep the holes vertical. Remove the support strips again and brush all over with release agent, also apply to the whole of the female mould with the exception of the cavity. Do not allow any release agent to get onto the Plastacine, it will make it stick like crazy! Set the mould level again, making sure the support strips are seated down and the woodscrews are in the cavity. If you haven't worked it out yet the screws are the means by which the core is registered (held in the correct relative position) to the cavity. Time to mix the sticky stuff again, this time fill the cavity carefully to the top, and make sure that resin comes into contact with the support strips. Don't fret if there is any spillage over onto the female mould, because the core will need to be worked in the same way as the cavity. Allow the resin of the core to cure thoroughly and to cool down completely before demoulding. This is important if you don't want to spend hours cleaning sticky clay off the mould halves! When the core has been removed clean the clay out of the cavity completely. Wipe it out with a solvent if needs be, but use something like turpentine, nothing too strong, as the surface of the resin can be effected. If in doubt test a small area somewhere non-critical. Now scrape and sand the core to remove any raised areas (which would have been pockets in the Plastacine). Check that the core with its support strips will fit back in place easily and that there is no appreciable play between the cavity and core. Brush two coats of release agent over all surfaces again, allow to dry, and assemble the mould halves ready to cast the shell. Set the whole tool level again. There are two ways in which the resin can be pored into the mould. You can simply pour it in slowly from one end, or into a clay funnel. Or you can fill the mould first then drop the core into place. I call this method displacement casting. Take a sharp knife and slice off any excess resin from the top of the mould before it sets hard (when it is still "green") and then demould shortly after that. The time to demould will depend upon how complex the part is, and on the resin you used. I tend to knock my castings out before the resin hardens properly just to help a little. The added flexibility of the part makes the demoulding process that bit less stressful. Any distortion in the casting can be removed by placing the cast in very hot water. The next stage is to finish detailing the casting, then to make a silicone rubber mould which will enable you to reproduce all the details and undercuts as often as you need. |
![]()
This page copyright © 1997-9 Starship Modeler™. Last updated on 8 February 1999.
![[Mold box]](bd_04.jpg)
![[De-molding]](bd_10.jpg)
![[Master & Female Mold]](bd_11.jpg)
![[Core support]](bd_15.jpg)
![[stuff with clay]](bd_18.jpg)
![[Completed molds]](bd_26.jpg)
![[Displacement method]](bd_27.jpg)
![[Molds and product]](bd_33.jpg)
![[Viola!]](bd_36.jpg)