
|
|
|
By Rob Caswell ©1999 |
|
|
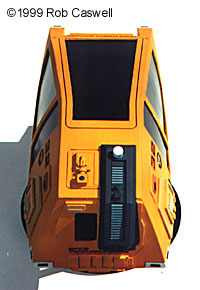
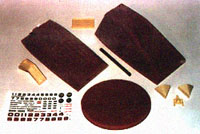
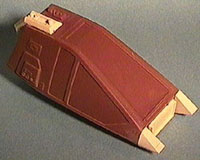
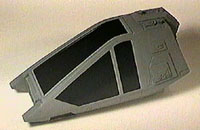
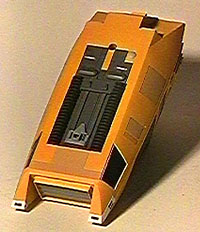
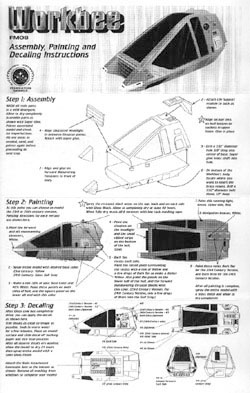
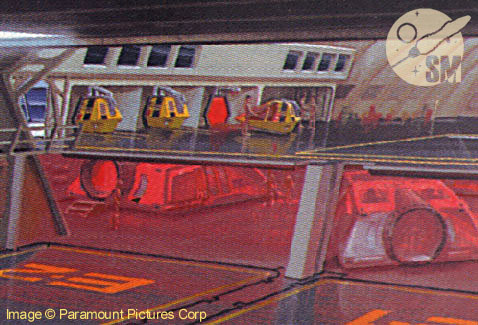
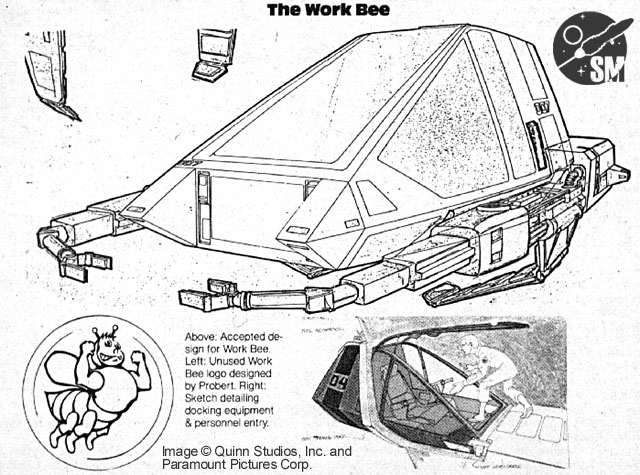
Regardless of what shortcomings folks may attribute to Star Trek: The Motion Picture, it probably had the most solid science and engineering foundation ever seen in the Star Trek franchise. The hardware not only looked good, but it was designed to work! For the first time we had airlocks and RCS thrusters in Star Trek. 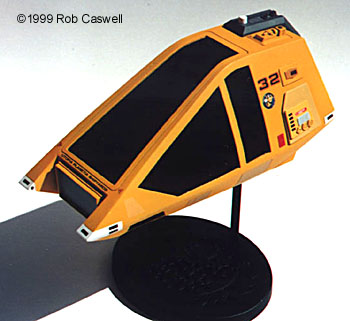 The Work Bee is a product of that practical approach to Star Trek. As designed for the movie, the Work Bee could be used to shuttle standardized cargo pods or could be outfitted with a pair of waldoes for missions requiring manipulating and toting objects around. They were Star Trek's equivalent of 2001's EVA Pods. After Star Trek I, the Work Bee was rarely seen until recently, when the design was dragged into the 24th century and featured in the revised Deep Space Nine opening credits. Thus the Work Bee was rescued from obscurity, which may have been part of Federation Models' incentive to make a kit of this subject. This model allows you to make either a 23rd century (early movie era) or 24th century (Next Generation/Deep Space Nine) Bee, though the kit only includes the basic Bee - no waldoes or cargo pod clasps (though both could be great scratchbuild projects). Attracting a Bee I chose to buy my Bee direct from Federation Models. It was $45 (1999 price). The service was quite good. Federation Models "casts to order", meaning they don't just have a big warehouse of stuff waiting to be shipped. Given that, I was impressed with the two and a half week turnaround. The kit came well packed in a sturdy corrugated box, with color xeroxed "box art". All the parts were well packed, with the small parts and decal sheet in their own separate baggies. Entomological Inspection The kit is pretty big - about 7" long when completed. Using the numbers in the Deep Space Nine Technical Manual, I estimate the kit to be about 1/23rd scale. The kit has nine structural parts, eight of which are resin. Two types of resin were used: a rust red types for the hull halves and base, and a light tan for the smaller components. The main hull is in two (big) pieces, with alignment pins on the inside to aid in getting an accurate fit between the halves. All parts exhibited some airbubbles and pits, but I don't want to give the impression that the kit's quality was poor. The pits were small and fairly easy to fix. For the most part, the casting was very clean and crisp. Still, the kit's large size and simple construction makes it a "painter's kit", so you'll want to spend the time to make sure all irregularities are cleaned up. One of the coolest elements of the kit are the decals! They include markings for the 23rd and 24th century eras and include a choice of "assignments", such as DS9, Utopia Planetia, Enterprise, Reliant, or just the general Starfleet Corps of Engineers. While a marking guide is included, we have never seen much in the way of markings examples in the show. As a result, it's fair to say the modeler has a good amount of latitude in decal choice and placement. It's a fun sheet to play around with! The only downside to the decals is that they were apparently done on an ALPS printer. This means that some colored areas exhibit a dot-screen effect, like the lower quality Monogram sheets.. The kit comes with a single, well illustrated, professionally done sheet of instructions, combining construction, painting, and markings notes. It also includes some useful hints and tips for building an finishing. However the painting guide may have some innacuracies (see "Coloring the Worker", below). Building the Bee Since the kit is so large and has so many smooth surfaces, I wanted to make sure I had ever pit, bubble, and seam adequately finished. For this reason, the bulk of my construction time went into clean-up and seam finishing. For both I used Gap Filling CA and Bondo Spotting and Glazing Putty, thinning it with acetone in some areas to help it flow into seams or small pits. I spent more time on this phase than I would have liked, but (a) I was being a perfectionist, and (b) I'm really inept at filling pin holes... The kit's construction is very simple: attach upper hull to lower hull, then stick on five parts. The hulls' alignment pins work quite well, however there was some very slight parts warpage on my kit, which resulted in a significant amount of puttying to hide a 1/32" gap where the two parts met. This problem could probably be avoided by making sure you dry fit the parts, closely examine the fit, and sand the mating surfaces where appropriate. In other words, do what I say, not what I do... I only caught two areas where the accuracy falls short. The most notable is that the lower of the two thrusters for both rear RCS quadrants is missing. The other concerns the panels set behind cockpit, on both sides. The port (life support access) and starboard (main power access) should be different, but the kit depicts them both with the life support access details. Both of these are fixable with some effort, but I figured that to do so would be confessing to the world that I spend too much time with my Star Trek blueprints (that and I figured the kit would look just fine, as molded). Coloring the Worker The next step is figuring out what paint and decal scheme to use on your Bee. This little craft has seen service from the original Motion Picture days, all the way up to Deep Space Nine. The instructions give details on how to paint the Bees for each of the given eras. However, these instructions seem to be flawed, given all the reference I've been able to uncover. |
|
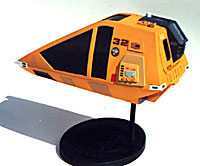
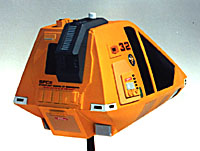
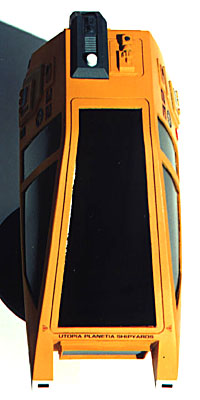
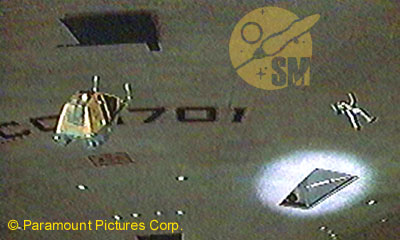
The biggest mistake the instructions make is in indicating that the 24th century Bee is painted gray. This was based on eye balling the Deep Space Nine opening credits. In all fairness to Federation Models, they do look gray in that sequence. On top of that, these instructions were spec'd in Summer '98, before the DS9 Technical Manual was published. The Manual clearly shows the 24th century scheme as an overall Caution Yellow. If you choose the 23rd century scheme, overall yellow is not appropriate. The Motion Picture shows two different schemes, which can be rationalized as a Space Dock scheme, and another for the Enterprise. We see lots of Space Dock Bees flying about, but the Enterprise Bees only show up in the background of a couple of matte shots. The main variables between these two are the color of the dorsal service hump and way markings are displayed on the cab sides, with the Enterprise Bees using a black graphic bar to frame the numbers. Accuracy aside, I mixed and matched and went for what looks best. I chose to do a Bee from the Utopia Planetia Yards. Since we've never actually seen one of those, I challenge you to tell me my color and markings choices are wrong! The instructions do give you some useful tips on how to approach the painting. I finished the kit in Polly Scale colors. I used future to both gloss the windows and put down gloss portions for decals. The decals went on great! These were some of the best decals I've worked with. They went on without a problem and had no significant silvering problems. They took Solvaset fine, which eliminated any minor silvering that occurred. I made custom decals for the two hard-docking attachment point doors, on either side of the nose. These were simply painted blank decal paper, clear-coated with Krylon. |
|
The Last Word This was a fun build, though it took me longer than expected due to filling airbubbles. The only things I'd have done differently were to put a styrene face on the front of the main fuselage (even though I carefully filled all the bubbles here, some still showed as depressions when the model was finished) and to have masked off the main nav beacon during the primer stage, rather than trying to paint it white once the rest of the model was finished. Overall this kit's a nice representation of the vehicle and when finished in bright yellow it adds a nice color highlight to one's model collection. |
|
|
References:
|
![]()
This page made possible by Starship Modeler - © 1999.
Last updated on 14 April 1999