
By Jacques Duquette - images & text © 2002
|
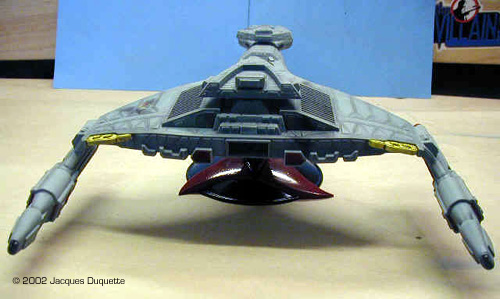
![[Click to enlarge]](jd_vorcha_003.JPG) This article details the building of AMT/Ertl's kit # 6812 Klingon Battle Cruiser, which they label on the instructions as a K'Vort class attack cruiser. |
|
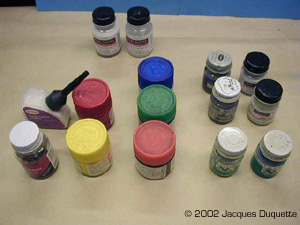
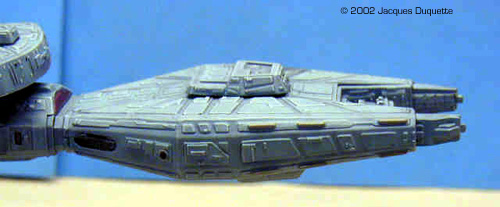
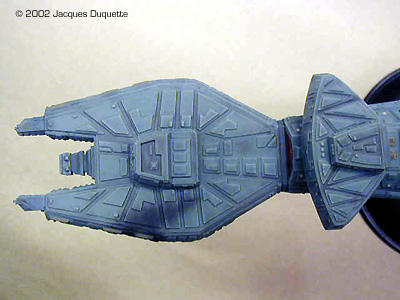
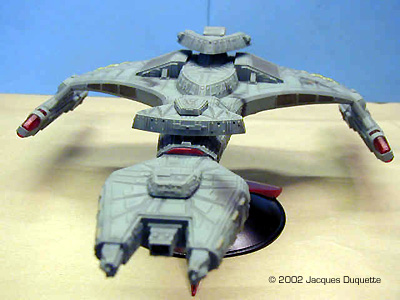
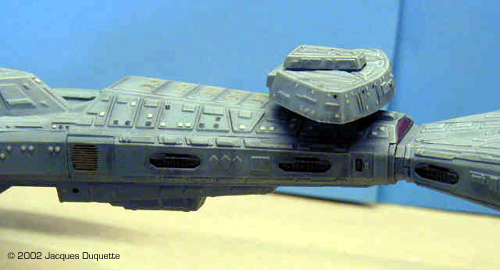
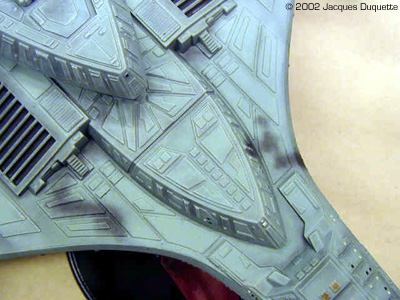
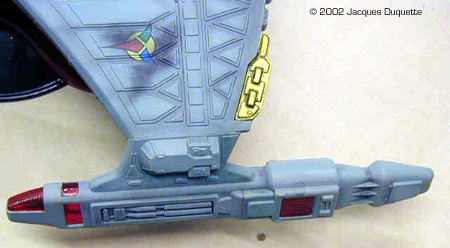
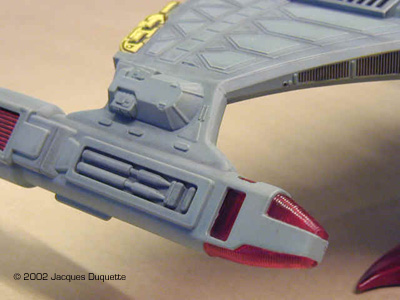
Image: Tinted parts and main hull pieces ... Image: ... and the rest of the parts Image: Paints and supplies used Image: Looking down the throad of the disruptors Image: Side view of the "fangs" Image: Top view Image: Looking over the bow at the bridge Image: Closer look at the bridge Image: Side view of the "neck" Image: Looking back along the top of the hull Image: Overhead view of the same area Image: Port "wing" and warp nacelle Image: Close-up, starboard side nacelle Image: Rear view Image: The kit-supplied stand hides the brass tubes Image: Base with brass tube Image: Brass tube inserted in the ship |
It should be a Vor'Cha class Battle Cruiser. The K'Vort is a larger version of the B'rel Bird-of-Prey. The scale is supposed to be 1/1400, which I accept. This kit is out of production, as with all of Amt/Ertl's Star Trek kits, but can still be found for $10-$30 pretty easily on the internet (as of this writing).
In the Box You open the box to find it mainly empty but for a couple of sprues molded in light blue and a sprue molded in clear red. You could probably fit three kits in the one box. There is also a small decal sheet and the large, fold-out instructions. Supplies Used
Building By-The-Numbers The instructions are broken down into 8 steps. I generally followed them, building up sub-assemblies and painting them separately Step 1: Basic Battle module assembly. There are a couple of seam problems between part 36 (front bulkhead) and the rest of the unit requiring filling and sanding. I used 0.25mm styrene rod from Evergreen. Once built, the unit is solid. Step 2: Detailing the Battle module. Adds the disruptor cannon and weapons control bridge. I added the navigational deflector as instructed as I planned on painting over it later. I set it aside for later painting. Step 3: Impulse Wedge Assembly. Not sure if this has anything to do with the impulse engines, but that is what they called it. It goes on the ship in the far back, above the impulse engines? Good fit, no problems. Once built, set aside for painting. Step 4: Bridge assembly. Bridge for the area right behind the Battle module. Again, no problems, set aside for painting. Step 5: Warp drive nacelles. Built as instructed. Had to do some filling and sanding to get the seams out, but nothing major. Fit was very good. I ended up reversing part 18 on both nacelle ends versus the instructions as looking at the Studio Model it looked better that way. I'm not sure if it is entirely correct though. Step 6: Hull assembly. Here is the majority of the kit-building work. |
|
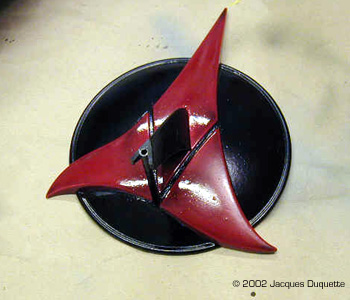
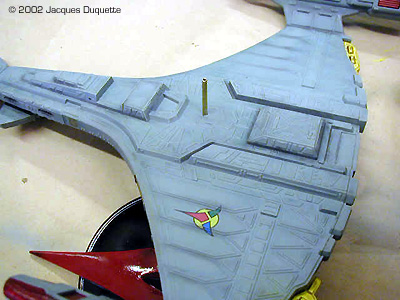
Parts 22 and 23 (Impulse bulkheads) did not want to conform to the shape of the upper and lower hull without some persuasion, so I ended up clamping and using rubberbands. This took care of the problem and the were no major fit problems. I then attached the warp nacelles. DO NOT add the warp nacelles until the main hull is glued and dry, as the warp nacelle's add a fair amount of stress to the kit. The assembly was set aside to dry, with care being taken to keep the nacelles straight and level to the hull and to each other. Seams that needed to be filled were along the upper hull (part 2) and Rear hull bulkhead (part 16) matchup, and the seams of the upper/lower hulls (parts 1 and 2) and the warp engine nacelles, from Step 5. I ended up using both .25mm styrene rod and Squadron Green putty to get these areas smoothed out to my satisfaction. The fit problems, however, were very minor compared to other kits, and I spent maybe 25 minutes on this step aside from glue drying time. Step 7: Final assembly. At this point, I added parts 303 and 302, the impulse engine lenses and I built the disruptor blocks (parts 26, 27, 28, and 29), and then added them to the rear hull. The disruptor blocks needed putty and sanding to smooth out the seams. I built the base and set it aside to dry. Step 8 deals with painting the kit. The instructions have some very detailed, and interesting, paint diagrams. I do NOT suggest you paint the impulse inlets flat red. Painting and Detailing ![[Perspective view]](jd_vorcha_022_Persp.JPG) I painted all parts from steps 1-7, excluding the base, with PS Light Blue. I let this dry for about 24 hours. Next, I pre-shadowed the hull by thinning PS BR PRU blue about 50/50 with thinner and using as narrow a line as possible, painting this into all of the lines and normal shadowed areas, if the ship were to be seem from above. Places that received a full painting and not just the panel lines were: the bottom of the warp nacelles and the undersides of the Impulse Wedge assembly and Bridge assembly. I then set this aside to dry. While waiting for the ship to dry, I painted the base PS black. I next glued the Bridge, Impeller wedge, and battle module assemblies to their respective places. The battle module fit so well that it may not have been necessary to glue it in place, but I did anyhow. I let this dry for about 2 hours. The only parts that should be left are clear red parts 304 and 305 (2 sets of each), the main ship, and the base. The base was then painted Tamiya Red on the Klingon Tri-symbol. PS Flat black was used to touch up any overspray. I then coated the entire ship with the future floor polish/water color mix, as well as the base. CARE MUST BE TAKEN! Using this method is somewhat tricky. The Future must be applied thick enough to look "wet", but not so thick that it will start to run. If it is applied too thin, it dries flat. IF too thick, it dries with runs that have to be sanded out and repainted. Remember to be careful. Practice this technique before painting with it on a kit. And do not get too frustrated, even I have my bad days were I cannot get this to work. Why bother? Well... This technique allows for three things:
I next applied the decals. I only added the Klingon Tri-logo decals as I thought the others looked to unrealistic, even for me. I then allowed the decals to dry for about 1 hour and then recoated the model with the clear Future floor polish mixed with a small amount of Tamiya Clear Green, about a 1:20 ratio. I had to add a small amount of rubbing alcohol as well to get the paint to mix well with the Future. The resulting liquid should look like Green Kool-Aid. I applied a light, wet coat. I let the kit dry for 24 hours. Then I applied another coat of clear Future with Tamiya Clear Blue that was a little bit stronger in color, and I again had to add a little rubbing alcohol to get the paint to mix well. I am sorry I do not have exact ratios, but experimentation should give you a good idea of what you are working with. If in doubt, spray on a piece of scrap plastic first to see the effect and if you need to thin it out more. This will give the desired green and blue effect, with a sort of grey appearance underneath. Now to drybrushing. I am assuming you the reader understand this technique. I started with the basecoat, PS Light blue. Then I selectively and carefully drybrushed with ModelMaster Camouflage gray. This is mainly used to highlight panels on the top deck and to accentuate the edges of main pieces extending up, like on the bridges and such. Take care not to overdo this technique. Less is often better. I then proceeded to paint the windows on the bridges and hull in a random pattern of what was on and off. I used PS black and MM Camouflage gray. I do not like using straight white as I think it is too harsh a contrast. I left the area on the right side of the hull, when you face the kit with the engines furthest away from you, with a patch of the lights painted black for a damaged area I planned on adding later. I also painted the "disruptor blocks" on the end of the ship in Tamiya Flat Yellow. The square "bumps" behind the main bridge and the impulse inlets on the front of the "wings" were painted MM Armor Sand. The "warts" on the battle module were painted MM Sand. These seemed to be good matches to the colors I saw on the studio model. Next, I added parts 304 and 305 to the Warp Engines. I glued them with the Testors clear parts glue, which works better than Elmer's glue for clear parts if you ask me, and admit it: you did! At this point, I painted all the parts that had been clear red, but painted over, like the impulse engines, warp drive radiators, and Deflector lenses with the Polly S Flat Aluminum. Let this dry about 1 hr. I then overcoated with Tamiya Clear Red, taking care to put a thick coat over the silver. I let this dry about 1 hour, then recoated any spots I thought need a "redder" look. (On reflection, I may have rather painted them Tamiya Yellow and then coated them with Tamiya Clear Red. It is something I will experiment with on my next project.) |
|
I took a few pictures of the kit next to the Bird-of-Prey from the AMT/Ertl 3 piece adversary set. I think they match well if you consider the BoP to be a B'rel class scout.
|
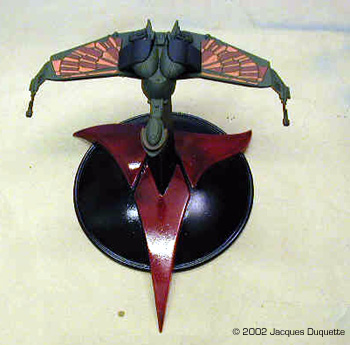
I now added "phaser burns" using the pastel chalks. I was not looking to add major damage, just the look of minor hits to add a little interest to the look of the ship. This is nothing more than a light dabbing of powdered up pastels dabbed onto the model with a brush. Then I used a powdered dark gray pastel in the brush to darken up the panel lines on the kit. Pastels can be very hard on brushes, especially if you use them for accentuating panel lines, so I use a older brush in the 0 to 1 range for this that I will never use to paint with again. I only applied pastels where natural shadows would occur, to help the 3D illusion. Also, take care not to touch what you have applies pastels to, or you will leave fingerprints that are a bugger to remove. Now I coated the whole ship with MM Flat clear to lock down the pastels. I let this dry 1 hour, looked over the pastel work for any touch-ups needed, applied said touch-ups, and recoated those areas with flat clear. Again, I let this dry for 1 hour. I then applied MM Gloss clear to the base, and painted all of the engine parts and deflector panels with it as well. This, in my opinion, helps give the illusion of the engines being on without the need to light them. I like the effect anyhow. Finally, I decided to add a brass tube to the base and put a smaller diameter one in the ship to help reinforce it for display. I drilled a hole on the ship where its natural balance point was on the base and added tubing. I then added the larger tubing to the base piece and ran it through the baseplate so that it would rest on the table surface and help support the kit's weight. The tube on the base was painted black, the one on the ship should not be painted so it will fit in the tube in the base. Overall Impressions The ship was put on the base and it was done. Comparing it to drawings in Star Trek: The Magazine, a couple of cards from the CCG Star Trek card game, and to pictures off the web, the model really captures the look of the Vor'Cha very nicely. Compared to the studio model, for its size the kit has a excellent level of similar detail. I really enjoyed this kit and can recommend it to anyone who wants to build it. I also hope this helps all those painters out there who want to get a nice effect on the hard-to-capture paint scheme. |
![]()
This page copyright © 2002 Starship Modeler™. Last updated on 12 April 2002.
![[Click to enlarge]](jd_vorcha_004a.JPG)
![[Click to enlarge]](jd_vorcha_005a.JPG)
![[Click to enlarge]](jd_vorcha_006.JPG)
![[Click to enlarge]](jd_vorcha_008.JPG)
![[Click to enlarge]](jd_vorcha_009.JPG)