
|
By Bill Human - images & text © 2003
The Eagle Transporter has always been one of my favorite ships. I never got to build one as a kid, but I did get one at a garage sale in 1977 or so. Well, six year olds manage to destroy everything they touch; as a result, I did not get another one till 2003. A few months ago, I bought an ERTL Space 1999 Eagle off eBay, and saw for myself the challenge it would be to build it into something I wouldn't be embarrassed to show. I had seen many great pics of Replica Unlimited's Eagle, built up by Jim Small, and was fascinated by the working landing gear. |
![[Click to enlarge]](bh_gear_fig13.jpg) |
|
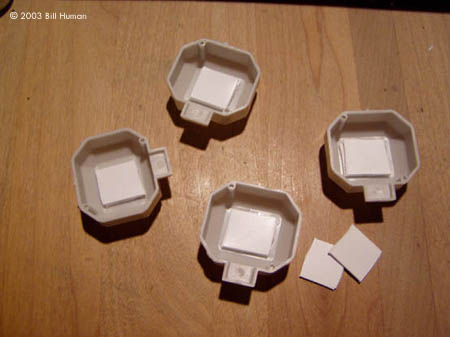
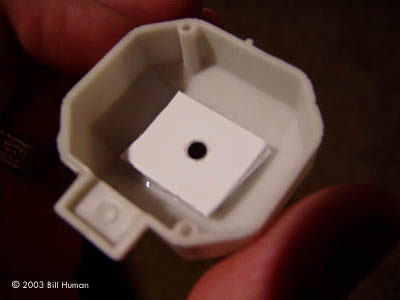
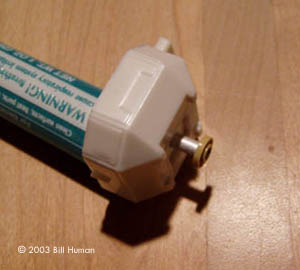
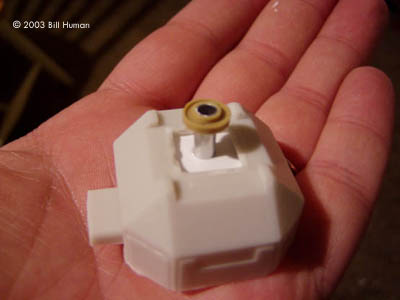
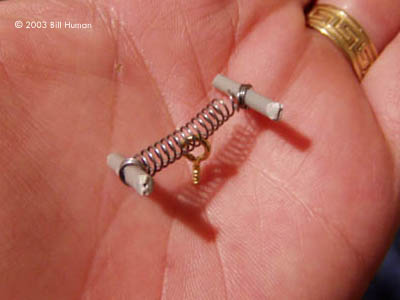
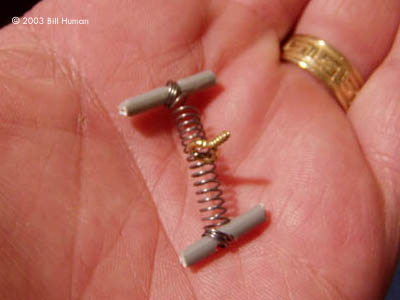
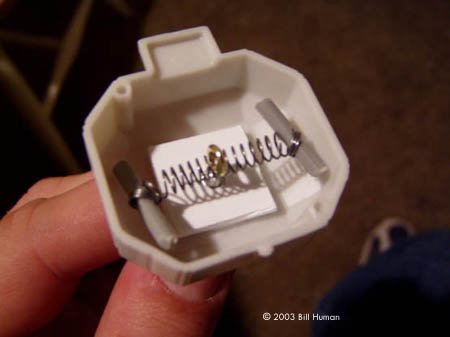
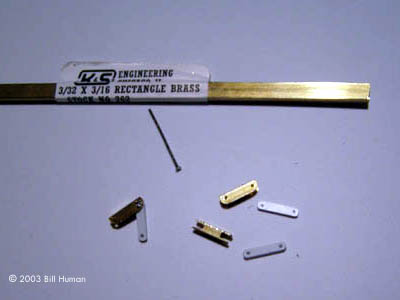
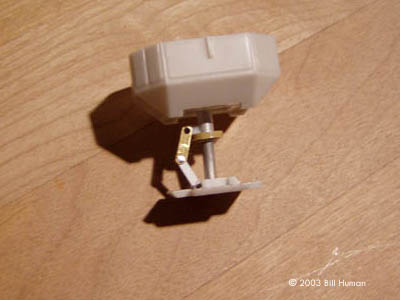
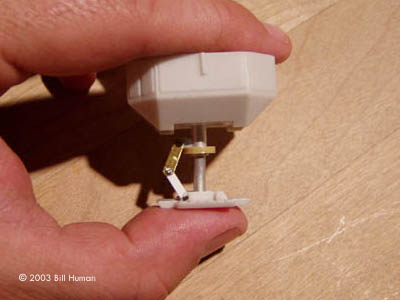
While waiting for my kit to arrive, I read all the articles by Michael Dentzer and Jack Wendt, and began planning my build - WITH working landing struts! Then, I got the kit... After I stopped crying, I started making a list of what needed to be done: the cages, the engines, the plumbing, the detailing, the drilling out of half the plastic in the kit, AND modifying the landing pods. The articles were very helpful, but were very sparse on pictures of the %$&#*@! LANDING STRUTS! Well here is what I did. First, I cut off the offensive little box on the underside of the pods and cut 16 plastic squares approximately 5/8 inch square. I then glued four squares on top of each other, over the opening but inside each pod. At the hobby shop, I found some aluminum tube and an aluminum rod that would "telescope" inside the tube. Sorry, I don't recall the exact measurement of the rod or tube. I cut the tube with a razor saw so that I had 4 pieces of tube about 1/2 inch long. I then drilled a hole of the same diameter as the pieces of aluminum, into in the center of my pods through the 4 small plastic squares in each one. After this was super glued in place, I rummaged through the parts box and found some bogie wheels off some old 1/35 scale tank kit. I drilled these out to fit onto the exposed aluminum tube, super glued them and then began building the "springy" part. I cut the aluminum rod into four pieces approximately 1 inch long, and using a very small drill bit, drilled a ¼ inch deep hole into the top of each rod segment. Again, at the hobby shop, I found some small, brass eyelet/screw thingies (used for the hangy part on Christmas ornaments!) which I then screwed into the top of the rod pieces. Cannibalizing four identical ballpoint pens, I took the springs out and inserted small pits of sprue through their ends. I then used pliers to slightly bend the eyelets till I could fit the rod/eyelet piece onto the center of the sprue/spring combo. Next, I fit the completed rod/eyelet/sprue/spring assembly into the pod and glued the sprue to the inside walls of the pod. I needed clamps to hold the sprue against the side of the wall, as the spring at this point became uncooperative. After resting several days, I decided that I had put the worst off till last. I had looked all over the hobby shop, craft stores, and hardware stores looking for something to use as the hinge, but found nothing pre-made. I even tried various pieces of plastic strips, staples, and paper clips as described in the (now hated) above-mentioned articles. Back once more at the hobby shop, I bought a piece of 3/32 X 3/16 rectangle brass by K&S Engineering, some Plastruct rectangle strip, and some Head Pins (used in jewelry making). Using my Dremel and a metal cutting bit, I cut the brass rectangle down to form the top of my hinge piece. After making just one of these, I was tired of doing it! Let alone making three more! I then drilled a hole in each end of the piece, and started making the other three.After all four were complete I cut the Plastruct to the same length as my brass pieces and drilled holes in each end. On the kit's footpad, I drilled a hole through the top of the ridges that run on top. On my bogie wheel piece I glued a small piece of plastic with a small hole in it to serve as my attachment point. I inserted the head pins through the holes in the brass and through the Plastruct, bent the head pin to join the pieces, and cut off the excess. I then joined the brass top to the bogie wheel piece and the Plastruct bottom to the footpad using the head pins. After super gluing the aluminum rod to the footpad, and using some plastic rod for the superstructure, my pods looked functional and worked! Whoa!Epilogue If you attempt this, you may want to stretch your springs a bit to reduce their tension. I had to add 1 pound to my Eagle's passenger pod with modeling clay embedded with fishing weights to get her set properly on the landing struts. But hey, the upside there is that she feels very substantial to hold, like a metal kit. This modification is a real pain to do, but I guarantee you'll love have working gear on you ERTL Eagle. Enjoy! |
![]()
This page copyright © 2003 Starship Modeler™. First posted on 22 October 2003.