
By Dominic Handl - images & text © 2004
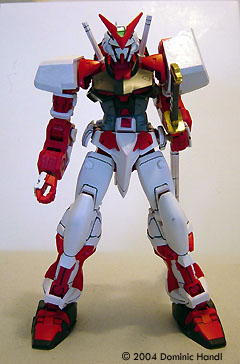
Bandai first released this kit as a simple 1/144 scale kit, then, released it again as a High Grade (HG) 1/144 scale model. That was better in quality and had more joint movement than the previous one. This is Bandai's latest release of the Astray- Red Frame. |
 |
|
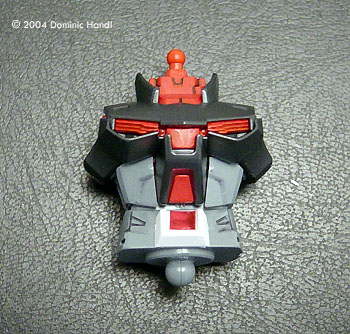
Image: Arms Image: Backpack Image: 'V' for Victory! Image: Katana Image: Legs Image: Main body
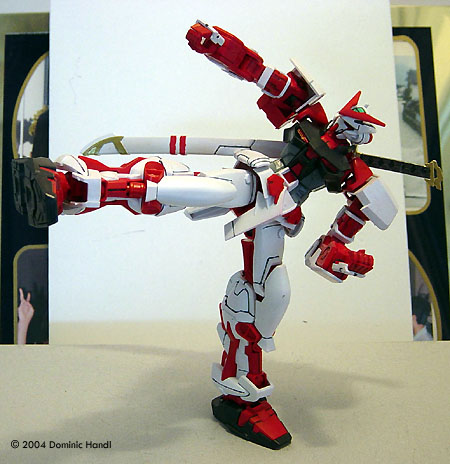
Image: High kick |
Among those who make the Gundam models, the demand for this kit is high. It would be sold out in every store. On eBay, it always commands high prices I was however, lucky. I was looking around in a hobby shop in the Kaimuki area in Hawaii, " Toys -n- Joys". There were a variety of models from the Gundam Seed series, including the 1/100 Astray. Of course I grabbed it. What You Get Upon opening the box, I saw it was crammed with plastic nicely packed inside. Each sprue is protected by plastic bags. The contents were-
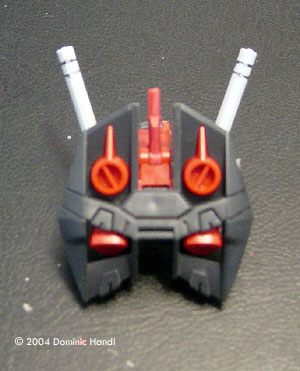
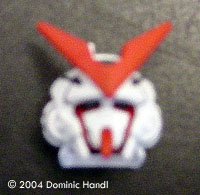
I looked at each piece closely. This kit certainly had a lot of detail to it. It really blew my mind. It presented me with a challenge. At that point, I was already thinking about how to make the model, what parts to use and what not to. I excluded the beam rifle and the shield. I felt they would not match with this model. Those are now spare parts for other projects. A pretty neat feature was the Astray's sword. First time I saw a Gundam use a katana. The blade of the katana was a chrome plated piece of plastic. This is really cool. And it comes with its own scabbard. That's even cooler. Bandai really had a good idea coming up with something like this. Painting Even if the model is molded in color, painting it will enhance its appearance. I favor painting the parts while they are on the sprue. To make things easy, I just decided to go for the white pieces first. I used a Gundam Marker to put two to three thin coats of paint on each part; the tip of the marker does a good job of spreading the paint evenly. I did the same with the red pieces. After the white pieces were dry, I took the sprue that had pieces for the katana. I painted the scabbard with some gold on some parts and red on some parts of it. The hilt I painted gold completely. The handle was a dark grey color in the middle and gold on both ends. It was starting to look good. The eyes were done in the usual manner: painted black on the recessed areas and green on the eyes themselves. For this Gundam it was a bit tricky with the small space, so caution was needed.A Touch of Realism I was never the type to see a Gundam look so shiny and new. For me it has to look like its been in some amount of action to at least look a bit real. I took the red pieces and I tried something new. I had a set of Real Touch markers, which are sort of detail ink for dry brushing. Using a q-tip (cotton bud), I dabbed some of the red Real Touch ink on the corners of the pieces and spread it around evenly. Each piece was covered evenly. I did the same with the grey pieces. It was really starting to look good. For further detail, I went over the panel lines of some of the pieces with my micron pen. Assembly As shown in the instructions, I started with the upper body. There were two large pieces to this assembly and three poly-caps. Two for the shoulder joints, one of which joins the main body to the lower body. The lower body is two large pieces and has a ball joint that connects to the poly-cap socket on the upper body. This part has a poly-cap for the pelvis joint. Its not like any Gundam model I've made in the past. The main body comes multi-jointed. That was all detailed before I put the outer covering on. It was 3 pieces: a big piece that goes on the chest, and two small ones that attach to the back, just below the shoulders. The head was next. I don't even know why Bandai set up the instructions in this manner. The head consists of seven pieces plus a poly-cap that connects to a ball joint on the neck. First I had to put the whole face together. It was three pieces: the eyes, the chin area, and the face guard. This part then goes into the two large pieces of the head. Then the back piece went on with the “V' on the head last. As an option, since the V was a whole piece, I could either have it on or have it with out the V as a Hexa-type. I chose to put the V on. Maybe on another Gundam of this type, I will make a it with a Hexa-type head. It has a very sleek look to it. The arms I had to do in stages. First the biceps had to be done. This part had two poly-caps, one for the elbow joint and one which connects to the shoulder. The upper arms were large pieces. Two poly-caps go in to this part with one extra for add on parts and one for the wrist joints. The wrists I did separately and joined later. This has a poly-cap which connects to a ball joint on the hands. After all that was done, I put the outer covering on the arms, and did the shoulders. These had a joint which connects to the arms and another which connects to the main body. The shoulder armor has grilles. I thought that was pretty cool. The hands were two pieces so they were straight forward to assemble. I used only three of them. The one for the rifle I didn't use. |
|
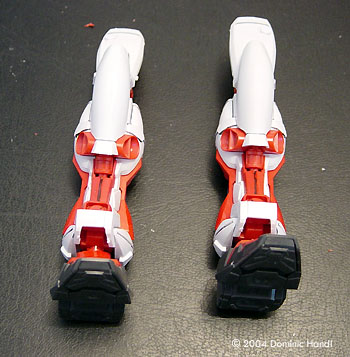
I got the arms together. With the head, I connected both arms to the main body. The lower body is a straightforward assembly, just two large pieces with three poly-caps. One poly-cap to connect it to the ball joint on bottom of the main body and two poly-caps for the side armor plates. After this part was done, I connected it to the main body. The legs, like always, has the most pieces. First I had to do the thighs and the hip joints. Two poly-caps had to be used, one for the knee joint and one to connect the hip joint to the thighs. The legs have one large piece which is the internal frame. Then the outer cover goes onfollowed by the back piece and the knee guards. The legs were completed, and I joined them to the hip joints on the lower body. The feet were easy, with one poly-cap for the ankle joint. These were assembled and connected to the legs. Then, not sure if it would be possible or not, I tried to pose the model stand on one leg and do a kick. Looks like it worked. The hip joints are angled up a bit, making this possible. The back pack was a few big pieces which came together easily. It has a hydraulic arm to give the option of lowering to put the sword on the back or in its raised position. I tried the movement. It worked well. Now the best part: the Katana. This sword's blade came in a chrome plated piece. I did the scabbard first then the sword. It was just the hilt and put it unto the sword and put it into the scabbard. I put the sword on the left side armor then put the hands on last. Conclusion This is the best model of the Gundam Seed line I have done. The contours of this Gundam are very sleek - it's a very nicely designed model. This is one slick piece of engineering. The amount of pieces it had for the legs made it look like it was almost a Master Grade model. It could almost pass as one. I did have fun putting it together. There are many other versions of this Gundam I will be doing later on. |
![]()
This page copyright © 2004 Starship Modeler™. First posted on 30 September 2004.
![[parts is parts]](dh_Astray_parts.jpg)
![[Click to enlarge]](dh_Astray_paintedanddetailedparts.jpg)
![[]](dh_Astray_057.jpg)
![[]](dh_Astray_058.jpg)
