

By Robert Merrill - images & text © 2005
|
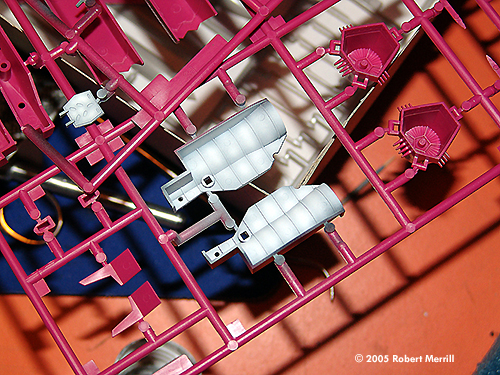
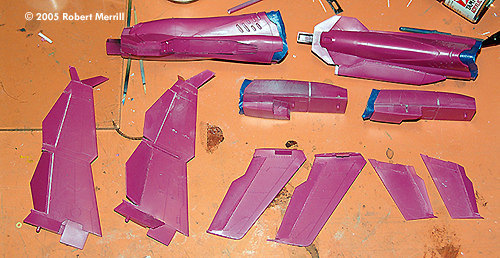
![[Super-secret photo smuggled out from a secret base - So secret you can't see it!]](rw_gamma_pictures/topsecrct2.jpg) Well, my first though upon opening the SV-51r was... magenta... the plane is magenta. |
|||||||||
|
This just simply would not do. A nice aubergine I would have kept, but magenta is not an aircraft color to me. So, first things first, what color am I going to paint it? Digging through the reference books, consulting with John, and wandering the vast empty stretches of the internet looking for neet-o paint schemes I finally decided on the hard edged angular Soviet scheme used on some SU-27's. With that question taken care of I moved to looking at the kit, figuring out the sub-assemblies and what would go where & when. Then I looked at the instruction book and realized those were the feet and not intakes. This changes things considerably. Oh well. |
||||||||||

|
Image: Instrument panel, masked Image: Trim the instrument panel decals as indicated to get the best fit Image: Pilot Image: I painted the interior parts as much as possible while still on the sprues Image: The parts were pre-shaded, then over-painted white Image: Lots of pre-shading Image: Main gear bays painted Image: Nose gear bay needs detail .... Image: So I added some. Image: Main gear bays needed detail as well Image: Here they are pre-shaded and painted Image: Exhaust 'feathers' painted and shaded Image: Broken tip Image: I used stretched sprue to make replacements Image: Basic sub-assemblies Image: Control surfaces were cut.... Image: ... styrene strip fills the gap in the wing .... Image: ... and viola, the control surfaces are re-positioned. |
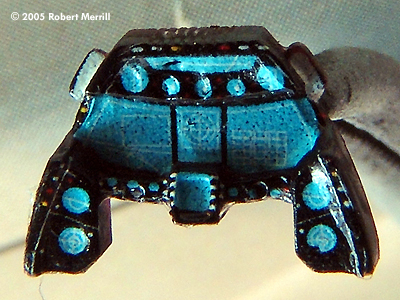
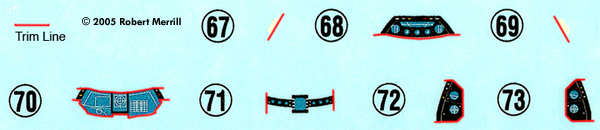
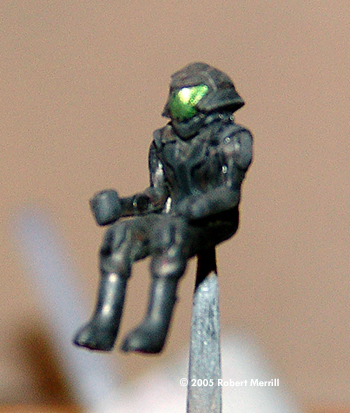
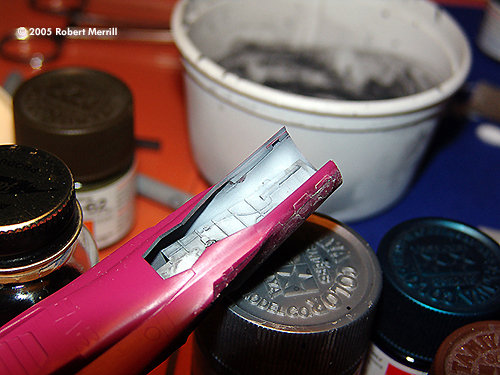
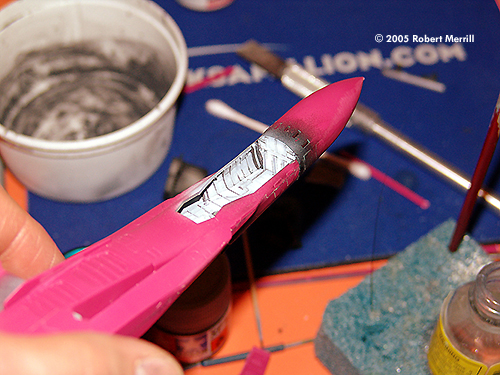
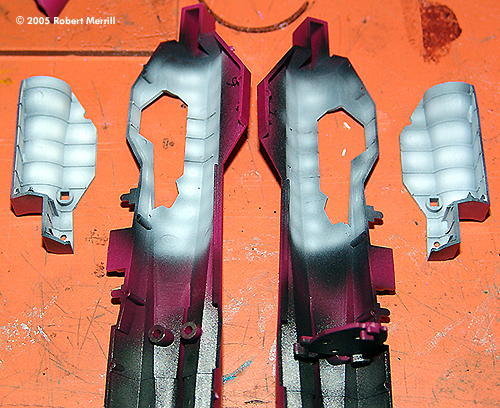
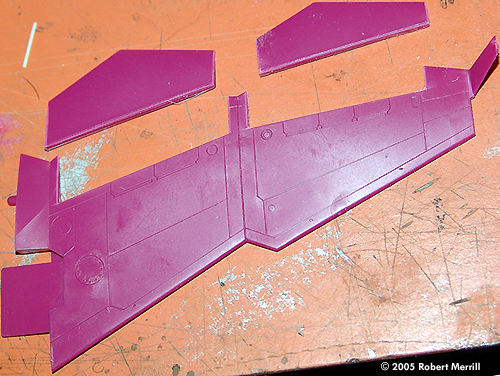
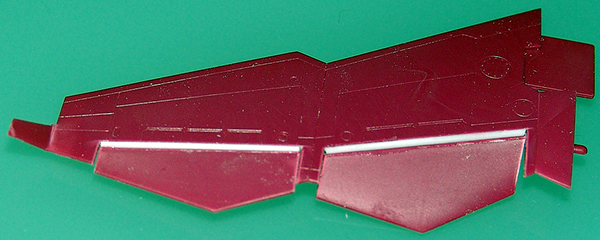
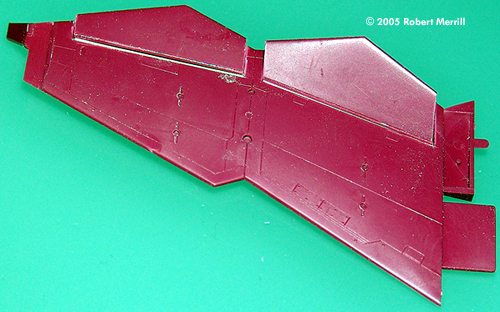
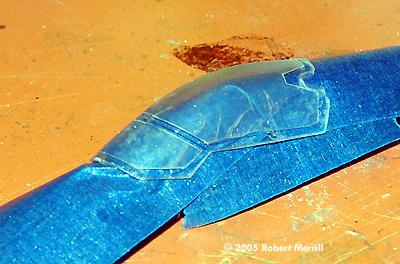
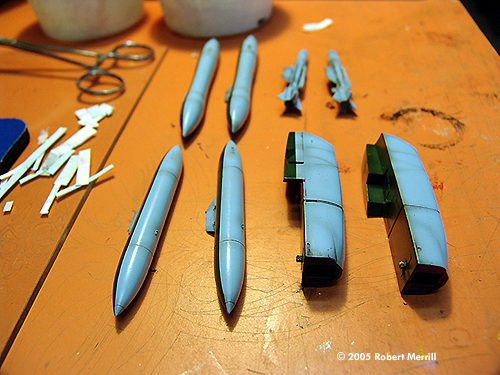
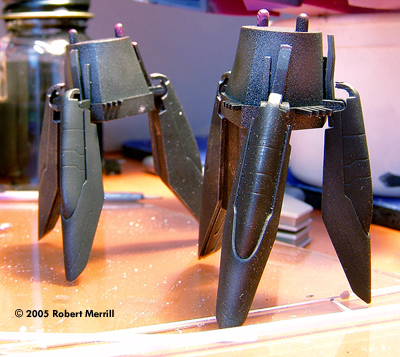
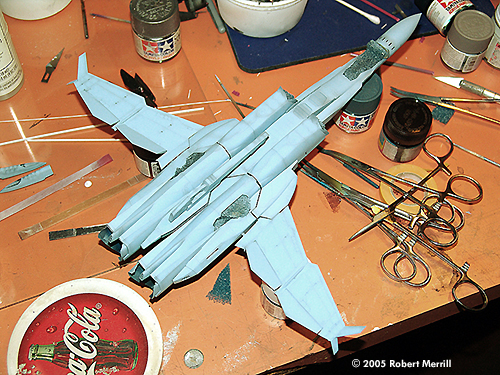
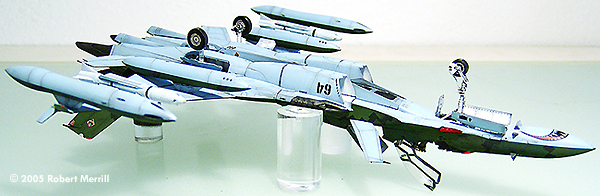
Sub-Assemblies Back to the build. I started just like the instructions say, with the cockpit. The cockpit goes together quite nicely, no big surprises. The real fun part was decaling the instrument panel. No less than 7 decals go on the panel, and while they snug down nicely with some MicroSol they are a pill to get into position. What I found handy was to lightly trim off the excess decal material on the areas where the decal might overlap. You can see my trim chart here. As I was building the cockpit I dry-fitted all the parts to the fuselage where I discovered a odd problem with this kit. The floor of the cockpit is also the base of the front landing gear bay and has some ribbing & fittings on it. My problem is that there is no detail on the inside of the fuselage for the bay. So you have the choice of leaving it plain and figuring nobody will see it, or adding some detail to it. I decided to just airbrush in some shading and call it a day. Or so I thought. The more I looked at those bare walls the more it bugged me. Unwilling to let it go, I finally decided to drag out the strip styrene and glue some ribbing on it. I used Evergreen .010x.020 strip, .060 C channel, and Plastruct 1.2mm T beams for the extra detail. Later I realized that doing this little modification was my downfall. Assembling the two fuselage halves showed two problems. The first was the somewhat loose fit between the upper & lower halves around the landing gear bay. You've got to be very careful about making sure everything lines up or you end up with a very tricky seam job. This leads us into the second issue; those little 6 sided plates along the sides. Be very light handed with the sanding or you'll easily wear them away. It's a shame, because they look so cool. I left off the canopy, VTOL jet cover, and little bits until later in the build to avoid breaking them off numerous times. Despite this I still broke off one of the antenna on the vertical stabilizers. The intakes do go together rather easily. The great thing is there is only a little strip that needs to be sanded smooth. The rest of the seams get hidden by the fuselage. I got to wondering, would Seamless Suckers ever produce a set of intakes for the SV-51/52? While waiting for things to dry I started looking at the wing assembly. Each wing has 4 parts, a pretty simple assembly. Then I thought about how cool the wings would looked with dropped flaps. Before I knew it I had started carefully cutting away the flaps & flaperons from the wing. I placed some 1.5mm half-round into the channels to fill the space up a bit. Then I used a small round file to cut a groove into the back of the flaps and glued them into place. Be careful to make sure the angle of the flaps don't interfere with the under-wing ordinance. Otherwise you'll have to break them off and reset them. Not that I had to do that (no I'm far too much the professional). As I started to dry fit the leg/engines I realized the main landing gear bays had the same issue as front bay, lack of detail. So out came the strip styrene again. This was easier than the front, largely due to the fact that I was working with flat surfaces and you could add the detailing before you had to assemble the parts. |
|
Image: Canopy masked, ready for paint. Image: The first layer of masking on top Image: Now for the lighter green Image: Painting the smaller parts Image: Painting, mostly finished Image: Some touch-ups were needed Image: Lots and lots of tape Image: Had some trouble with my home-made decals Image: Find the decals! Image: A light wash |
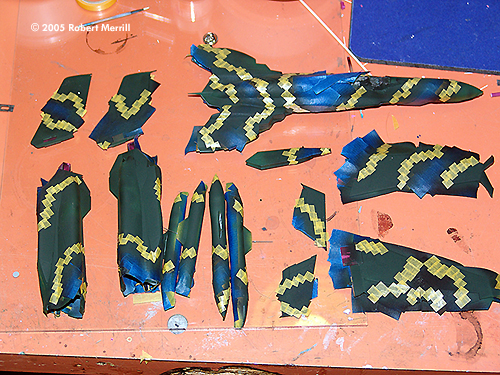
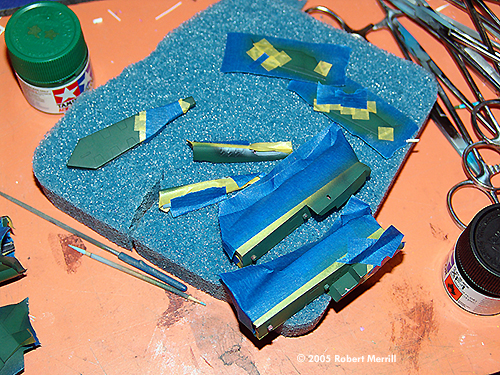
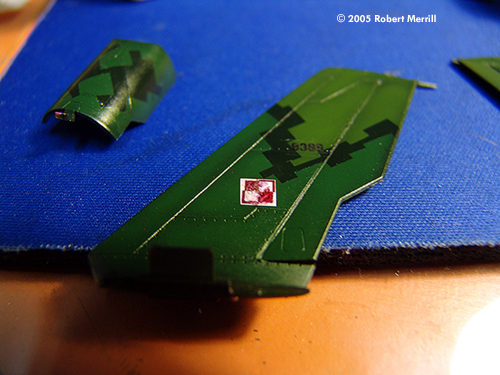
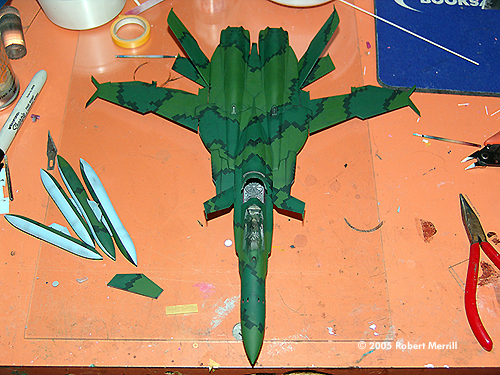
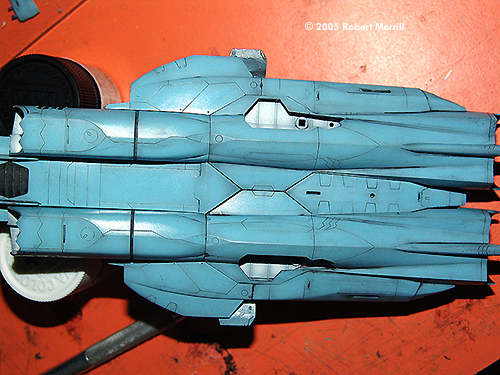
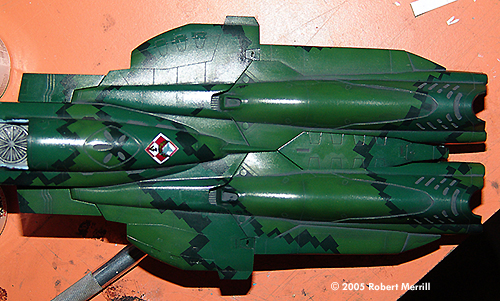
Gonna need a lot of tape.... Then came paint. Remember that hard edged angular Soviet scheme I talked about earlier? It got changed to a three color green ground attack scheme. Oh boy was this fun. The painting process proved my love for Tamiya's masking tape. Four layers of masking & no pull-ups. First I masked off the intake trunks & landing gear bays to protect the white. I used foam, masking tape, & Parafillm-M. Then I pre-shaded dark blue followed by the light blue on the underside. Then that got masked off using more masking tape. When pre-shading multicolor camo I run the reverse of what's normal. So the first color I laid down was the dark green, then more masking, then the medium, more masking, then finally the light green. Lots of tape. And not a single pull-up (boy do I love that Tamiya masking tape). The tough part was continuing the scheme through all the sub-assemblies. I've found decaling to be much easier on sub-assemblies than on a fully assembled model. Having ditched the magenta & yellow paint scheme I also decided to ditch some of the decals. This meant re-creating the SV-51 decals in Illustrator. Luckily I'd already started that for another project. I printed out the black decals using a laser printer and the color ones using an ink-jet printer. You can get a more detailed review of my results in the MicroMark Decal System mini-review below. In the end decals went down fine. |
|
Image: Assembled exhaust Image: Test-fit looks pretty good... Image: ... but upon closer inspection, tehre are some issues. Image: Some more gaps Image: Landing gear attached on Image: Underside, mostly assembled Image: The leg bone's connected to the .... Image: From the top Image: Almost there ..... |
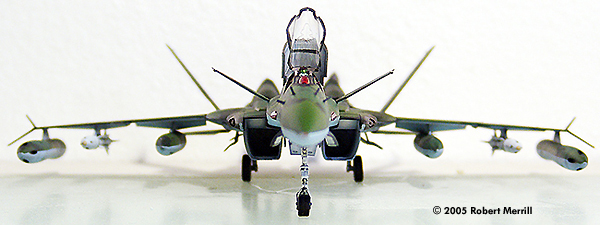
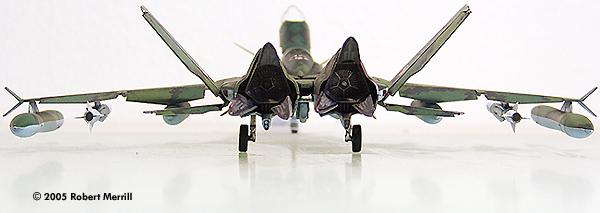
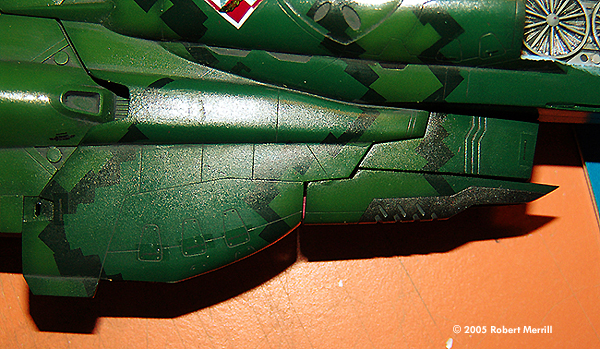
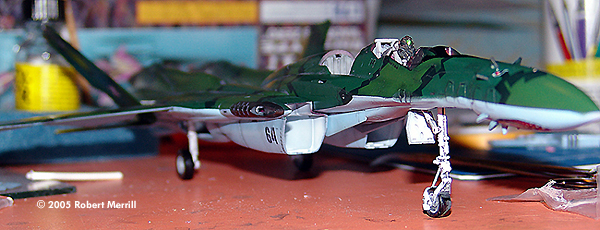
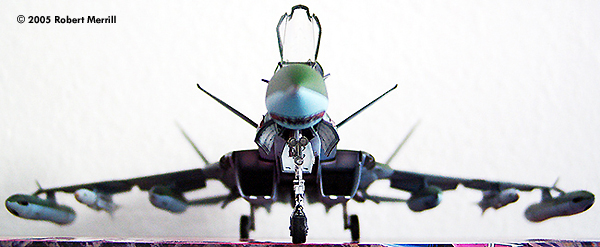
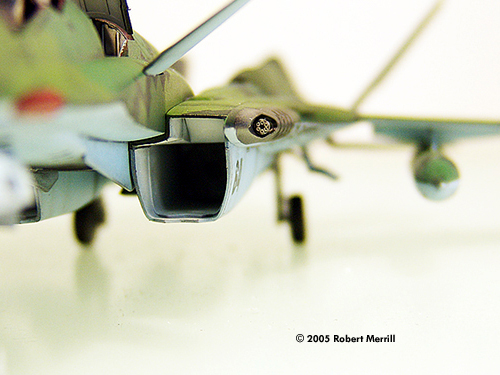
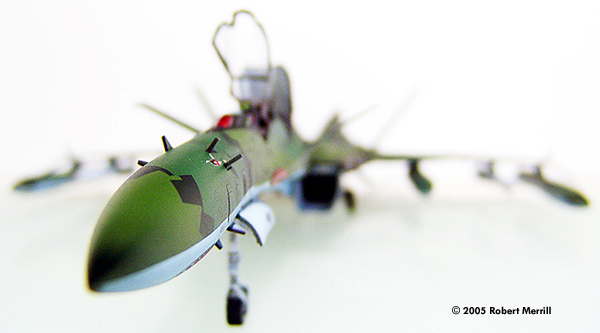
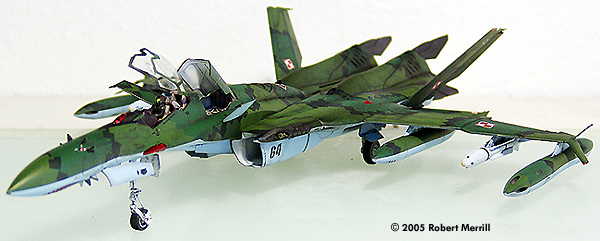
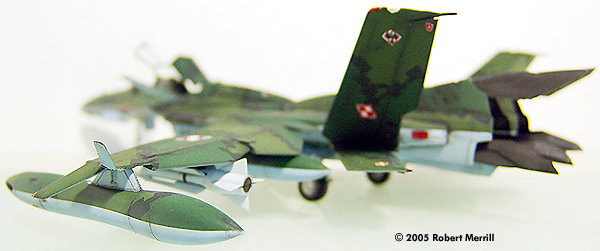
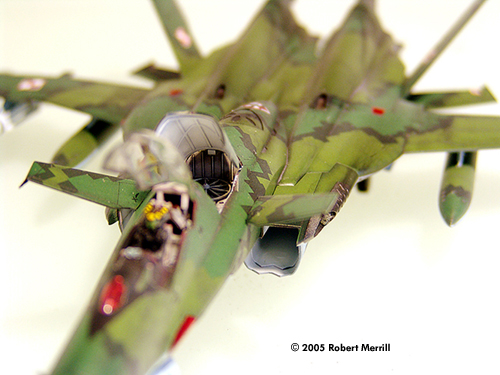
Final Assembly Finally, paint & decaling done, it was time to assemble. Fitting the leg/engines to the body posed little problem. I ended up not being able to glue the large gun into place as the fit between it and the legs are tight enough that it wasn't needed. The guns next to the intake had some small fit issues but trimming the mounting pegs a bit solved that. I also noticed that the insides of the gun mounts were unpainted. So much for my critical analyses of the plans to paint everything. Placing the exhaust/feet in place has some issues. The exhaust units have these little tab/spring things that need to fit into slots in the base. My guess is you have the choice of positioning the feathers in or out. Not the best system. It takes some careful fitting and wiggling to get everything in place. The wings came next. The left wing fit in easily, little bit of Tennax & some pressure and bamf! No seam. This, of course, meant the right wing was going to be an utter pain. And I wasn't entirely wrong. The dry fit looked good but when I adjusted the camber to match the left wing some gappage was revealed. Tried a bit of filing but I still had issues. Finally I gave up and made the best of it, figuring to try fixing the it at a later date. Tail surfaces went together fine but revealed some unpainted areas. Some touch-up solved that. Landing gear went in without any problems. I did wait until last to glue the front landing gear lights in place. Speaking of clear parts, I do wish that somebody would develop a more positive mounting system for the cockpit canopy. My best method is to glop on some Testor's Clear Parts glue and hope. Anyways, back to assembly. The only tricky parts left were the landing gear bay doors & the under-wing ordinance. With the exception of the two doors (I managed to break one of the mounting tabs off) everything went on fine. For some reason the big missile pods on the wing tips didn't want to settle down unless I trimmed off the mounting pins. Once I trimmed them off they went on well. Then suddenly it was done. Wow, cool. Then, in the midst of taking pictures I realized I hadn't put the front landing gear lights on. Now I was done. Finally. Conclusion In the end, I think this is one wicked looking aircraft. Assembly is well thought out and the fit rather good. The lack of detail in the landing gear bays is forgivable but I really wish they'd added in. Next time I may replace the position lights with little clear bits and trim the vent holes out. I also think next time I'll prime the model completely to help reduce the pink bleed-through. You learn something new every day. |

|
Image: Toothy grin Image: Cannon Image: Nose Image: Birds of a feather |
You may be asking why I chose to make this a Polish aircraft. Well, I'm 1/4 Polish so I have a bit of an affinity for things Polish. I justified the markings & scheme by making this an aircraft in the Polish Airforce after the UN War. This one is from Pozna?-Krzesiny (EPKS) which I chose largely for the ease at which I could trim out the decals. |
|
Image: Decal comparison: the smudged are ink-jet. Image: Beauty Image: Left/rear view Image: Underneath Image: Open wide |
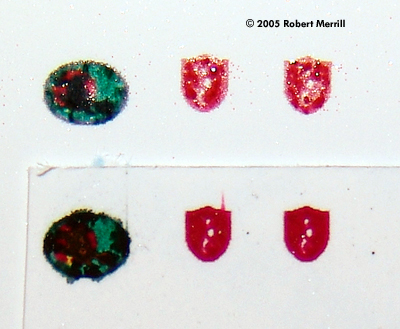
MicroMark Decal System Mini-Review The MicroMark system is available for Ink-Jet printers or Laser printers (or copiers). Basically divided up into dry toner (the laser & copier) decal film and ink (wet) film. Both are available in either clear or white film. It is recommended that you also use their sealing system when using the ink based decal film. Toner based decal film: I feel I can give fairly high praises to the laser printer/copier film with one exception; it stuck in the printer every time. Just on the end but it was annoying. Clarity is great, as you would expect from a laser printer. There was some bleeding/choking of the toner on the film that obscured small details but you'd need a magnifying glass to see it. While MicroMark again recommends their sealer (which is simply Krylon Crystal Clear acrylic) I found there was no need with the laser based decals. They snugged down beautifully with some MicroSol & MicroSet. No problem whatsoever. Ink based decal paper: The ink-jet paper on the other hand was somewhat a failure. First, printing is iffy. I'm using an Epson 880 with "ColorFast" ink. The decal paper has been treated so that the ink won't absorb into the paper. This means that when the paper comes out, the ink is resting every so gently on the film. Playing around with the settings did get better results. Print at maximum resolution with photo-quality paper, not film. Film lays down much more ink to improve the density, which results in more ink laying on top of the film. Allow several hours for the ink to dry completely or it will smear if you look at it wrong. I tried both the Krylon and the Microscale Liquid Decal film as sealers trying to see which would work better. The Microscale Liquid Decal film makes for a lousy sealer. The ink ran, smeared, and just vaporized. The MicroMark sealer (the Krylon, available at your local art or hardware store) on the other hand works great. My only complaint is that it makes the decal a bit on the thick side. I've thought about trying some other sealers but since the Krylon works so well I figure it's the easiest. The trick I found is to wait several days for the ink to fully cure, then spray with the Krylon making sure to get an nice even glossy coat. Then wait at least 24 hours for the Krylon to cure, otherwise the ink may not seal properly and run when dipped in water. As far as printer tricks, print to glossy paper at as high of a resolution as possible and a fairy light gamma. You may also want to reduce the ink quantity a touch. The reduction of the ink reduced the ink choking on the details. |
![]()
This page copyright © 2005 Starship Modeler™. First posted on 2 September 2005.
![[Please click to enlarge]](rw_gamma_pictures/cockpitvtol.jpg)
![[Please click to enlarge]](rw_gamma_pictures/finaltop.jpg)
![[Please click to enlarge]](rw_gamma_pictures/paintfinish2.jpg)
![[Please clisk to enlarge]](rw_gamma_pictures/partsisparts.jpg)
![[Please click to enlarge]](rw_gamma_pictures/finalcockpit.jpg)
![{Please click to enlarge]](rw_gamma_pictures/finalbottom.jpg)