
By Allen B Ury - images & text © 2006
|
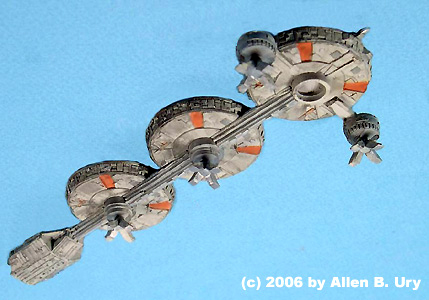
![[]](abu_mineral_01-MiningShip-RightFrontAngle.jpg) In addition to its titular starship, ABC-TV's "Battlestar Galactica" series featured dozens of smaller ships -- mostly civilian -- that had been lucky enough to survive the Cylon sneak attack that otherwise wiped out the 12 Colonies and their inhabitants. Among the ships that composed the Galactica's "Rag-Tag Fleet" was a large industrial Mineral Ship, a craft designed to draw ore from asteroids and other planetary bodies and then process them into useable metals. |
|
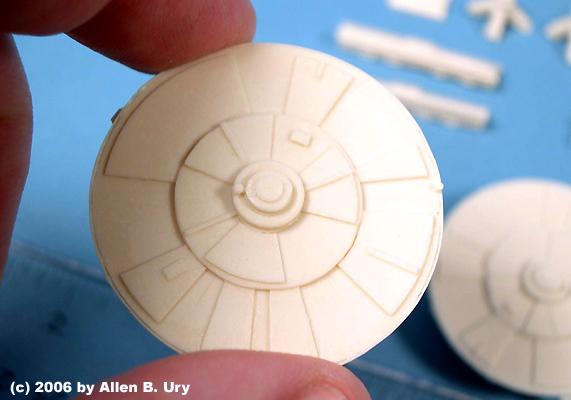
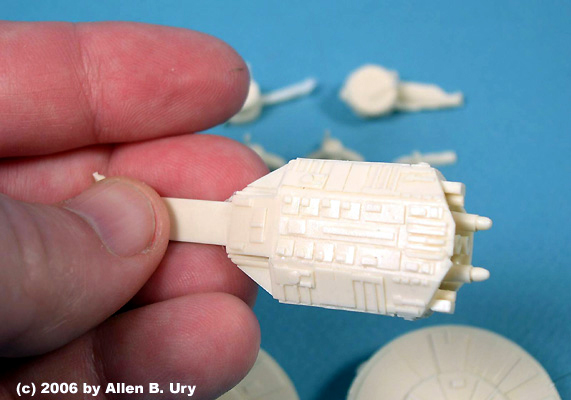
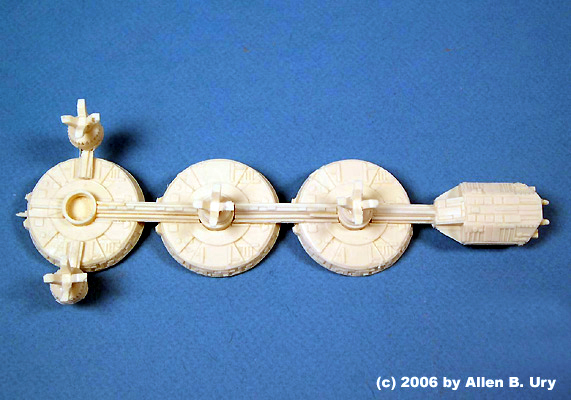
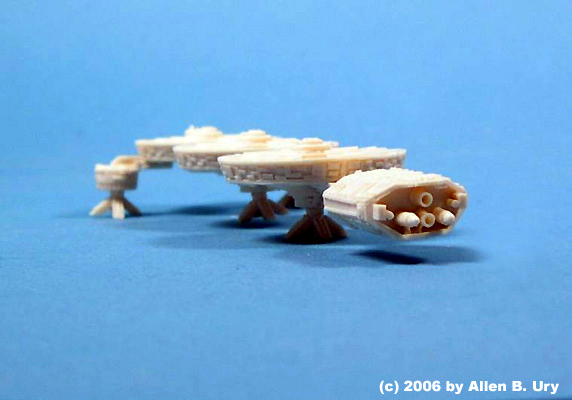
Image: Disc Image: Engine module Image: Assembled, underneath Image: Left/rear view Image: Painted, underside Image: With the Big G |
The Mineral Ship proved to be an invaluable asset to the Galactica and its RTF as it provided the surviving humans with the raw materials necessary to repair and maintain their technology as they searched for the mythical sanctuary called "Earth." In fact, like most ships in the "Rag-Tag Fleet," the Mineral Ship was thrown together by John Dykstra's special effects crew in just a few hours using whatever materials that happened to be available. In the case of this spacecraft, its most distinctive components -- the three disc-like ore processing sections -- were just greeblie-covered 35mm film cans! A fan favorite, this unique vessel was subsequently re-created intact via CGI for the Sci-Fi Channel's 21st Century "Battlestar Galactica" TV series. What You Get Opening the sturdy box from Arvey Models Products, I found two small plastic bags, one containing the three “film can” discs that make up the bulk of the model, the other the engine module, spine pieces and landing gear. There was also a four-page instruction sheet with simple but clear step-by-step illustrations on kit assembly. Alas, there was no painting guide. Each of the three “discs” had several small pour that were easily removed with a sprue cutter and a sanding stick. The landing pads had a lot flash on them, but again these were cleaned up in a few minutes. All the other components, including the engine module, were prepped with ease. A found a few voids in the landing gear, voids that I quickly and easily filled with modeling putty. |
|
Construction After soaking all the pieces in a warm water/dishwashing detergent mixture for 24 hours, I then scrubbed each with an old toothbrush and air-dried. Assembly was then done quickly and easily using the instructions provided. I encountered only two situations that were somewhat problematic. (1) Although each of the spine components appeared to be straight, as the “discs” were assembled in line, there appeared to be a slight “droop” - especially when the engine module was added. I easily corrected this by briefly dipping the partially assembled model in boiling water, which instantly softened the resin, then carefully bending the spine into perfect alignment. (Damn, I shoulda been a chiropractor!). Within seconds the resin had cooled and the “droop” was gone. (2) The instructions are unclear on which end of the tiny “bridge” module, which goes onto the top of the leading “disc,” is, in fact, the front. Fortunately, I had “Googled” some visual references for the Mineral Ship and based on those photos was able to identify the “front” and position it accurately. Total assembly time was about an hour. Painting and Finishing As noted above, AMP's instructions don't include a painting guide. Fortunately, what I was able to find on-line was more than adequate. After priming the model with automotive gray primer, I first sprayed the entire model with Testors Aircraft Gray enamel. I then custom-mixed a combination of Tamiya Red, Yellow and Light Gray acrylics to create the rust-red color found on the original miniature. I hand-painted this mixture onto the recessed areas of each “disc” as suggested by the photos. For the “hub” of each “disc,” I again used the Tamiya Dark Gray acrylic paint, hand-brushed. For the very tip of the “bridge,” which is supposed to be clear, I added a bit of Testors metallic silver enamel. I then darkened the spine and landing gear with a thinned Tamiya Dark Gray acrylic and let dry. To weather the model, I started by giving it a wash of thinned Flat Black acrylic paint, which I then removed with rubbing alcohol. I then added black “streaks” to the upper and lower sections of each disd using both black pastels and thinned black acrylic paint. Conclusions And that was it. I was able to comfortably prep, assemble and build the model over the course of just three days. The result is a good-sized (6½" long) sci-fi miniature that accurately reproduces the look and texture of the original BSG miniature and that will look great next to my old Monogram “Galactica.” Arvey is producing a whole line of “RTF” ships, and if their quality is as good as this one, I'm going to buy 'em all! |
![]()
This page copyright © 2006 Starship Modeler™. First posted on 12 December 2006.
![[Please click to enlarge]](abu_mineral_01-MineralShip-Parts.jpg)
![[]](abu_mineral_04-MineralShip-Assembled-Top.jpg)