
By Carlo Piscicelli - images & text © 2011
I began this project after I recently purchased a 1:72nd scale studio diecast metal replica of the Space 1999 Eagle Transporter from the UK. What inspired me most was the way this model was painted and the degree of weathering it had with gave it a very realistic finish. This diecast model also had interesting detail not found on plastic model kits of the same scale. As I had an AMT/Ertl model kit in 1:72 scale and I was inspired to try to replicate both the detail and finishing technique used. |
|
Image: Scratchbuilt inner bulkheads Image: Cages and bulkheads Image: Bulkheads in place Image: More tankage Image: Landing strut cut from a 747 part Image: The hole in the bottom of the pod Image: Covered Image: Another look Image: Engine bells, detailed Image: Bells mated to the fuel pods Image: Details Image: More Image: Nose area Image: Detailed Image: Side thrusters Image: Another look Image: Reamer Image: Opening up the pod ends Image: New door Image: Completed pod, right side Image: Top view Image: Left/front view Image: Left/rear |
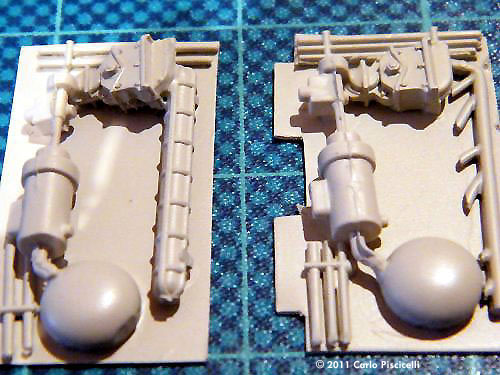
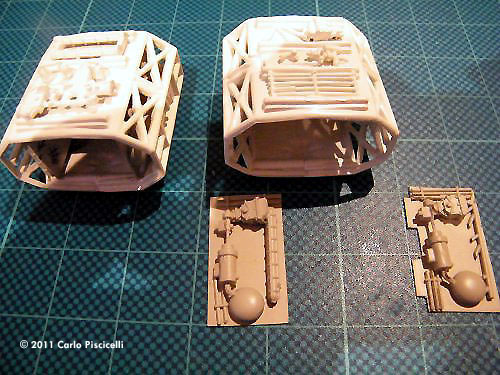
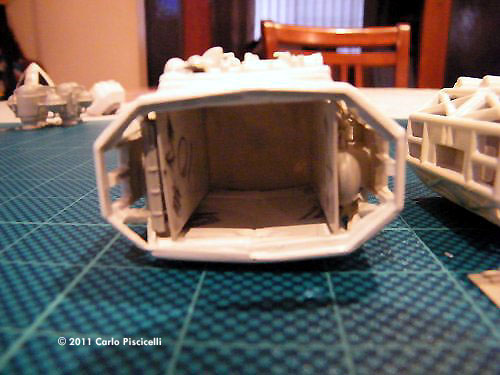
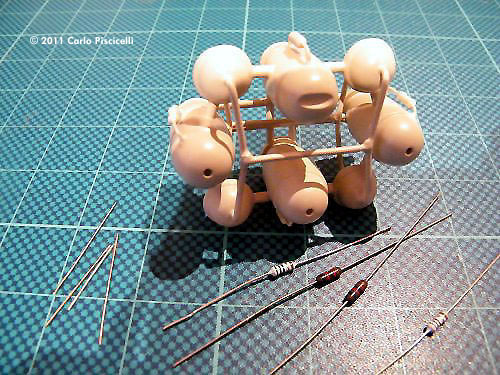
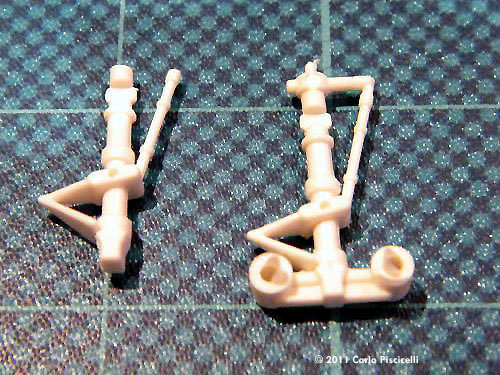
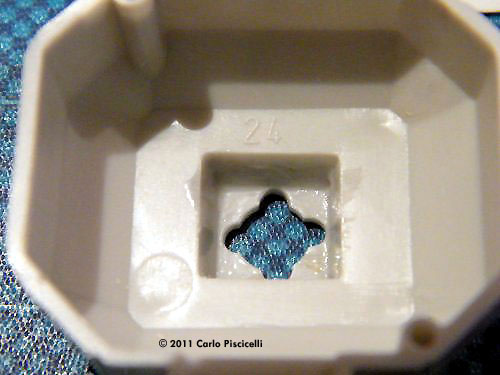
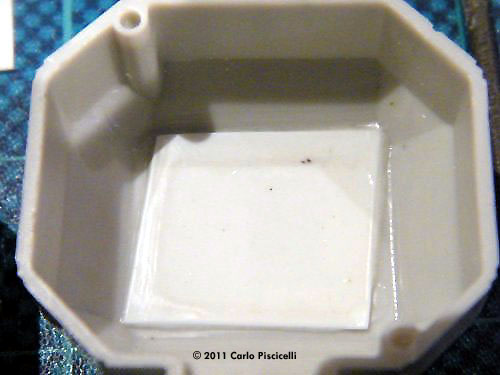
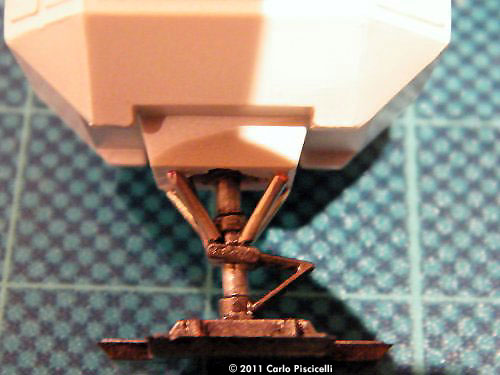
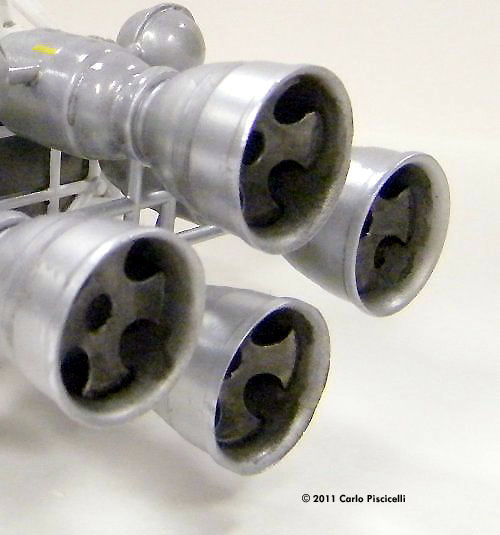
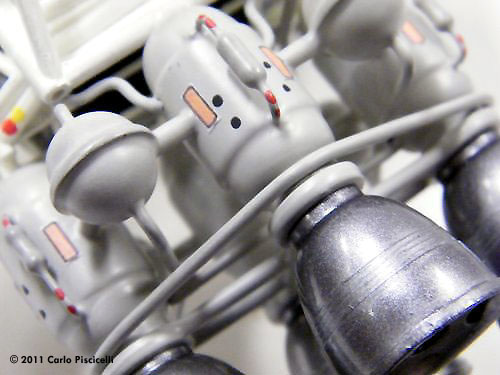
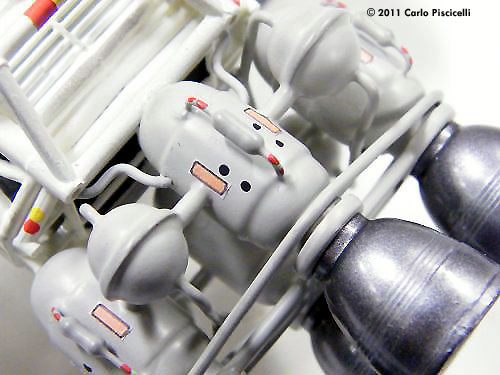
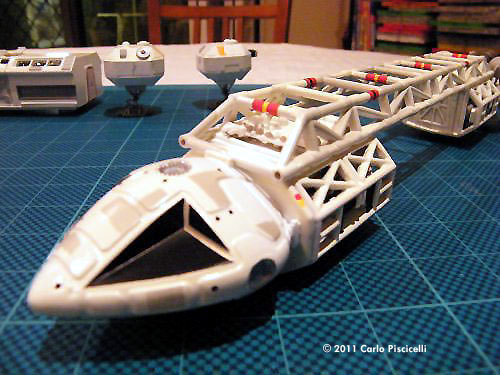
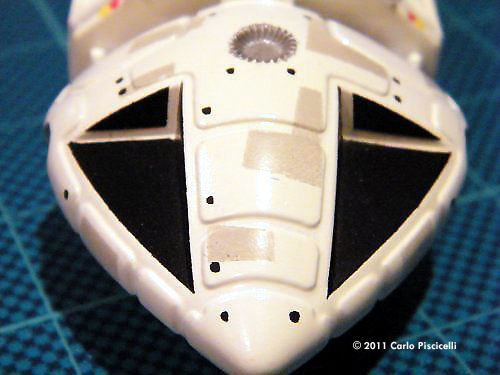
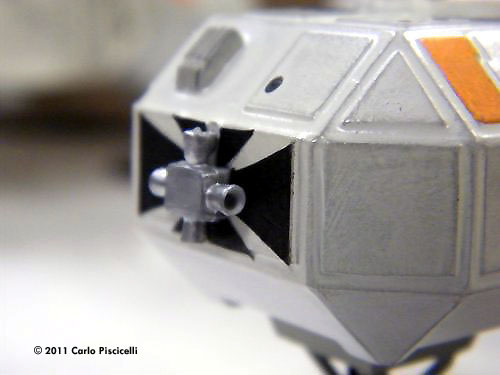
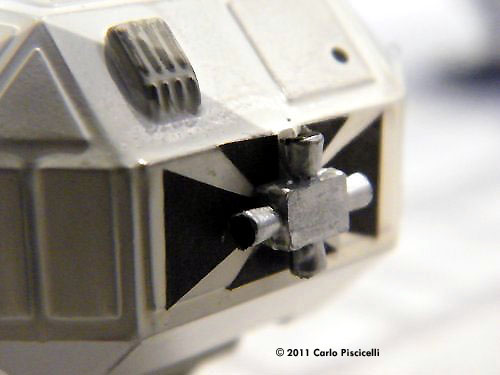
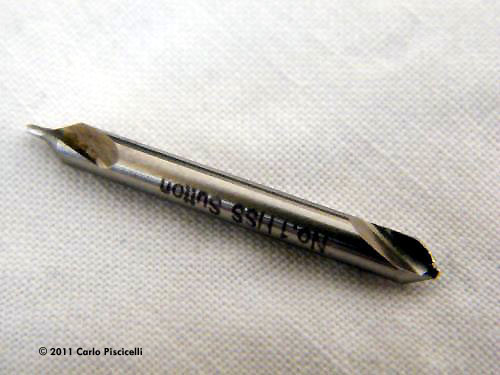
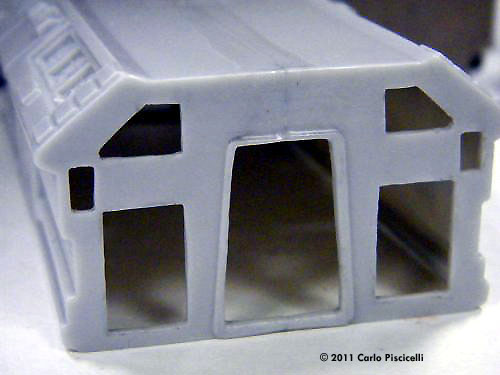
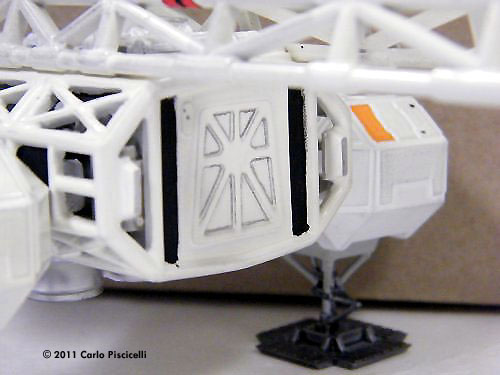
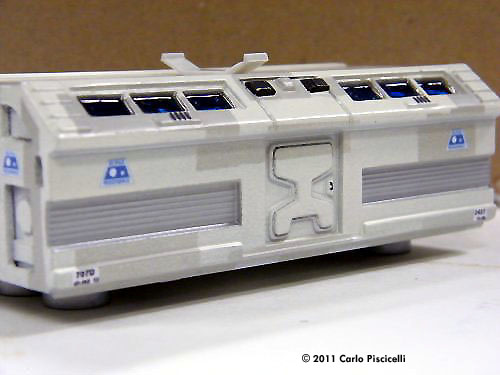
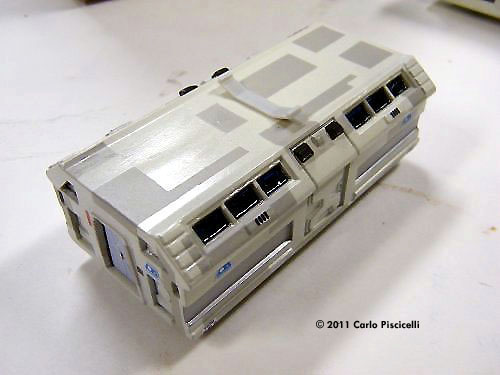
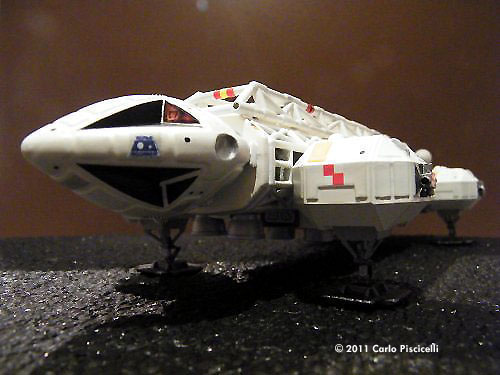
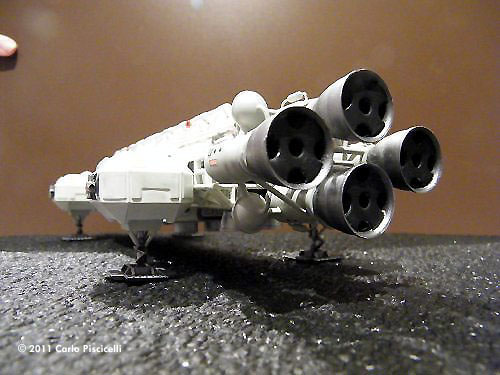
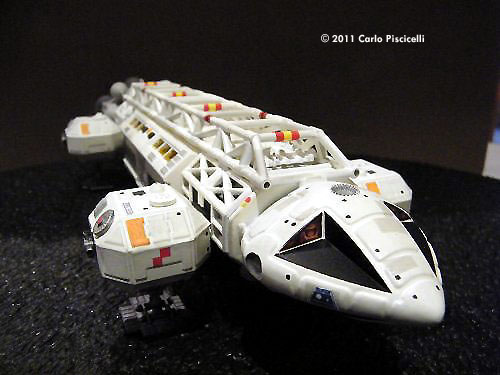
I did however decide to build a different Eagle to the one I had. I chose to build an Eagle Passenger Transporter and to do this on a budget. I scrounged and scratch built all the additional parts I needed to complete this model as I do not believe that to build a good model you must always have to buy expensive accessories.I used every day items, which I am sure you can easily obtain or have lying around your home or workshop. I had fun doing this and at the end of the day I think it worked out well. So here's how I went about accurising and finishing my Eagle Passenger Transporter. Getting Started To begin with you need to drill out the space between the girders of the engineering and service module. This is tedious and care is needed to ensure that you do not damage any of the support girders. Drill out the windows, side end doors and side panels on the passenger pod and clean them up. Then using a Dremel tool remove as much of the inner plastic as you can within each window and finish off using a scalpel blade and several small files to clean up the corners and edges. Do not be tempted to rush this as the windows stand out on the finished model and as such any imperfections will ruin the overall appearance of the completed model. Alternatively, a picture or photo of the interior of the craft placed inside of the pod to simulate the interior with lighting could be inserted if you really wanted to and were keen enough to do so. However, my simple technique proved to provide a subtle nice effect. After measuring the internal length and height of each pod I cut out four square pieces to be used as the internal bulkheads. I used a sheet of 1mm thick plastic card to do this. On the outside face of the plastic card walls between the girders I added some odds and ends from my spares box to build the ducting system. They look complex and functional, just the right mix for this model. The systems were then all sprayed with a gloss Tamiya Neutral Grey and left aside for a few days to dry. Plumbing The next step was to enhance and detail the engine array, which was going to be a challenge; many images were down loaded from the net, which I had to compare and study in order to undertake this part of the project. Reference material is always essential when undertaking such a modeling project such as this. Using 2mm thick copper wire and some very old resistors from an unused antique radio, I constructed the pipework and extra fuel pods for the main fuel tanks. Drilling the little balls I added the pipe work followed by the resistors, which were superglued to the main tanks. If you don't have any old resistors handy, you could cut and shape the part using a piece of thick plastic rods from old kit sprue. Then using a thin drill bit, I drilled to allow a thin copper wire to be inserted through this. Everything was then sprayed using Tamiya Light Grey overall and left to dry. As you can see from the image the result was a great improvement on what was before. Landing Gear While the main fuel tanks were drying I then focused once more on the landing pods and landing gear. I must stress that the landing gear provided in the kit is an absolute shocker. To begin with the landing pods and gear look wrong and under scale compared to the size of the model they are supposed to support. As a result, they do need to be enhanced big time and again, my spares box came to my aid in the form of a set of 1/144 scale Boeing 747 Jumbo landing gear. Cutting 2 mm from the top of the landing strut I then removed the wheel connections. This worked a treat as it ended being the right height for the Eagle. After cleaning these parts and sanding then down, I then sprayed them with Tamiya light Gun-Metal colour. The result was perfect! The landing pads were next, so I removed the center-landing pin and sanded this as close as possible to the base. Care and attention to detail was required to ensure I did not ruin the landing pad. This process was repeated for the other three landing pads. I sprayed them all with the same colour as the landing gear and let them dry for a couple of hours. After which I proceeded to glue the landing gear to the pads. What a pain this was to get them straight! I ended up having to actually melt the two ends together with DCM liquid glue (i.e. Dichloromethane Glue). It looks pretty realistic to me and once the silver parts were painted in, that's some handsome landing gear. The next step was to drill out the landing pods in order to fit the landing gear in place. The center of the pod was drilled out with a 6mm drill bit. The sides were then filed down in the middle of the hole to about 2mm depth using a 2mm file. A sheet of plastic card was then cut to size and shape to enable it to fit in the middle of the pod. This was then glued into place. Once the landing gear was glued into place, I felt that the whole assembly needed a little something extra. So I decided to add struts between the landing gear strut and bottom of the pod. I cut 5mm lengths of 2mm copper wire, which were then super glued into place. Not bad even if I do say so myself. Front Office You do not need to do much to the Eagle's nose cone apart from painting in the window frames and spraying a very light coating of Tamiya light grey. This is a form of shading to simulate the paneling in certain areas. Black "dots" strategically placed on different panels help to simulate the locking devices that were on the actual TV show models and provides a subtle overall effect to the nose. Engine Assembly The engine bells were next. To these I made up some four flutes which go inside of each bell. These were cut slightly smaller in circumference to the engine bells using an 18mm borer. A 4mm center hole was then drilled out and an additional four 6mm half holes were cut on the outside edge of the flute. Once this was done the disc was then super glued just inside the engine bell. You have to repeat this process 3 more times to the other engine bells. The engine bells were then all sprayed with light gun-metal, using a Tamiya spray tin. Then a light dry brushing of silver around the edges finished them off . Once the engine bells were all dry, it was time to glue them to the newly detailed fuel pod assemblies. Please note here the added pipe work going around the fuel tanks, which appear to be holding all the bells and fuel pods together. This is in reference to photographs I have, but what they actually are supposed to do, I do not know. However, looking at the result.... it's not bad! Putting It All Together The spine is next. Not much needs to be done here apart from cleaning it up and drilling a few holes at the ends to simulate piping. The red-black and red-yellow stripes were then hand painted on accordingly using references downloaded once again off the net. How did we ever manage to build our models before the Internet? Once the spine was complete the time came to glue the engineering module and service module to the spine. Then the nose cone and the engine array were glued on next. All of these parts fit perfectly together and without a hitch resulting in a clean and yet complicated main body . Once the main body was completed I then began work on the pod. Here I glued the two halves together and then sanded them down to remove any imperfections or joint lines. It was then sprayed with a light coat of Tamiya grey primer. A good way to highlight paneling, in this case the access doors to the pod, is to run a pencil into the interior indentation lines of the doors. This helps to provide shadows and definition of the door paneling. It also makes it stand out and look realistic, which worked out very well indeed. When it came to the side thrusters, I decided to go that little bit extra so I drilled out and tapered each thruster cone. This was made easy using an ingenious tool given to me by a work colleague and friend (thanks Marcel). I you can get your hands on one, a Taper Center Drill Bit is very handy and easy to use to hollow out each pod thruster. Once all this was completed, it is time to put all the 'pieces' together and complete the kit. Also, all the decals I used on this model were made by me using a bubble-jet printer and Avery sticky labels. This also included adding the pilots in the nose cone windows. Conclusion The finished model ends up looking like the “real thing”. It's easy to do and fun. The result, from a little hard work and imagination is a breathtaking model as compared to what it would have looked like without the homemade budget improvements I added. |
![]()
This page copyright © 2011 Starship Modeler™. First posted on 30 June 2011.
![[Please click to enlarge]](cp_eagle_513.jpg)
![[Please click to enlarge]](cp_eagle_drilled.jpg)
![[Please click to enlarge]](cp_eagle_509.jpg)
![[Please click to enlarge]](cp_eagle_521.jpg)
![[Please click to enlarge]](cp_eagle_532.jpg)
![[Please click to enlarge]](cp_eagle_543.jpg)
![[Please click to enlarge]](cp_eagle_537.jpg)
![[Please click to enlarge]](cp_eagle_616.jpg)
![[Please click to enlarge]](cp_eagle_601.jpg)
![[Please click to enlarge]](cp_eagle_604.jpg)