
|
By Craig York - images & text © 2012
|
|
|
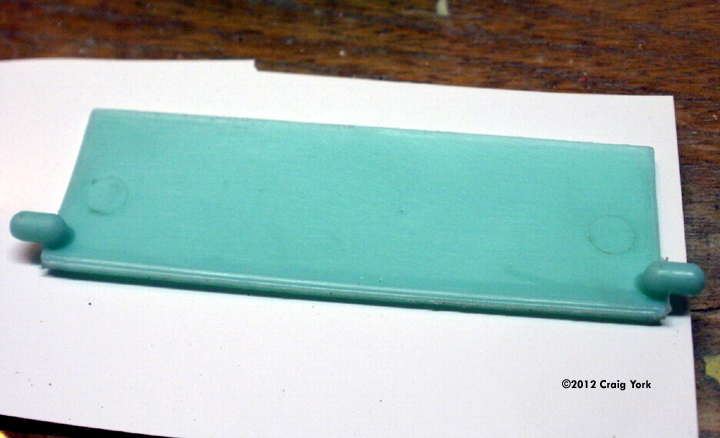
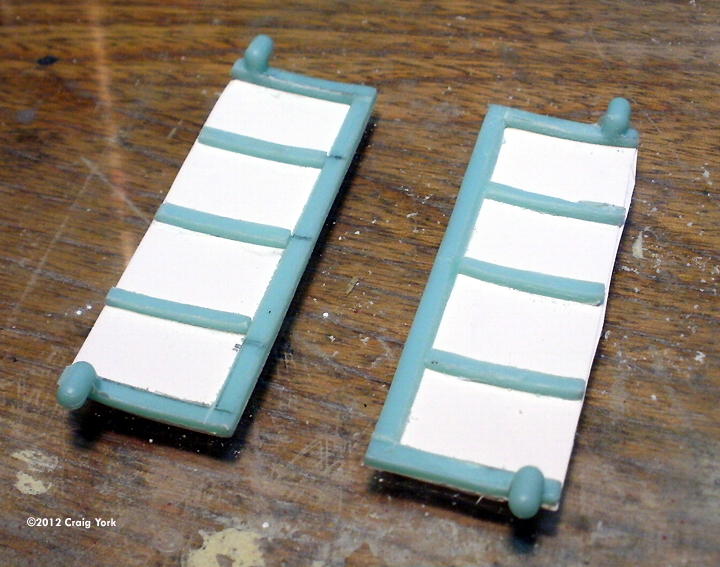
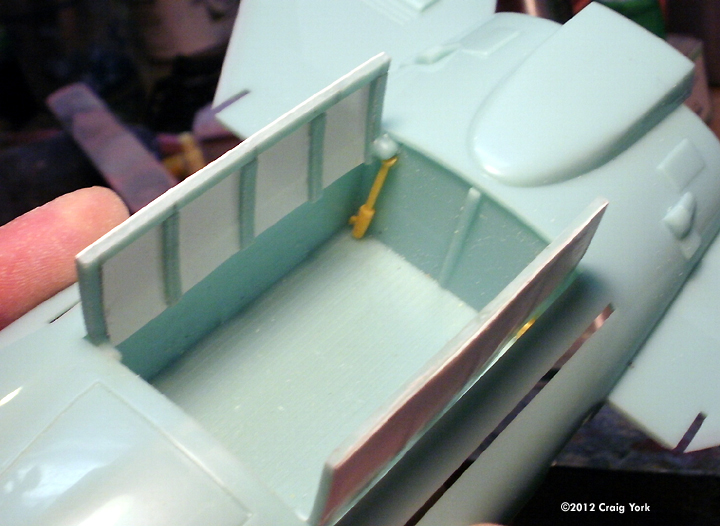
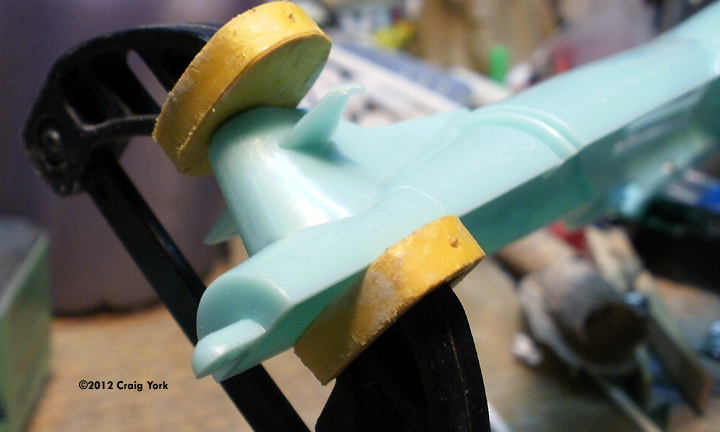
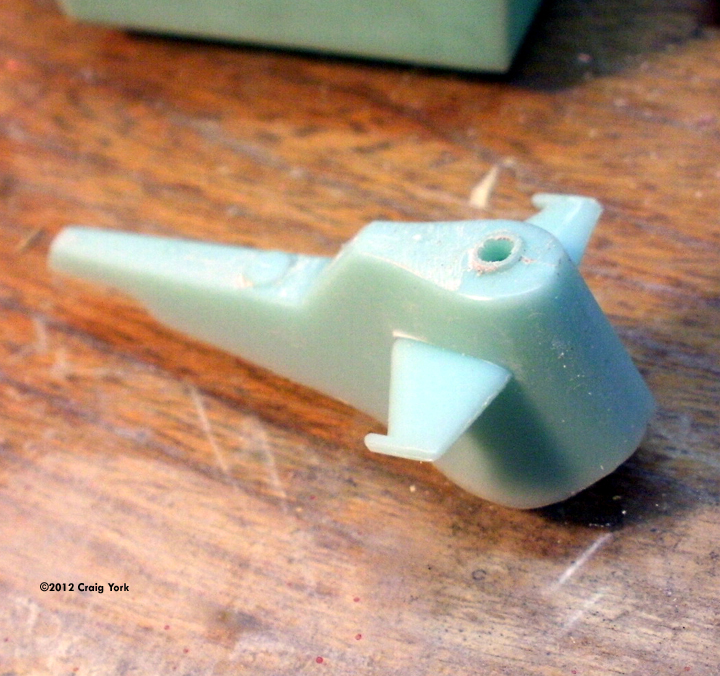
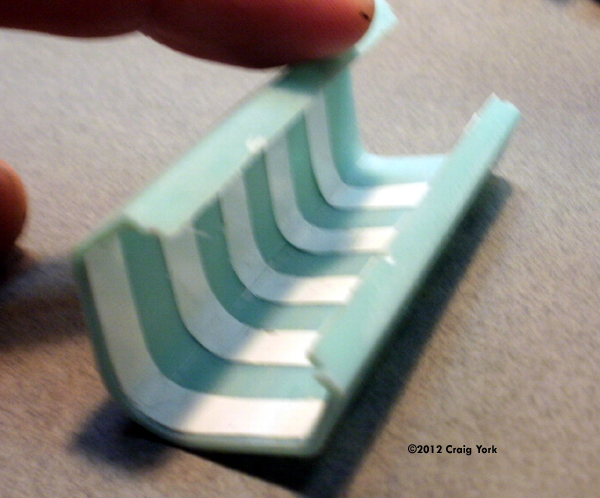
^ Major subassemblies, ready for paint Image: Shuttlebay doors ... Image: ... Now with detail Image: Added bay detail Image: Clamped Image: Command "sail" assembled Image: Adding detail to the inside of the engine housings Image: Both sides Image: Basic hull assembled
^ Shuttlebay completed Image: Another look
^ Completed
|
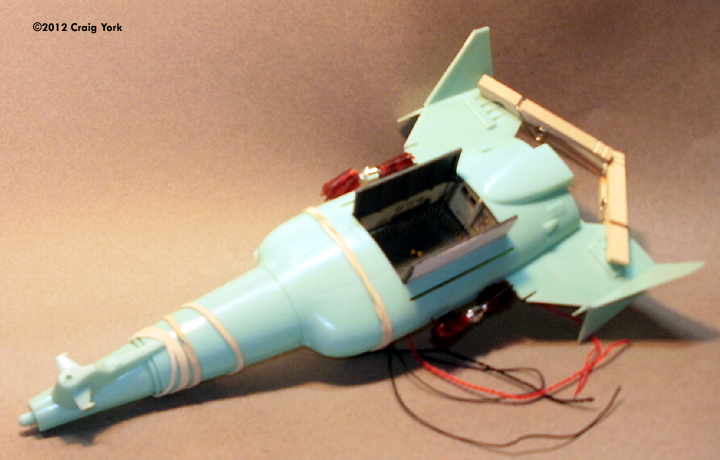
Christmas morning, 1968. I don't remember much else about it, but I do remember gazing with delight at my brand-new Leif Ericson Galactic cruiser. Since I was ten years old at the time, construction was finished by early afternoon. It was the age of Testors' enamels in tiny glass bottles and good old Testors tube cement. I also remember being a little too enthusiastic with the latter: the optional 'Phaser shield' on the nose melted and began to droop before Christmas dinner. Forty-odd years later, I got a second chance. Parts and Basic Construction It certainly looks like the original issue, but there are a few changes. The 'grain of wheat' bulbs have been replaced by bright LEDs, and decal sheet is much, much bigger. (I'll come back to that in a bit.) The parts are packed in a pair of poly bags, and most were still on the sprues. The molds themselves are in good shape-I saw no flash on any of the parts, though there are some minor sink marks and ejector pin blemishes. The smaller components, the clear red engine and chrome pieces are also bagged separately. A few pieces had come the sprues, but noting seemed scratched or damaged. In a minor departure from the usual practice, the instructions - consist of a whopping four steps - are reproduced completely in five languages. I departed from the assembly instructions in a few places, starting with the engines. I was a little leery of the instructions to bend the wire leads to the LEDs back on themselves, but a test with a battery after placement showed no problems there. The instructions make no mention of scraping away the chrome plating, but you'll have to do this on the mating surfaces of the 'engine inter-coolers' before assembly. It might be a good idea to sand down the ends of the completed inter-coolers too. While they slide into the engines, the fit is extremely snug, and I snapped one of the assemblies in two trying to rotate it slightly. I twisted the wires together and fed them through the hole in the bottom of the hull, lining up the engines with their slots, but I didn't cement them at this stage, since I wanted to be able to mask around them for painting. I held off gluing the stand top to the hull for the same reason. I then tacked the command tower (the conning tower, or sail) wings in and clamped the assembly to the hull. The fit wasn't terrific, but nothing a dab of putty couldn't fix. I set the hull aside for a bit, and tackled the shuttlebay. While I didn't want to go overboard detailing the kit, I wasn't too keen on the decals provided for the shuttle bay. To my eye, they go way too far, creating a too-strong contrast with the rest of the kit. I did wind up using the floor and pieces of the wall details, but decided not to use the door details, electing instead to cut away the bulk of the door material, leaving a frame over which I tacked some thin sheet plastic, and struts cut from the original door material. I added some tall 'pistons' at the corners of the shuttle bay, then primered and hand-painted the rest of the bay. When that dried, I shot it with Future, and added the decals. I then glued the bay and bay doors in place. From there, I glued the hull halves together, set them aside, and tackled the engine shrouds. Looking at them, I decided that they would probably snap into place once glued together, and that it would make it easier to clean up the inner seam, which would still be fairly visible. I tacked the shrouds together with Tamiya liquid cement, and after they had dried, I cut some thin 'stripes' of styrene, and glued these to the interior of the shrouds. I glued the rear plate in place, tacked the shuttle together, and did some puttying. The seams are a bit tricky, and I lost a little of the window detail sanding them down. I think a little hotter cement might help here. The worst fitting parts in the whole kit are the shuttle pieces-all four of them. (Technically, seven, but I didn't use the 'club-footed' landing gear.) They are mighty small seams, but a right pain to sand due to the contours of the lower half of the little ship. I finally used a q-tip and a little acetone to smooth the seams. All this done, it was time to start painting. Painting and Final Construction I decided to do some to the accents on the hull in Alclad, so I first masked off the engines and shot the whole model with a gloss black primer. After letting this dry for a few days, I masked off the 'radiator' surfaces on the shrouds and the lower hull, along with the small fixtures nest to the large housing atop the aft hull, and the large 'intakes' on the wings, and shot all of them, and the interior of the shrouds with Alclad Duralumin. I now tacked the engines into place, popped the shrouds into place, and masked off the metalized portions of the build. I oversprayed the whole hull with a simple flat white, and followed that with an overspray of Future. |
|
The last construction step was putting it on the stand. An earlier look at the pieces showed me that I would have to shave down the screw holes for the switch. If left alone, they hold the switch too low in its slot-you'd have to use a toothpick to turn the lights on and off. The battery pack was tacked in place with five-minute epoxy. All the wire joins had been soldered before final assembly, and then wrapped with a bit of electrical tape. The final step, adding the decals, was complicated by my losing the decal placement portion of the instructions-all I could find on my sheet was the placement guide for the shuttle bay decals. Its possible it doesn't come with one, but it seems unlikely. The earlier release of the 'UFO Mystery ship' had a full-page guide along with its extensive decals. In any case, I went with what seemed right to me, making one small change in the decals themselves. I cut apart the SSC prefix and re-ordered it to read SCS (for space command ship, natch). All the decals lay down smoothly with a bit of Micro-sol. I also added dark blue 'fin flashes' with sections of blue decal paper from the decal vault. Finally, a mix of Future and Tamiya flat base knocked a bit of the 'shine' off the finish, the chrome 'sensor sphere' was tacked into place, and I mounted the Vega on a small piece of bent wire to show it emerging from the ship. |
![[]](cy_Leif_13.JPG)
|
Conclusions It's wonderful to see this design available again for a reasonable retail, rather than the vastly inflated collectors prices it had been fetching. While the SSC will never rival STAR TREK for popularity, I hope this re-issue will spark a wave of enthusiasm for the design. To me, it represents the chance for SF modelers to create their own 'franchise', and if the continued interest shown at the SSM forums is any guide, the kit will be around for quite awhile. There is already a small aftermarket for the kit, with resin and photoetch sets being recently made available. I hope we'll see a few sets of decal sheets offering some name and color scheme variety. And who knows, maybe one-day new ships as well. To read the in-box preview, please click here. Many thanks to Round 2 Models for providing the review sample. Manufacturers and retailers, interested in getting your wares reviewed and publicized on a site averaging 6000+ readers a day? Contact us! |
Please note that the opinions expressed in this article are those of the reviewer.
Read other reader's reviews of this kit ![]() Submit your own review of this kit
Submit your own review of this kit
![]()
Go back up | Other Sci-Fi Index | Starship Modeler Home | Site Map | Feedback
This page copyright © 2012 Starship Modeler™. First posted on 9 May 2012.
![[Please click to enlarge]](cy_Leif_00_lil.jpg)
![[Please click to enlarge]](cy_Leif_11.jpg)
![[Please click to enlarge]](cy_Leif_09.jpg)
![[Please click to enlarge]](cy_Leif_13.jpg)
![[Please click to enlarge]](cy_Leif_14.jpg)