
By John Lester - images & text © 2008
|
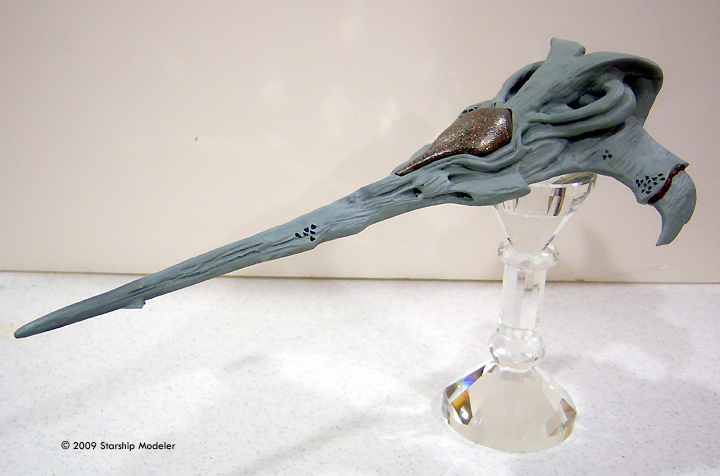
![[Please click to enlarge]](jl_wraith_1551.jpg) The Wraith 'Dart' made it's first appearance in Stargate: Atlantis' debut episode. |
|
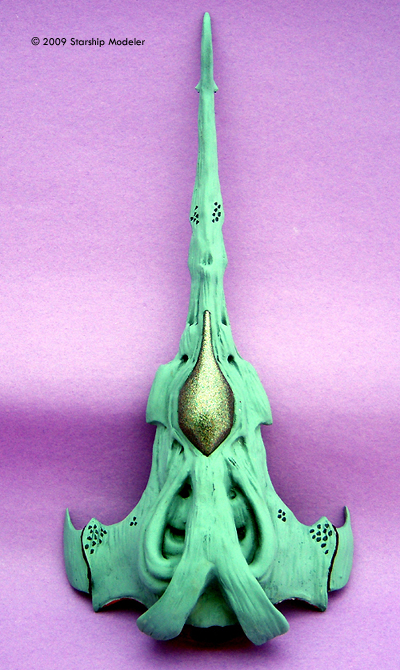
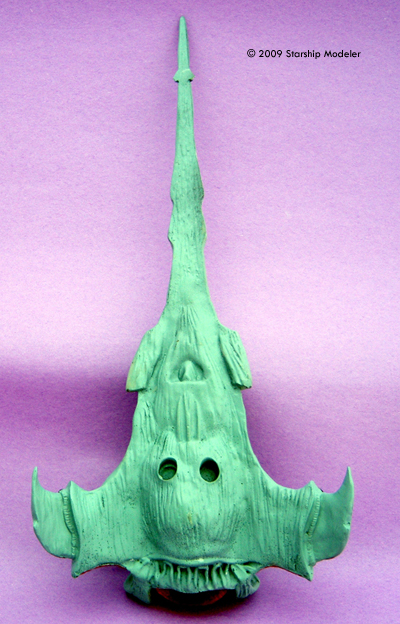
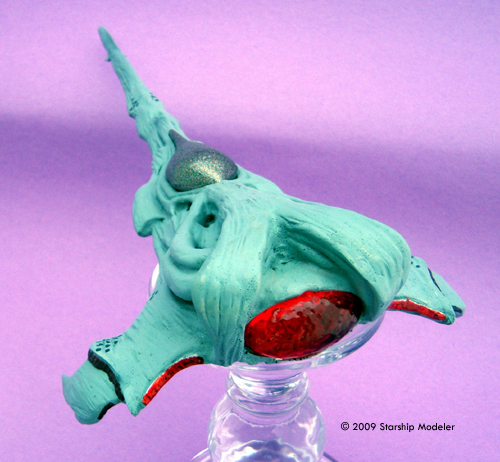
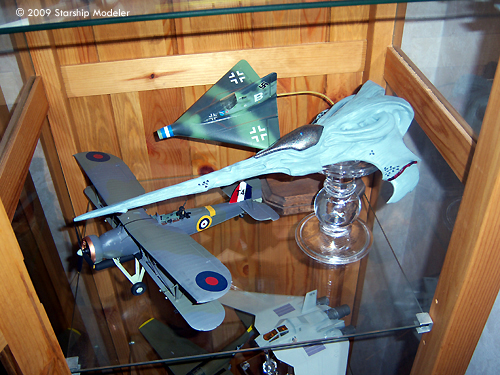
Image: What you get Image: Overall Image: From above Image: Underneath - yes, I forgot to paint the "eyes of the monkey face" black Image: Another Image: Cockpit canopy and environs Image: Intimidating the other models in my display case |
Crewed by one pilot, it is a dual use craft: starfighter and transport. Lightly armored but heavily armed, it is a dangerous opponent in a fight. It's primary use, however, is to “cull” humans for use as food by the Wraith. This is done by means of a transporter 'beam' and associated data storage on the craft. Though it's a fairly large machine it is thin enough to fly through stargates. Model Realms' 1/48 scale kit, introduced in 2009, is - to my knowledge - the first kit of this subject. And only kit, as of this writing.... What You Get The kit is comprised of five resin parts, three of which are made in red-tinted clear. The fuselage is one large piece. Red-tinted main engine and left/right winglets, plus an opaque canopy, round out the parts. There are no decals, but none are needed. The kit was mastered by Alfred Wong for Model Realms. Detail is acceptable. Because the ship has an 'organic' design (and the series hints that they are not so much manufactured as 'grown') slight irregularities in surfaces and symmetry are actually good things. Parts fit is decent (in fact, the canopy join is so tight you may not need glue). Casting is a mixed bag. The small parts are well done, with no bubbles or other flaws. The three red-tinted clear pieces are very well done - almost water clear. The main body, however ..... Apparently, the master was too large to fit in the caster's largest pressure pot and as a result, the piece was not pressure cast. My sample had a lot of small bubbles over ever surface, with more appearing any place I sanded. My sample also had a substantial mold seam around the entire piece. Is it accurate? Considering the visible differences between CGI at the start of the series and at the end, not to mention the full-size mockup, I'd say the kit is pretty close. Any irregularities can be written off as natural variation amongst 'organic' ships. (that's my story and I'm sticking to it!) |
|
Assembly and Finish After a good scrub to remove any mold release agents, I set to work clearing up the mold seam around the fuselage. It took about an hour, using my hobby knife, various files and sandpaper, to carve away the excess material and smooth out the surrounding areas. I noticed as I did so that I was revealing more small pits lurking just below the surface. Irritating to be sure, but pretty easily fixed. The resin is easy to work with - easily sanded/filed and not brittle. I decided to get the wingtips affixed to the main fuselage before tackling pinholes - and here I made my first mistake. I glued the two translucent red pieces to the appropriate spots - using black CA (superglue). Because the resin is so clear you can now see exactly where I put the glue. Ooooops. I should have used regular clear superglue. Fit was a little bit loose on both wingtips so I filled the gaps with thin ribbons of Aves Apoxy Sculpt epoxy putty. (It's inert and won't potentially mar the smooth, clear resin - I wasn't sure I could say the same for a solvent-based putty like Bondo or Squadron). Once I had the gap filled I smoothed the putty with a q-tip and a finger, both wet with plain water. I let that cure overnight. The next afternoon, I masked off the red-glowy parts (engines) along the base of the winglets using a generic liquid latex masking agent (similar to maskol or MicroScale's blue Liquid Mask). That set up fairly quickly and I was ready to make my next big mistake. I was priming another model and I thought I could combine the process with the Dart. Unfortunately for me, I was using flat black spray paint. Black is great if you want to start shading and highlighting; not so much if you want to find all the pits and flaws on a surface. Even less great if the primary color for the model is to be a lighter shade, because the black stays in all the pits while the lighter shade stays on the surface and then you see every last flaw. I realized my mistake as soon as I started to fill the pits in the surface, but then I was up against a deadline so I grit my teeth and pressed on. Filling pits is easy, if tedious. I spread artists' matte gel medium, which is a thick acrylic paste you may find at any decent craft store, across an area. Then I used a damp washcloth to wipe the excess away. The gel medium gets into the pits, filling them, and the washcloth removes the unwanted stuff. After about an hour, the remaining medium has dried enough that you can paint it. So I did. The references I collected (thanks Bar!) showed the craft to be a very light blue or lilac color, depending on lighting. I chose a Gunze light blue that I happened to have several bottles of and airbrushed the entire model. After that had dried, I went back with hobby knife, files and gel medium to fix all the flaws that the flat black primer had hidden. Then I sprayed another coat of the light blue. The last step in painting was to paint mall dark blue 'freckles' in various places as indicated by my references. The next evening, after all that had dried, I peeled off the masking on the winglets to expose the clear red engine bits. I then took a silver paint marker and painted the recess where the large, main engine dome would fit as well as two small areas on the back of the wings where my references indicated more glowy engine bits. The wing areas received a thick coat of Tamiya transparent red paint when the silver had dried. Meanwhile, I dunked the red main engine in Future clear acrylic and brushed more Future over the red areas on the wings. When all this had dried, I glued the engine in place - this time using a little clear superglue. The last thing to do was the cockpit canopy. In the show, the canopy is actually a force field that looks silvery-black. My first thought was to paint it chrome and overcoat with clear black, but I found something at Hobby Lobby called “Magical Multicolor Glitter Spray” (made by Krylon) that looked like it might fit the bill. The stuff - which seems to be flecks of mica in a heavy clear carrier - was not easy to use. The nozzle kept getting plugged resulting in spits and drips. Eventually I did get a decent coat on the canopy piece. It had a very rough texture though, so I buffed it with a cotton rag to smooth the surface and dipped it in Fuuture to fill in gaps. It was too sparkly for my tastes, so I buffed on some SnJ "Aluminum" metallic powder to make it look more uniform. Then I overcoated it with a tint of airbrushed clear black (Tamiya's Smoke) to tone down the glitter. The end result is not bad, to my eye, though I may still go back with another coat of the Smoke. The canopy is such a tight fit that I merely pressed it and place and declared victory. Conclusions This is a big model when finished, mean and menacing too (and pointy - you can use it to defend your home against intruders, should it come to that). It builds quickly and looks like it's supposed to when done. The pits are certainly a pain in the butt, but an easy enough fix. My model may not be perfect, but it is done --- and none of the other models in that display cabinet are going to dare point out any lingering flaws. |
![]()
This page copyright © 2009 Starship Modeler™. First posted on 15 June 2009.
![[click to enlarge]](jl_wraith_1695.jpg)
![[Please click to enlarge]](jl_wraith_1552.jpg)