
|
By John Lester - images & text © 2007
|
![[Boxtop]](http://www.starshipmodeler.biz/images/products/kotobukiya/kbykp-27box.jpg) The Jigabachi AV is a futuristic, AI-controlled attack helicopter from the Ghost in the Shell 2: Stand Alone Complex anime series set in 2029 (think AH-64 Apache on steroids). |
|
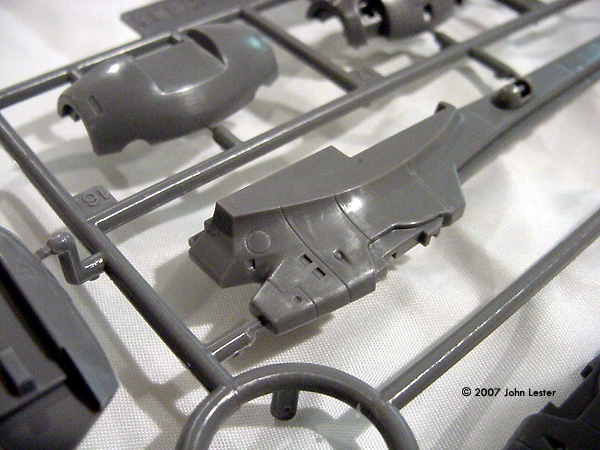
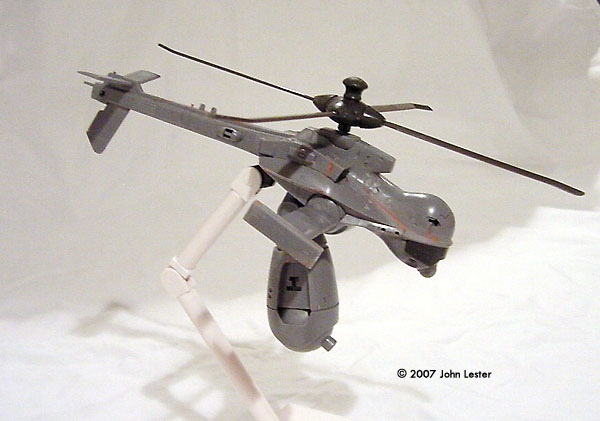
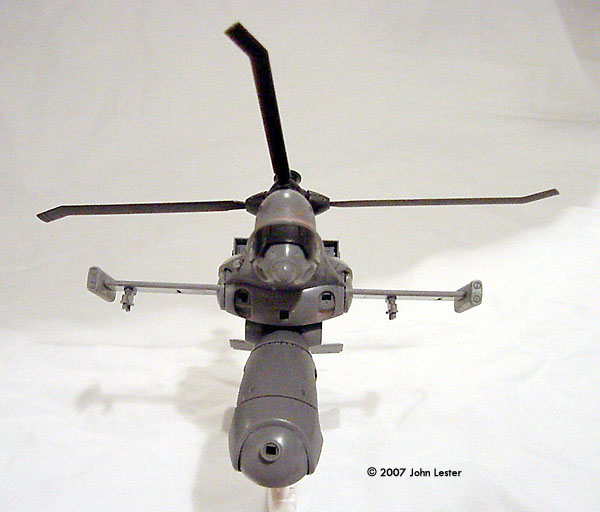
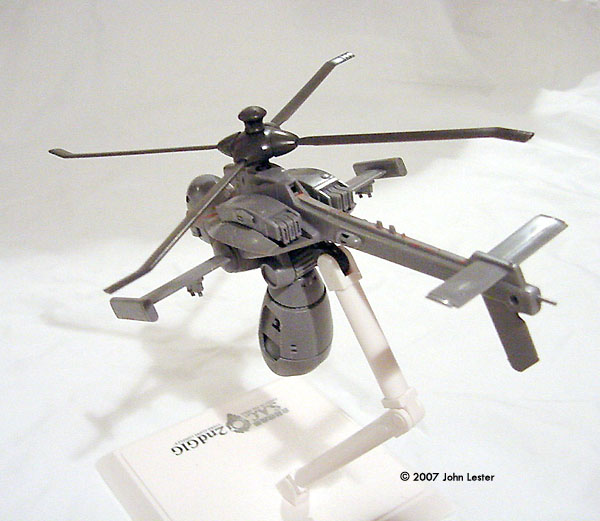
Image: Detail is very crisp, as seen on the Tachi's body Image: Right side, "stinger" deployed Image: Front view Image: Left/rear view |
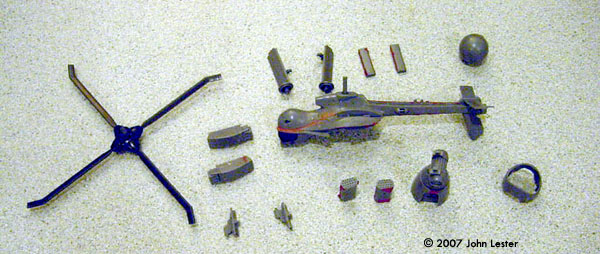
It's the first in Kotobukiya's new Real Mechanical Collection series of plastic model kits - and if it's any example of what's to come, I'm pretty excited! What You Get Inside the colorful box are 7 parts trees in blue, grey, white and black plastic, bagged to prevent scratches and keep any parts that may detach in transit from Kotobukiya to you from escaping. Parts are provided for the Jigabachi (in flight or landed), a 1/72 Tachikoma, and a stand/display base to display them together. Tere is a full weapons load for the Jigabachi, including 8 missiles on 2 underwing MERs, and two each of two different rocket pods Also provided is a multi-page, fold out assembly/finishing guide. Molding quality is what you can expect from a state-of-the-art Japanese manufacturer: sharp detail, no flash and minimal mold seams and sink marks. Panel lines are finely engraved; raised detail is crisply delineated. Subassemblies are thoughtfully engineered so that joins between parts generally fall on panel lines, or are covered by other subassemblies. The assembly guide consists of 18 exploded diagrams (15 for the helicopter, three for the Tachikoma), a color paint guide and reference drawings/description from the anime. All text is in Japanese - which makes the reference portion kind of moot for us gaijin, but which isn't really a problem for building and painting. The assembly diagrams are very clear and easy to follow, and the paint guide (which looks to have call-outs for Gunze and Tamiya paints) is easy enough to decipher, since it's printed in color. Assembly and Finish Assembly is straightforward, and as you can see from the pictures, I as able to have the major sub-assemblies for the Jigabachi together and ready for paint in about 2 hours. |
|
Parts fit is really good - in fact, most parts fit so tightly you don't need glue. I glued most of the pieces anyway, for extra strength, aiming for the fewest number of subassemblies consistent with easy painting. I did need a bit of putty - but I always need putty, so I wasn't surprised or disappointed. As you can see, I left off some of the smaller, more fragile pieces in order to spare them from rough handling during construction --- I'll add most of those just before I paint. I still managed to snap off the tailskid (I think that's what it is, maybe it's a fuel dump or static discharger), which I'll have to replace with fine brass rod later. And yes, I managed to glue the underwing hardpoints for the rocket pods in the wrong spot on one wing. Arrggggghh. A couple of things to note: First, in Step 10, it appears you are to glue parts A24 and A23 to the autocannon “bulb”. Don't do that unless you want to have the model permanently displayed as “in flight”. The rear landing gear assembled in Steps 13 and 14 fit in that same place. Also in Step 10, you assemble the autocannon and it's “turret”, then trapping them between part A7 and the rest of the housing you assembled in Step 9. It's a very, very tight fit; you'll want to lightly sand the “ball” (parts B30 & B31) first, then force it into part A7. And I do mean force it - you really have to press to get it to fit both A7 and front of the pod you made in Step 8. Finally, the missile heads have a small hole in their fronts. From the pictures in the paint guide, it appears as if you are supposed to place a drop of clear green paint, or tinted Future, there to replicate a camera lens. Conclusion Despite the high parts count and a bunch of small parts, this is a pretty straightforward kit of an interesting subject. You get plenty of options - and there will be a bunch of parts left for your greeblie box when you finish the model (mostly from the C sprues). Painting is pretty simple - stay true to the show and paint it grey, or let your imagination run wild. What's not to like? Highly recommended. Many thanks to my wallet for providing the review samples. Manufacturers and retailers, interested in getting your wares reviewed and publicized on a site averaging 3500+ readers a day? Contact us! |
![]()
This page copyright © 2007 Starship Modeler™. First posted on 2 July 2007.
![[Please click to enlarge]](jl_jigga-008F.jpg)
![[Please click to enlarge]](jl_jigga-004F.jpg)