
|
By Jeff Semprebon - images & text © 2016
This 1:18 scale Robot Mule started off as Glencoe’s 1:15 scale M274 Mechanical Mule kit, which I found cheap on eBay while looking for something completely different. I thought that it would look close enough to scale with some 1:18 scale military figures built as intended, but it turned out that the deck piece (which serves to stabilize the entire chassis) was badly warped. I tried heat-softening and rebending it, but could not get it straight enough that it would not torque the chassis parts out of alignment. Since I needed to build a new deck, it occurred to me that lengthening the new deck and eliminating the driver’s seat would allow the deck to fit three cargo pallets or bins that I had already made for a model railroad project. |
![[Side view, with cargo]](js_Mule_21_SideView.jpg)
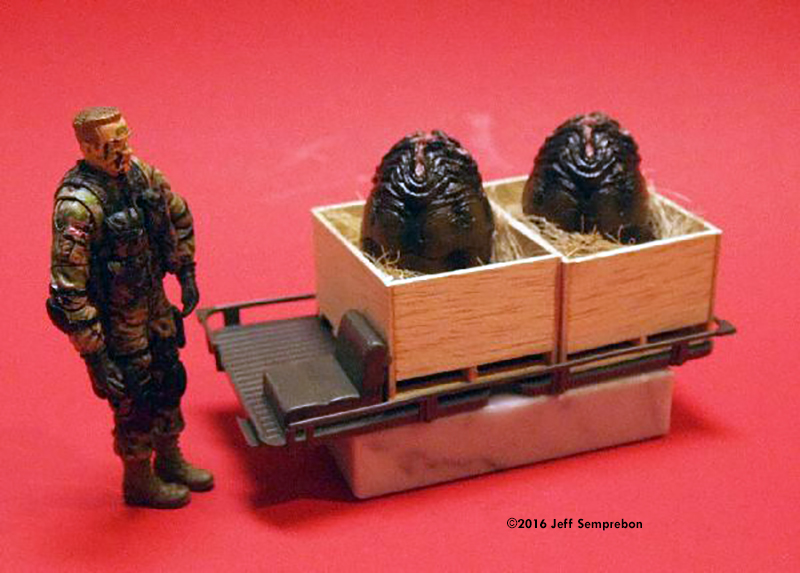
^The dome-shaped cargo pods are O-scale LCL (less-than-carload) cement containers intended for use with model trains.
|
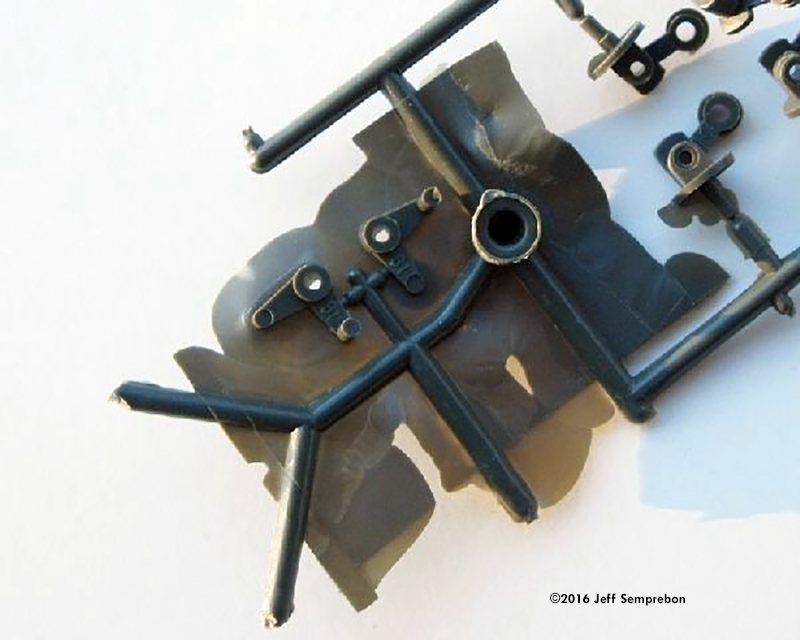
Image: Original deck piece with seat – note warpage of far rail. Image: Steering linkage parts with a “slight” amount of flash. Molds likely date to the Vietnam War era.
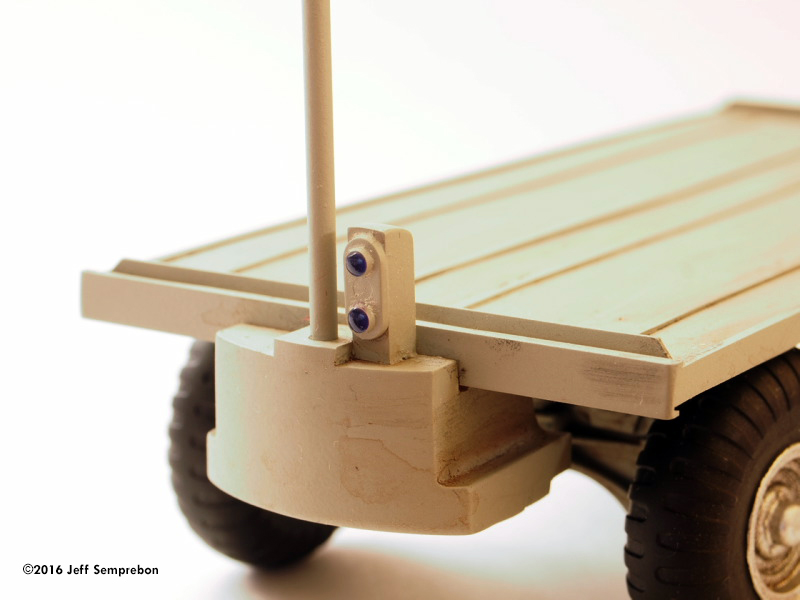
^ Top rib strips added, spaced to match the gaps in the cross-slats on the pallet. Note the aqua-colored filler putty where and additional section was added; the deck piece was originally cut the same length as the original deck piece, before realizing that the longer deck would fit an additional piece of cargo.
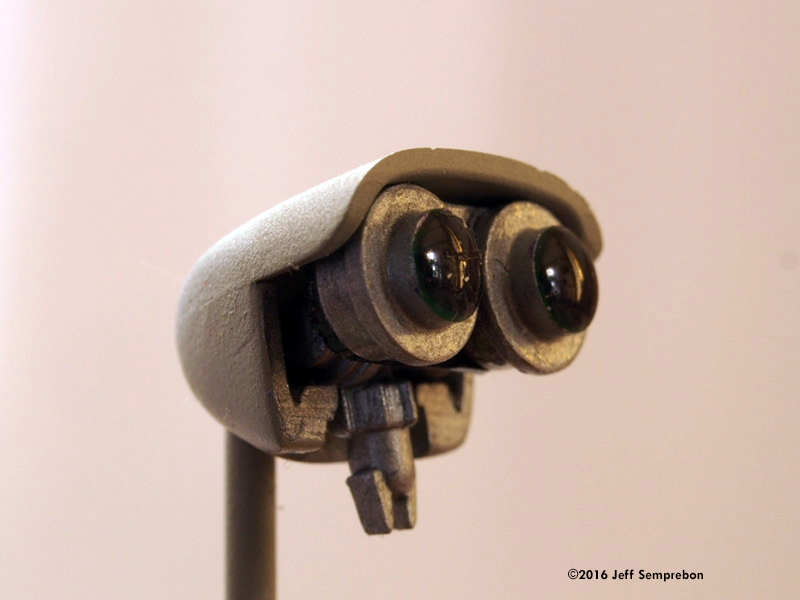
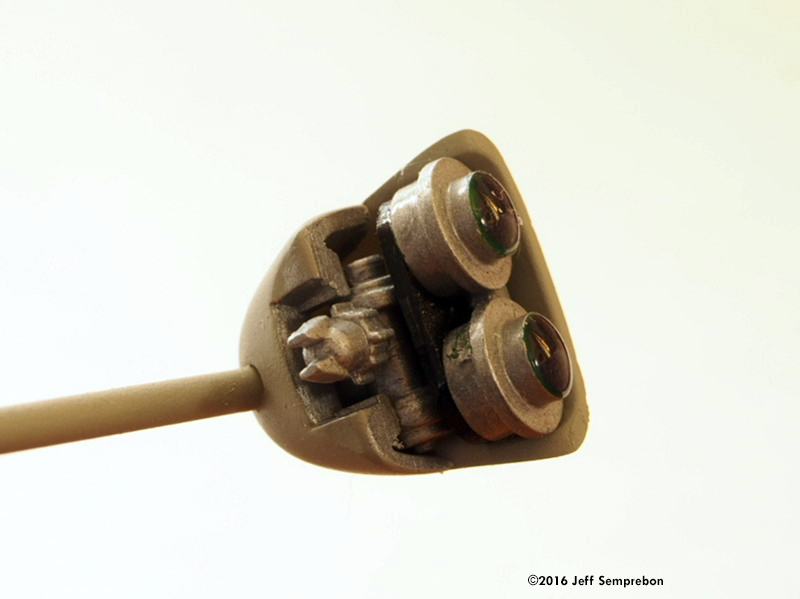
^ Eyes made from LEGO pieces, with the front surfaces sanded slightly round and several coats of tinted acrylic finish applied. Sides were brush painted Testors “steel”.
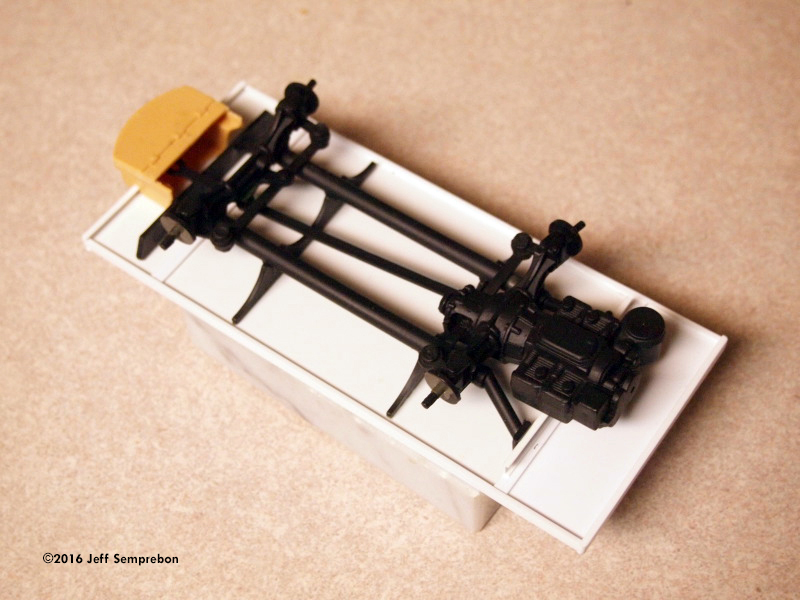
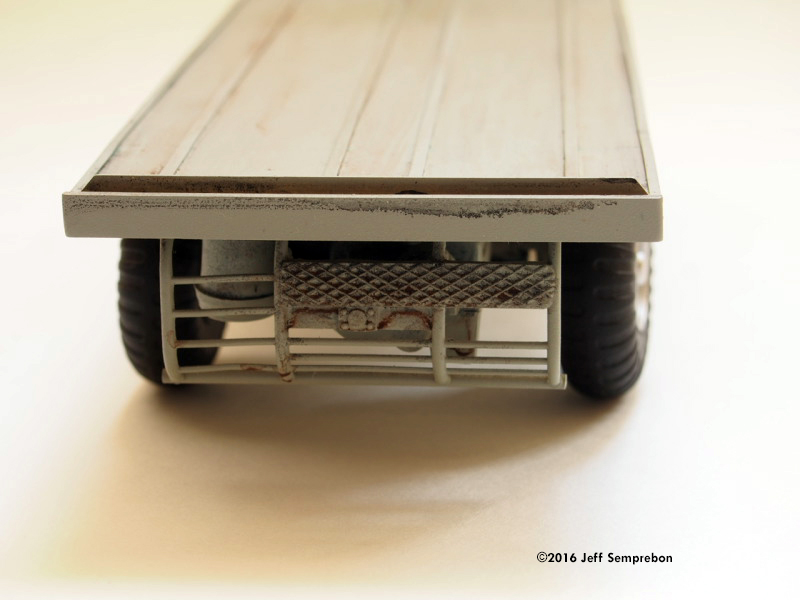
^ Chassis assembly was sprayed black before attaching to the deck. Note piece of channel attached to the square mounting surfaces on the backs of the frame pieces.
^ Front view |
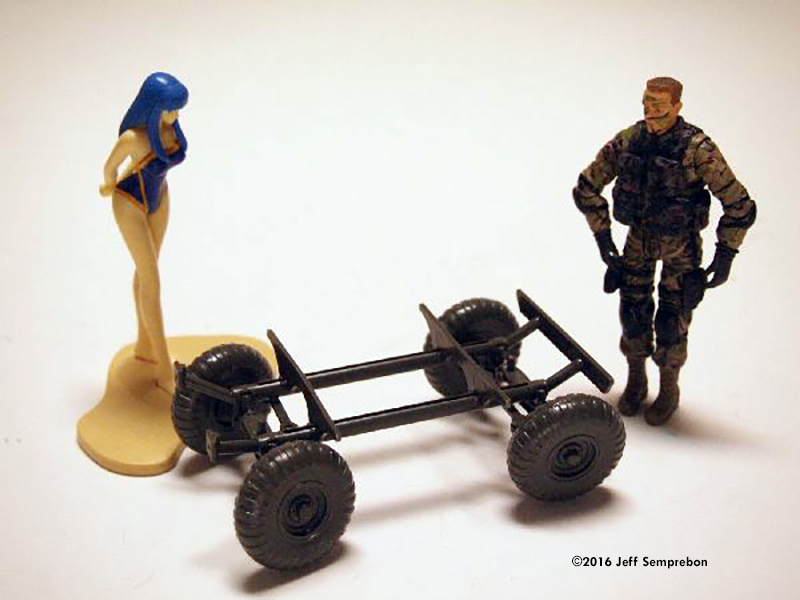
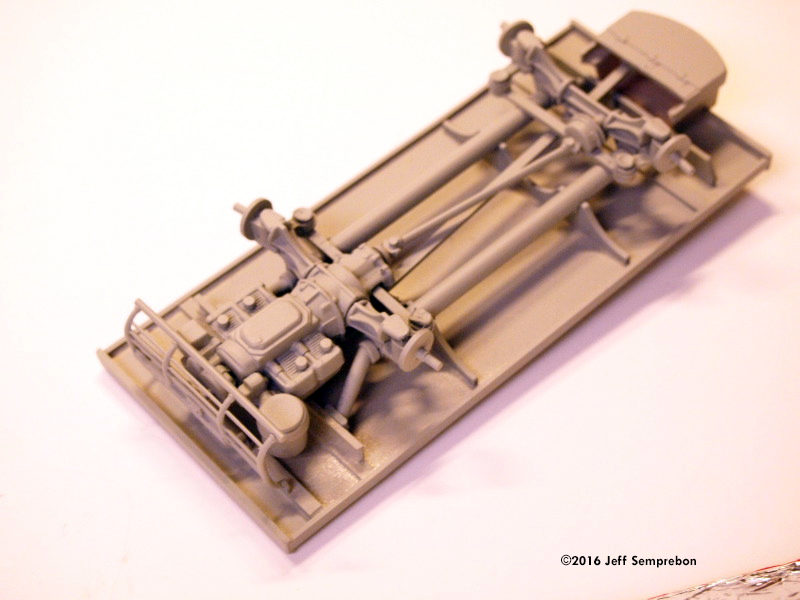
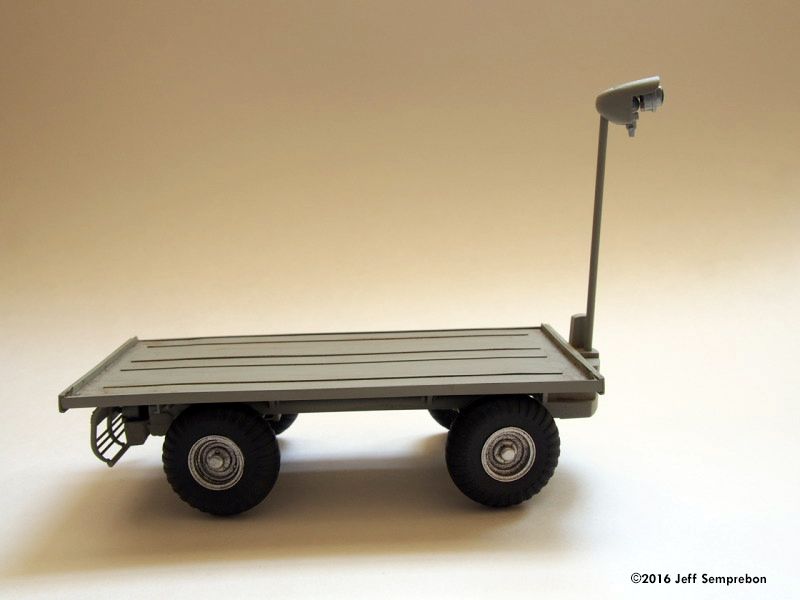
Chassis Construction Construction of the chassis, operating steering linkage (which turns the front and rear wheels in coordination), engine, and transmission was done mostly according to the kit directions. A review and build description can be found online at CyberModeler. One should take care when removing the longitudinal frame pieces (12 & 13) to keep the rectangular indexing lugs on the ends - these fit into sockets on the front cross-piece (14). These lugs could easily be mistaken for part of the sprue and inadvertently trimmed away. The main wheel support axles/crosspieces (16 & 17) can be engaged with the frame pieces (12 & 13) to hold them in place when installing the cross-braces/deck supports (11). In fact, an alternative assembly sequence would be to build up the axle assemblies and steering linkage first, then attach the axle pieces onto the frame, and attach the deck supports last (or leave them off and add some completely different non-planar body onto the chassis assembly). I added a new piece of styrene channel across the rectangular pieces on the ends of the longitudinal frame pieces, mostly just to give them something to attach to; this was added while the chassis was upside down on a piece of glass to assure that the channel came out even with the deck supports. As with all models with styrene-to-styrene moving joints, I dabbed the pins of the steering linkage parts in plastic-compatible lubricating gel from Radio Shack before assembly to prevent them seizing. The pictorial directions may confuse some modelers where they show a screwdriver used to secure the steering linkage. The pins are to be “peened” with a heated screwdriver to melt the protruding end of the pin into a “mushroom” shape to retain it in the passage (a crude technique that may be a novelty for younger modelers). I found this more easily done before attaching the axle pieces (16 & 17) to the frame. One trick to forming neat retainer “mushrooms” seems to be to leave the hot screwdriver (heated over a candle flame) in place to cool a bit after pushing it down to form the mushroom, and then hold the parts and pull the screwdriver away quickly to avoid pulling any molten plastic with it. The kit comes with free practice sprues to perfect this technique.... The wheels are intended to be installed so as to rotate, but I left them off until the end to make it easier to sand the seam between the halves and to ease painting. The exhaust and fuel tank were left off completely, and currently the Mule has no evident power source; I may add some battery packs along the sides in the future. New Deck and Robotic Controller The deck was cut from 0.040" styrene sheet, with raised longitudinal ribs on the top surface from 0.015" thick strips spaced to engage the gaps between the cross-slats on the bottoms of the pallets and bins to keep them from slipping laterally (I wish I’d though of this when making the railroad cars these were designed for). A couple of cross-piece of styrene strip were added to match the heights of the supports on the chassis. The sides are framed with 1/8” styrene channel, and the ends are framed with 3/16” styrene channel. Styrene angle was added atop each to retain the cargo longitudinally. For the control box at the front, a search of my parts boxes revealed the turret-back storage compartment from an Italeri Pzkwgn IV that looked about right, with some trimming to fit and added detail from bits of styrene. Sensor eyes on the front were added from a long-deceased Heller C-119 window piece, with blue-tinted Future acrylic finish on the “eyes”. The head has eyes made from two transparent lime-yellow round LEGO pieces that were sanded to a rounded shape, mounted to a styrene bulkhead with CA adhesive (solvent-based Plastweld did not impress the LEGO plastic), and treated to several applications of blue- or purple-tinted acrylic floor finish ("Pledge with Future shine"). The main piece of the head was cut from the nose of a 1:200 Space Shuttle orbiter (do not recall whether Revell/Monogram or Lindberg), and an unidentified part from my greeblies box serves to fill in behind the piece onto which the eyes are mounted. The sensor mast for the head is styrene tube, and press-fits into a hole in the control box to allow the head to be turned. The body and head were sprayed with Testors flat gull grey, while the wheels were sprayed with unrecorded flat black spray paint, masked, and the hubs sprayed with Testors chrome silver. The entire vehicle was given a couple of rather sloppily done washes of black and dark brown. More Images Image: Chassis assembly with wheels dry-fitted Image: Test fit of deck with lower cross-pieces before adding framing and top ribs and angles. Image: Deck piece complete, controller unit and head under construction. Mast supporting the head is high enough to let it look back above the cargo. Image: Eyes after a few coats of acrylic, tinted with small amounts of blue or purple Liquitex artists acrylic paint. Image: 10 – Rear grill piece added and body assembly painted flat light grey. Image: Completed Model, right side Image: Underneath Image: Rear view Image: Front view of controller unit. Image: Detail view of side of head. Image: Detail view of bottom of head. |
|
Cargo Notes
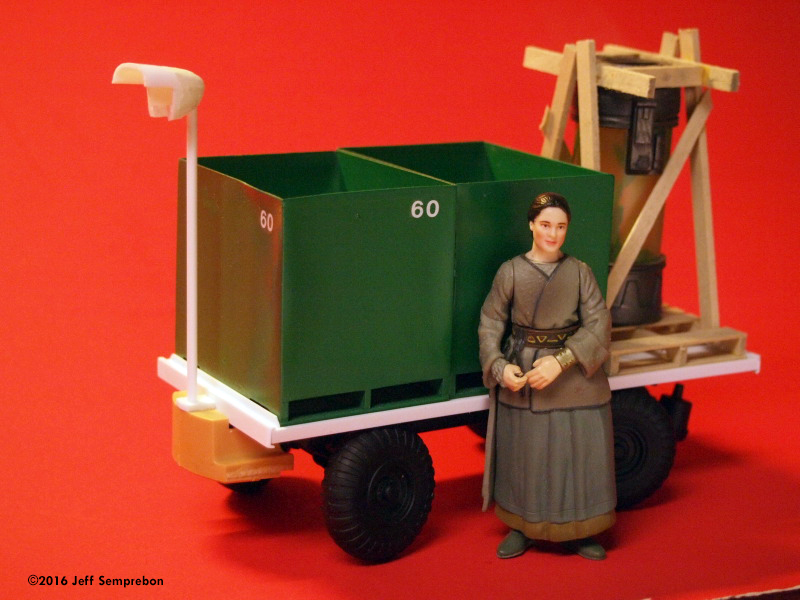
For both bins and wooden pallets, stringers were formed by using a first jig to cut the stock to length and a second jig to drill holes for corners of forklift notches. The notches were then trimmed out. The cross-slats were cut to length with a third jig. These are a bit smaller than conventional 42” x 48” or 42" square shipping pallets, measuring a scale 32” x 42”. Wooden pallets were formed from basswood. The 3/64" thick stock needed for 3/4" thick slats in 1:18 scale was found at BlueJacket Shipcrafters (superb customer service). Braced canister: The specimen container with plant is an accessory from a 1:6 scale Final Fantasy: The Spirits Within figure, mounted to a pallet and stabilized with a frame of basswood strips. The green bins are made with 0.020” styrene sides. Center stringer is 0.080" x 0.188" styrene, side stringers are 0.060" x 0.188" styrene glued onto the side pieces for 0.080" thickness. Cross slats are 0.040” x 0.188” styrene (roughly 0.75' x 3.5” in scale).
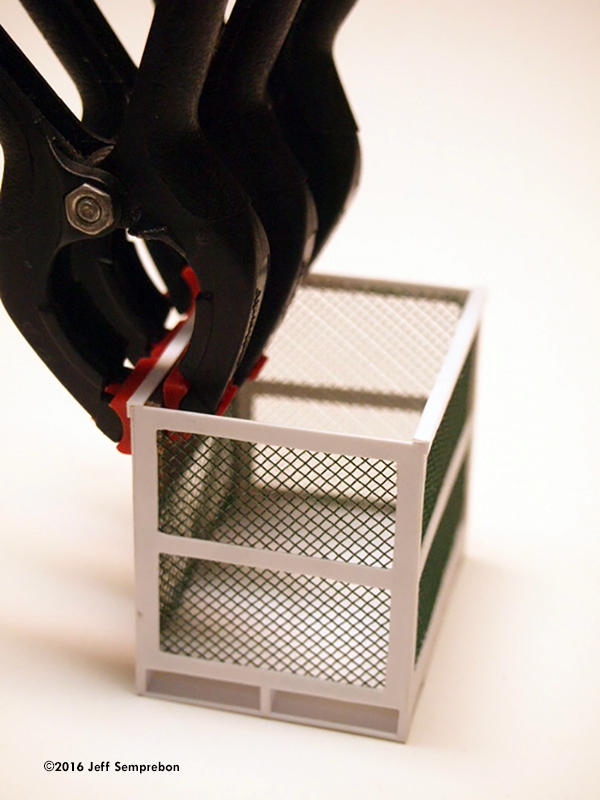
^Mesh-sided bins finished at last, sprayed with Testors gloss blue enamel. The mesh side bins are similar to the solid bins, but use pieces cut from scrap aluminum window screen tacked onto the 0.020” styrene sides with CA adhesive. Top trim is 0.100" styrene angle to help hide the ragged cut ends of the screen wires. Image: Mesh side bin styrene parts assembled, ready to add mesh cut from scrap window screen. Image: Applying the mesh – pieces were held in place with weights while cyanoacrylate adhesive was applied to the edges to tack it in place. This was a tedious process, attaching one edge at a time. Image: Gluing angle trim pieces onto the top to conceal the upper edges of the mesh and proved a more finished appearance. Top flange of end pieces are cut away to fit against the side pieces.
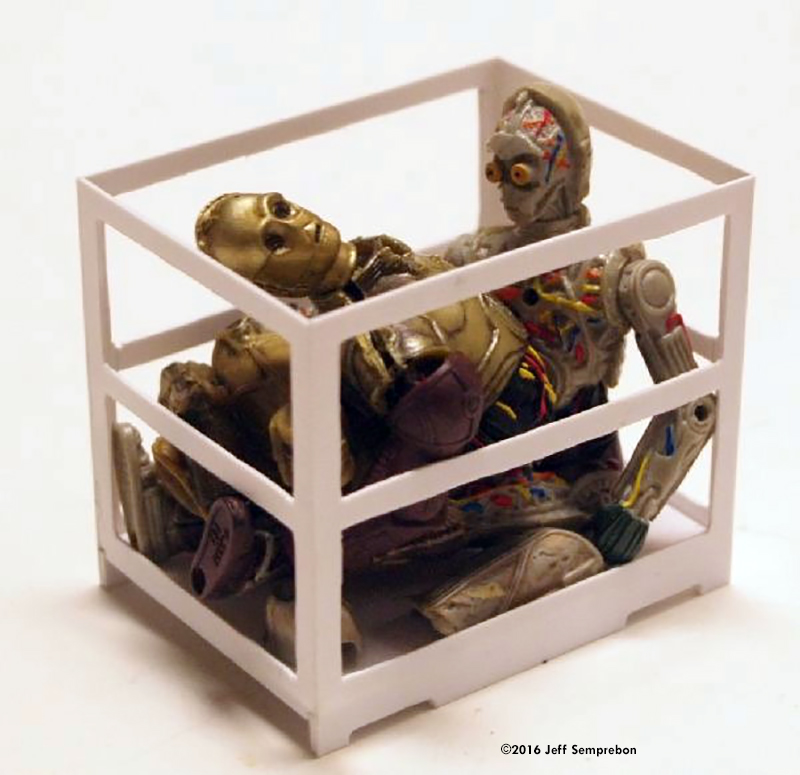
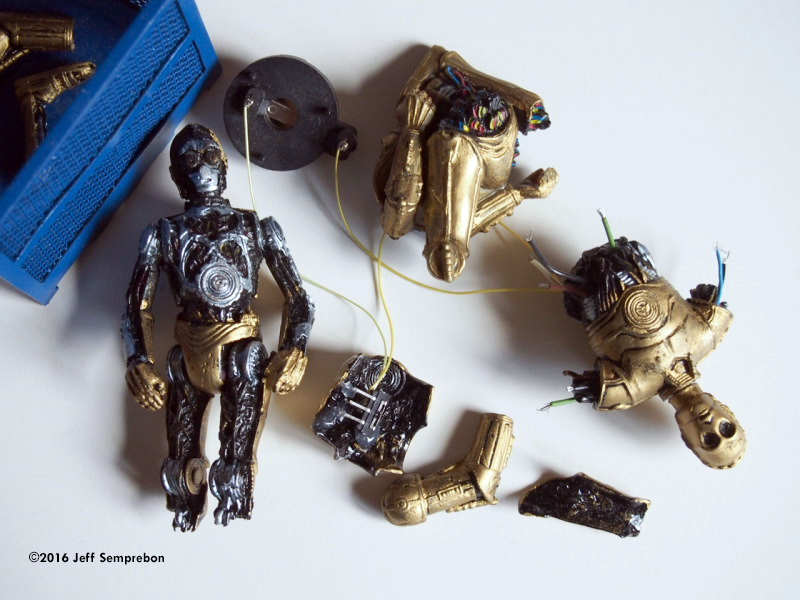
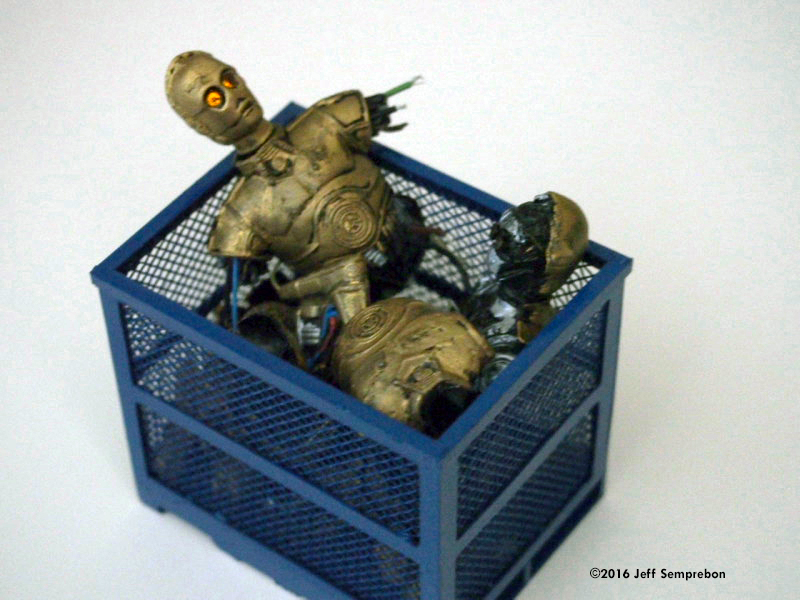
The C-3PO crate includes parts from two action figures. One is an Episode 1 figure with removable panels, and the other a disassembled figure that was an accessory for a "Bespin Escape" Chewbacca figure. The latter figure has the head molded in clear plastic, with the neck stem serving as a light pipe to allow the eyes to light from a lamp contained in the torso. The torso was split to allow installing a flickering yellow LED (taken from a 2-for-$1 LED tea light) powered by a CR2023 battery (included with the tea light, but mounted in a separate holder and wired with a tiny switch – battery holder and switch from Radio Shack). The glowing effect is so dim that it is questionable whether it was really worth the effort. The parts were painted with Krylon Fusion satin black, then the gold finish applied with “Rub n Buff” wax paste and details painted with "aluminum" acrylic (Testors Model Master). Some small lengths of stranded wire were cut and glued into holes drilled into the torso of the 2nd figure. Image: Parts of 2 C-3PO action figures, sprayed with a black base coat, detail painted with aluminum, and Rub-n-Buff metallic wax finish applied for the gold sections. Note additional bits of stranded wire added, and the battery case (round black object near the bin) and small switch (tacked onto the inside of the torso shell w/ low-temperature hot-melt glue) wired onto the electronic tea light LED (which has the flickering circuitry build in). Image: Lighted eye effect, which is rather dim and questionably worth the effort.
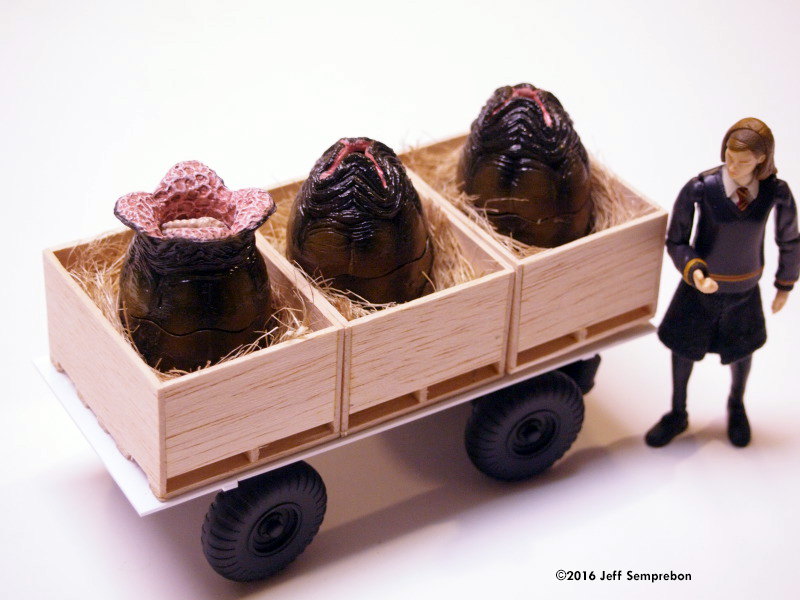
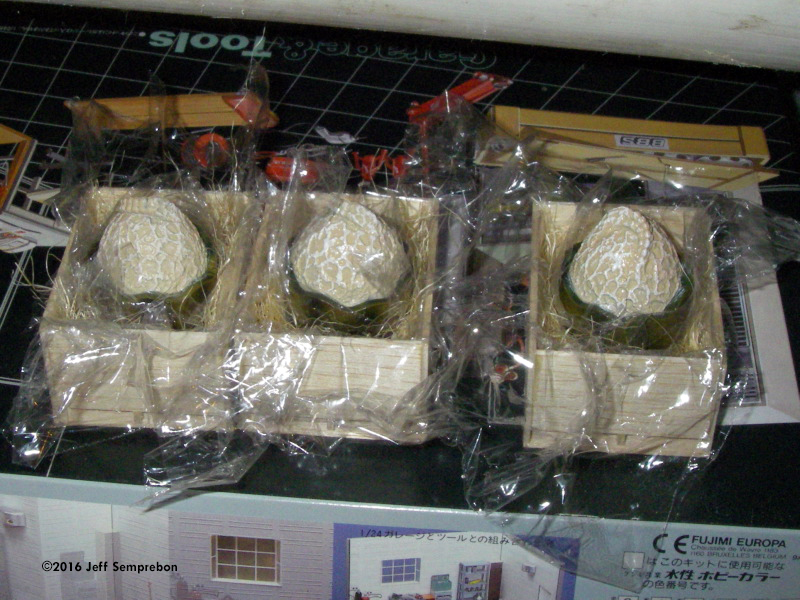
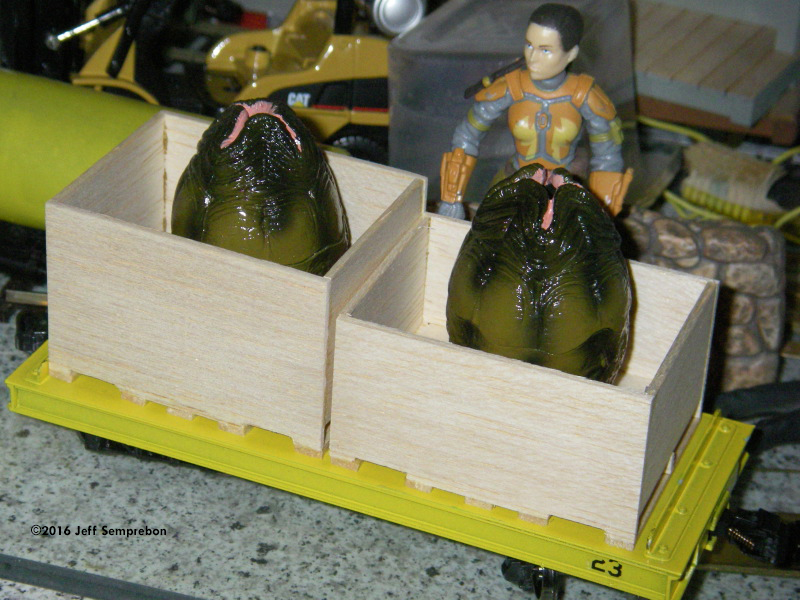
Egg crates - Alien eggs are from Hot Toys in their Snap-Kits line (now sadly overpriced on eBay), crates are balsa with basswood slats, packing “straw” is made from fibers cut from a length of sisal rope (about all sisal is good for, in my opinion). Image: Sisal fiber “straw” packed in around eggs and dripped with diluted acrylic matte medium to hold it in place. Plastic kitchen wrap prevents the eggs from becoming glued in place. Image: Comparative test of wall heights for egg crates. All-in-All, the Glencoe Mule is a nice little kit that is fun to build and could form the basis for a variety of vehicles. The basic, utilitarian design should allow quite a bit of leeway in scale. |
![]()
Go back up | Robots & Vehicles Index | Starship Modeler Home | Site Map | Feedback
This page copyright © 2016 Starship Modeler™. First posted on 25 May 2016.
![[Click to enlarge]](js_Mule_05_DeckRibSpacing.jpg)
![[You know what to do]](js_Mule_07_HeadComponents.jpg)
![[click to enbigiggen]](js_Mule_14_Front.jpg)
![[Right/front view]](js_Mule_11_RtFront.jpg)
![[Mesh bins]](js_Cargo_06_MeshBinsPainted.jpg)
![[Left/front view]](js_Mule_12_LtFront.jpg)
![[Easter eggs]](js_Mule_20_SideView.jpg)