
By Johnny E Worthen - images & text © 2006
|
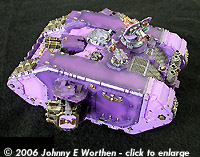
![[Please click to enlarge]](jw_crusader_All_Off.jpg) As a birthday present my kids pooled their money, knocked over a liquor store and sold an organ on eBay to buy me this Games Workshop Crusader Land Raider at a bargain price of $65. |
|
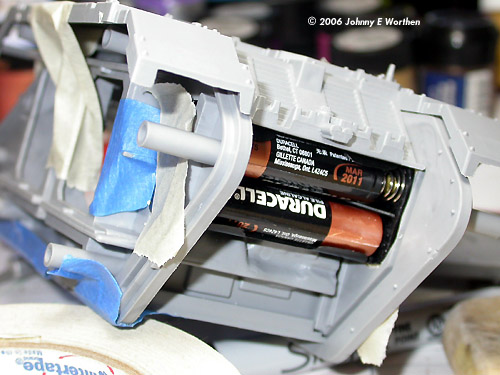
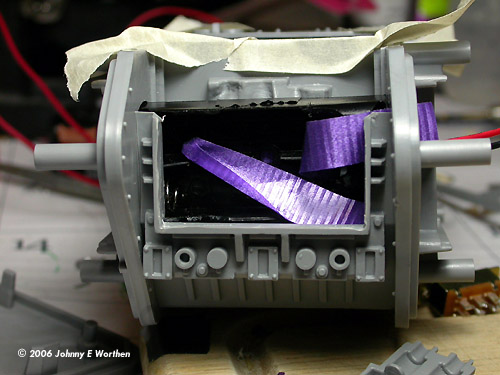
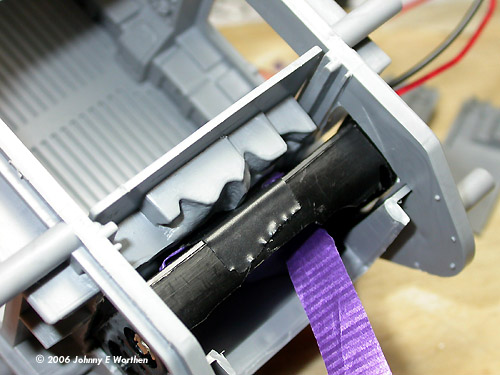
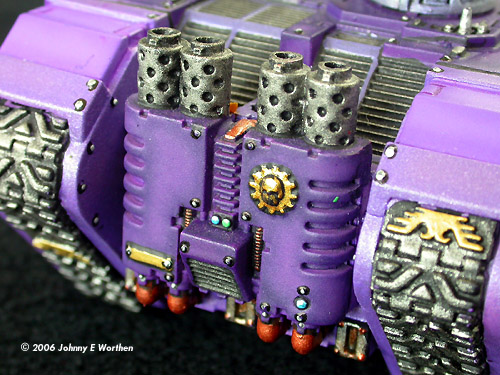
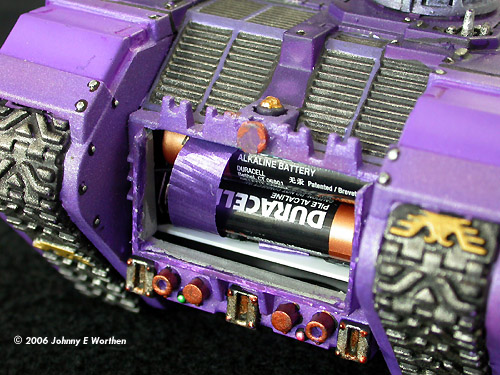
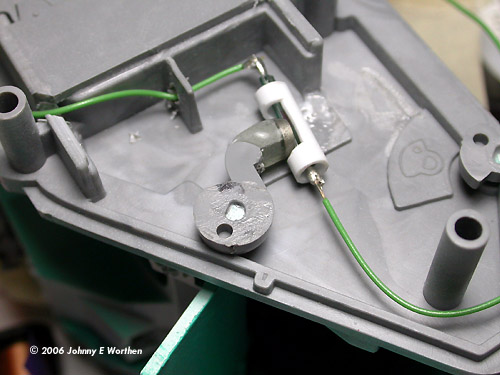
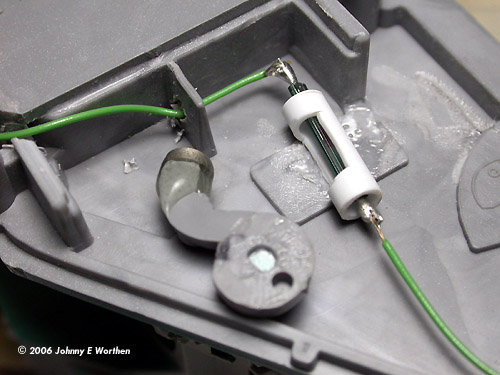
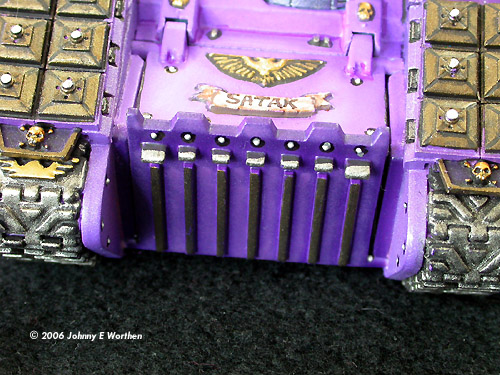
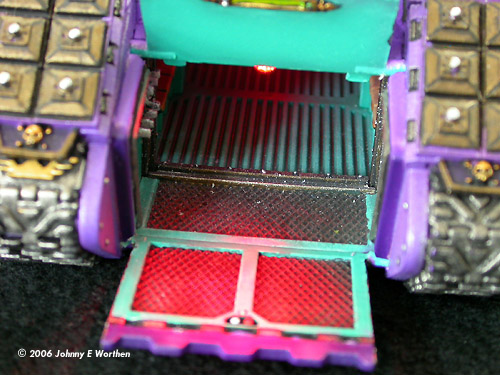
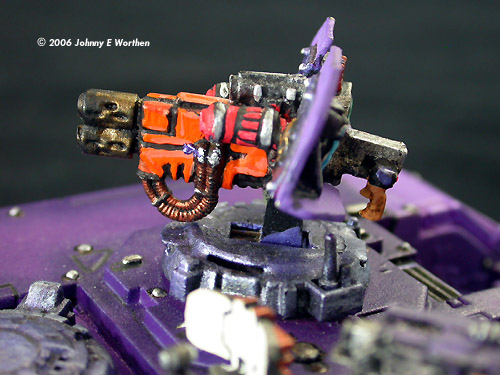
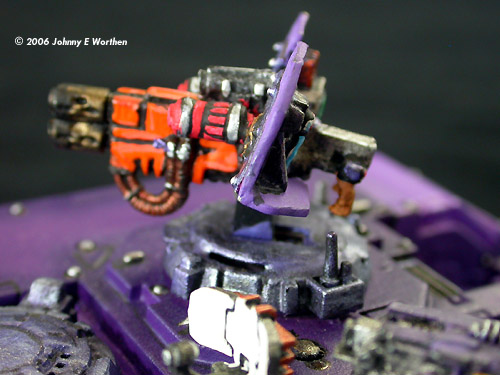
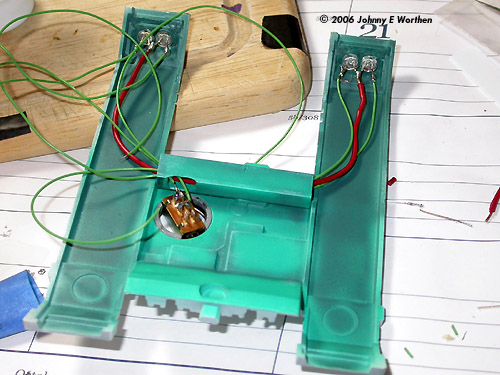
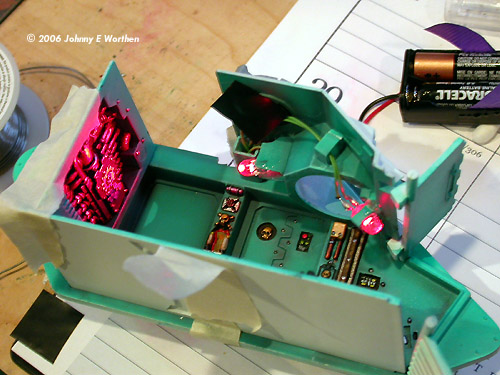
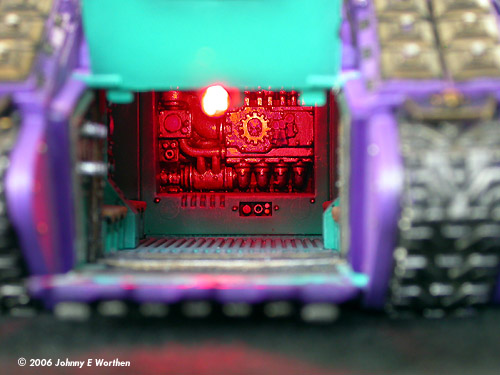
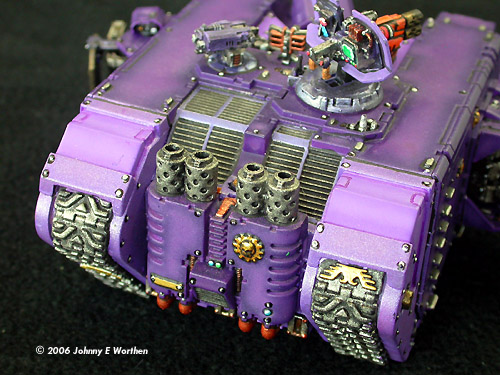
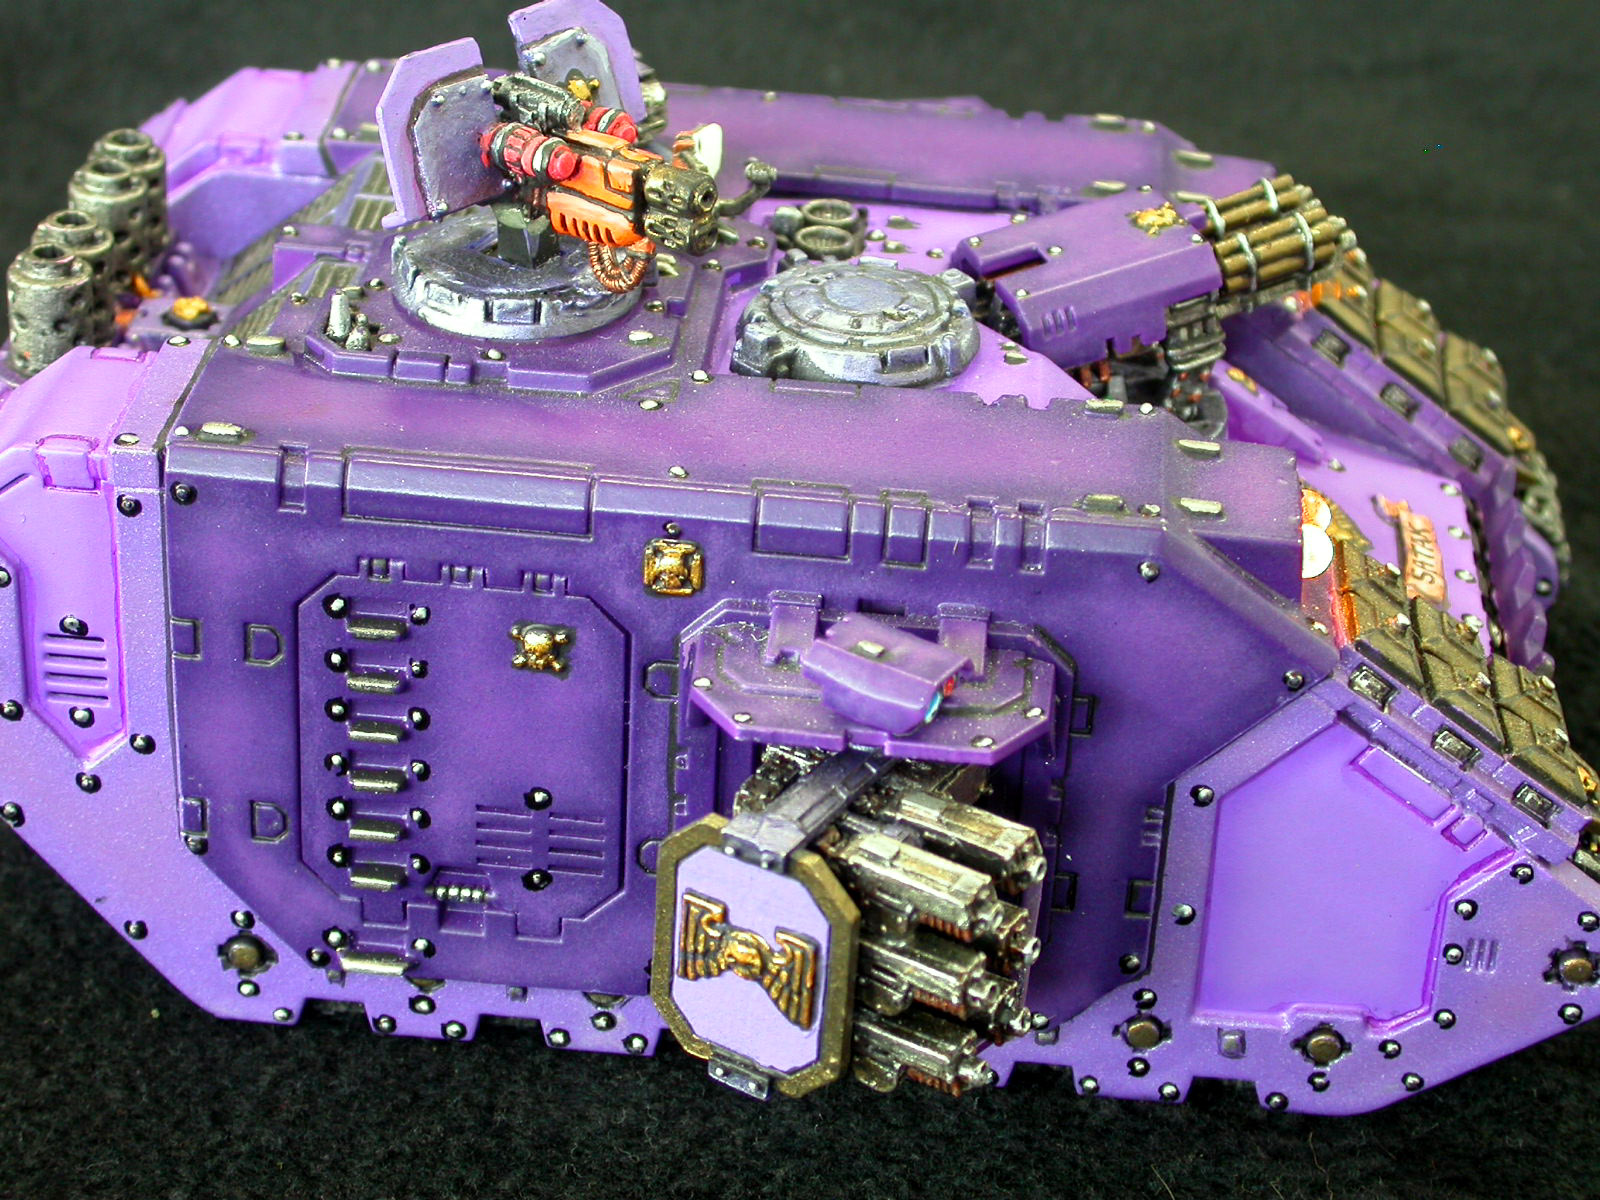
Image: Lights work Image: Hatch cut open Image: Hatch in place Image: Batteries in place Image: Battery compartment fills the back end Image: Hopefully, the ribbon strip will help me remove the batteries! Image: With the hatch closed, you don't know the power pack is there ... Image: ... but it is. Image: Reed switch, open ('off') Image: Troop compartment hatch closed Image: Ramp down Image: Here it is 'on' Image: Switch in place Image: Another look Image: Hi-beams and fog lamps Image: Lots of detail Image: Interior weathering Image: Electronics in place on the left side of the model Image: Interior arrangement, right side Image: Interior lighting test Image: LED lets all the detail be seen Image: Completed model, right side Image: Right side exterior details
|
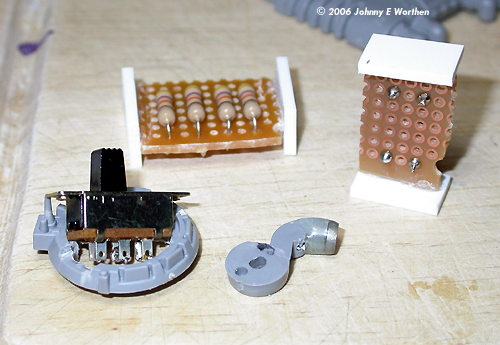
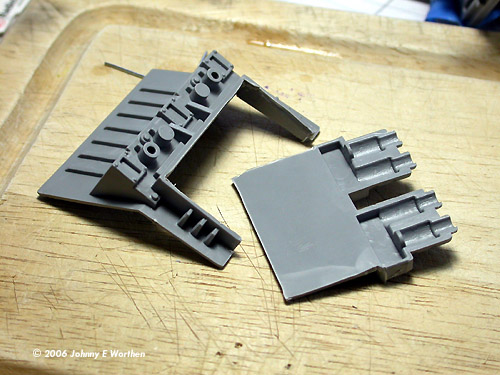
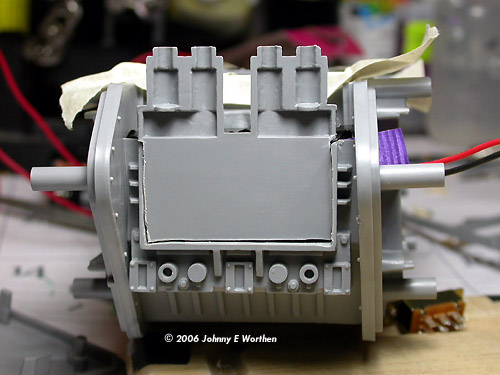
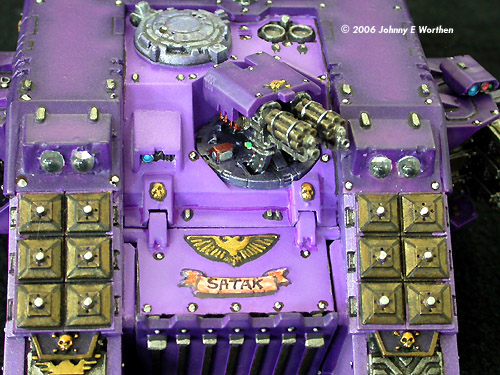
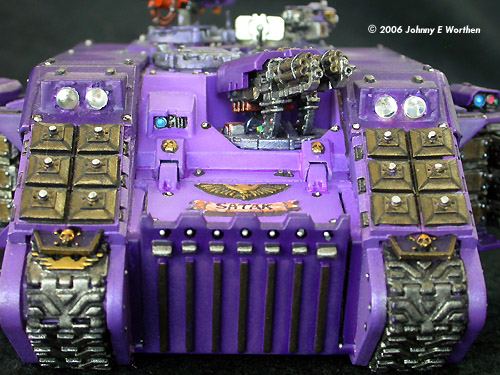
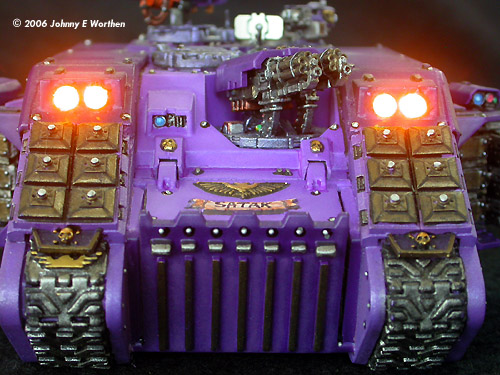
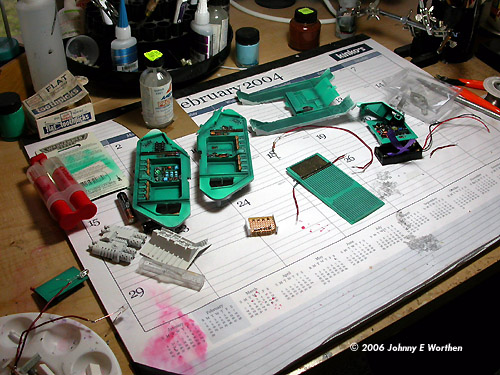
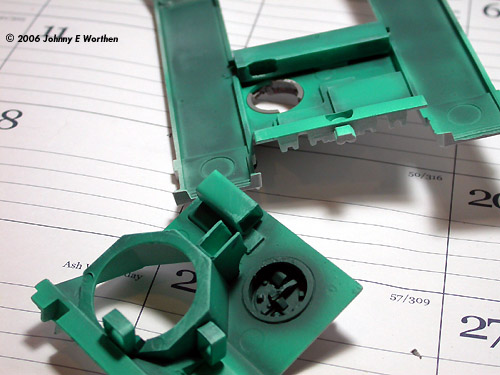
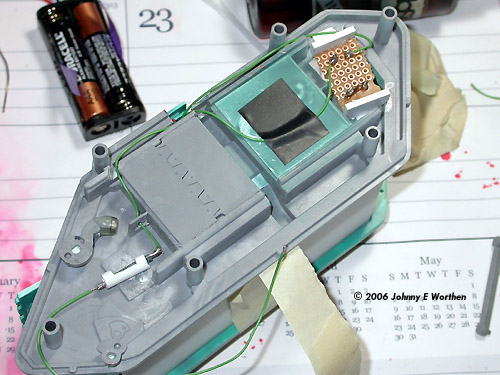
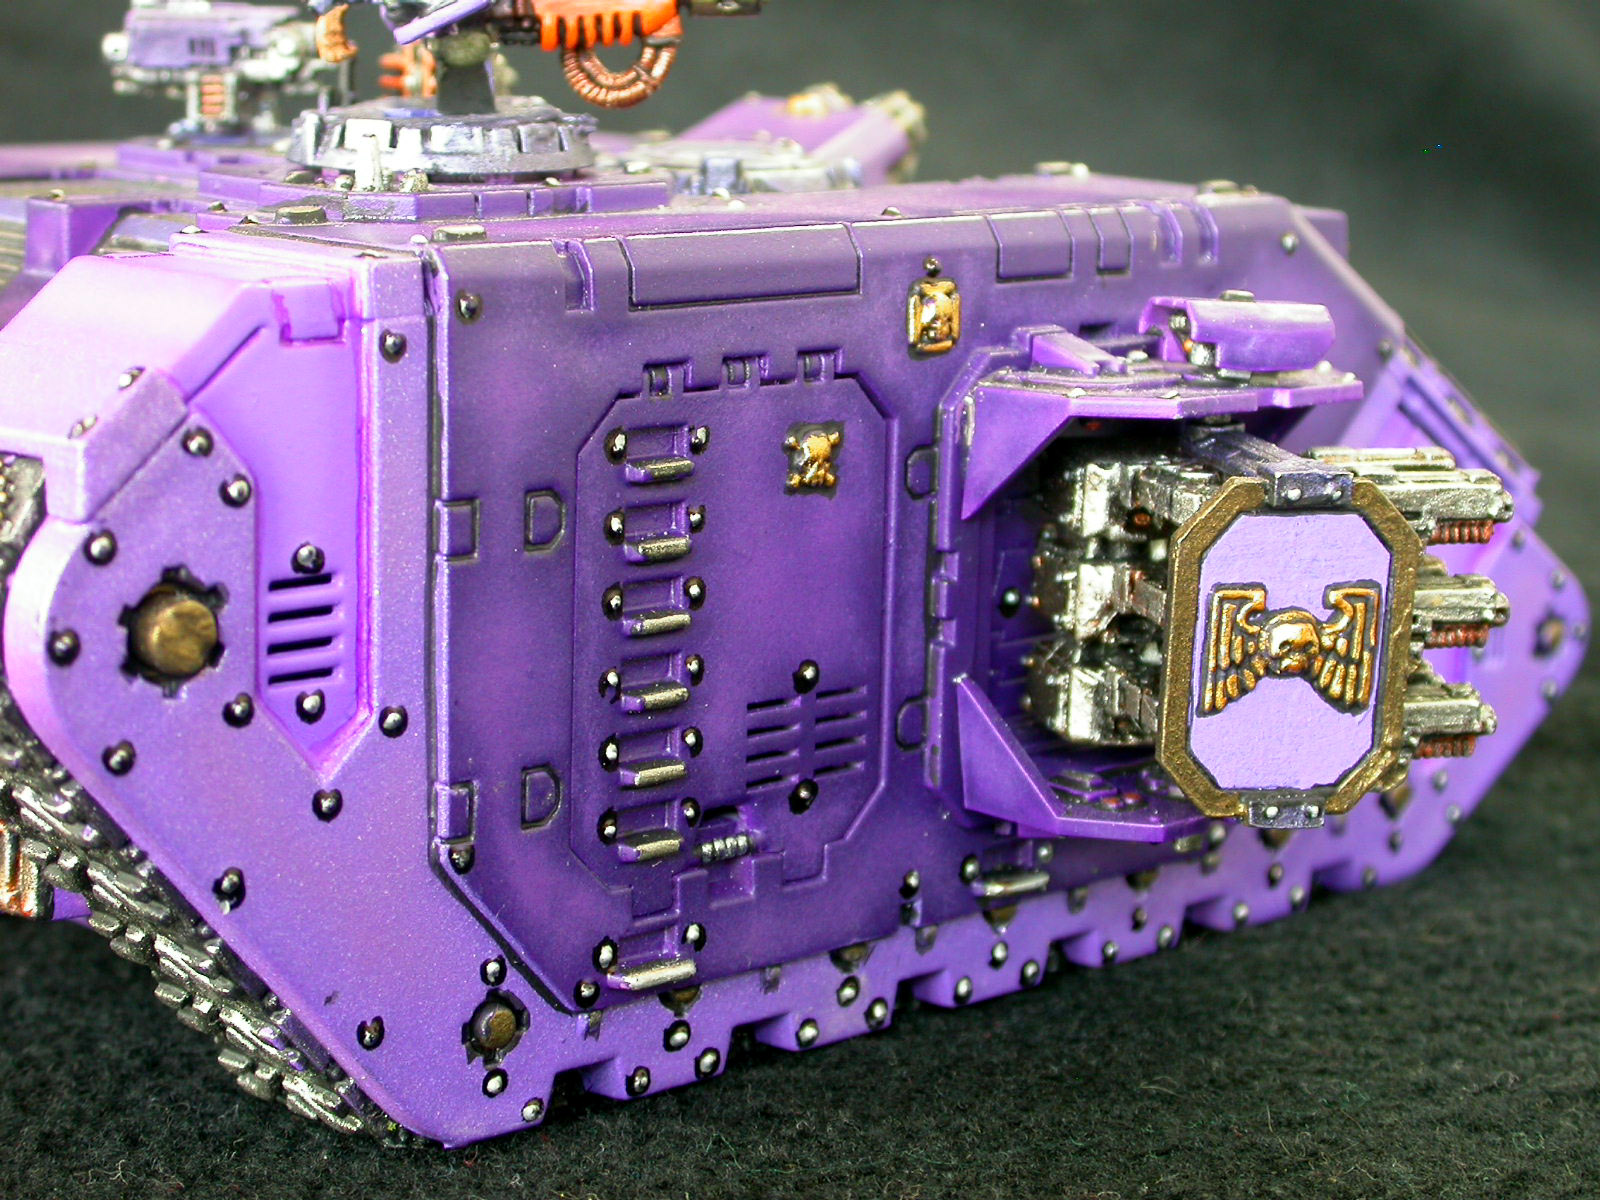
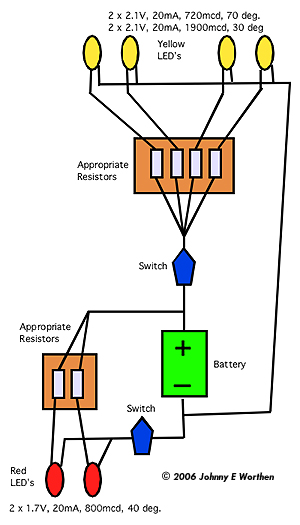
With this kind of pressure it was not going to join the mouse hotel kit collection in the basement. It would be built. Besides, I could use it in my Warhammer 40,000 Space Marine army. I'd built a version of this future tank before. It's a big lump of purple plastic that plays well but is a little boring to look at. The shading is good but monochromatic. The detailed and exciting part was inside. The model has a fully detailed interior, which I finished. The problem is that you can only be seen it through a small front door, preferably while wearing a miner's helmet. This problem inspired me to light the new Crusader. With this in mind I calculated my options. More Power! The basic idea was to put lights inside the tank so you could see the interior detail better through the single door. I have experience with LED's from lighting my Monolith model and figured to use the same techniques. I quickly found two major problems. The first was how to trigger the LED's - where and what switch to use. Ideally it should turn on when the doors open. The second problem was more immediate for my building: where to put the battery? I like those square 9V batteries; they have plenty of juice, are cheap, easy to change and position. However, it would not fit happily in the model. I'm kind of a Monster Garage kind of builder here; I wanted the model to appear stock with the modifications simple and elegant and no visible panty lines. From the beginning of the project I had my heart set on placing the battery appropriately in the engine compartment at the rear of the tank. There's some room there, but not a lot. I can't tell you how long I worked on finding a way to use this space for my 9V battery before finally giving up, but I'll try: I worked a long time on it. Eventually, for my elegant solution I moved to a 2 AAA battery housing from RadioShack and by cutting out the inside (unseen) ends of side bulkheads pieces and repositioning the interior panel forward of its slot, it would fit, but it was cramped, like a SkyWest economy class window seat in front of the emergency exit. You can't even recline the freakin' seat! I mean I'm a big guy, who're those seats designed for? Oompa Loompas? Don't get me going.... I cut down by half the spring wires that hold the batteries, trimmed away much of the plastic around the housing, added a pull-out ribbon and made damn sure not to glue the housing in place so it could maneuver a bit. With any luck this would give me a fighting chance to extract the batteries. I cut away the rear engine exhaust plate where it wouldn't be seen. I had thought to create a hinge door, but I quickly gave up on that and used rare earth magnets held in place with 5-minute epoxy to keep the exhaust plate on the model. What I'm left with is an opening just large enough to allow access to the batteries. With care and communion, battery replacement is possible- not easy, but possible. Easy wasn't on the menu any more. Simple had long since been outsourced. But elegant had arrived. Lighting Serendipitously, about this time Steve Satak, a modeler living in Washington, contacted me through my website. He too made WH40K models and lit them. He was far more proficient at electronics than I. In correspondence, I outlined my project and he was full of helpful information. Gotta love the internet! After talking to Steve I expanded my project from one internal LED to two internal and four external. Feeling flush with electronic power and a hot soldering iron, I decided to add headlights to the vehicle. If nothing else, I might be able to dispense with glue - the wiring might hold the kit together. Steve solved my switch problems. There's a clever mechanism in the model that opens the front hatch - pull the bottom door down and the top opens with it. When Steve told me about magnetic reed switches, the light went on, or would when I opened the door. I fabricated an arm to hold another one of those wonderful rare earth magnets and using a switch Steve sent me in the mail (thanks again Steve). I had it going on. I wired the reed switch so that it worked the internal lights. I wanted a second switch for the headlights. It made no sense for the headlights to come on only when the door opened. I mean, come on. Really. What were you thinking? I needed another switch for those headlight puppies. Steve again put me on the scent. He told me that in a model he had made, he hid the switch under an ammo box - move the box and trigger the switch. I loved the idea of a switch hidden right in plain sight. I mounted a simple sliding switch on the top hull gun turret. Slide the gun forward - light; back - no light. Does it get any cooler? I don't think so. The final part of the plan was to figure out the actual circuit. Using my usual resources Getting Started in Electronics by Forrest M. Mims III (happily still in print) and ''Model Lighting 101'' by Kirk Schermerhorn and Ross Waddell (a pamphlet of great value used at a bygone Wonderfest), I set out to find my resistors. By changing to AAA batteries, the voltage dropped from 9V to 3V and I couldn't use white LED's any more - at least none that I had. I was going to use red for the inside to simulate "jump lights," (low level lights to adjust the combatant's eyes to seeing red before a battle or something. I dunno, I saw it in a movie once.) I settled on yellow for the headlights - fog lights, Steve suggested. Right on! If you don't know, LED's usually have a very limited viewing angle. What this means is that even though you might find a very bright one, the beam may be narrow. There's lots of compromising in model lighting. Thus I had one red LED aimed back at the interior detail and one aimed forward on the exit ramp because one LED couldn't illuminate it all. I chose two different LED's for the headlights; one bright and narrow and one wide and not so bright. High and low beams! Still cool huh? I drew up a diagram of what I wanted to do. Then I did the resistor math. Here it is: Resistor Value = (V in - V led)/ I led
Yellows (both the bright ones and wide ones had the same values): (3V - 2.1V)/.02A = 45 Ohms Reds: (3V - 1.7V)/.02A = 65 Ohms |
|
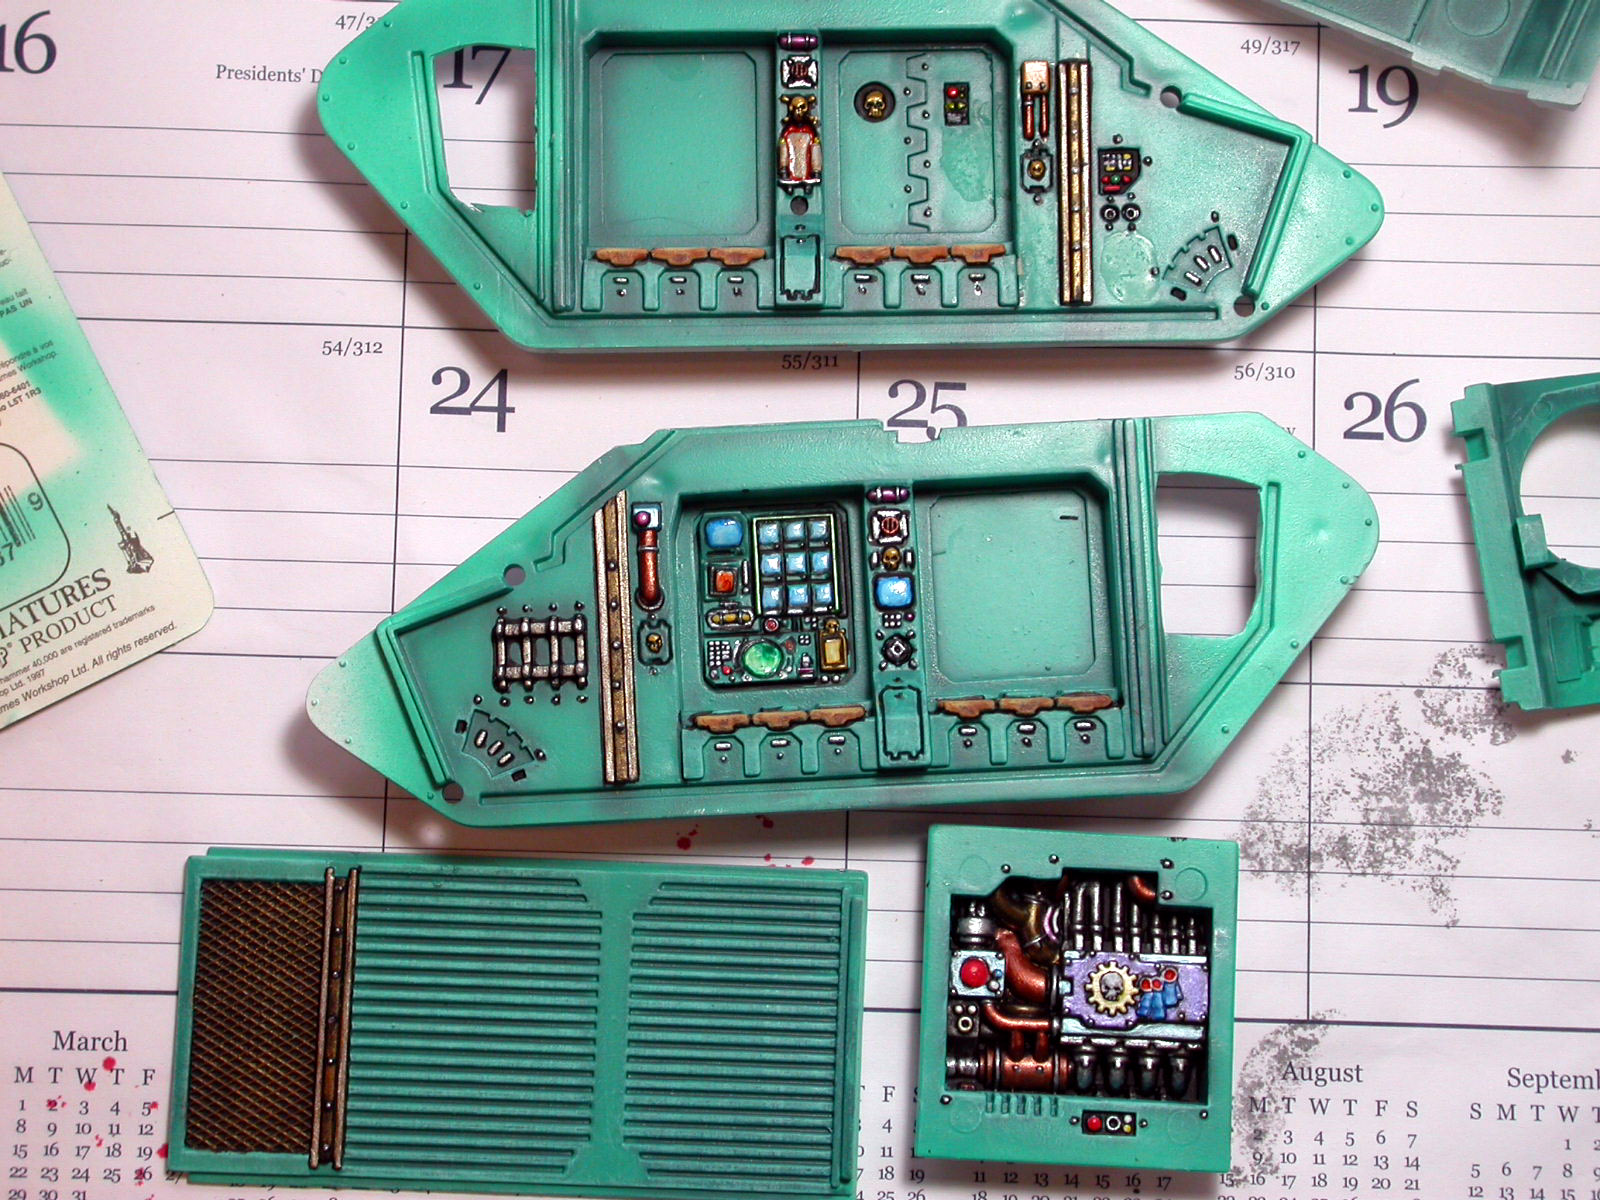
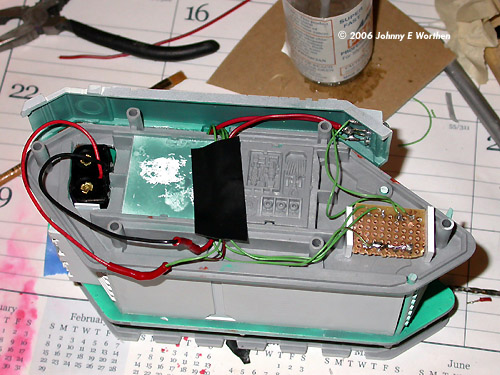
Oh by the way, when buying resistors get close to the value without going under what you need; so a 46 Ohm would be okay for a 45, but not a 50. Also, sometimes, there's a little "k" after the number. That means, thousands. So remembering you need to be close to the value you need, 45k wouldn't really work in this application at all, no matter how many times I soldered it to the circuit, pulled out my hair and screamed until I was hoarse. Read packages carefully. Just a tip. I made two resistor boards for simplicity - one for the interior lights and one for the head lights. I set them up between the inner and outer hulls, one on the left rear, the other on the right front. Building & Painting The inside came out very nice I think. I painted the interior spaces in shades of Liquitex Phthalocyanine Green, an unpronounceable militaristic green acrylic which I shaded (darkened) by mixing in a red and highlighted (lightened) with white. (This is also a great color for Klingon Birds of Prey, by the way.) I painted the intricate details with my usual figure paints - too many brands to mention, but all acrylic, since I like to clean brushes with water which my cat sometimes drinks. I like my cat. I cut the necessary holes for wires, pulled them through and soldered the connections - switches, wires, lights, resistors. After that, the construction was straightforward: I used glue. This was a mixed media piece, which means that it's not all plastic. There're some pewter pieces that are added to the standard Land Raider kit to make the conversion into a Crusader - the weapons mostly. This jacks up the price and makes you pull out your super-glue along with your plastic cement. I should say here that if you like your pieces free of flash and perfectly molded every time, stay the HELL away from any kind of miniature wargaming models. GW is not the worst but have a file ready for the pewter pieces. Early in the test fitting, I suspected that something was amiss and it was. The left side exterior bulkhead was warped. It made construction a little difficult but not impossible. What really caused problems was my over-eager use of a heat gun. I picked one up at Harbor Freight for a bowl of rice and thought I'd be fancy and use some of that shrinking plastic wrap insulation instead of my trusty black tape. Word of warning; styrene plastic doesn't like high temperature direct heat. Yep, I shrunk a wire over the already warped left hull (naturally) and before I knew it everything was as limp as (fill in your own metaphor - the FCC is watching). A litany of colorful expressions later, I set about repairing my stupidity. The damage was mostly to the panel itself, which was now warped even more. It also damaged the connecting supports, the pin holes, the magnet arm extension, switch housing, door mechanism, wires, all soldered connections, some of the paint, my left hand, ego and all my sanity. Nothing really. Actually, the damage was bad enough I considered buying a new one, but egos are so expensive. Moving on. I put the model together with more glue and more care than I'd used before. Clamps tamed the problem panel and I put the heat gun in the garage under the weed killer behind some boxes where spiders guard it to this day. Things didn't fit quite as well as they had. In the end, the model came together well enough, despite my idiocy. The tank had to be purple to match the rest of my army, but one color purple is so, like, last year. I had to complicate the paint too - why make it easy now? I masked and airbrushed the model. I used three different purples for the hull: my Space Marine chapter purple, a darker purple which matched my army's other vehicles and a mid lavender mixed with Liquitex Iridescent Tinting Medium which gave it a subtle pearl-like glitter. I think of it as ceramic armor plating. The iridescent paint settled quickly since it was thick and I didn't use the right thinner. I had to mix and paint quickly or it would clog my trusty Sotar 20/20 airbrush. Finishing Up I picked out the details with a brush. I took my time and enjoyed the project. On the front, I wrote "Satak," in honor of the unseen force which helped bring the whole project together. I've toyed with the idea of making some custom decals of my custom Space Marine Chapter, The Centurions, but as of this writing, I haven't, have I? Still, I'm very pleased with the result and even though it challenged my competence and questioned my intelligence, I enjoyed making it very much. It makes quite an impression whenever I play it - the headlights are blinding. Whenever I finish a model, it becomes my favorite. This model is my favorite, my masterpiece - at least until I build something else. |
![]()
This page copyright © 2006 Starship Modeler™. First posted on 29 March 2006.
![[Please click to enlarge]](jw_crusader_Battery_Hatch.jpg)
![[Please click to enlarge]](jw_crusader_All_Lit.jpg)
![[Please click to enlarge]](jw_crusader_Front_Quarter.jpg)
![[Please click to enlarge]](jw_crusader_Headlights_On1.jpg)
![[Please click to enlarge]](jw_crusader_Rear_Quarter.jpg)
![[Please click to enlarge]](jw_crusader_Three_Quarter.jpg)